iBoysoft DiskGeeker Online Help
- Network Drive Connection
Overview of Network Drive Connection
You can access a network drive by clicking Go and then Go to Server from the top menu bar with correct server info. But you have to add it manually every time your Mac restarts.
iBoysoft DiskGeeker allows users to add a remote network drive and shows it in the local Finder folder for easier access, and the utility will remember the added server info and connect to it as soon as the utility is launched.
It has a wider support of network protocols such as WebDAV, SMB, NFS, FTP, and AFP as macOS and Mac OS X support SMB and AFP connections. Anonymous login is allowed. iBoysoft DiskGeeker also supports connecting network drives when the system wakes up and disconnecting them when the system goes to sleep.
How to map a network drive in Finder?
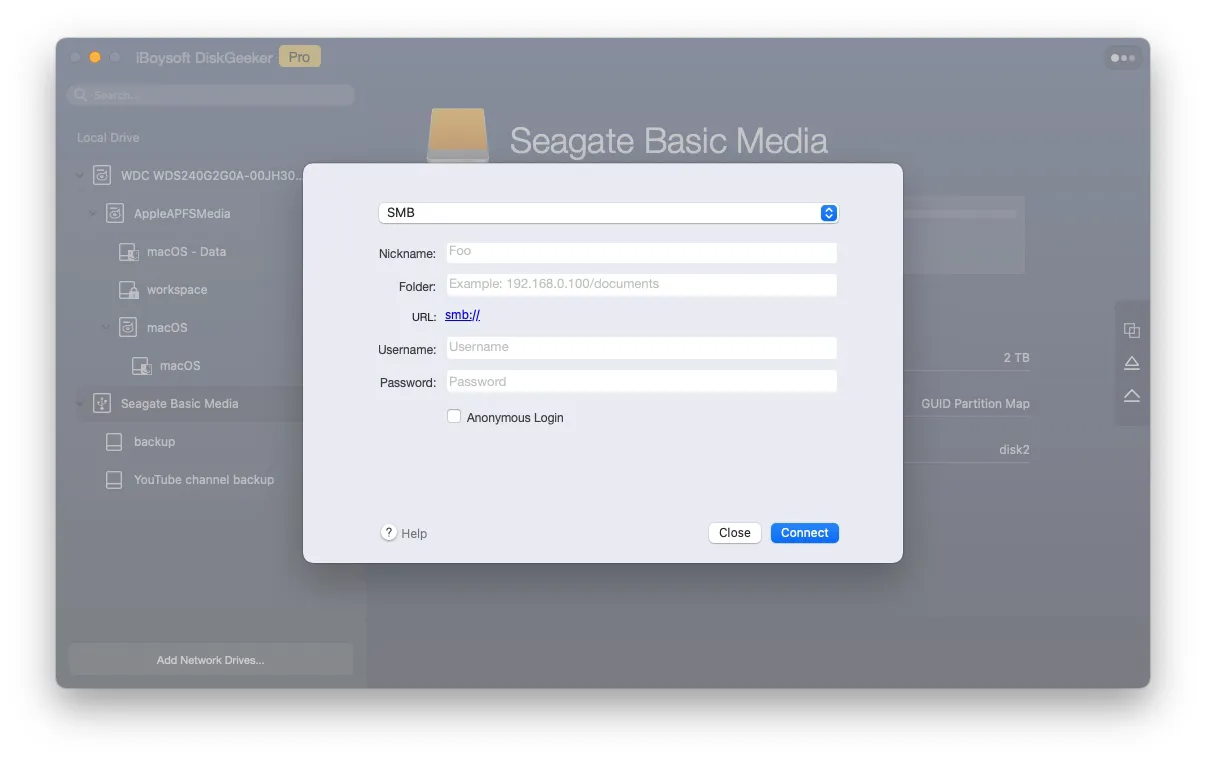
Step 1: Click the "Add network drives…".
Step 2: Provide all required information including server protocol, server address, name and password and then click "Connect".
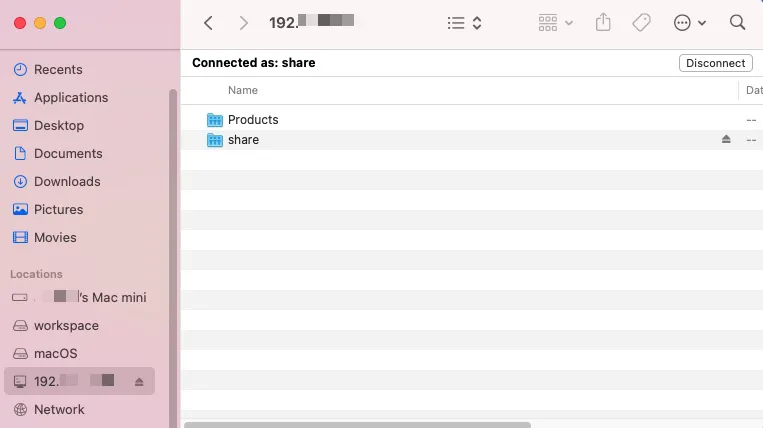
Step 3: Find your network drive under Locations in Finder after it is successfully connected.
FAQ about network drive connection in iBoysoft DiskGeeker
1. How to map a network drive on Mac?
Step 1: Click Go > Go to Server on the Finder menu bar.
Step 2: Enter network path and click Connect.
Step 3: Provide name and password and click Connect.
2.How to remove a network drive in Mac Finder?
Step 1: Go to Finder application.
Step 2: Find the network drive under Locations.
Step 3: Select the network drive you want to disconnect and click Eject button to the right.