iBoysoft DiskGeeker Online Help
- Create Boot Disk
Overview of 'Create boot disk'
The common way to create a bootable installer for macOS requires running commands in Terminal, causing the process to be sophisticated, time-consuming, and error-prone, especially for tech newbies.
The newly added Create boot disk feature in iBoysoft DiskGeeker is designed to help you create a macOS bootable USB with simple clicks. It greatly simplifies the creation process and improves the success rates.
This handy utility supports you in creating a bootable installer for macOS High Sierra, macOS Mojave, macOS Catalina, macOS Big Sur, macOS Monterey, macOS Ventura, macOS Sonoma, and macOS Sequoia.
How to create a bootable installer for macOS using 'Create boot disk'?
Preparations:
1. An external hard drive or USB drive with a capacity at least as large as the image file.
Note: To check the size of the macOS DMG file, you can open iBoysoft DiskGeeker, select Macintosh HD, Macintosh HD - Data, or the Macintosh HD volume group and click "Download Image."
2. Back up your data on the external drive. Creating a bootable macOS installer on the disk will format it. So, back up the files to avoid data loss.
Guide to create a bootable USB macOS installer:
Step 1: Connect the external hard drive to your Mac.
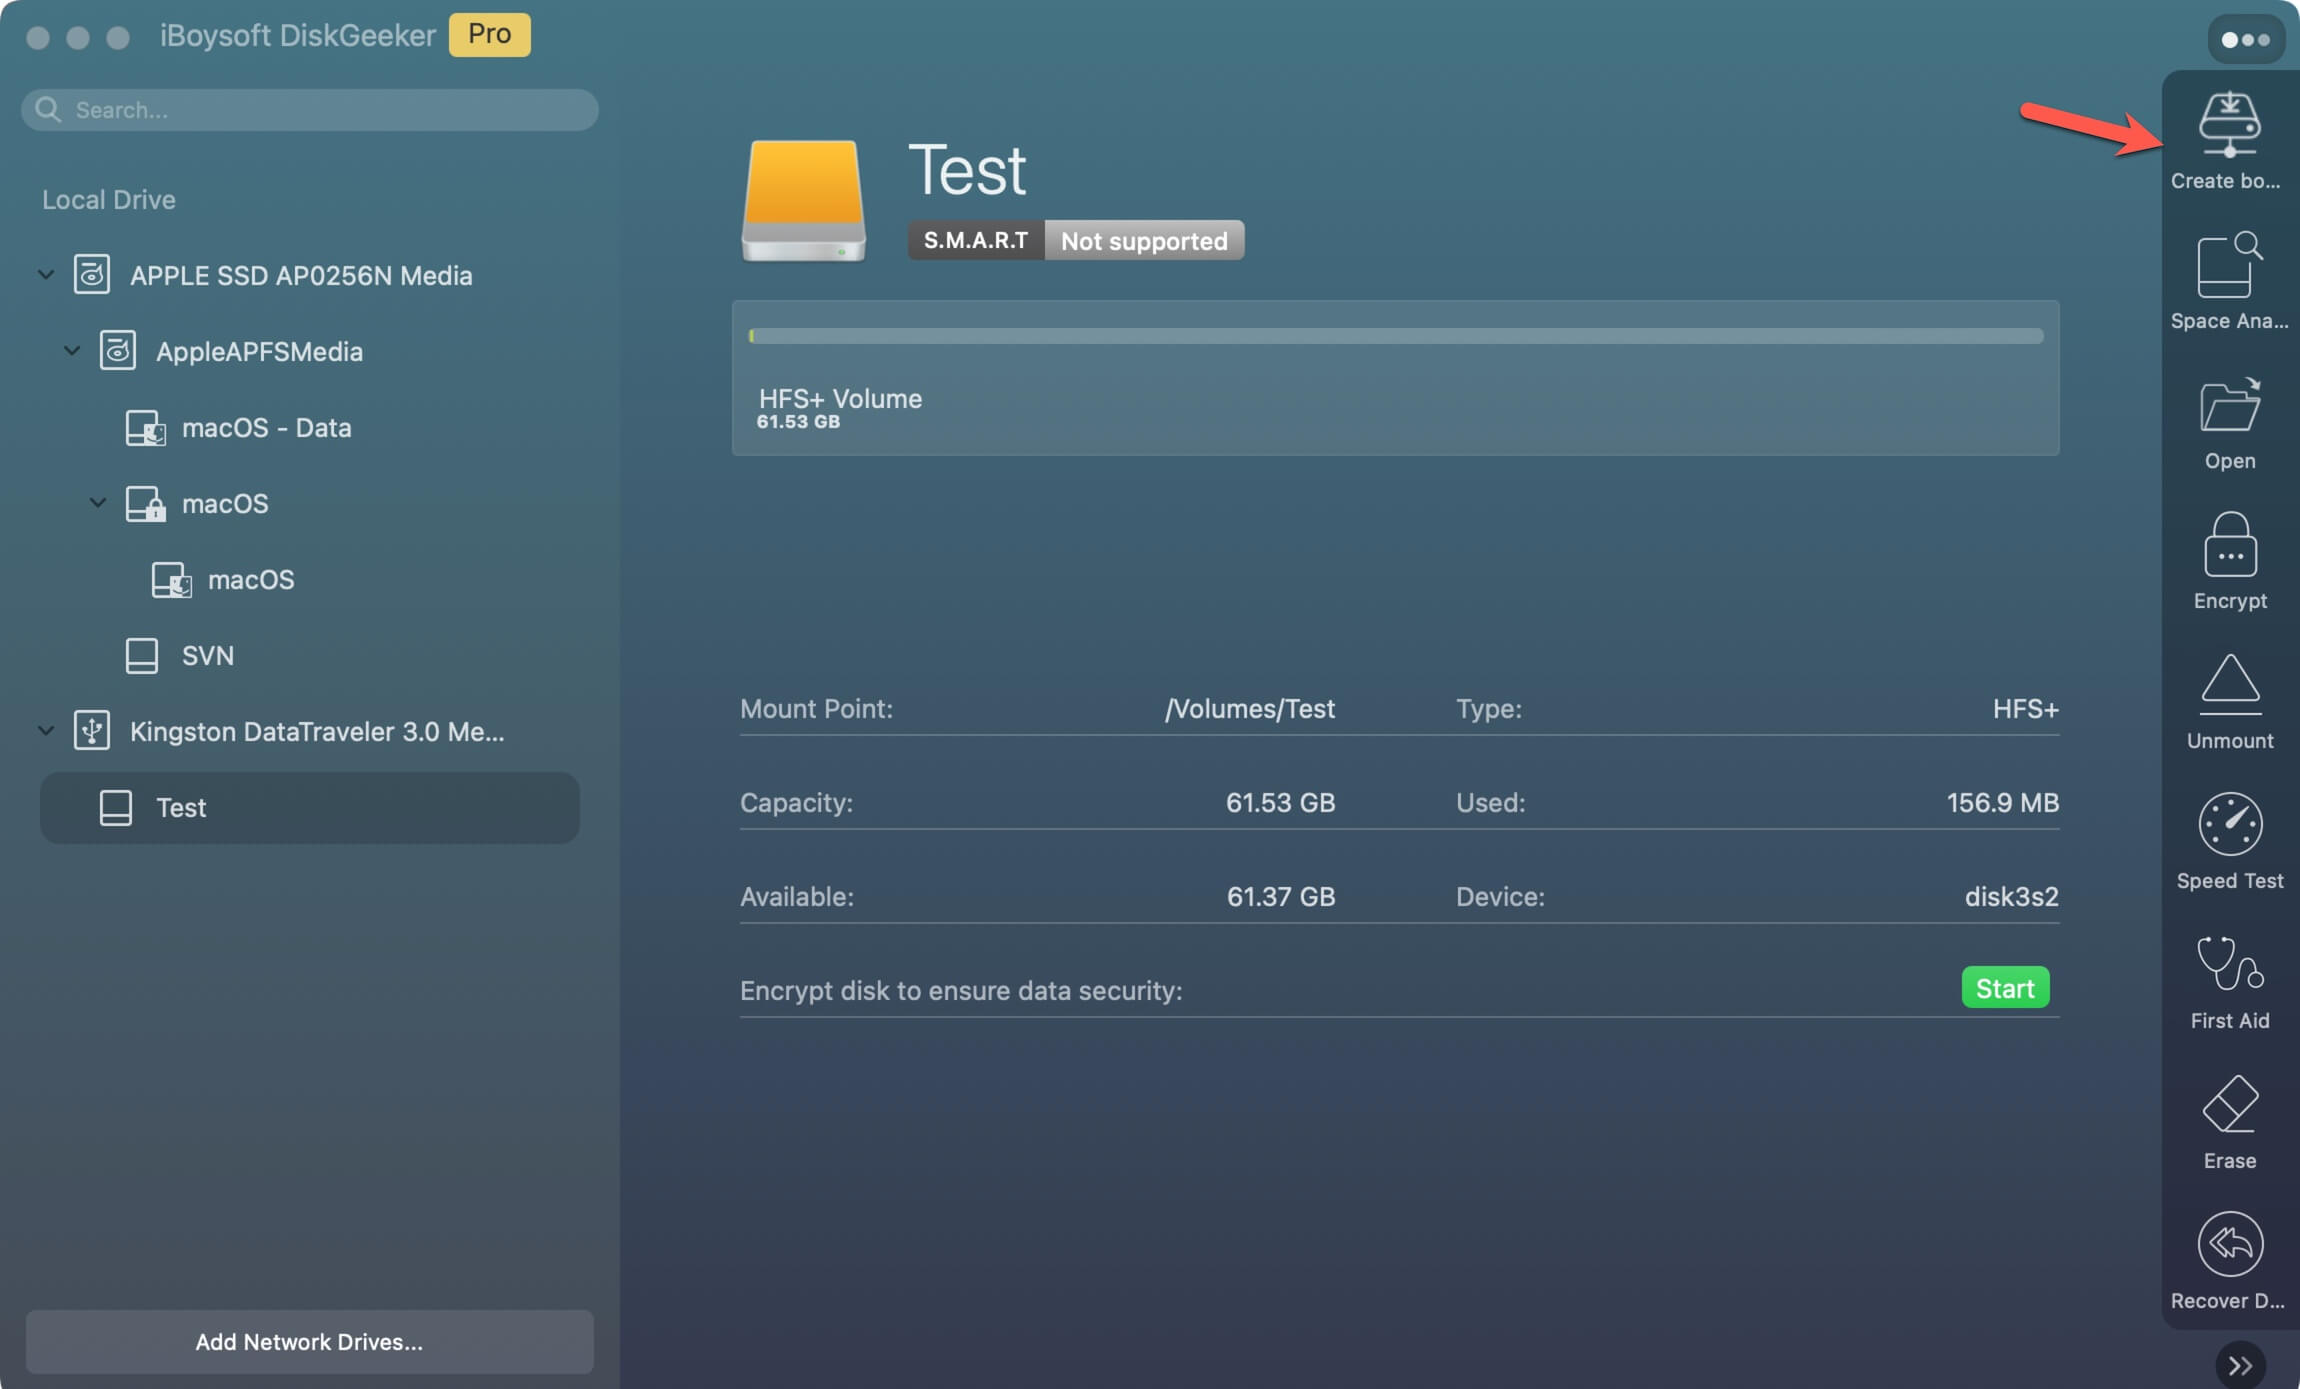
Step 2: Open iBoysoft DiskGeeker and click "Create boot disk" from the left sidebar.
Step 3: Select a target partition and click "Select."
💡 If the external disk doesn't have any volume, select the entire disk on the left sidebar and click "Create boot disk" on the right-side toolbar. Then, a prompt will appear to hint that the drive hasn't been formatted. Just click "OK" to let the tool format the disk to Mac OS Extended (HFS+). Then, select the volume and click "Create boot disk" again to move on.
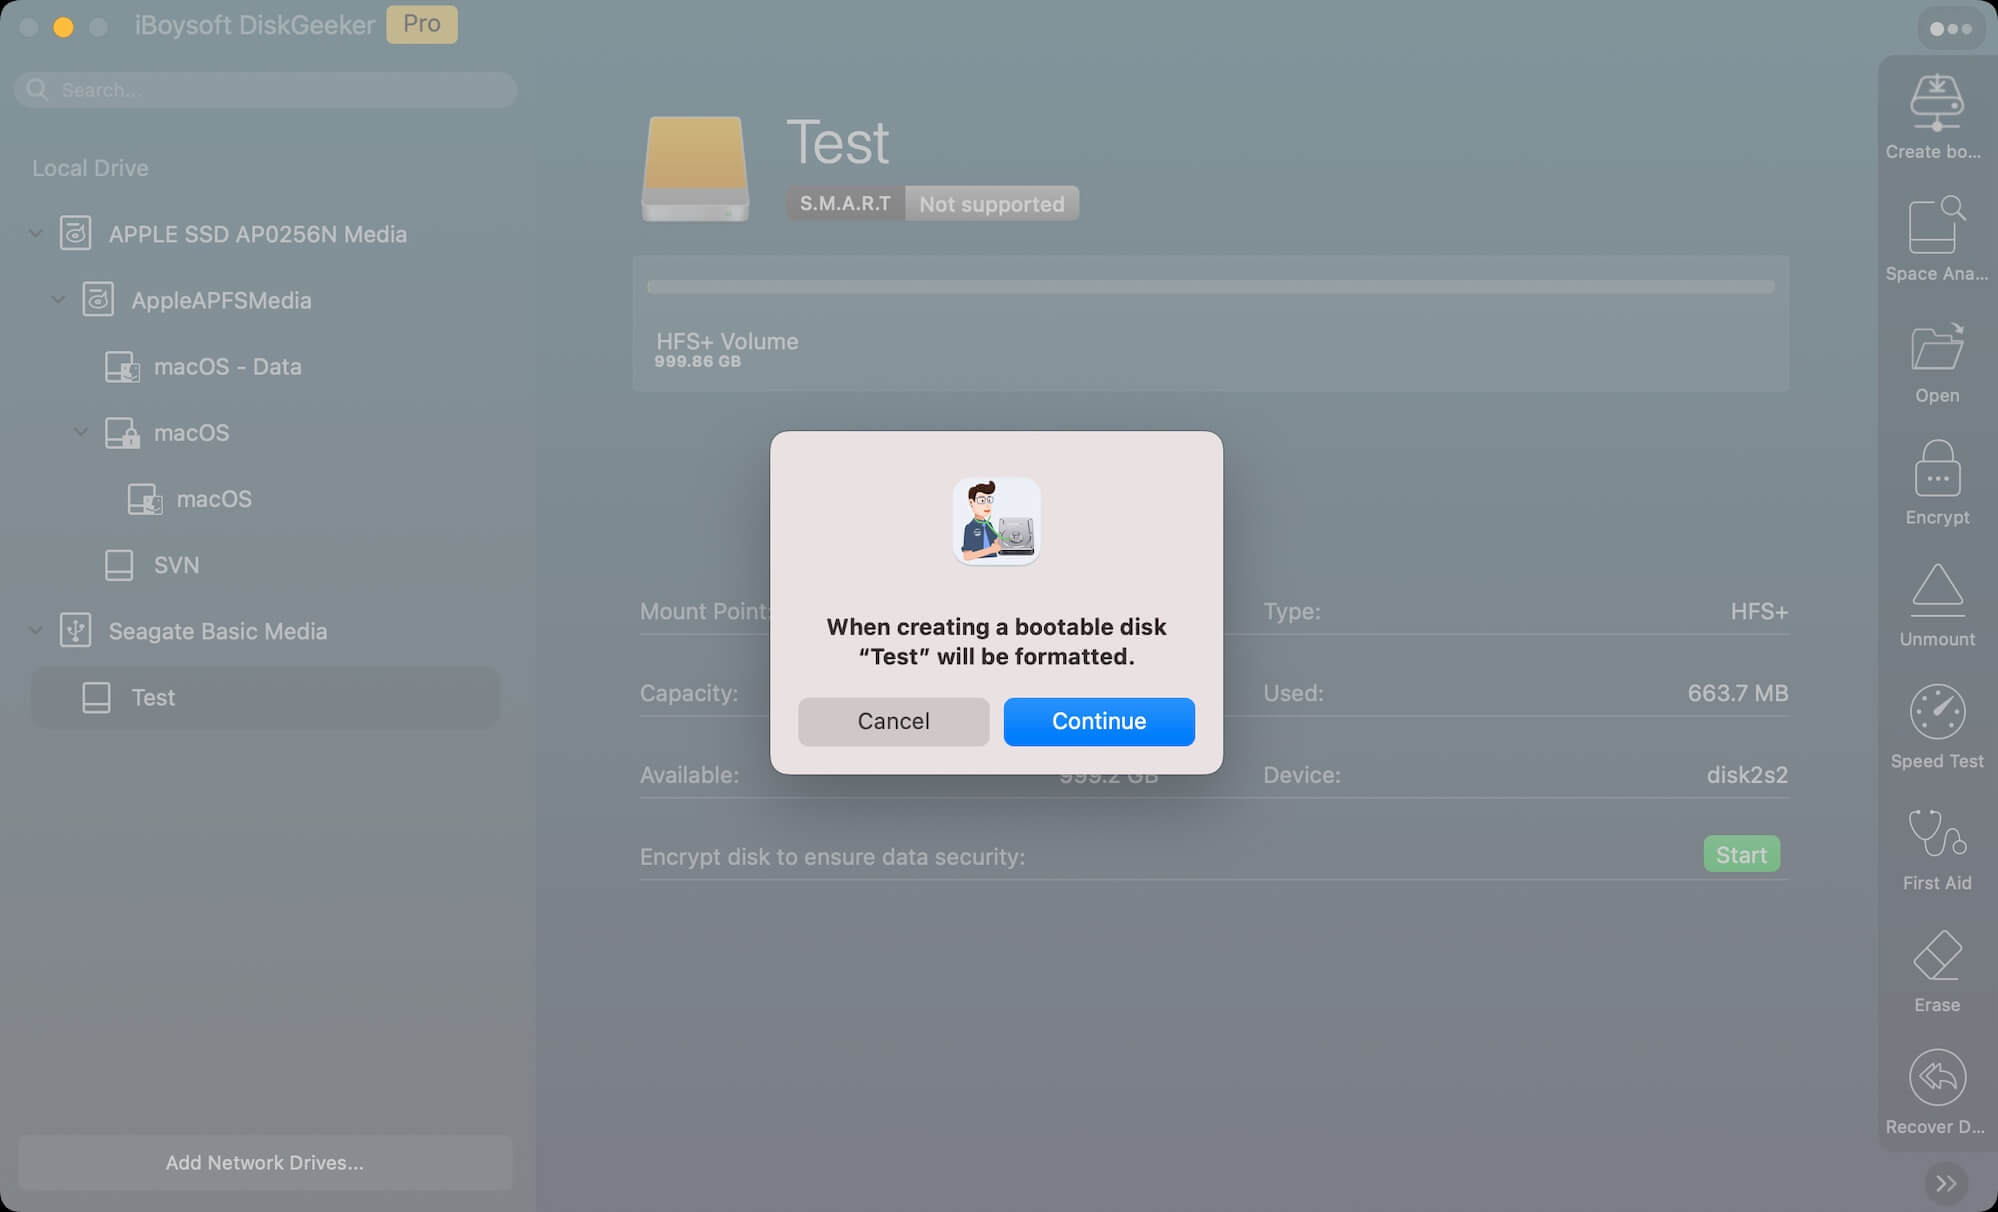
Step 4: Click "Continue" on the prompt alerting you that the selected volume will be formatted.
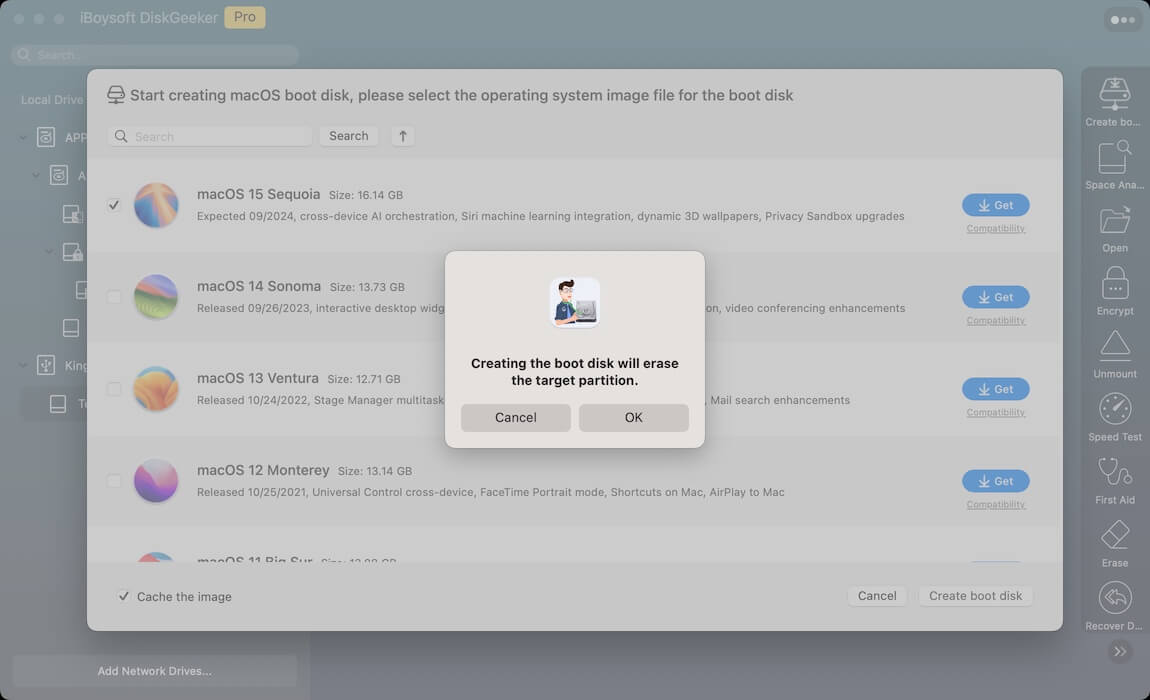
Step 5: Select a macOS version you want and click "Create boot disk."
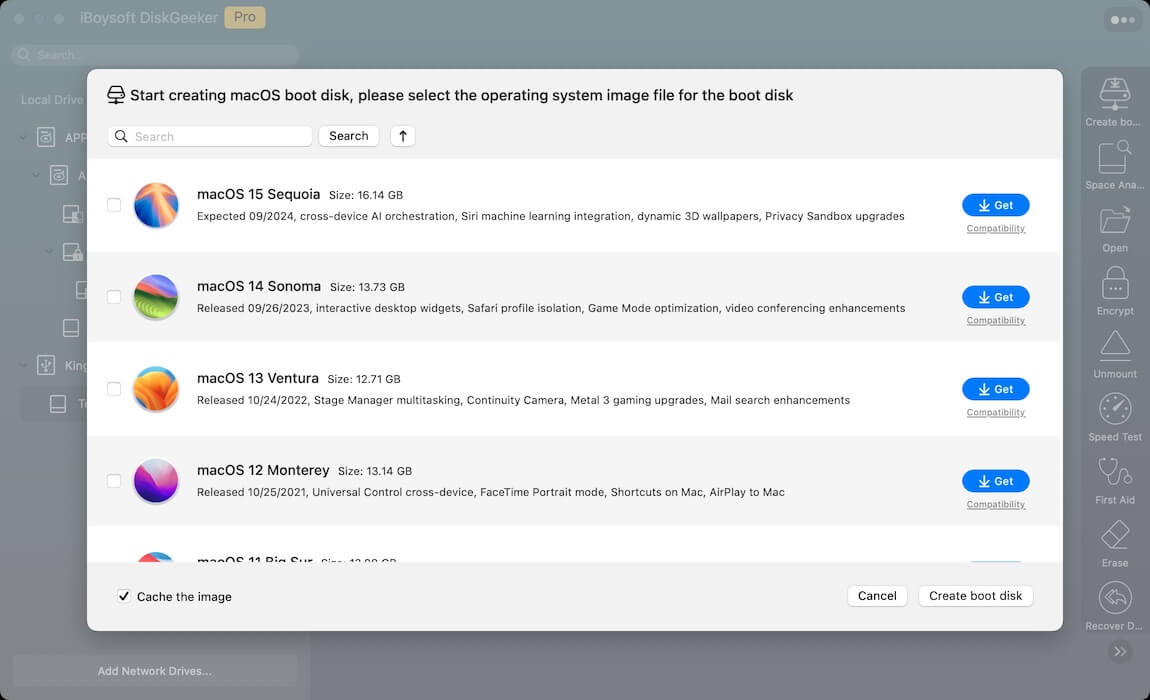
💡 You can click "Compatibility" next to the desired macOS version to see which Mac models it supports.
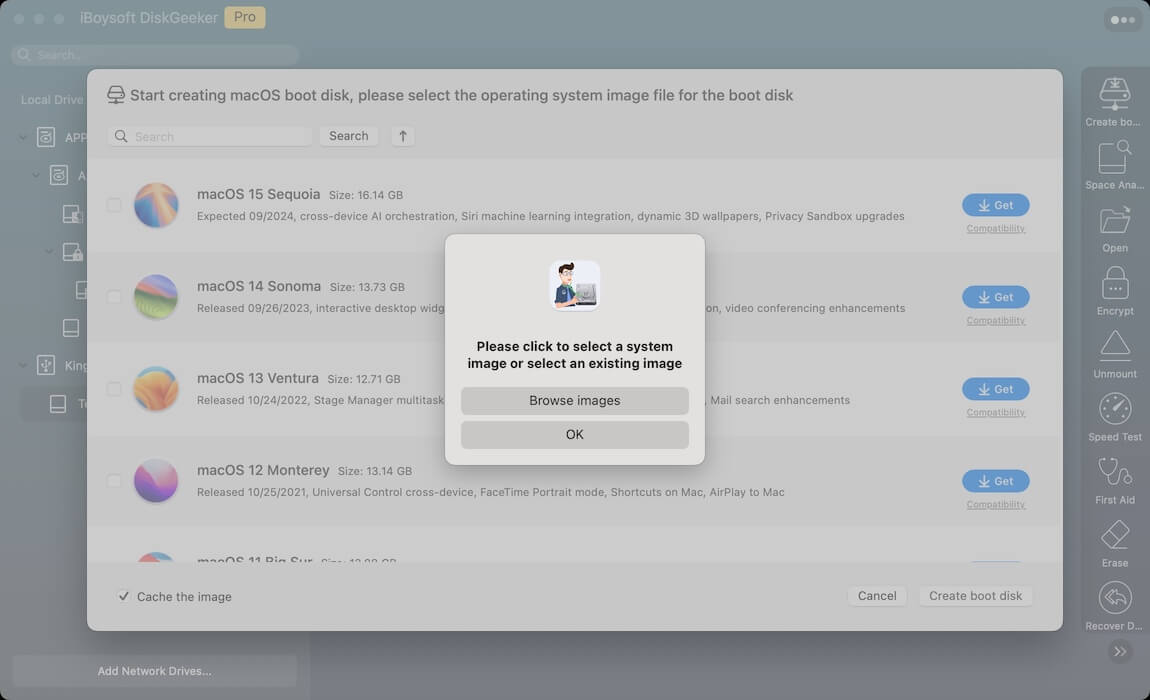
💡 If you've downloaded a macOS DMG file using this software, don't select any macOS version. Instead, click "Create boot disk" > "Browse images" to upload it. Then, jump to the Step 8.
Note: iBoysoft DiskGeeker doesn't support the macOS DMG file downloaded from other sources, like the App Store.
Step 6: Click "OK" on the pop-up that tells the target partition will be erased.
Step 7: Wait for the DMG download process to complete.
💡 Make sure your Mac is charged and the network is stable during the process.
💡 If you want to cancel the macOS DMG download process, click the X button. However, the canceling process won't be resumed.
Step 8: Once the download ends, a pop-up will inform you that creating a bootable disk will erase the target partition. Click "OK" to go on.
Step 9: Wait for a moment to let the tool finish creating the macOS bootable installer.
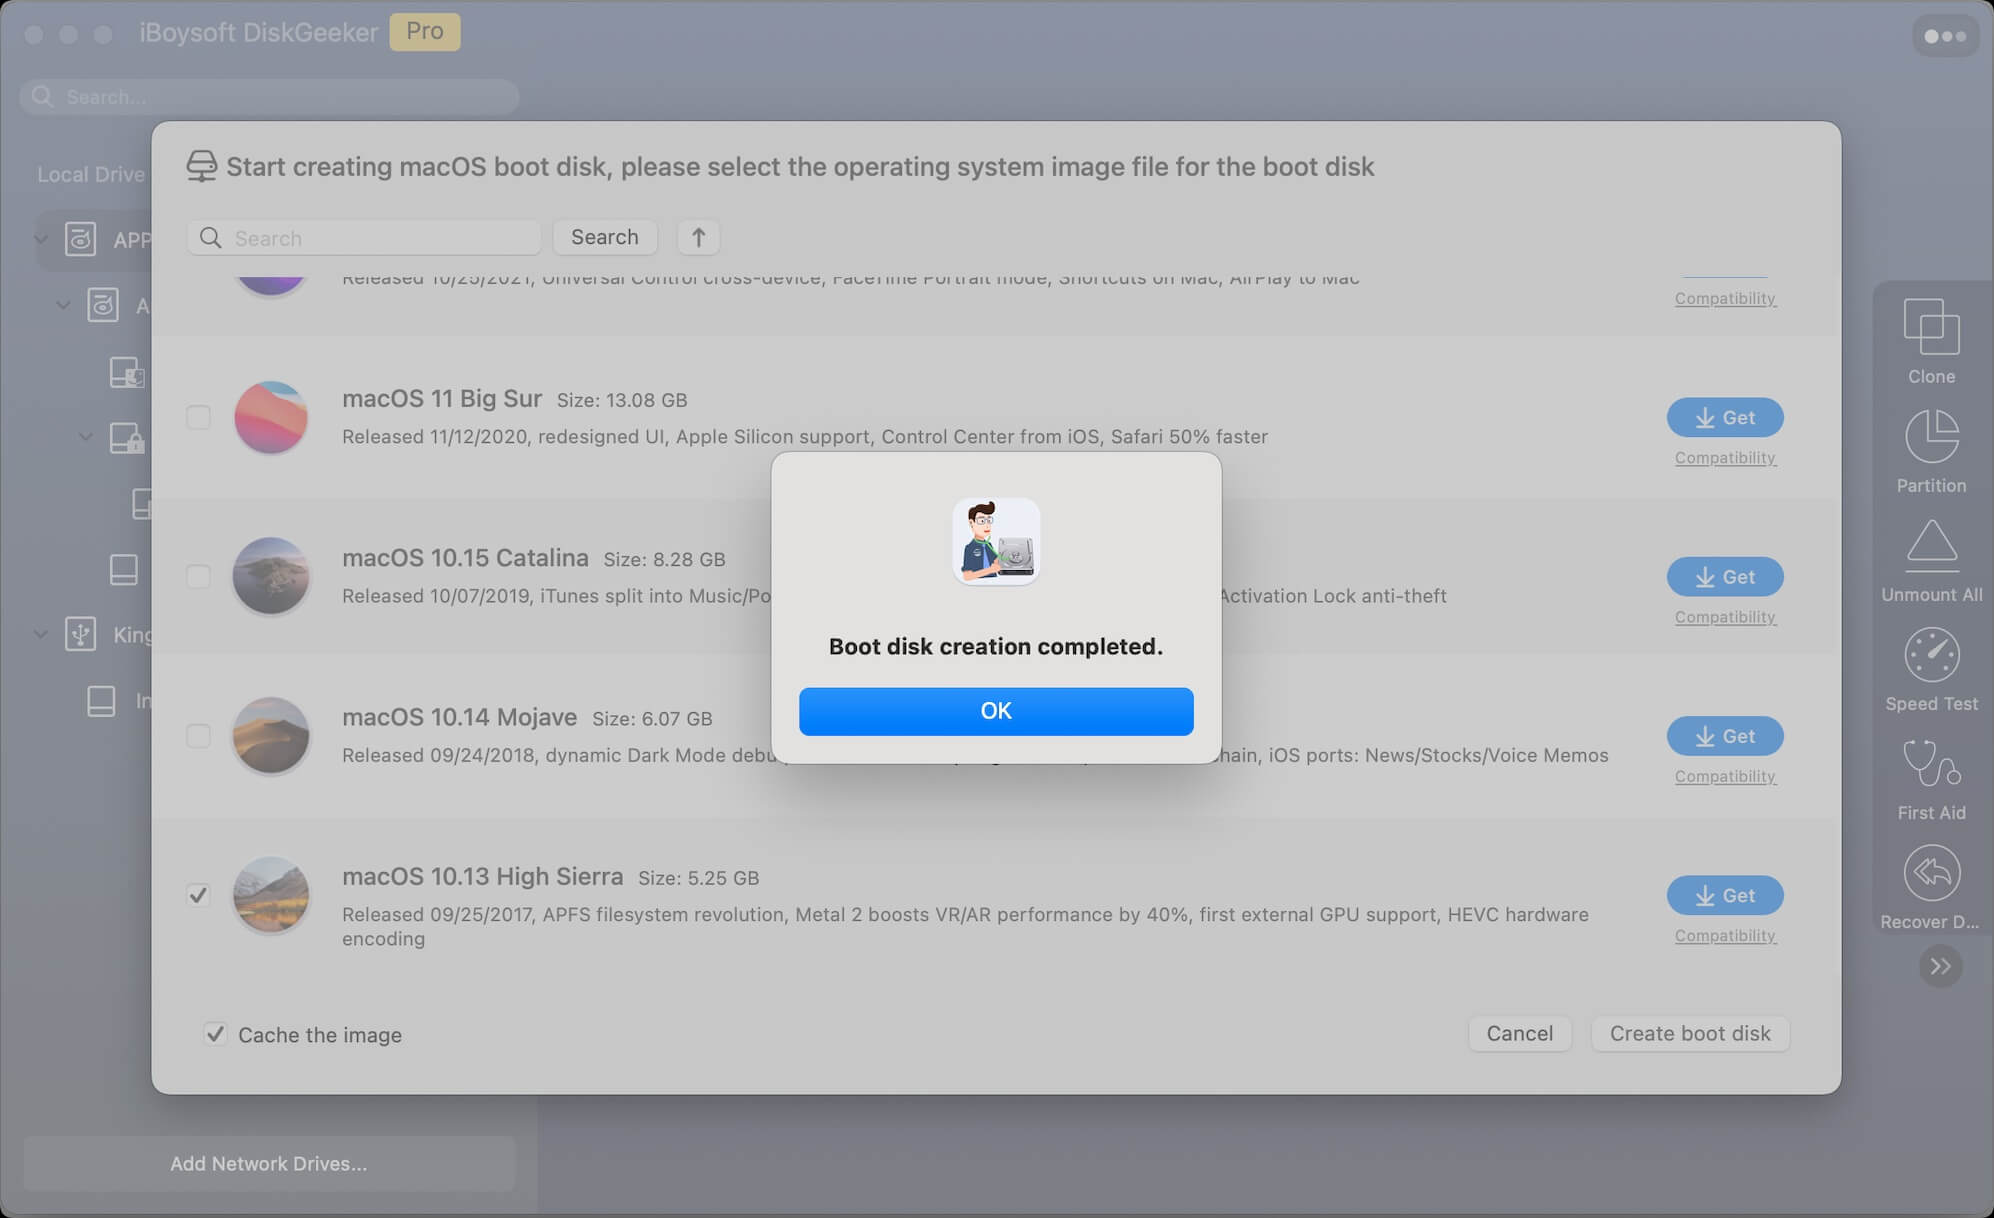
After that, you'll have a bootable macOS drive. Use it to start an unbootable Mac, perform a fresh macOS installation, or test the system on multiple Mac devices.
How to boot your Mac from the USB installer?
Before you use the bootable macOS installer:
1. Make sure you have adjusted the security settings on your T2 or Apple silicon Mac to allow it to boot from external media.
If not, go to macOS Recovery mode > Utilities > Startup Security Utilities and choose "Allow booting from external or removable media."
2. Check if the target Mac machine supports the macOS version on the bootable drive.
3. Ensure the target Mac has a good internet connection.
Steps to start up the Mac from the bootable media:
On an Apple silicon Mac:
Step 1: Connect the bootable installer to the Mac.
Step 2: Restart the Mac, and meanwhile, keep holding the power button until the startup options appear.
Step 3: Choose the external bootable drive and click "Continue."

Step 4: Follow the onscreen instructions to install the macOS.
On an Intel-powered Mac:
Step 1: Connect the bootable USB installer to the Mac.
Step 2: Restart the Mac while pressing the Option (Alt) key until the bootable volumes show.
Step 3: Choose the boot USB and press "Return."
Step 4: Select your language, select Install macOS from the Utilities window, and follow the on-screen instructions to boot your Mac from the USB installer.
Note: If your Intel-based Mac can't boot from the bootable USB with the Option (Alt) key, restart your Mac and simultaneously press Command - Option - R - P until the progress bar or Apple logo appears on the screen. This operation can clear the cache that may result in the booting failure. Then, try again to reboot your Mac with the Option (Alt) key.
FAQ about 'Create boot disk' in iBoysoft DiskGeeker
1. Why is the macOS download process so slow?
Downloading the macOS DMG file requires stable internet. The slow process may result from an unstable or poor network. If you want to accelerate the process, you can unlock the high-speed download channel.
2. How can I stop the bootable disk creation process?
You can stop the macOS DMG file downloading process but can't stop or pause the creation process. Don't try to force-eject your disk from the Mac. It may result in disk corruption.
3. Why does the bootable disk not show as a startup option?
Your bootable disk either fails to connect correctly to your Mac, or your Mac isn't compatible with the macOS version.
Related articles: