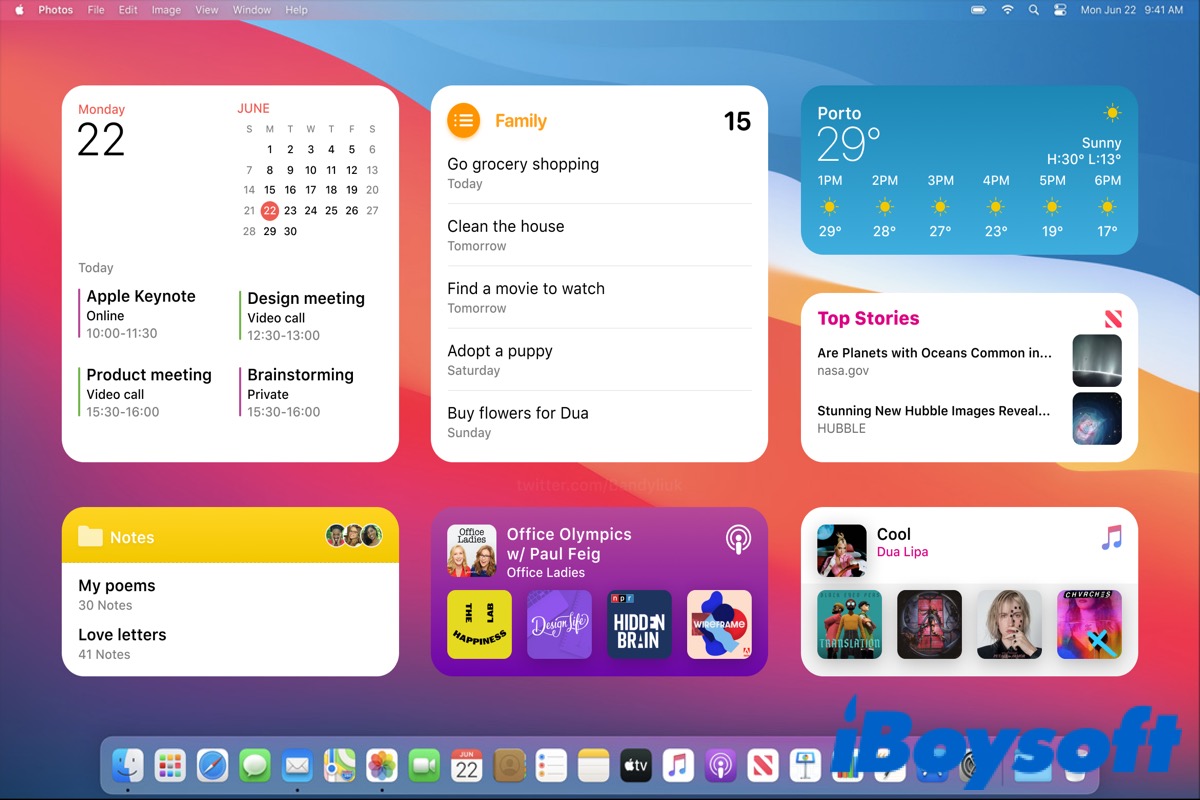
macOS Sonoma (14) is the latest macOS version released by Apple Inc. on WWDC on June 6, 2023. It brings multiple new features and upgrades some traditional functions, like desktop widgets, Safari Web Apps, etc.
In the new macOS version, Apple moves the widgets from the Notification Center to the desktop, as you would do on your iPhone and iPad's home screen. Before you upgrade to macOS Sonoma (14), check the compatibility of your Mac first.
After you install macOS Sonoma (14), you can get started using widgets on your desktop.
If you think this post is informative, click the below button to share it.
What are desktop widgets?
Widgets are a wonderful feature that Mac users have at their fingertips. In macOS Big Sur to macOS Ventura, Widgets are a part of the Notification Center, which no longer has its own icon in the menu bar. They're essential mini-apps that are put on your desktop and give you quick access to frequently used information or tools.
Widgets let you easily check the weather or date, track your to-do list, monitor your system performance, or even control your music playback without opening separate apps.
When macOS Sonoma is updated, Mac users can move the widgets from the Notification Center to the desktop. You can access the specific features more quickly and easily.
How to add widgets to the desktop?
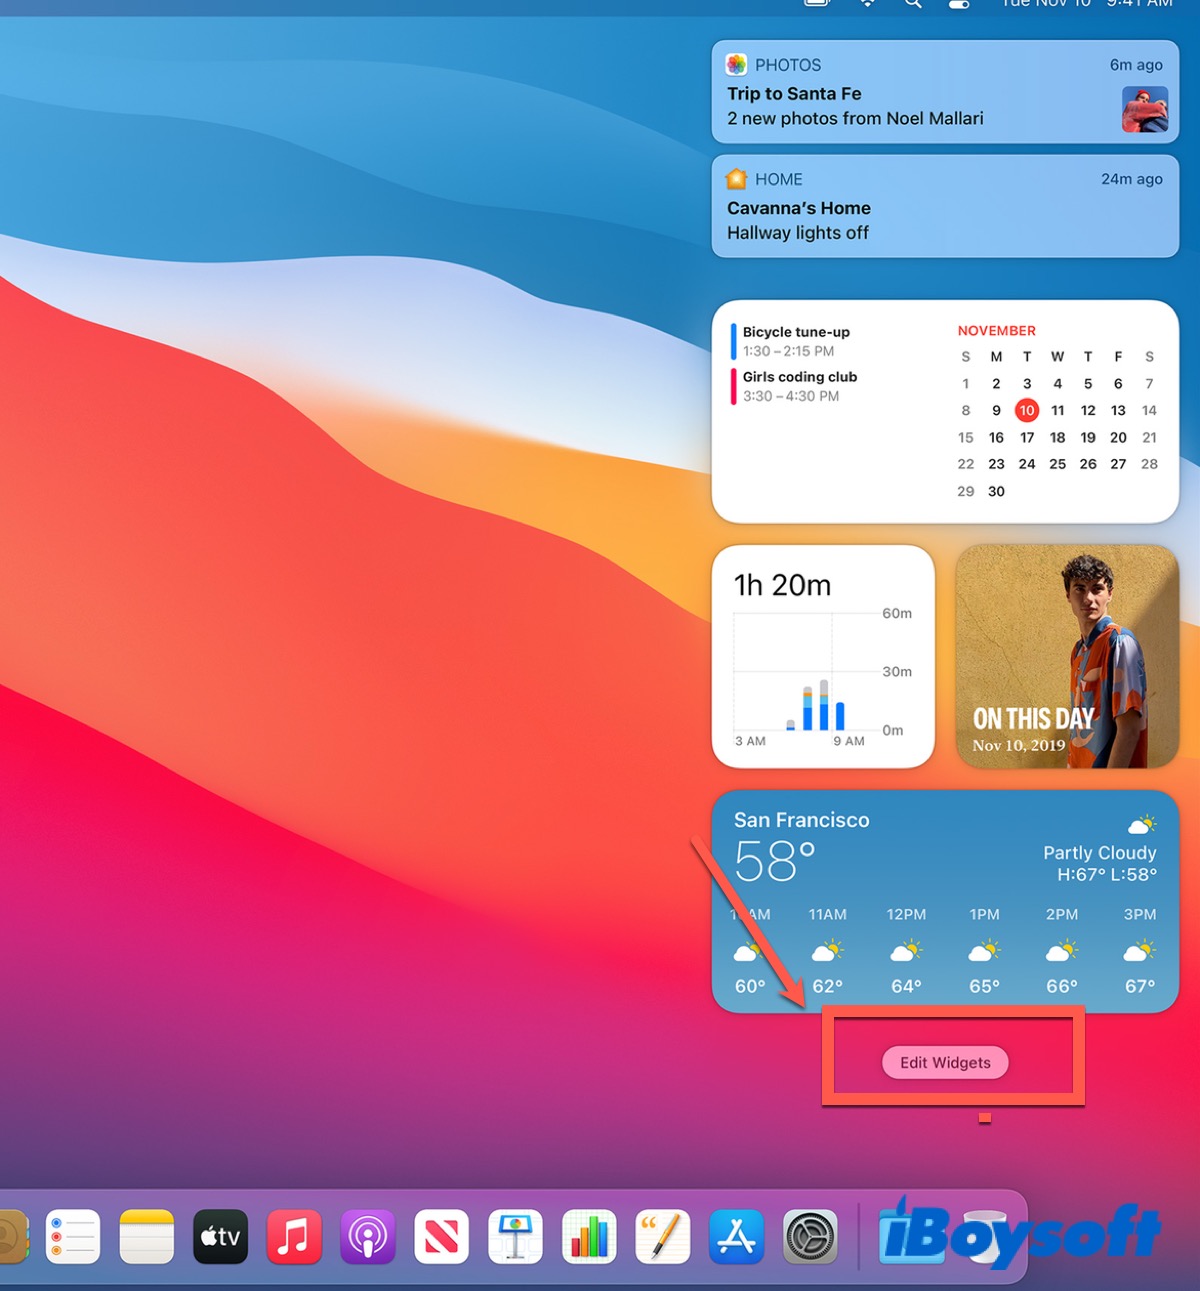
Apple removed the widgets icon from the menu bar since macOS Big Sur, so if you want to access the widgets, click on the time in the top-right corner of the screen.
The Notification Center has been desperate with two parts, one of the above is the message or notification you received, and the below part is the widgets. You can scroll down to check all the widgets and click them to interact with them.
From macOS Big Sur, you can add, customize, and use widgets in the Notification Center, but from macOS Sonoma, you can add the widgets to your desktop as well. Here's how:
- Open the Notification Center.
- Scroll down to the bottom and then click Edit Widgets to select the preferred widgets or add more widgets.
- Drag the widgets to your desktop and place them anywhere on your screen.
Except for dragging them to your desktop, Apple allows you to add widgets directly from the desktop.
- Remove all the open app windows from your desktop.
- Right-click on your desktop.
- Choose Edit Widgets.
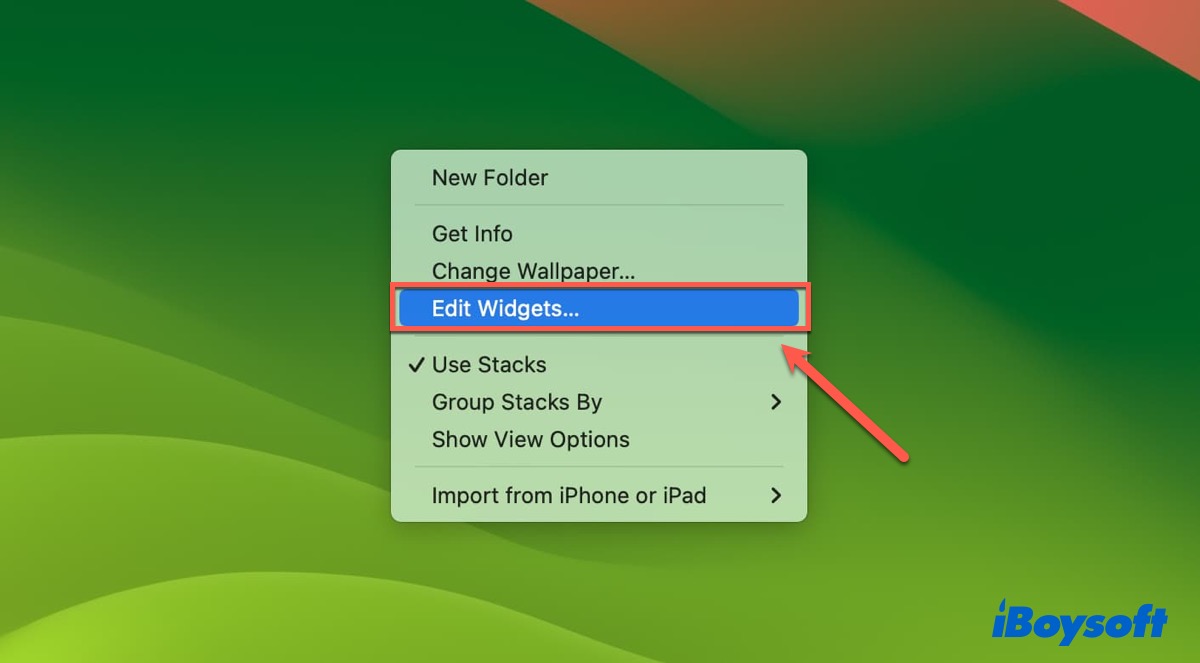
Now, you can check a list of available widgets from the left panel and then choose the preferred widgets and add them to your desktop.
Remove widgets
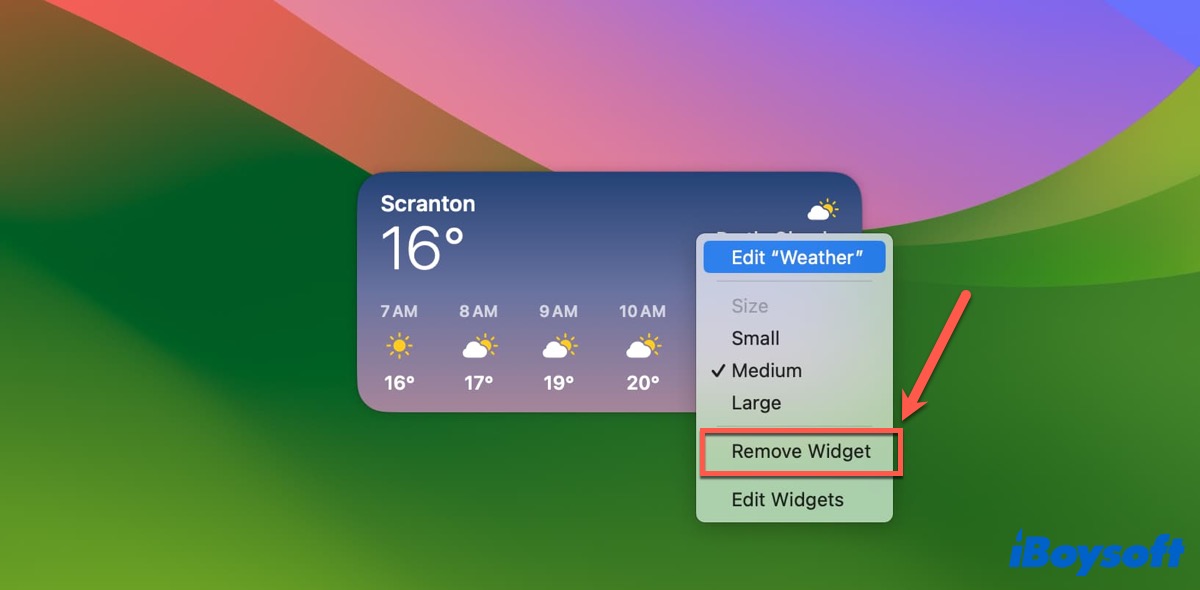
If you think there are too many widgets on your desktop, you can use the following way to remove some unnecessary widgets.
- Right-click on the widgets you want to remove.
- Select Remove Widgets in the pop-up menu.
How to add iPhone widgets to the desktop?
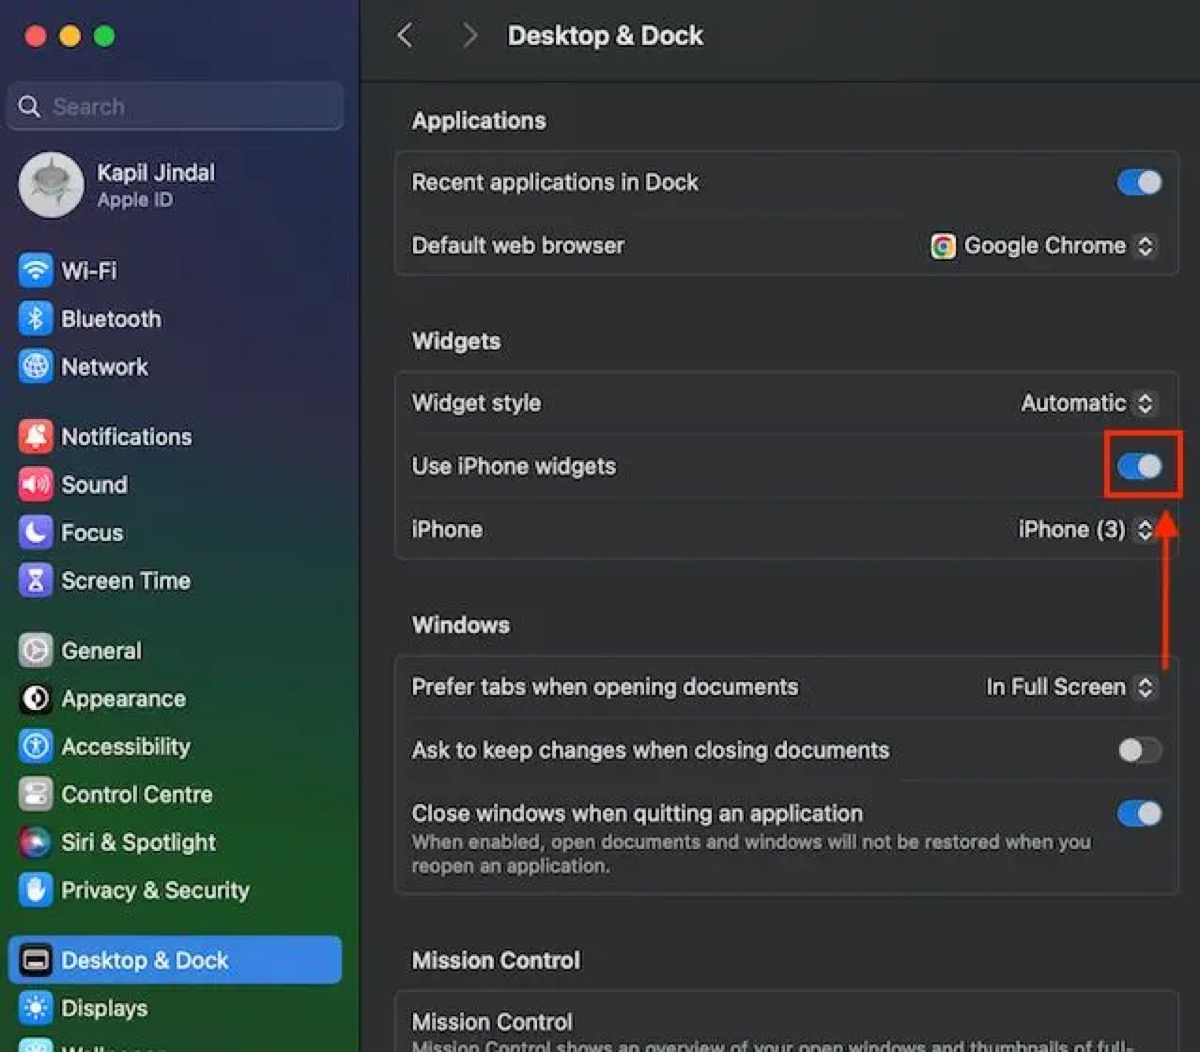
Due to the Continuity feature, you can use your Mac together with the other Apple devices that sign in with the same Apple ID. With such a powerful feature, in macOS Sonoma, you can access the widgets from your iPhone on your Mac's desktop without installing them.
- Go to System Settings > Desktop & Dock.
- Scroll down to find Widgets and turn the Use iPhone Widgets toggle on.
- Back to the desktop and right-click to choose Edit Widgets.
- Search the app widgets you use on your iPhone and then add them to your desktop.
Also read:
macOS Sonoma Desktop Widgets Not Working/Showing | 11 Fixes
What is WeatherWidget on Mac & Fix WeatherWidget High CPU
Have you learned how to add widgets to your desktop? If yes, share these useful methods on your social media.
FAQ about widgets on the desktop
- QCan you have widgets on macOS?
-
A
You can add widgets in the Notification Center from macOS Big Sur to macOS Ventura, and after macOS Sonoma, you can add widgets on your desktop.
- QCan you add widgets to Mac desktop home screen?
-
A
Sure. If you have installed macOS Sonoma (14), you can add widgets to your Mac desktop.
- QHow do I put widgets on my desktop?
-
A
You can drag them to your desktop from the Notification Center; or right-click on the desktop and then choose Edit Widgets from the pop-up menu.
