The G-Drive Desktop Hard Drive is one external hard drive developed and introduced by SanDisk Professional. Thanks to its extra-high capacity and fast data speed, this enterprise-class hard drive is perfect for data backups and large file storage. Moreover, this HDD is designed to be both macOS and Windows compatible.
Perhaps you have a fresh new G-Drive and plan to use it on your Mac, or you already use the hard drive on Windows for a while but decide to switch to Mac devices, this post will cover comprehensive tutorials to show you how to use G-Drive external hard drive on Mac. Before getting started, let's have an overview of how G-Drive works on your Mac.
How G-Drive external hard drive works on Mac
When you connect the G-Drive HDD with your Mac, the Mac recognizes your device following the procedures below.
First, the computer detects a hardware connection and starts to supply your drive with power. Then, the system reads disk content such as the device type, manufacturer, and partition information. Next, your Mac keeps reading the file system of the drive and verifies whether this drive is mountable or not.
Recognizing the G-drive so far, your Mac can finally show it in Finder or Mac desktop where you can clearly find your drive.
Set up a new G-Drive HDD on Mac
For users who own a G-Drive that's newly purchased without anything stored on it, follow the steps below to set up G-Drive external hard drive on Mac for use.
Step 1. Connect the G-Drive HDD with your Mac device.
To ensure maximum compatibility, this external HDD includes both USB-C to USB-C and USB-C to USB-A cables, so it can work with your Mac USB port without any hassle.
Step 2. Find your G-Drive on the desktop or Finder to get ready for formatting.
The G-Drive disk has to be tested before delivery. Some testing info left on it will take up a certain space on the drive. In addition, oftentimes, a newly purchased disk needs to be formatted by users to determine the disk type. Therefore, it's suggested to erase and format the G-Drive disk before putting it into use.
Step 3. Navigate to Disk Utility to format the G-Drive external hard drive.
Open Disk Utility from Launchpad > Other. Alternatively, you can search for it in Spotlight search. When you enter the Disk Utility, on the left column under the External section, click on your G-Drive external hard drive.

Step 4. Erase your G-Drive external HDD by hitting on the Erase button on the top.
A prompt will show up to inform you that all data stored on the drive will be deleted.
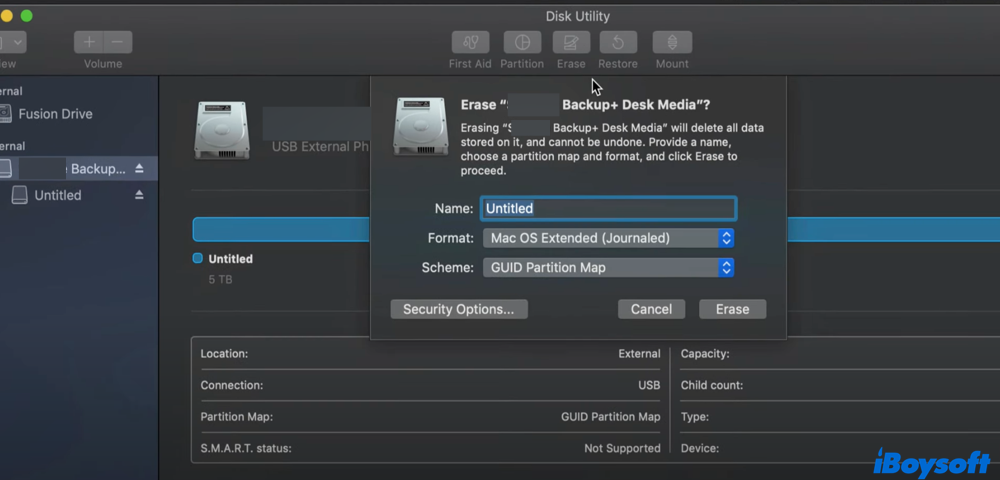
Step 5. Fill in the name and choose the format and scheme of your external hard drive.
macOS provides you with multiple file systems, including APFS, HFS+ (Mac OS Extended), FAT, and exFAT.

APFS vs. Mac OS Extended - Which Format Option is Better
A guide about the differences between APFS and Mac OS Extended in speed, Time Machine backup, and encryption. Read more >>
If you decide to use the drive on both Windows and Mac devices, choose exFAT due to its powerful compatibility. However, if you prefer to use the G-Drive on Mac only, then HFS+ (Mac OS Extended) is a better option as it's the default file system of macOS. Click Done to wait for the procedure to be completed.
Step 6. Partition the drive based on your needs.
Considering that G-drive offers large storage space that starts with 4TB, it makes great sense if you want to separate the drive into various volumes for different uses. To do this, erase the drive again. Then click on Partition next to Erase.
Click on the add sign under the chart to create as many partitions as you want. Similarly, you can drag and move the partition chart to add more gigs. Name the partitions and assign a file system to each one as what's mentioned above.
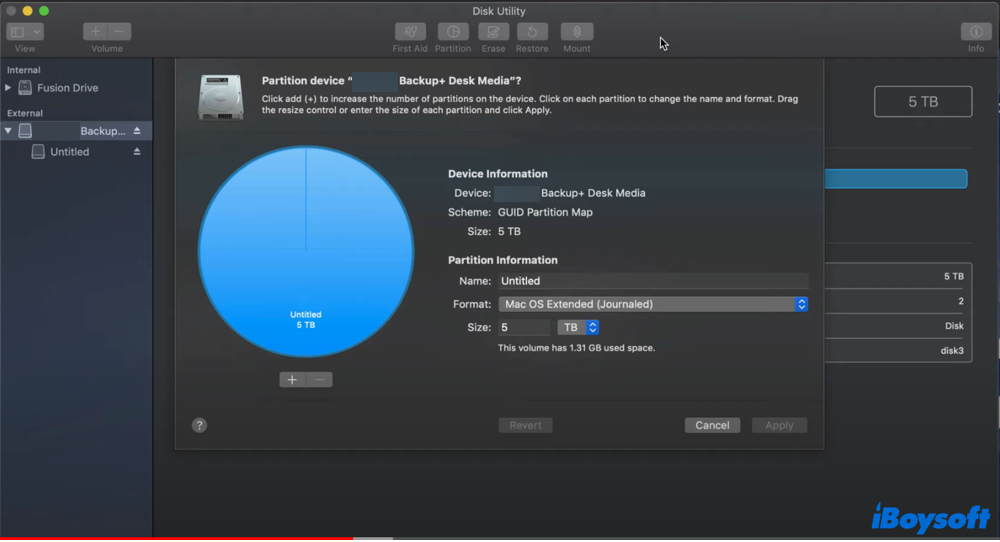
When the operation is successful, you can see all partitions under your G-Drive external hard drive on the left sidebar. Feel free to make use of them, say, use one partition as the Time Machine backup option.
Successfully set up G-Drive on your Mac? Share this method to help more people!
How to format G-Drive to NTFS on Mac
NTFS is a Windows-developed journaling file system. It shares quite a few advantages compared with other file systems and is widely adopted by users. However, lack of a proprietary license, macOS does not offer native support to NTFS. That's to say, you can't format a drive to NTFS on Mac or read-write an NTFS drive on macOS.
The same situation applies to your G-Drive external HDD. When you format or partition the G-Drive in Mac Disk Utility, there's no NTFS option. To format or partition your external hard drive to NTFS on Mac, using NTFS for Mac software is the best option.
iBoysoft NTFS for Mac is an all-in-one solution to manage all NTFS-related issues on Mac. Since it's natively integrated with the macOS, you can find and choose the extended NTFS format option in Disk Utility without extra effort. Alternatively, you can enter the software interface to erase your drive to NTFS with one click. Let's see how it works the magic in detail.
Step 1. Download and install iBoysoft NTFS for Mac. This software is upgraded to be fully compatible with macOS 10.13 and later. The latest macOS Sonoma is also included.
Step 2. Connect the G-Drive external hard drive to your Mac computer. Make sure to connect the right cable and port.
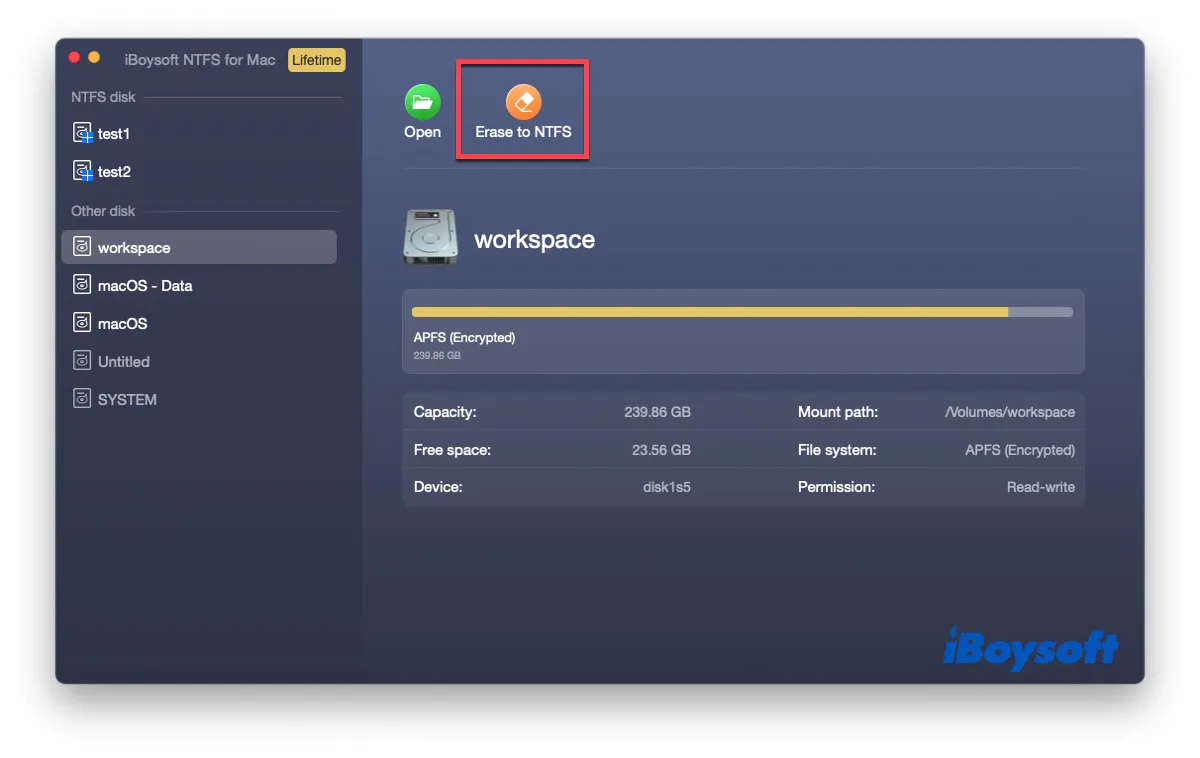
Step 3. Launch iBoysoft NTFS for Mac. All detected drives are divided and listed into two sections on the left column, including the NTFS disk section and the Other disk section. Under the Other disk, find the G-Drive or the partition you want to format.
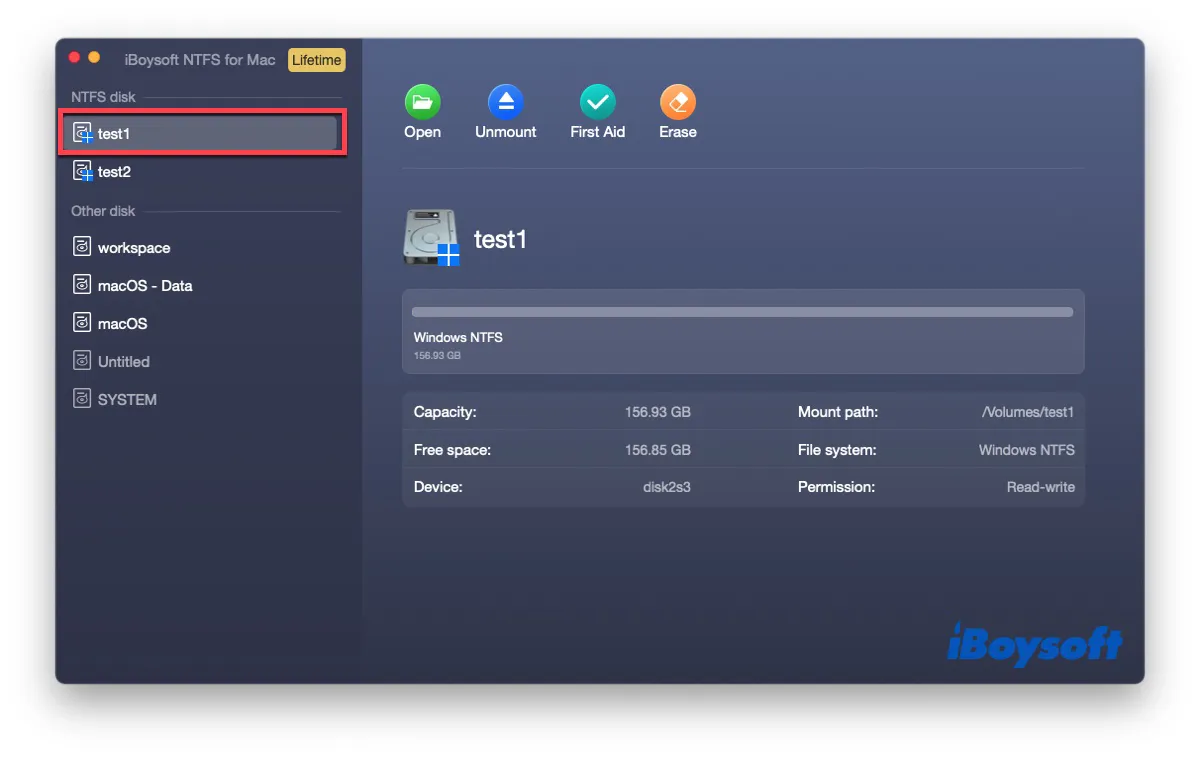
Step 4. Detailed information on the drive will appear on the right panel. Click on the Erase to NTFS button to format your external hard drive to NTFS with just one click.
If you prefer to run the procedure without opening iBoysoft NTFS for Mac, here's how to do it in Disk Utility.
Step 1. Open Disk Utility and locate your G-Drive.
Step 2. Select the drive and click on Erase or Partition on the top menu bar.
Step 3. Assign a new name to the drive. When it comes to the file format, surprisingly, you can find the Windows NTFS option. Select it to format your G-Drive to NTFS on Mac.

Spread the news if iBoysoft NTFS for Mac helps to format drive to NTFS on Mac.
How to read-write NTFS-formatted G-Drive on Mac
Possibly, you've already used the G-Drive on Windows before but for some reason, you have to connect it to another Mac computer. If you find it unable to write to the drive, including editing, renaming, or modifying, unfortunately, this drive is pre-formatted as NTFS.
To enable NTFS write on Mac, iBoysoft NTFS for Mac can take well care of you. Simply download this NTFS for Mac software and it will mount your external HDD in read-write mode automatically, allowing you to use an NTFS drive on Mac with ease.
If you can read and write the NTFS drive on Mac after using this software, you can share this solution to help more people!
Conclusion
The G-Drive external hard drive is a competitive candidate when it comes to system backup and fast data transfer. Whether it's a brand new or an old G-Drive, this post covers effective solutions on how to use G-Drive on Mac with step-by-step guides.
FAQs about how to use G-Drive external hard drive on Mac
- QDoes G-Drive work with Mac?
-
A
Yes. G-Drive is designed to be Mac-ready and Apple Time Machine compatible.
- QG-Drive not showing up on my Mac, what to do?
-
A
First, check the connection such as the port and the cable. Next, to make your G-Drive appear on the Mac desktop, go to Finder on the menu bar > Preference > General and tick the box in front of External disks. Then go to Sidebar and do the same to make your G-Drive appear in the Finder sidebar.