Your Mac won't boot but shows a gray, black, or white screen on Mac. Then, you can't access the files stored on your Mac hard drive. In such a serious situation, what worries you most is that if you can recover data from MacBook that won't turn on.
I have a MacBook that will not boot and tried all manners to recover data even with macOS Recovery mode and Target Disk Mode, however, none worked. What can I do? -reddit.com
How to recover data from Mac that won't boot
These five methods are applied to MacBook Pro, MacBook Air, Mac mini, iMac, and Mac Pro, including T2 Mac, M1 Mac, and M2 Mac.
Besides, the internal hard drive of iMacs (2012, 2013, 2014, 2015, 2017, 2019, 2020) is a Fusion drive. iBoysoft Data Recovery for Mac has implemented Fusion drive data recovery from an unbootable Mac or bootable one.
Method 1: Using data recovery software - Very fast & easy
As your Mac won't boot, data recovery is challenging. Using data recovery software is testified the most efficient and simplest way. However, not all the data recovery software in the market has the ability to recover files from a Mac that won't boot.
iBoysoft Data Recovery for Mac, taking advanced and safe techniques, helps recover data from an unbootable Mac in an easy way. It can be launched in macOS Recovery mode through Terminal without creating a bootable drive.
Step-by-step tutorial: How to run iBoysoft Data Recovery in macOS Recovery mode.
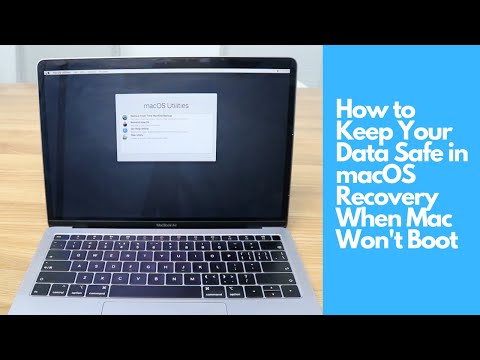
Now, watch this video to learn how to recover files from a Mac that won't boot.
Have you got this way to get files off Mac that won't boot? Share this useful tool to help more ones.
Method 2: Restore Mac from Time Machine backup
A better situation is that you have backed up the Mac before it crashes. The Time Machine backup can help you restore your Mac. Then, not only your data is recovered but also your dead Mac can boot up again.
However, you should know that the Time Machine backup only saves the files on your Mac at a certain time. As the data on a Mac changes every minute and every second, you'll still lose some data. Hence, using iBoysoft Data Recovery for Mac to rescue files is a more guaranteed way.
To restore your Mac from Time Machine backup:
- Connect the external hard drive that stored the Time Machine Backup to your Mac.
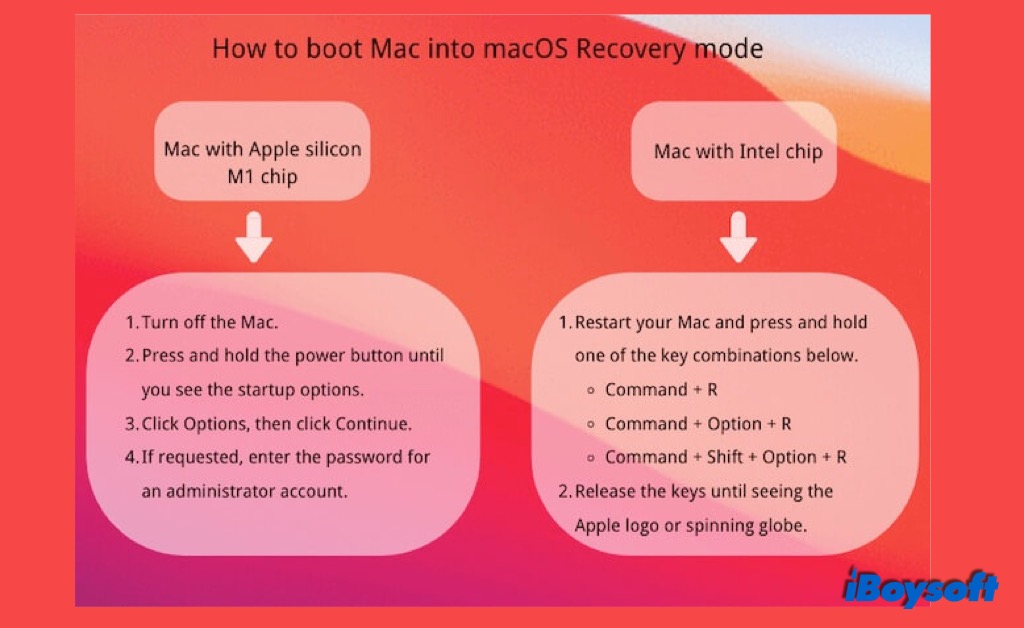
- Boot your Mac in macOS Recovery mode.
- Select Restore From Time Machine Backup on macOS Utilities and click Continue.
- Select the external hard drive > the latest Time Machine backup and click Continue.
- Choose a drive where to save the Time Machine backup and click Continue.
- Erase the destination disk first, and click Restore.
It will take a long time, maybe hours, to restore the macOS and files. Then, your Mac will restart automatically. Note that you might also fail to recover lost data as the process is complicated.
Method 3: Restore Mac from APFS snapshots
Snapshot, a feature of APFS since macOS High Sierra, captures the state of an APFS drive including saving all the data on the drive at that state. If you want to restore data from the Mac that won't turn on without a Time Machine backup, roll back your Mac to a previous state with APFS snapshots.
Note: Using Terminal can't restore files that have been permanently deleted or removed by Mac automatically from Trash after 30 days. It only can retrieve deleted files in the Trash can.
If you insist, follow these steps:
- Boot your Mac into macOS Recovery mode.
- Select Restore from Time Machine in macOS Utilities.
- Select the latest APFS snapshot.
Note: For some reason, like not enough Mac hard drive storage space, your Mac might fail to save an APFS snapshot. - Follow the instructions to restore your Mac.
Method 4: Copying your Mac hard drive via creating a disk image
Creating a disk image on Mac is to copy the contents of a disk compressedly. To copy data from a Mac hard drive only if it is not corrupted.
However, most of the reasons for the MacBook not turning on are due to internal hard drive corruption or similar. For MacBook Data Recovery, there's a very small chance that you can create a disk image from the Mac hard drive and recover data from MacBook hard drive that won't boot.
Uh, you can also have a try.
- Boot up your Mac into macOS Recovery mode.
- Connect an emptied external hard drive (with a large capacity) to your Mac.
- Select Disk Utility > the startup disk.
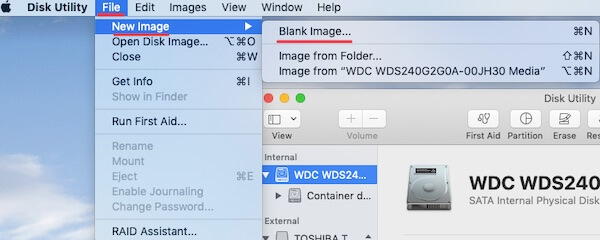
- Choose File at the top Apple menu. Click New Image > Blank Image.
- Type basic information for the disk image, choose an external hard drive to save it, and select the image format as read/write.
- Click Save > Done.
It's hard to successfully create a disk image of your Mac hard drive. Why not use the easy-to-operate iBoysoft data recovery software to save your files?
Method 5: Use Target Disk Mode or Share Disk to copy files
Target Disk Mode (Intel-based Mac)
Target Disk Mode enables you to transfer files from one Mac to another Mac. This way is complex as it requires another bootable Mac and a Thunderbolt or Firewire cable for connecting the two Macs. Besides, you need to disable FileVault on the healthy Mac.
Then, press down the T button when restarting the Mac that not turning on. If it is successful, you'll see the internal hard drive of the faulty Mac showing up as an external hard drive on the Mac that works.
The question is, usually, the unbootable Mac hard drive has some issues, it is not accessible or even won't show up on another Mac via Target Disk Mode. Let alone transfer files from it. To save your time and energy, you'd better choose iBoysoft Data Recovery for Mac to rescue the lost files.
Share Disk (M1/M2/M3 Mac)
Here's how to use the Share Disk utility to copy files:
- Use a Thunderbolt cable to connect your M1/M2/M3 Mac to another Mac.
- Shut down your unbootable M1/M2/M3 Mac.
- Press down the power button until the startup options and the Options gear icon appear.
- Select Options > Continue to enter into macOS Recovery Mode.
- Type your admin password if asked.
- Select Utilities from the top Apple menu > Share Disk.
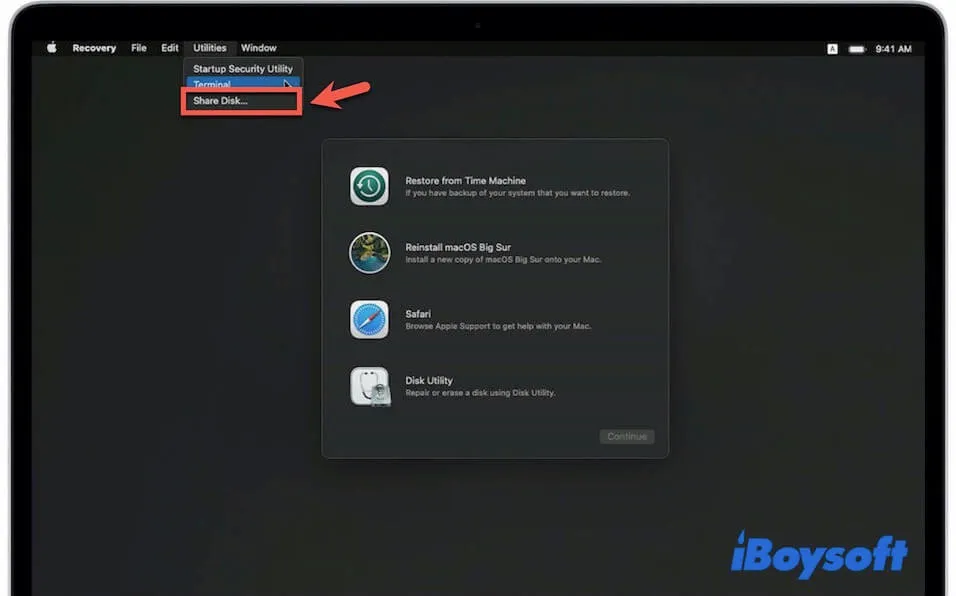
- Select the startup disk of the M1/M2/M3 Mac and click Start Sharing.
On the other Mac that you prepare to connect it with your M1/M2/M3 Mac:
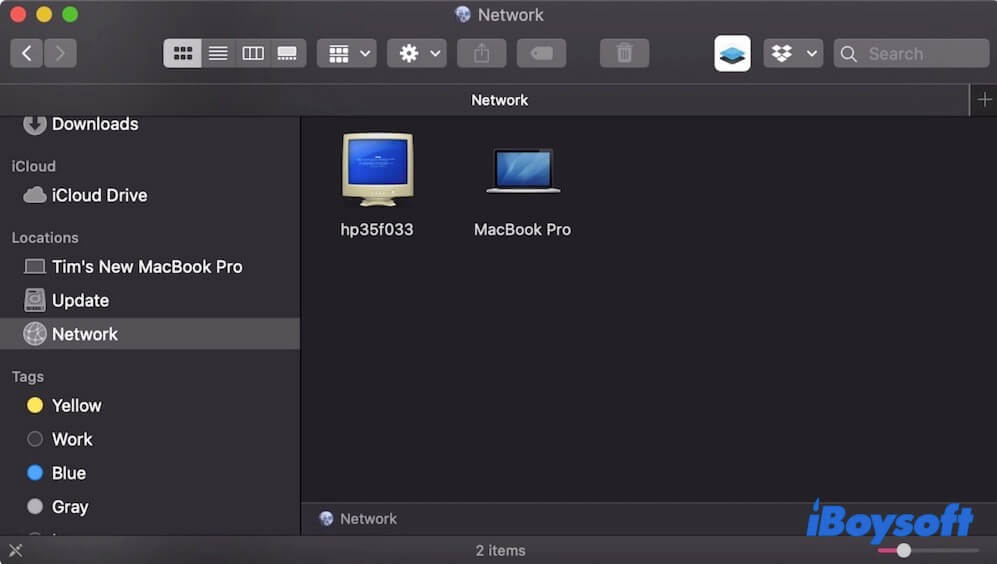
- Open Finder and click Network under the Locations tab.
- Double-click the detected M1/M2/M3 Mac in the Network pane and then select Connect As > Guest > Connect.
Then, if luckily, there are some volumes on your M1/M2/M3 Mac hard drive that show up and are accessible, you can copy the available files to this healthy Mac for recovery.
But in most cases, the internal hard drive of the unbootable M1/M2/M3 Mac is not accessible and won't appear on the connected Mac as an external hard drive. Therefore, using the reliable and professional Mac data recovery software - iBoyosft Data Recovery for Mac is the best choice.
After recovering data, it is time to fix the 'Mac won't turn on' issue.
Final thoughts
In this post, you can try different ways to recover data from the MacBook that won't turn on. But no matter what situation you are in, using iBoysoft data recovery software to recover a Mac hard drive that won't boot is the best choice. Then fix your MacBook and boot up it again.
• How to restore your Mac when Mac Recovery mode not working?
Please share our post to help other Mac users.