Creating a disk image for a Mac startup disk or a connected device is a solution provided by macOS Disk Utility, the disk management tool, for Mac users to copy one system to several Macs, create incremental backups, restore a Mac from a disk image, make a copy of the Mac internal/external disk, and so forth.
A disk image is a compressed copy of the contents of a disk or folder. The name of a disk image ends in.dmg. It appears and functions similarly to a mountable device or volume, both in the Finder sidebar and on the desktop. Here, we will walk you through how to create disk images on Mac.
How to create a disk image on Mac?
You may want to create a disk image - a complete copy of a hard drive or a specific partition to back up data, restore OS to an earlier state, or transfer data from one computer to another. With the built-in app Disk Utility, you can make it by following the steps below, you can also encrypt the disk image if needed.
Note: If you want to save a disk image on the external SSD, HDD, or USB flash drive, make sure it is compatible with macOS, and you can read-write to it, otherwise, the disk is not available as the location to save the disk image. For example, you can't save disk images to an NTFS drive on a Mac.
Create a blank disk image for storage
Perhaps, you want to save new files to the disk image to manage files on your Mac drive, then you can choose to create a blank disk image, it serves as a virtual disk, and applications can read and write to files stored on it. Here's how:
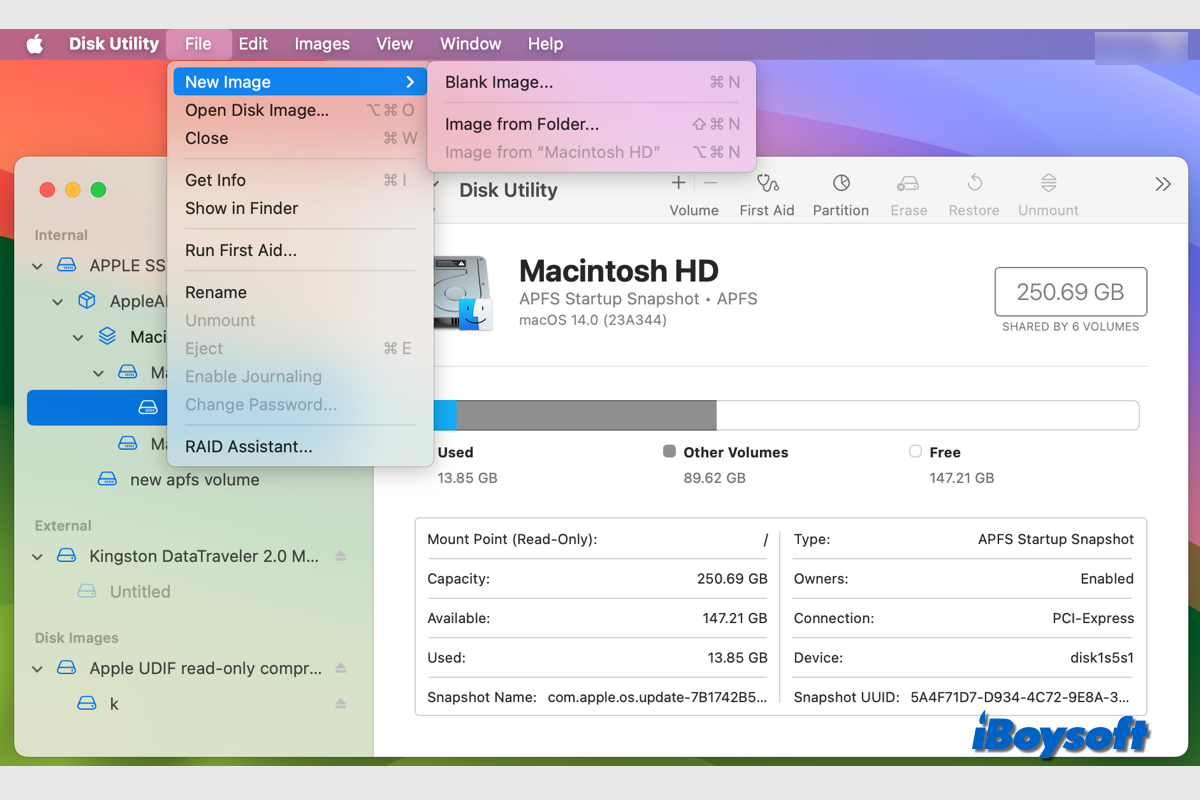
- Access Disk Utility from Finder > Applications > Utilities.
- Click File on the menu bar and choose New Image > Blank Image.

- Enter a filename for the disk image, and choose where to save it.
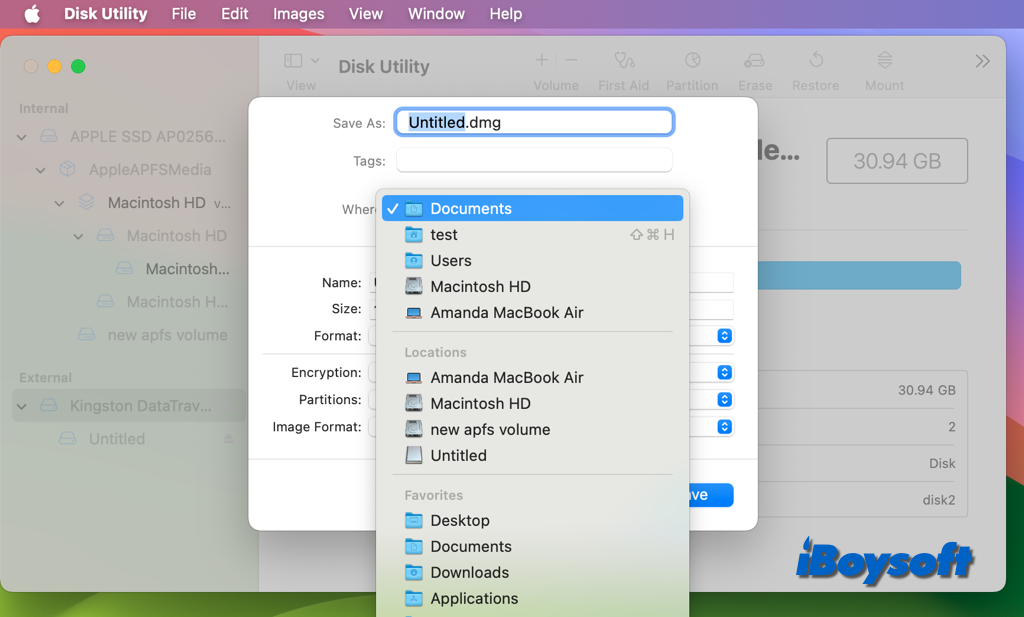
- In the Name field, enter the name for the disk image. This is the name that appears on your desktop and in the Finder sidebar after you open the disk image.
- Enter a size for the disk image.
- Choose the format for the disk from the Format pop-up menu: APFS for SSD Mac running macOS 10.13 and later, Mac OS Extended for macOS 10.12 and earlier, MS-DOS(FAT)(32GB or less) or ExFAT(over 32GB) for Mac and Windows.
- To encrypt the disk image, click the Encryption pop-up menu, then select an encryption option.
- Click the Partitions pop-up menu, then choose a partition layout.
- Click the Image Format pop-up menu, then choose Read/write disk image, it allows you to add files to the disk image after it's created. Uses the .dmg file extension.
- Click Save > Done. The new disk image file is saved to the chosen location in the Finder, and you can access its disk icon on your desktop and in the Finder sidebar.
Double-clicking the disk image will open it when you need to use it. When prompted, enter the password if the disk image is encrypted. You can access the disk image's contents in the Finder just like any other disk after it has been mounted. When finished, select Disk Utility > Eject in the menu bar or drag the disk image to the Trash.
Create a disk image from a disk/folder
In most cases, Mac users want to create a disk image that includes the contents and free space on a physical disk or connected device, and perhaps, you only want to create a disk image that contains the contents of a certain folder instead of the whole folder, you are covered in this part.
Note: You can't create a disk image for a single APFS volume on any Mac, you should select the whole APFS container on an Intel Mac to create a disk image for it. However, you can't create images of APFS containers on a Mac with Apple silicon or an Apple T2 Security Chip.
- First of all, launch Disk Utility from Launchpad or via Spotlight.
- To create a disk image from a disk or connected device: Select a disk, volume, or connected device in the sidebar, choose File > New Image, then choose "Image from [device name]".
To create a disk image from a folder or connected device: Choose File > New Image, choose Image from Folder, and select the folder or connected device in the dialogue that appears, then click Open. - Type a filename, add tags if necessary, and choose where to save it.
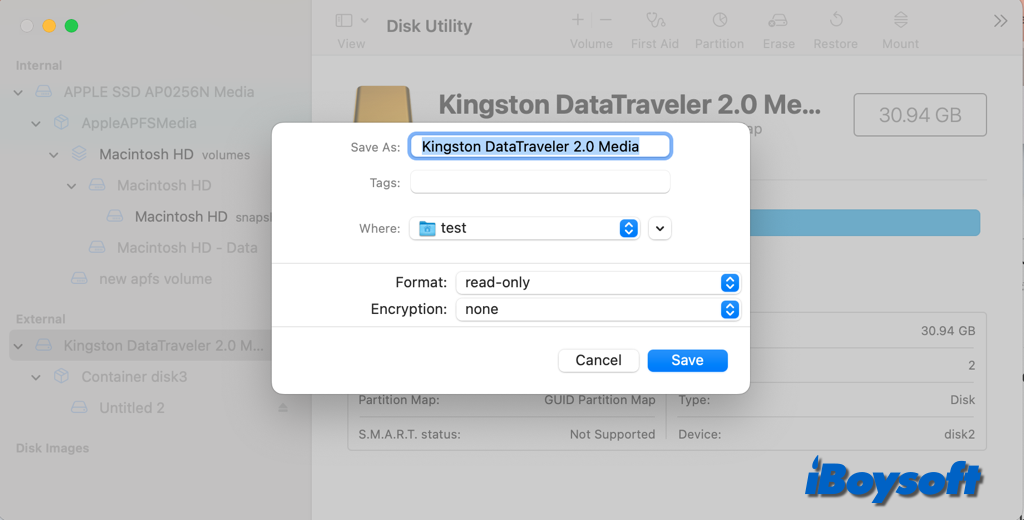
- Expand the Format box, then choose an option:
Read-only: The disk image creates and opens more quickly and cannot be written to.
Compressed: Data is compressed, resulting in a smaller disk image than the original data. The disk image can only be read.
Read/write: You can add files to the disk image after it's created.
DVD/CD master: is compatible with apps from third parties. Whether or not they are used, they contain a copy of every sector on the disk image. All data is precisely duplicated when you make additional DVDs or CDs from a master disk image. - Click the Encryption pop-up menu, then choose an encryption option.
- Click Save, then click Done.
If you have successfully created disk images on Mac with the above steps, share them to help others!
How to restore a disk image to a disk on Mac?
When you need to restore a disk image to a disk on your Mac, you can follow the steps in this part. You should first erase the drive. Thus, you'd better back up your drive for important files before you decide to restore a disk image to Mac Startup or an external HDD, SSD, USB flash drive, etc. For a disk image that has multiple partitions, you must restore each partition individually.
- Open Disk Utility and choose the volume that becomes the copy.
- If you want to restore a disk image with multiple partitions, choose Partition to make it have as many partitions as the disk image, and each partition must be at least as large as the corresponding partition in the disk image.
- After selecting the volume you want to restore, and click the Restore button.
- Click the Image button and browse your Mac to choose the disk image, then click Choose.
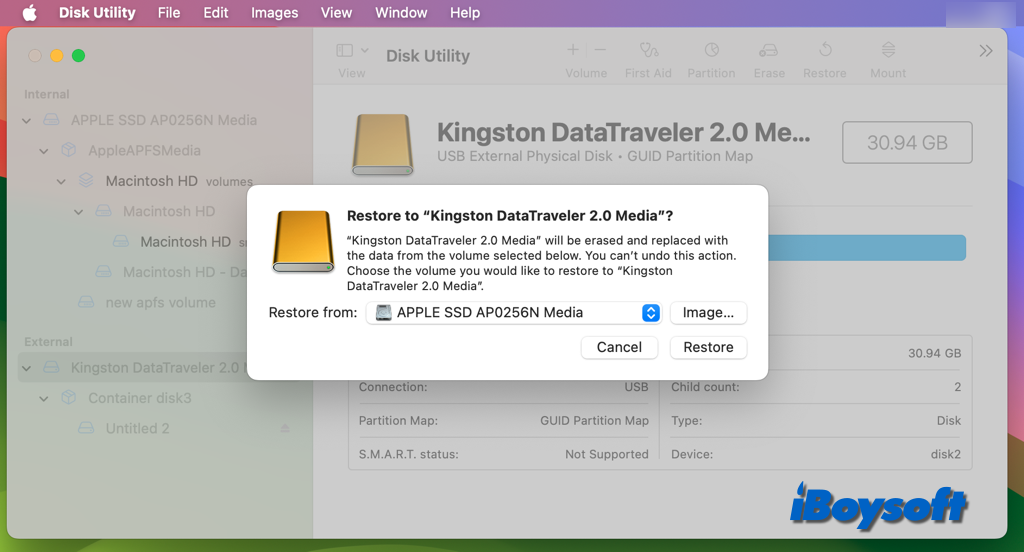
- Click the Restore button to begin.
Can't create a disk image from an APFS container? Fixed!
If you are using an Intel-based Mac, you can create a disk image for the whole APFS container via Disk Utility. However, it doesn't work on a Mac equipped with a T2 security chip and an M1/M2/M3 chip. Even though, there are some workarounds to create disk images from an APFS container on T2 chip Macs and Apple Silicon Macs.
What you need is third-party Mac cloning software, it allows you to clone the APFS container on Intel Macs, T2 chip Macs, and Apple Silicon Macs. Among them, iBoysoft DiskGeerker ranks top, it can create a 1-to-1 copy of your startup disk or external disk to a target device fast and stably.
Note: Being different from creating a disk image, the target disk will be erased, and make sure you have created backups for important files, the capacity of the target disk must be more than that of the source disk, or at least the same, and you can't select the startup disk containing OS as the target disk.
Steps to clone drive on Mac with iBoysoft DiskGeeker:
- Download and install iBoysoft DiskGeeker, the all-in-one disk management tool for Mac.
- Select the whole drive with the APFS container, and choose the Clone button from the side toolbar.
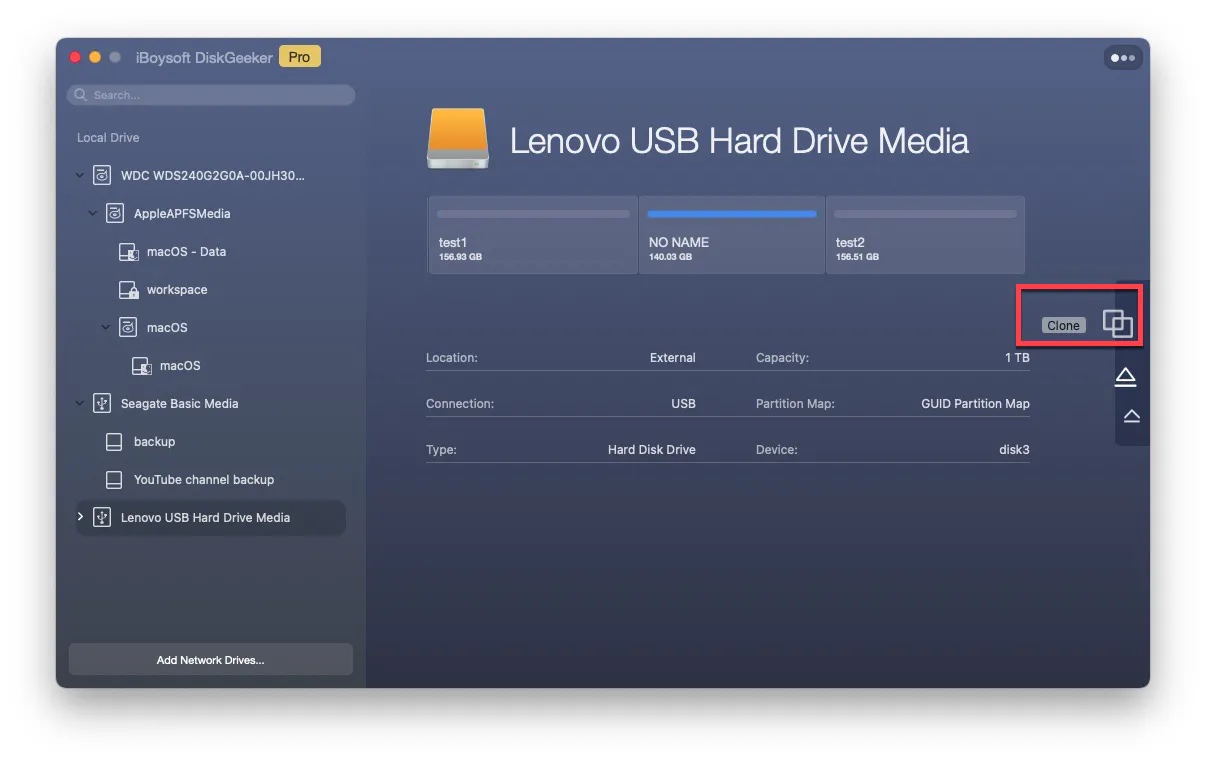
- Choose the destination disk to clone on the pop-up window.
- Click Start Cloning and wait for the process to finish.
Recommend this software if anyone wants to create disk images for APFS container on T2 chip/Apple Slilicon Macs!
FAQs about how to create disk images on Mac
- QWhat software is used to create disk image on Mac?
-
A
Disk Utility is the default Mac imaging tool, you can use it to create a blank image for storage or create a disk image from a folder/disk or a connected device. Besides, there are some third-party Mac imaging software for you to create disk images on Mac such as Carbon Copy Cloner, SuperDuper, DeployStudio, etc.
- QWhich is better a disk image or a backup?
-
A
You may guarantee that your important files, folders, and application data are conveniently accessible and enable faster recoveries with the help of routinely scheduled file-level backups. Disk image backup is a great option to take into consideration when it comes to virtual machines and sophisticated computer systems.
- QIs it better to clone or image a hard drive?
-
A
Disk cloning offers you the speed and ease of copying and moving your current hard drive, while disk imaging gives you the flexibility you need to back up your computer regularly and reliably. Nevertheless, despite their similarities, they are both ideally suited to different use cases.