macOS and Windows are the most commonly used operating systems in computers nowadays. Thus, sometimes, you may need to transfer files between Windows PC and Mac to share files with your colleagues, families, friends, etc. Or, you switch from Windows to macOS and want to migrate the information. Both scenarios are covered in this post.
Tips: Instead of manually copying files, you can download Windows Migration Assistant to transfer files from Windows to Mac.
How to transfer files from Windows to Mac with Migration Assistant
Suppose you have bought a new MacBook Air/Pro/iMac, and want to migrate the files from the previously used Windows computer to the new one. In that case, it is recommended to use the Migration Assistant to copy all of your documents, apps, user accounts, and settings to the new Mac either during the initial setup or after that.
Now, follow the steps below to migrate your PC to Mac via the Migration Assistant.
Step 1. Set up your Windows PC and Mac
You should install the latest OS on both your Windows and macOS computers. You should turn off antivirus software, firewall software, or VPN software if any installed on your Windows PC and Mac before you proceed to migrate the info. Then, turn on the Wi-Fi on both devices.
On macOS Ventura and earlier, you can also use Wi-Fi and Ethernet to connect the Mac and PC to the same network to use Migration Assistant. In case an old PC doesn't support Bluetooth Low Energy, you should get a Bluetooth adapter to connect to your PC's USB port.
Step 2. Connect your computers via Migration Assistant
The specific steps to connect your PC and Mac via Migration Assistant are different depending on the macOS version installed on your Mac. You should first identify the macOS your Mac is running from Apple Menu > About This Mac.
On macOS Sonoma 14.4 or later
- On your PC, download and install Windows Migration Assistant 3.
- On your Mac, launch Migration Assistant from Finder > Applications > the Utilities folder.
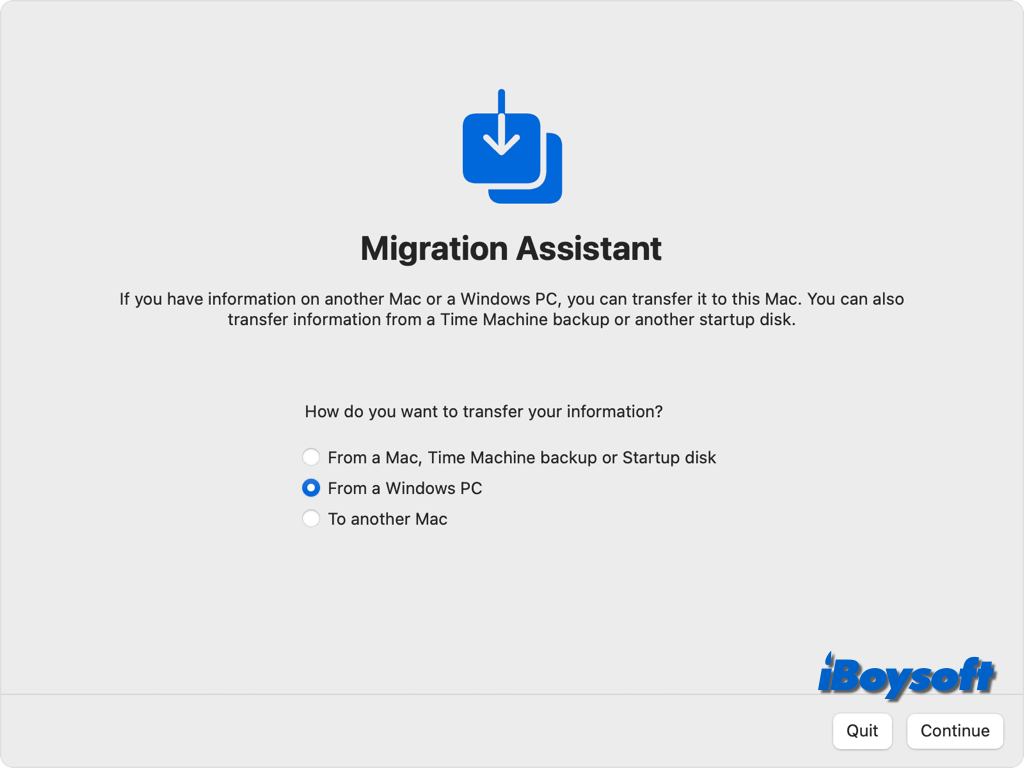
- On the Migration Assistant window, select From a Windows PC to transfer your information.
- When you receive the code on Mac, open Windows Migration Assistant on the PC, and enter it, then click the Continue button.
- Wait for the Windows Migration Assistant to connect to your Mac.
On macOS Sonoma 14.3.1 or earlier
- Windows Migration Assistant 2.4.5.0 for macOS Sonoma 14.0-14.2.1, macOS Ventura, and macOS Monterey.
- Windows Migration Assistant 2.3.1.0 for macOS Big Sur
- Windows Migration Assistant 2.2.0.1 for macOS Catalina and macOS Mojave
- Windows Migration Assistant 2.1.2.0 for macOS High Sierra and macOS Sierra
- Windows Migration Assistant 1.0.5.7 for OS X EI Capitan and earlier
- Download and install the appropriate Windows Migration Assistant.
- Open Windows Migration Assistant and follow the onscreen instructions to connect to the Mac.
- On your Mac, open Migration Assistant from the Utilities folder/Spotlight.
- Similarly, select From a Windows PC as the information source.
- Select the icon displaying on the PC, and click Continue.
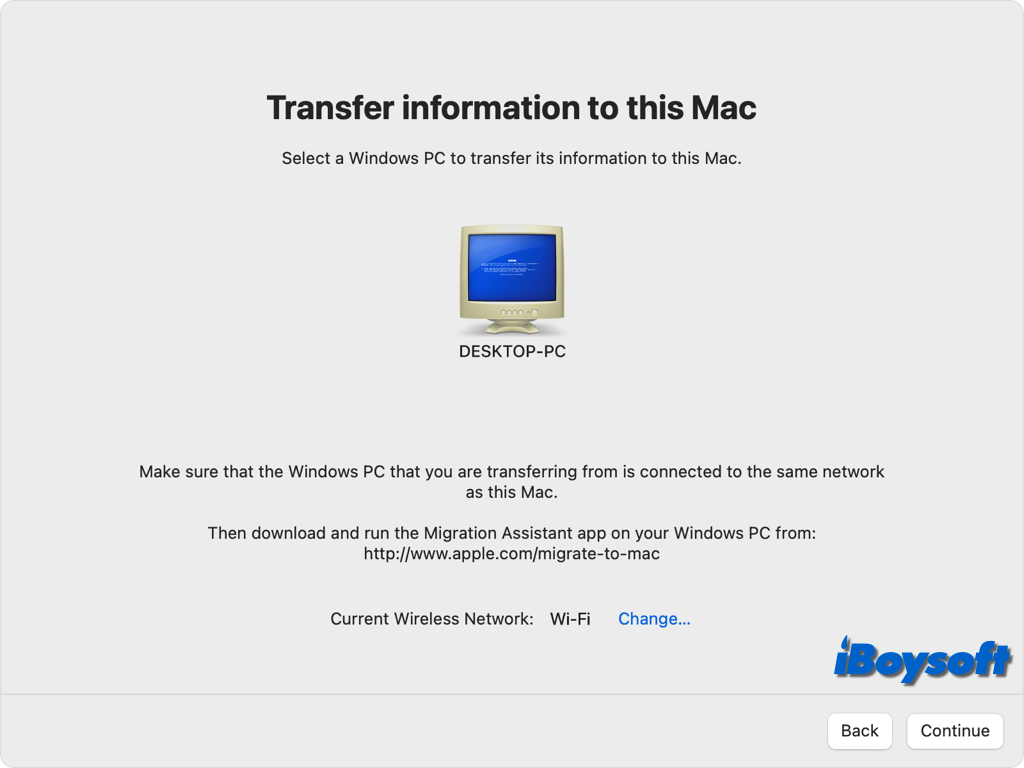
- Ensure the same passcode appears on your Mac and PC, then click Continue on PC.
Step 3. Transfer information from PC to Mac
- After connecting the two computers, it takes a few minutes for the Migration Assistant to categorize the information and calculate the storage space used for each group of files.
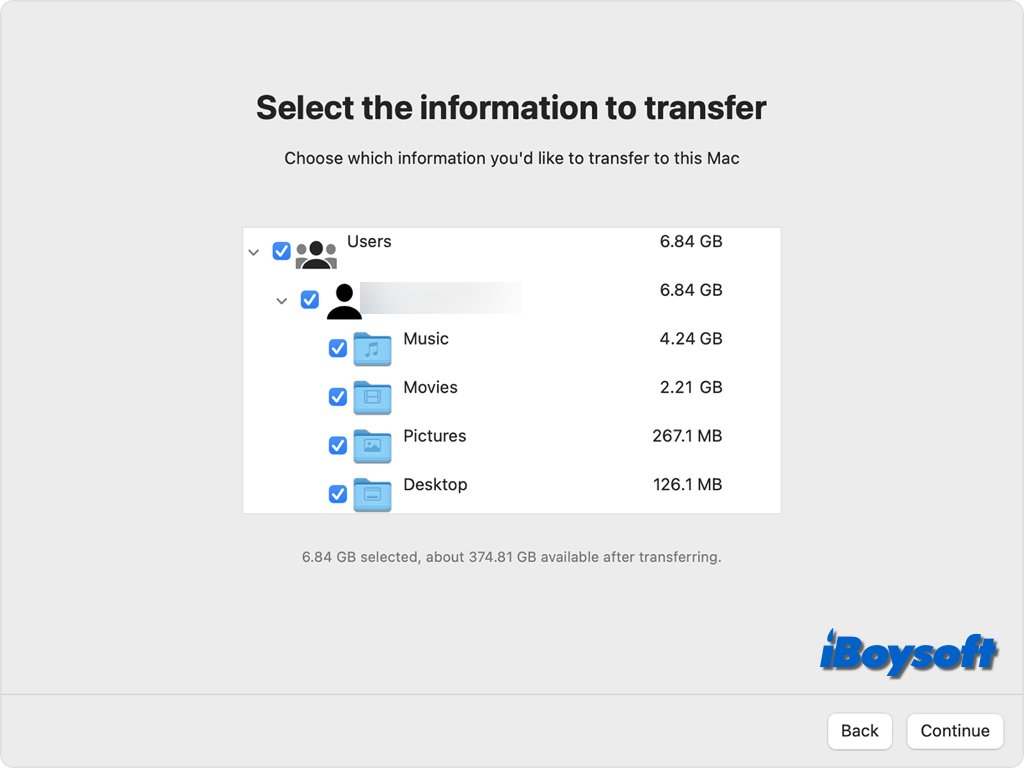
- Check the boxes of information you want to transfer, and click Continue.
- When the process finishes, close the Migration Assistant app on Mac and PC.
- On the Mac, Log in to the migrated account with the same account name on your PC to access the transferred files.
- Authorize the Mac for Apple ID purchases so that you can sync or play content downloaded from Apple.
The information transferred from your Windows PC automatically goes to the same or similar type of app on your Mac. For example, Contacts from People (Windows 10 or later), Outlook, and the Contacts folder in your home directory on Windows are transferred to the Contacts app, homepage, and bookmarks from Chrome, Edge, Firefox, Internet Explorer, and Safari are transferred to Safari, etc.
If anyone around you wants to migrate from PC to Mac, share this post with him/her!
What if Migration Assistant PC to Mac fails
If you encounter a failure to transfer information from PC to Mac via the Migration Assistant, you should make sure that both the PC and Mac run the latest OS updates and that you have installed the correct version of Windows Migration Assistant.
As we have mentioned at the beginning, if there is any antivirus software, firewall software, or VPN software on your Mac/PC, you should turn off it and then continue using Migration Assistant.
In addition, you can use the CHKDSK command on your PC to check disk issues that might be the culprit of unsuccessful transfers. Or, you can choose other ways in the next part to transfer files from PC to Mac.
How to transfer files from PC to Mac without Migration Assistant
Unfortunately, the Migration Assistant is not working to transfer the files from PC to Mac, so, there are some alternatives you can consider to transfer files between Windows and macOS.
Use File Sharing
When your Windows PC and Mac are connected to the same network, you can choose to use the File Sharing feature to share Mac files with your Windows PC. After setting up the feature, it enables you to access the shared Mac files/folders on your Windows PC and you can copy them to your PC.
Via cloud storage services
Cloud storage services like Google Drive and Dropbox enable you to store your files on their servers so that you to access them from anywhere with an active internet connection. You just need to install and configure these services on Mac and PC and turn on automatic syncing of your files.
Use removable storage devices
Besides, you can easily copy files from the Windows PC to a removal USB Stick or an external hard drive, then move/copy the data from the storage media to your Mac again. This method works even if there is no internet connection.
You'd better prepare an external SSD/HHD/USB flash drive with a file system compatible with macOS and Windows such as exFAT and FAT32. If it is an NTFS drive, read-only file system on macOS, you may need a third-party NTFS driver such as iBoysoft NTFS for Mac to move/copy files from the NTFS drive to Mac without reformatting.
Via Email
You can also send the files/folders you want to share to your email, then you can access them on another computer with the same email address logged in. However, it has a significant drawback: limited memory space, you can only store and access a limited number of files and data.
Which method do you prefer to share files between Mac and PC? Share this informative post with more people!