There are multiple ways to share files on your Mac with others. While using the macOS built-in functionality - File Sharing is one of the simplest and safest methods. Here, this post will introduce File Sharing on Mac and also tell you how to set up it to help you share the specific files and folders with the target users over the Internet.
What is File Sharing on Mac?
File Sharing is a feature first introduced by Apple for macOS. It locates in the Sharing preferences and is used to share files and folders on your Mac, such as personal and private documents, videos, images, etc. with the allowed users or groups who are also on the same network. And you can even use File Sharing to enable someone else to access your entire Mac.
And Mac File Sharing also allows you to offer what kind of privilege to the specific user, including Read & Write, Read Only, Write Only, and No Access.
This feature becomes less popular with the spread of cloud storage, which is also a way of networked file sharing. But it still plays an important role in file sharing or transferring from Mac to Mac or Windows over the Internet.
If the above explanation helps you learn about Mac File Sharing, go to tell more people.
How to enable and set up File Sharing on Mac?
If you want to share certain files and folders with other users, you can follow the way below.
How to enable File Sharing and share a folder on Mac:
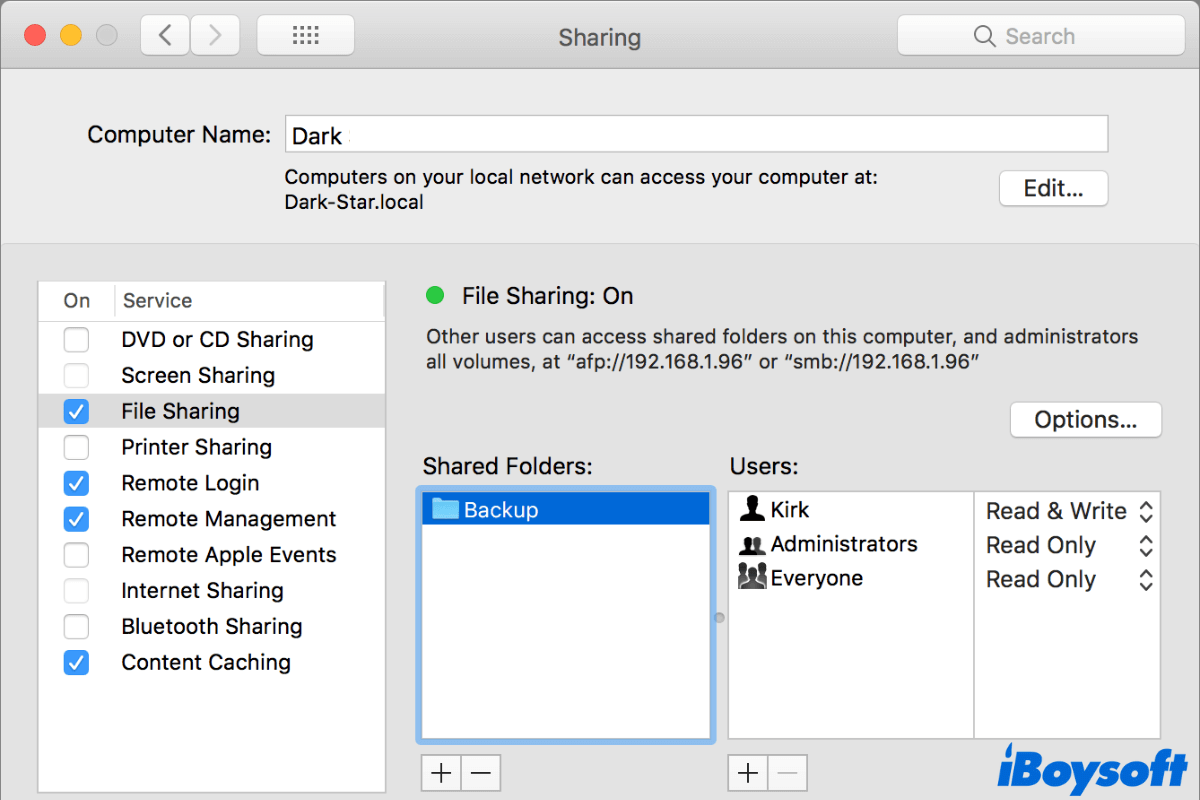
- Open the Apple menu > System Preferences > Sharing.
- Click the padlock at the bottom of the Sharing window and enter the admin password for changes.
- Check the box beside File Sharing on the left side of the Sharing window.
- Click the add button ( +) under the Shared Folders section and then select the folder you prepare to share and click Add.
Note: The Public folder of your current account is enabled to share with everyone automatically by default. If it's not the folder you want to share, you can select it under the Shared Folders section and click the remove button (-) to stop it from being shared.
Now, all users set up in Users & Groups preferences who can connect to your Mac over your network have read-only access to the shared folder. If you just want a specific user to read or read and write to this shared folder, you need to do these extra steps:
- Select the added folder and click + under the Users section and choose the target user. You can select users or groups from the users of your Mac, the users on your network, or your contacts.
- Select the user name in the Users list and then click the pop-up window to change the privilege to Read Only, Read & Write, or Write Only (Drop Box).

How to use File Sharing to share files between Macs?
After turning on File Sharing and configuring the files or folders you want to share on your Mac (steps are on the above), you can now set up another Mac to access the shared files or folders.
On another Mac:
- Ensure the Mac connects to the same network as your Mac.
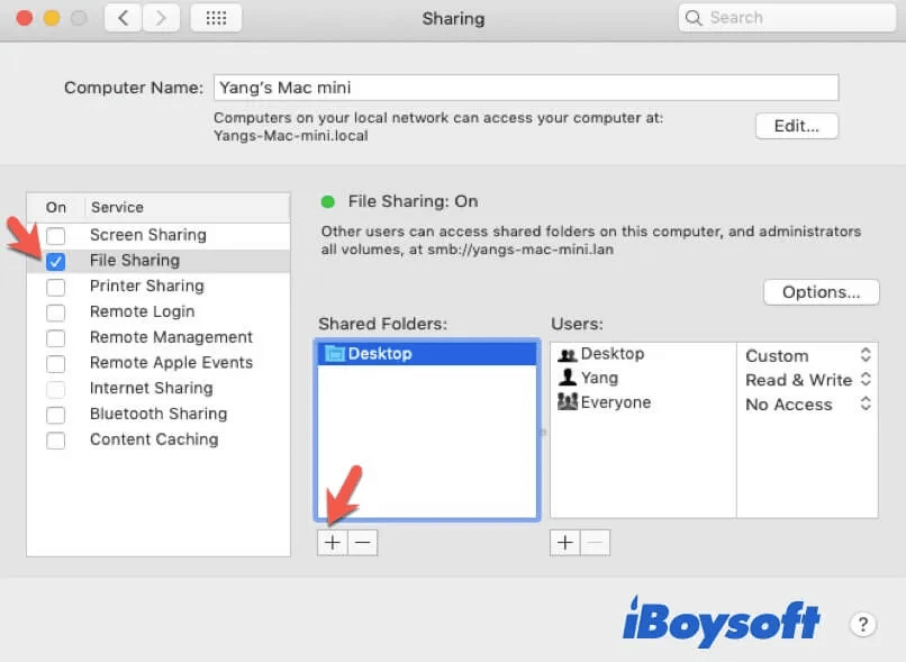
- Open System Preferences > Sharing and then check File Sharing.
- Open Finder and select Go on the top Finder menu bar > Network.
- Select your Mac > Connect as > Connect.
- Choose the way you log in to this Mac (Guest, Registered user, Using an Apple ID).
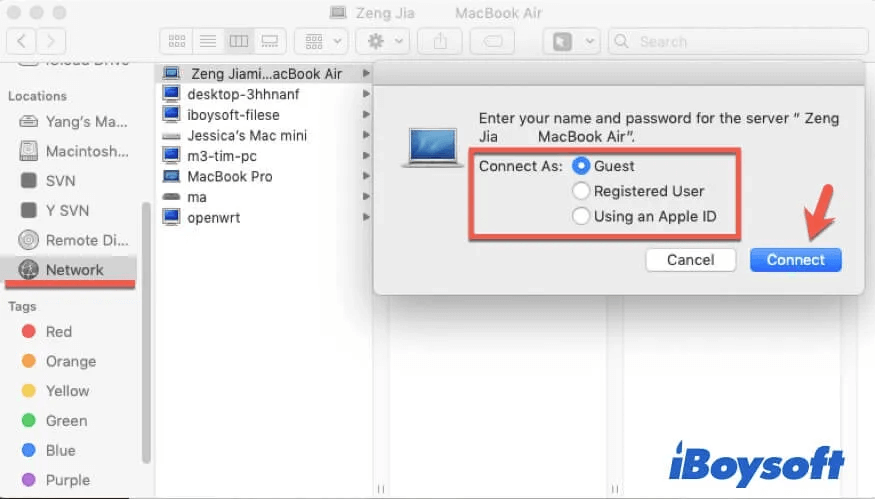
- Type in your account password and click Connect.
You can find the shared folders or files appearing on this Mac.
How to use File Sharing to share files between Mac and Windows?
If you want to share files between Mac and PC, File Sharing can help. In the first place, you need to enable File Sharing and set the folders you want to share on your Mac with the steps mentioned in the above "How to enable and set up File Sharing on Mac?" part.
And the extra steps on your Mac are:
- Open Sharing in System Preferences and unlock the bottom lock with your admin password.
- Click Options on the right pane of File Sharing.
- Ensure the box beside Share files and folders using SMB is checked.
- Check the box next to your account in the Windows File Sharing window.
- Click Done.
- Click the bottom lock icon to save changes.
Now, someone else needs to set the related settings on the Windows computer to access the shared folder on Mac.
Here's how to access the shared folder on your Mac from Windows 10/8/7:
- Launch File Explorer on Windows and right-click This PC on the left sidebar.
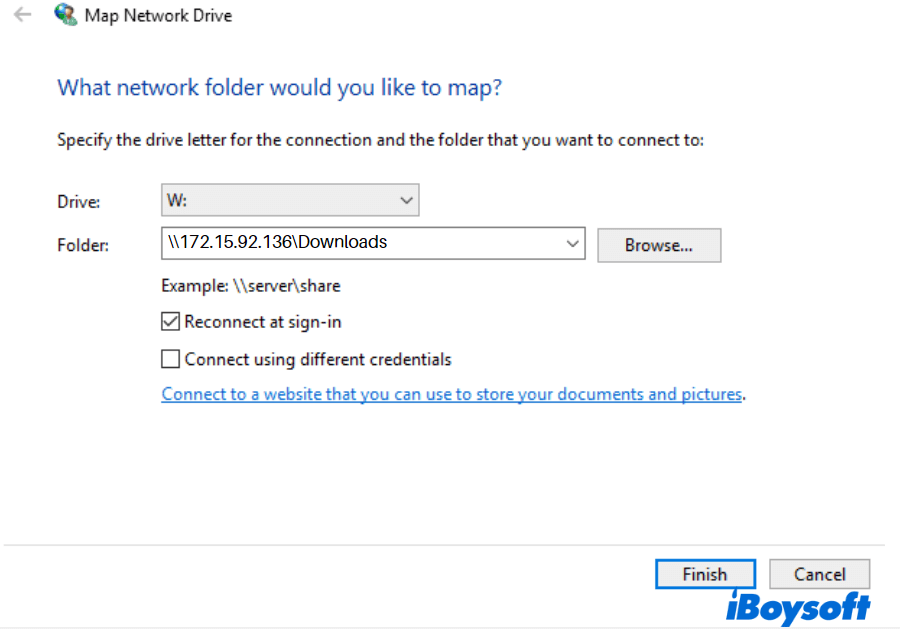
- Choose Map network drive.
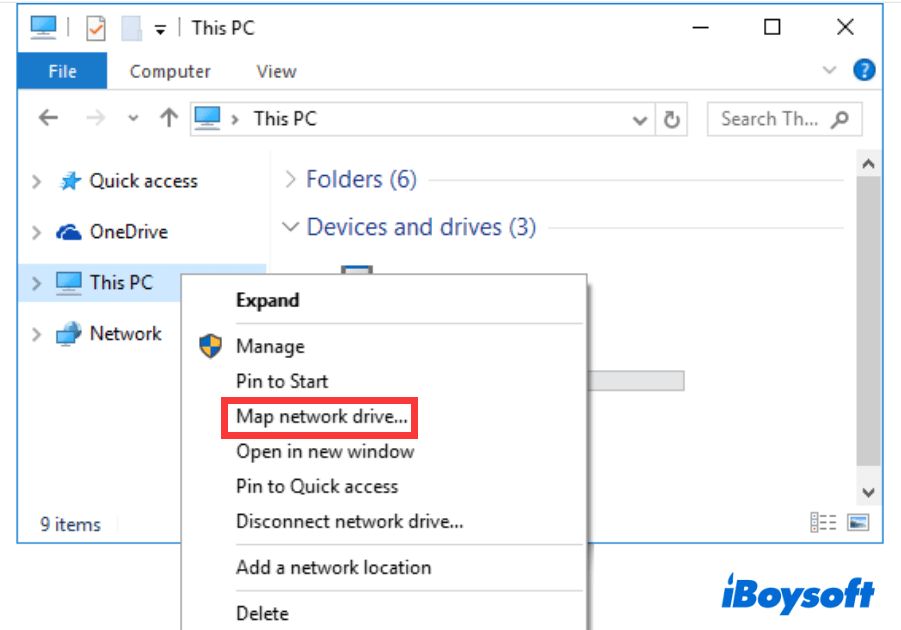
- Enter the IP address of your Mac into the Folder dialogue box. Your Mac's IP address is shown below the "File Sharing: On" words on the File Sharing pane on your Mac. The form is \\YOUR-MAC-IP\SHARED-FOLDER. For example, if the IP address on your Mac is smb://172.15.92.136, you need to enter \\172.15.92.136\Downloads.
- Click Finish.
- Enter the login account of your Mac for authentication and click OK.
Others can now access the shared folder on their Mac on the Windows computer.
Besides, you can also transfer data from PC to Mac with Migration Assistant.
Share with others how to use File Sharing on your Mac to share a folder between Macs or between Mac and Windows. And learn more about how to share large files on Mac if you need.
[3 Ways]How to Share Files between Users on Mac
This post provides 3 ways to share files between users on Mac, including the Shared folder, Public folder, Drop Box, iCloud drive, etc. After reading, you know how to share files between Mac users. Read more >>
Mac File Sharing not working, what to do?
If you can't share files and folders with File Sharing on your Mac, you need to consider a lot as the causes are not unique. Your incorrect configurations, software errors, faulty network, etc. Are all the possible reasons.
When your Mac File Sharing is not working on macOS Monterey, Big Sur, or Catalina, you can try these simple tricks:
- Check if the other Macs are connected to the same network as your Mac.
- Check the settings are correct in the File Sharing preferences.
- Turn off and then on File Sharing.
- Update your Mac to fix system errors.
- QWhy is File Sharing not working on Mac?
-
A
The common reasons are network issues, operating system errors, temporary bugs of File Sharing, faulty settings, etc.
- QWhere is the shared folder on Mac?
-
A
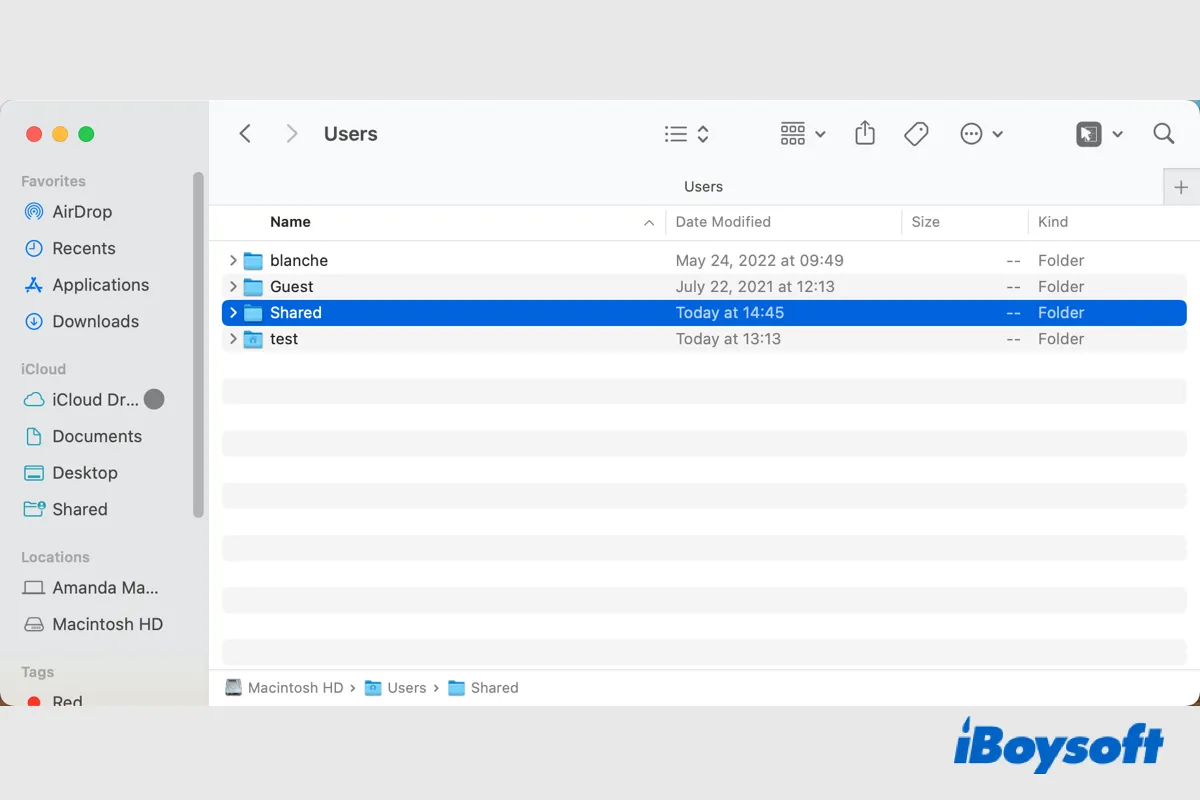
To open the shared folder on Mac, you need to launch Finder and move to the top Finder menu bar. Select Go > Network. Next, on the pop-up window, select your Mac’s name and click Connect As (choose the way you log into your Mac) and enter your account password and click Connect. The shared folder will appear on the Mac.