Both Mac desktops (iMac, Mac mini, and Mac Pro) and laptops (MacBook, MacBook Air, and MacBook Pro) come with USB ports for connecting external peripherals like keyboards, mice, and USB storage devices. However, these USB ports pose a potential risk for data leakage and malware infection. To safeguard your Mac against unauthorized USB connections and malware threats, it is advisable to temporarily forbid USB ports on your Mac.
This article offers a comprehensive guide on how to disable USB ports on Mac. Keep reading to uncover four effective methods.
Benefits of disabling USB ports on Mac
Disabling USB ports on a Mac can provide several advantages in terms of security.
Prevent data breach
Disabling USB ports can help mitigate the risk of data leakage or unauthorized copying of sensitive information onto USB storage devices. It helps maintain the confidentiality of sensitive data such as individual intellectual property and the company's business information.
Protect against malware
Viruses and malware can be transferred via USB storage devices and infect your computer, causing data loss and potentially compromising your Mac, granting unauthorized access and control to hackers. Disabling USB ports on Mac reduces the risk of malware spreading through connected peripherals.
Prevent unauthorized access
Disabling USB ports helps prevent unauthorized access to your Mac through external devices. This can be particularly useful in environments where physical security is a concern.
This article offers you 11 excellent tips on how to improve the security of your Mac.
If you find this article useful, share it with your followers.
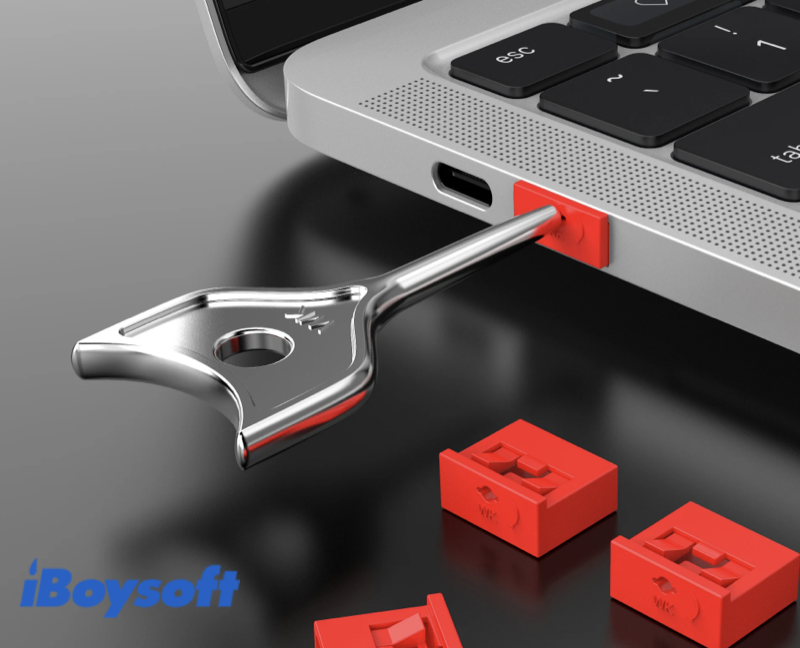
Method 1. Use physical locks to restrict access to specific USB ports
If you don't want to tackle the system settings, the most straightforward method is to use physical USB port locks to physically limit access to a specific or all USB ports.
These physical USB port lockers are usually easy to install and effectively prevent unauthorized connections to unused USB ports on your Mac.
- Pros:
- Easy to install and use
- Block specific or all USB ports
- Cons:
- Physical USB port locks cost money
- The key or password for the USB port locker can be lost
Method 2. Block USB ports with professional USB blockers
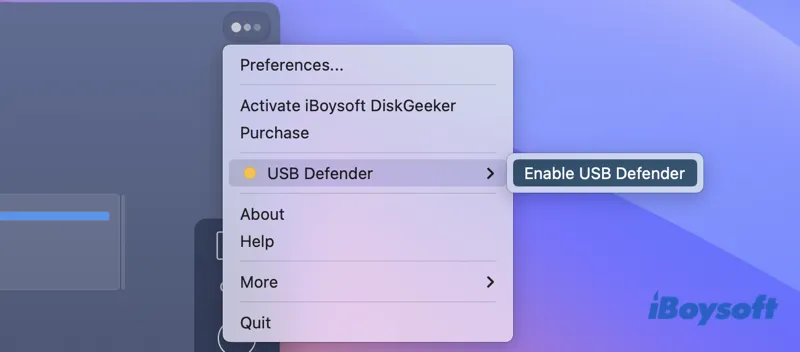
To block untrusted USB drives and accessories from connecting to your Mac via USB ports, a specialized USB blocker utility is what you need. iBoysoft DiskGeeker is an all-in-one disk management tool for Mac users. It is packed with a series of features and utilities to manage disks, enhance disk performance, and repair disk errors.
Its USB Defender utility allows you to create a white list and set up a password for accessing external USB-based storage devices and accessories. Without the correct password or authorization in the whitelist, any external devices connected through a USB or Thunderbolt port on your Mac will not be recognized or mounted.
How to disable USB access on Mac with iBoysoft DiskGeeker
Step 1. Free download, install, and launch iBoysoft Disk Geeker on your Mac.
Step 2. Hit the three-dot icon in the upper right corner and select USB Defender > Enable USB Defender.
Step 3. Set a password shorter than 48 digits.
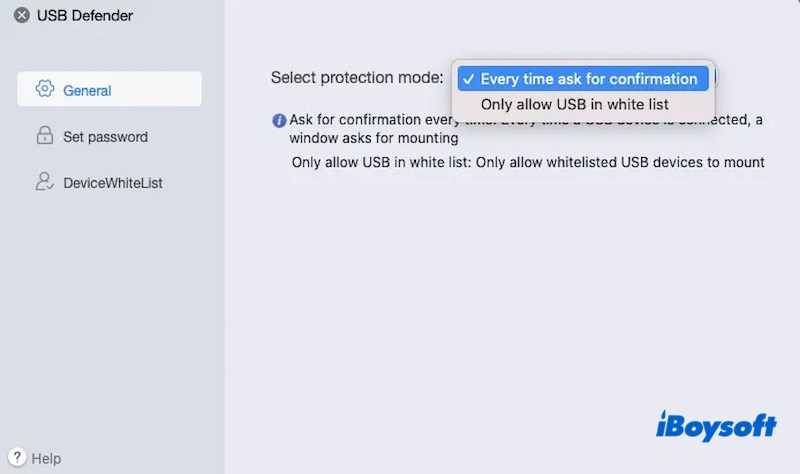
Step 4. Select a protection mode in the pop-up window. Choose "Only allow USB in white list" and specify the USB devices you want to trust all the time. Choose "Every time ask for confirmation" to block all USB ports on your Mac and prompt for the password each time a USB peripheral is plugged in.
- Pros:
- Protect your Mac from unknown USB devices when your Mac is unlocked
- Great flexibility in disabling all or specific Mac USB ports
- Compatible with most Mac models and macOS versions
- Very simple to set up or change the settings
- Cons:
- Limited 7-day free trial
- Third-party app installation
Disabling USB ports on Mac is easy with the help of a third-party USB blocker. Share your thoughts on social media.
Method 3. Disable all USB ports on Mac by removing specific kext files (macOS 10.15 or earlier)
The Mac operating system relies on specific kernel extensions to interact with USB storage media and external devices. If these extensions are deleted or their location is altered, the system will lose its ability to connect with removable devices through USB ports. It's crucial to be aware that such changes will impact all USB ports.
However, this process is only applicable to Macs running macOS 10.15 or earlier. In newer versions starting with macOS 11 Big Sur, you cannot modify the system volume as it is now a signed and sealed volume.
If you have the admin privilege to modify the system settings, follow the steps below to deactivate USB ports on your Mac with macOS 10.15 or earlier:
Step 1. Disable System Integration Protection (SIP) on your Mac.
Step 2. Go to your Mac's desktop, click Go > Go to Folder in the top menu bar.
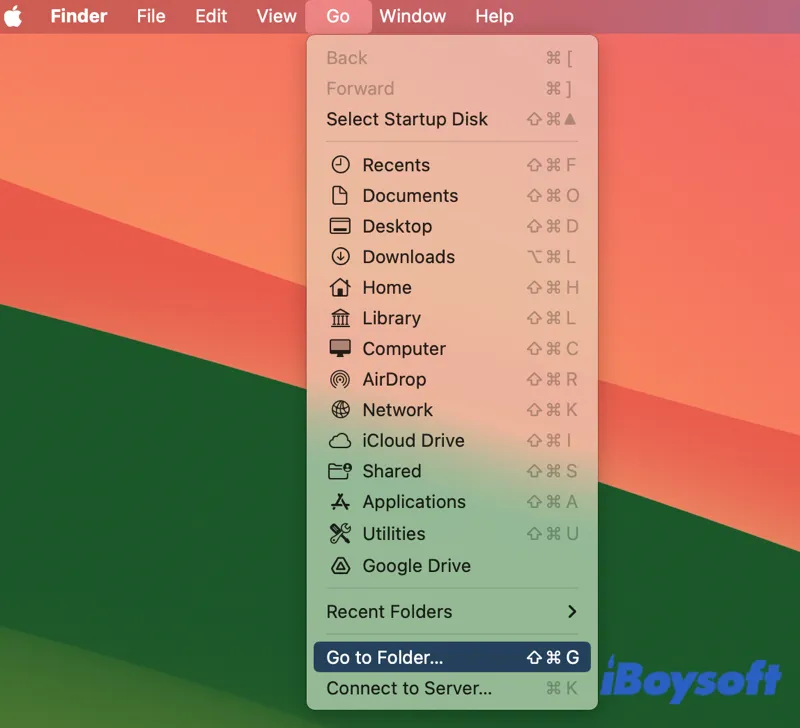
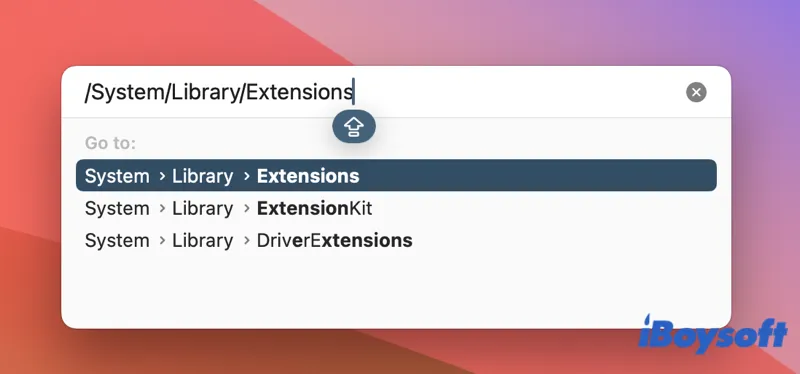
Step 3. Paste the path "/System/Library/Extensions" to the Go to Folder window and hit Return.
Step 4. In the Extensions folder, locate the two .kext files named IOUSBMassStorageClass.kext and IOFireWireSerialBusProtocolTransport.kext.
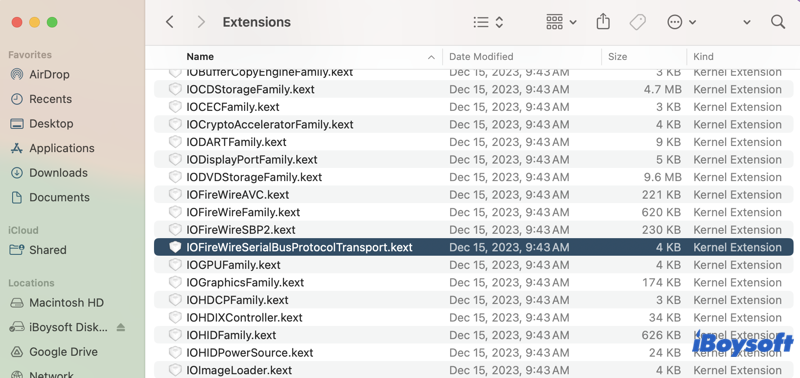
Step 5. Create a folder called "disabled in Extensions" in another location.
Step 6. If you just want to disable USB ports for USB mass storage devices, cut the file named IOUSBMassStorageClass.kext to the new folder. This won't affect other devices connected through USB ports. If you want to block all external USB peripherals from connecting, cut both kext files to the new folder.
Step 7. Reboot your Mac to make all changes take effect and Mac's USB ports should be disabled now.
If you want to enable USB ports on your Mac, simply move the kext files back to the Extensions folder and restart your Mac.
- Pros:
- Completely free method
- Disable all USB ports at one time
- Cons:
- The process is too technical for a tech novice
- It's difficult to constantly enable and disable USB ports
- Can't disable a specific USB port on Mac
- Doesn't work for newer macOS versions
Method 4. Restrict all USB ports via USB Restricted Mode (MacBook Air/Pro with Apple Silicon running macOS 13 or later)
Accessory security (known as Restricted Mode) for macOS is designed to protect your Mac from attacks with wired accessories. Beginning with macOS 13 Ventura, this extra layer of protection is enabled by default to ask the user to allow new accessories when a Mac is locked.
You can change the settings to let the locked Mac verify authorization each time an external USB device is connected. Then data transfer and other activities between the USB device and the Mac only happen if permission is granted.
Here is how to set USB Restricted Mode to disable USB ports on Mac
Step 1. Select the Apple menu and go to System Settings.
Step 2. Select Privacy & Security in the sidebar.
Step 3. Scroll down to find "Allow accessories to connect" and Select the "Ask Every Time" option.
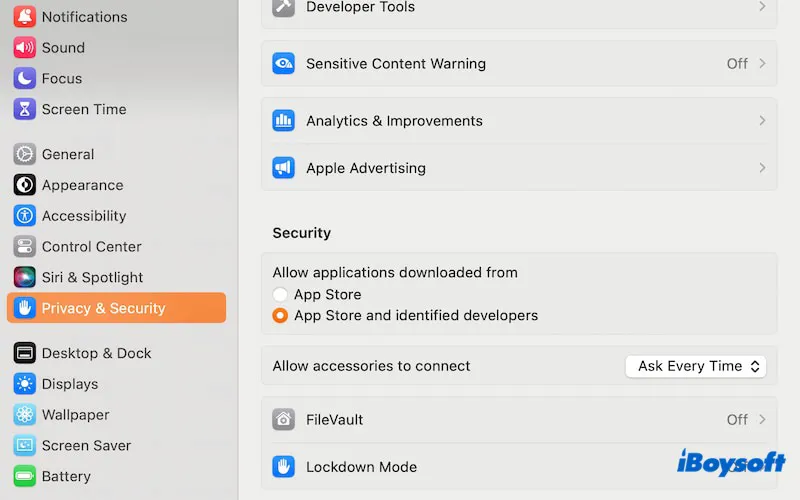
Step 4. Enter your admin password to allow the change.
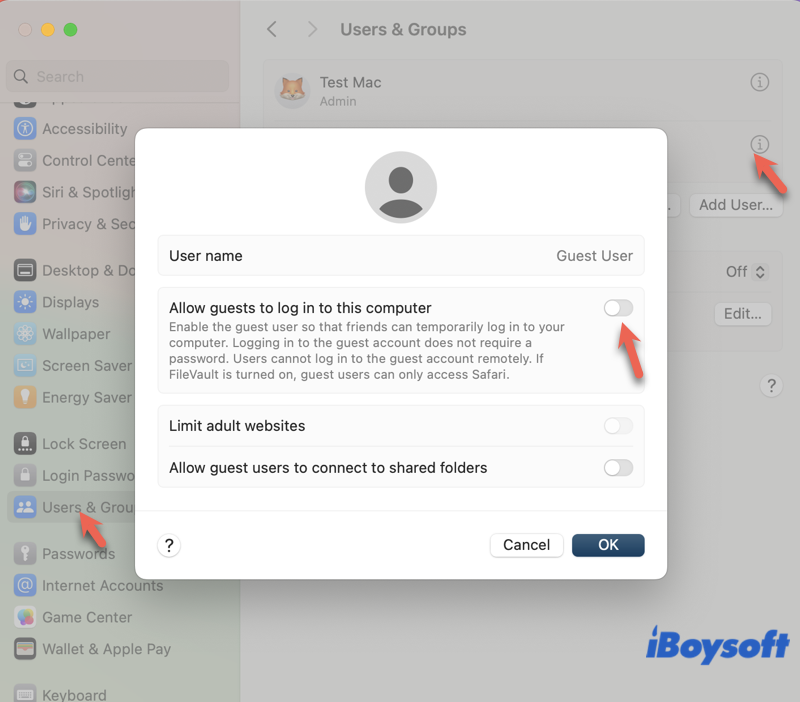
Step 5. Select Users & Groups in the sidebar.
Step 6. Make sure there is no other user but the Admin is allowed to log in to this Mac. If you have a guest account that can log into your Mac, disable it by clicking the information icon and turning off "Allow guests to log in to this computer".
Note: 1. These connections don't apply to power adapters, non-Thunderbolt displays, approved hubs, paired smart cards, or to a Mac that's in Setup Assistant or that was started from recoveryOS.
2. Your Mac needs to upgrade to macOS 13.3 or later to be able to restrict SD Extended Capacity (SDXC) cards.
3. Approved accessories can be connected to a locked Mac for up to 3 days from when the Mac was last locked. Safely eject unneeded USB devices when you are done using them.
Now, when you connect a Thunderbolt or USB accessory to your Mac, the computer will ask if you trust the device and allow the accessory to connect. This is especially helpful in case someone attempts to connect an unknown external device to your Mac when you're away from your Mac machine. Don't forget to lock your Mac when you're not around for added security.
- Pros:
- Completely free USB blocking solution
- Very easy to set up
- Cons:
- Can't protect your Mac when your Mac is unlocked
- Can't block a specific USB port on Mac
- Very limited supported Mac models
- Not applicable to all devices via a USB connection
Sharing is loving.
Guide you on how to remove viruses or malware from your Mac with its free built-in utilities. Besides, this post will also tell you how to know if your MacBook Air or Pro is attacked by a virus.
Conclusion
Now you have discovered how to block USB ports on Mac in four effective ways. Evaluate their pros and cons to choose the one that aligns best with your needs, skills, and budgets. Among these options, iBoysoft DiskGeeker's USB Defender offers the most convenience, simplicity, and flexibility for controlling your USB ports on Mac. Try it for free to protect your data against malware and leakage today.
FAQs
- QHow do I see what's connected to my Mac's USB port?
-
A
It is easy to view the list of connected USB devices on your Mac.
1. Click on the Apple menu > About This Mac > More Info.
2. Scroll down to click System Report.
3. Navigate to USB under Hardware.
4. Check the listed USB devices with details like capacity, product ID, vendor ID, serial number, and more.
- QWhy did Apple remove USB ports?
-
A
Apple did not remove USB ports. Apple has transitioned its devices from conventional USB ports (A, B, Micro, and Mini) to Thunderbolt/USB-C ports for multiple functionalities in a single port, emphasis on wireless connectivity, and thinner designs.
- QWhy are USB ports permanently blocked?
-
A
If USB ports on a computer have been permanently blocked, it is possibly done by an MDM administrator in a corporate setting to prevent data leakage and the spread of malware.
- QWhat is the difference between locking a USB and locking a USB port?
-
A
Locking a USB involves securing the data stored on the USB drive itself. It can be done through a device password or an encrypted USB drive with a password. Locking a USB port means restricting the physical connection of any USB device to the corresponding port on a computer or a device.