Installing the macOS 27 beta lets users try new features early, but it comes with risks. The public beta is safer than the developer beta since Apple uses developer testing to identify and fix major problems before wider release. However, public beta users may still encounter macOS beta issues, so it is important to back up data securely before installation. (📖: macOS Golden Gate issues)
I've used iBoysoft DiskGeeker for Mac to 1-click clone my Mac's whole hard drive as a backup. Besides, there are other preparations before macOS 27 beta installation. I referred to macOS 27 beta upgrade preparations to free up my Mac storage space, create safe update conditions, etc.
Short on time? Check the quick summary table below to choose the most suitable way to download and install macOS 27 beta without reading the entire experience guide.
| Install Methods | File Type | Size | Minimum Storage Needed | Best for |
| Software Updates | a .chunklist and .sufilesmanifest format | 16-17 GB | 21.81GB | Directly update to macOS 27 beta |
| Apple Server | .pkg file | 15.9 GB | 18 GB | Download macOS 27 beta full installer |
| Bootable USB installer | .dmg file | 16.99 GB | 18 GB | Install on numerous Macs or unsupported Macs |
| Terminal | .app application file | 15.9 GB | 18 GB | Terminal fans |
| Separate volume | .app application file | 15.9 GB | 18 GB | Keep older macOS and macOS 27 beta on the same Mac |
If you only have a Windows PC, follow the guide to run macOS 27 on it: How to install macOS Golden Gate on Windows.
Download and Install macOS 27 Beta via Software Update
Software Update is always the primary way for me to upgrade macOS to the latest version. Updating to macOS 27 public beta is no exception. I plan to upgrade macOS Tahoe 26.5.1 to macOS Golden Gate 27 public beta version on my Apple Silicon M1 MacBook Air.
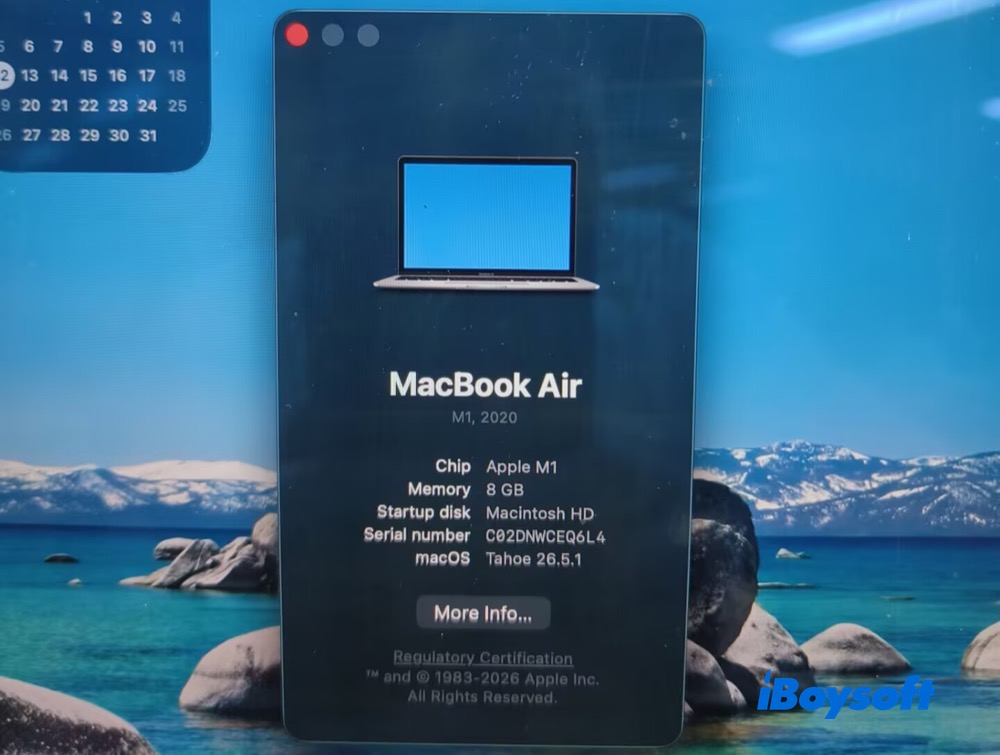
Note: None of Apple Intel-based Macs support macOS 27. If your Mac's chip has an "M" in its name (e.g., M1, M5), it's compatible with macOS 27. If your Mac doesn't support macOS 27, you can follow these guides:
1.Download macOS on unsupported Macs
2.Install macOS on unsupported Macs
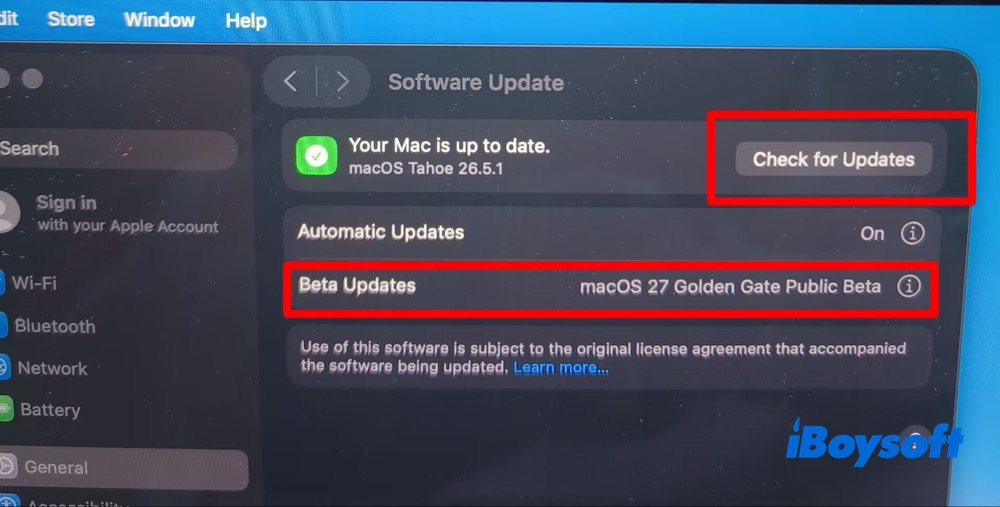
1. Click the Apple icon > System Settings > General > Software Update. I see the macOS 27 Golden Gate public beta is available under Beta Updates. But the upper row still shows “Your Mac is up to date". In such case, tap "Check for Updates". It will list out the check result later.
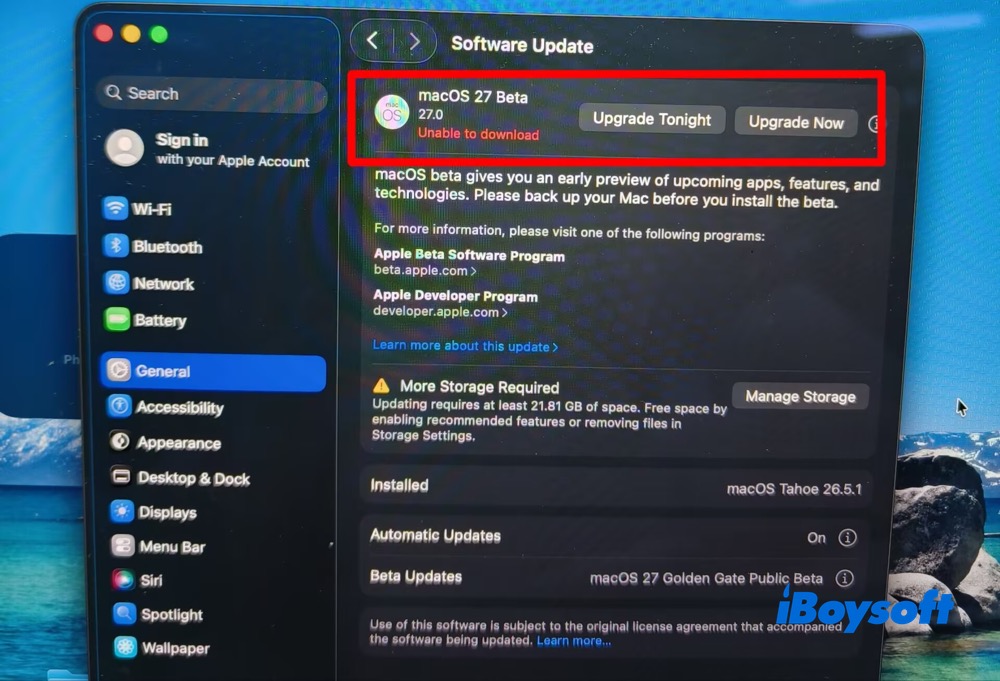
2. The macOS 27 Beta 27.0 finally displays on the interface. Ignore the red words notice “Unable to download". Instead, pay attention to the “More Storage Required" reminder. It requires at least 21.81GB of space for macOS 27 beta update. Keep reading the tips and tricks to free up space on Macintosh HD.
Then I click "Upgrade Now". You can choose “Upgrade Tonight" if you need using your Mac currently.
3. Tap "Agree" on the pop-up window > I'm asked to enter my password afterwards.
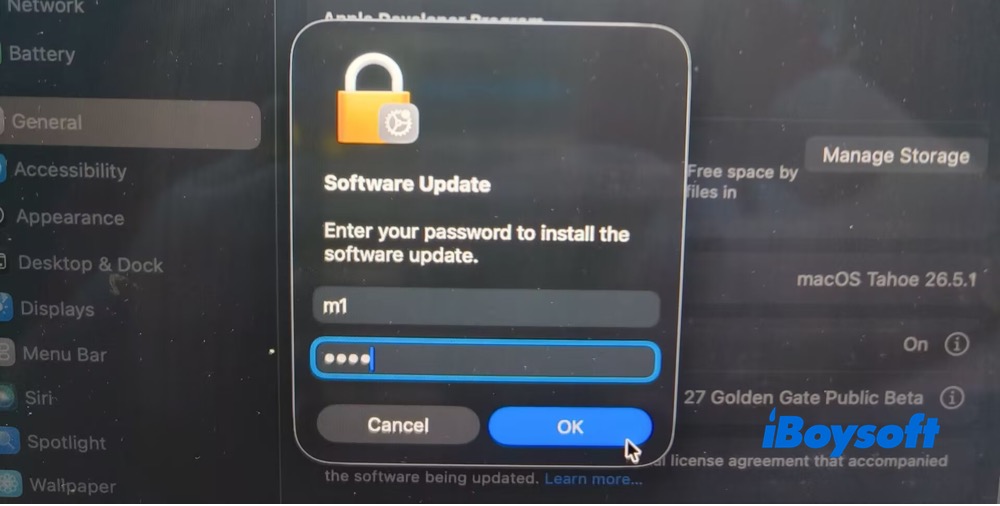
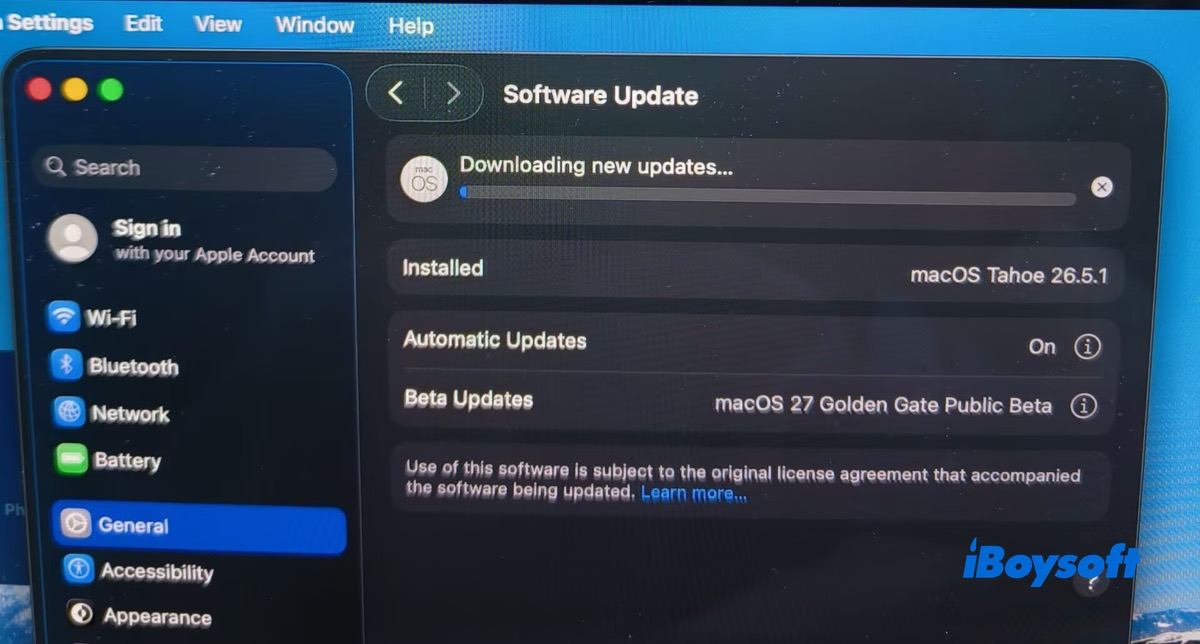
4. It begins downloading new updates. The whole downloading procedure is smooth and stable, no freezing or crash. Just wait for completing macOS 27 public beta downloads.
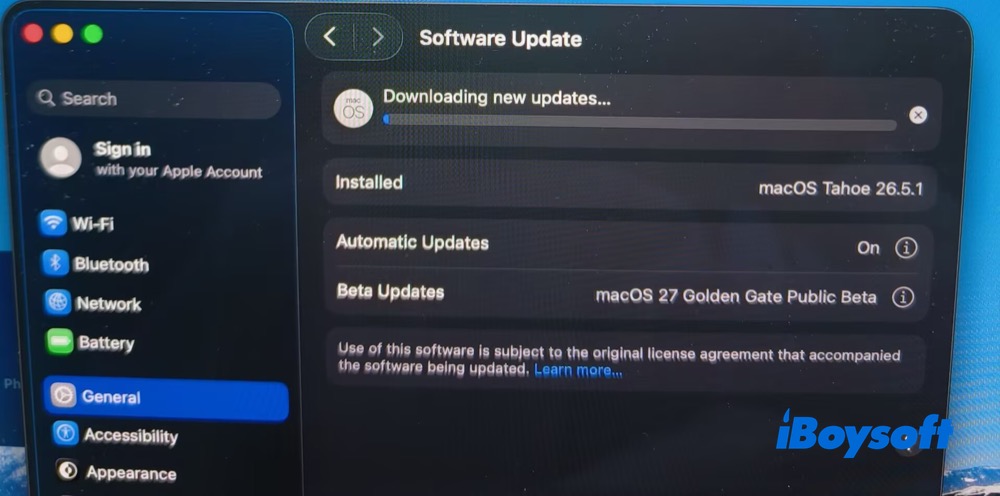
5. I restart my M1 MacBook Air after the macOS 27 public beta update is finished. So far, so good.
Download macOS 27 Golden Gate Beta Full Installer from Apple's CDN Servers
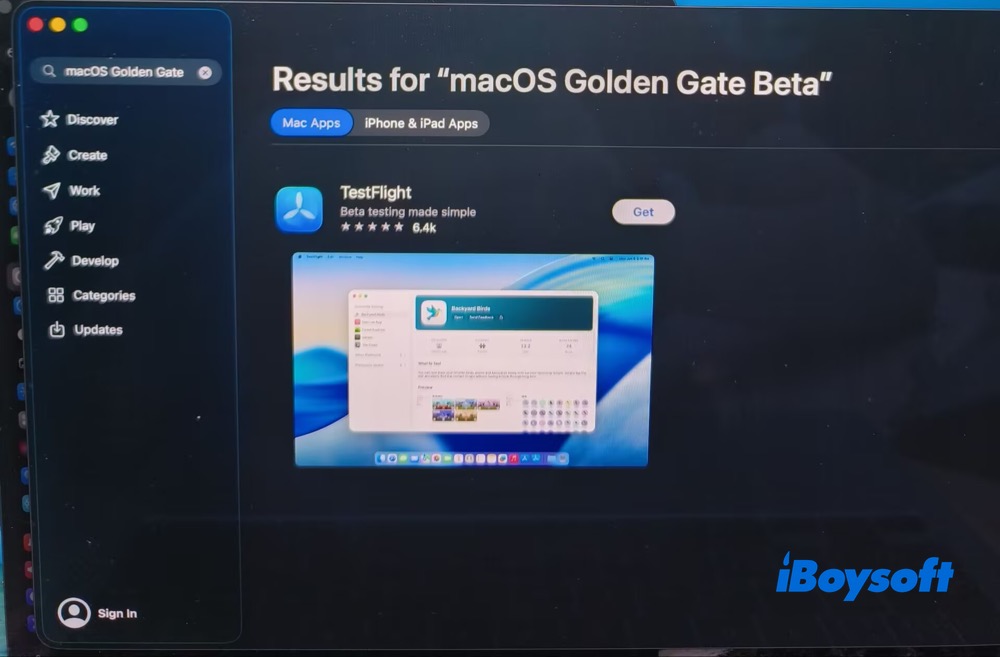
You might be curious why I mention Apple servers here instead of App Store. Actually, I tried App Store. Yet, there is no macOS Golden Gate 27 beta currently (picture shown as below).
No worries! Apple's CDN servers are also reliable resource to download macOS 27 public beta and developer beta full installer - InstallAssistant.pkg file. This .pkg file is the same full macOS installer that you would download directly from the App Store for Apple Silicon Macs (M1-M5).
The InstallAssistant.pkg file is hosted on Apple's servers and contains the complete "Install macOS.app" package. After downloading, simply install the .pkg file, and the full macOS installer will be placed in your Applications folder.
Download macOS 27 Golden Gate public beta pkg file
Download macOS Golden Gate Public Beta Full Installer, DMG, or ISO
Download other macOS, Mac OS X full installer
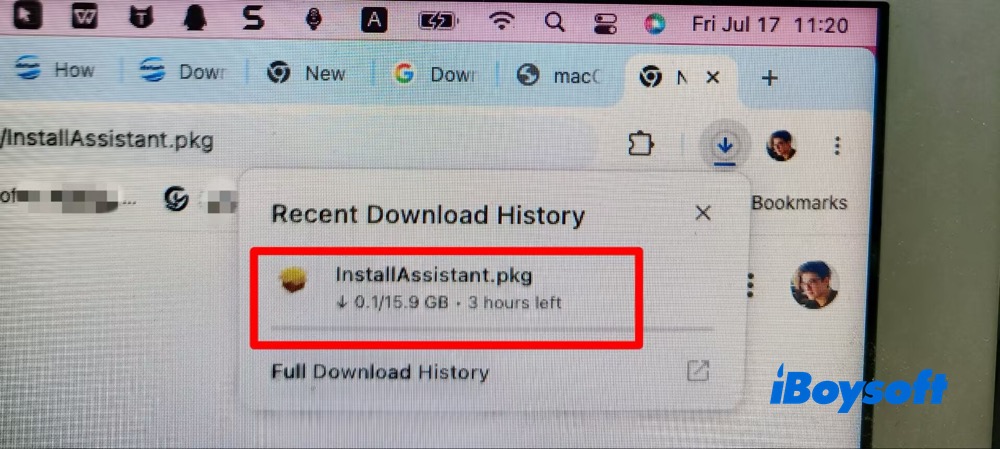
Note: The .pkg file is 15.9GB in size and requires roughly 3 hours to download. It's highly relevant to your network connection. Please switch to a stable and high-speed connection to speed up your macOS 27 beta pkg file downloads. Or use the following easier and faster way - create a macOS 27 beta bootable USB installer.
Install macOS 27 Beta with Bootable USB Installer
Creating a bootable macOS USB installer is a widely used method to download and install macOS. It allows me to upgrade/downgrade macOS versions, perform clean installs, recover unbootable Macs, and deploy macOS across multiple computers.
To create a macOS 27 beta bootable USB installer, I choose iBoysoft DiskGeeker for Mac - a feature-rich disk management toolkit to help me directly download macOS 27 Beta DMG file and create a bootable USB installer within simple clicks, no Terminal commands.
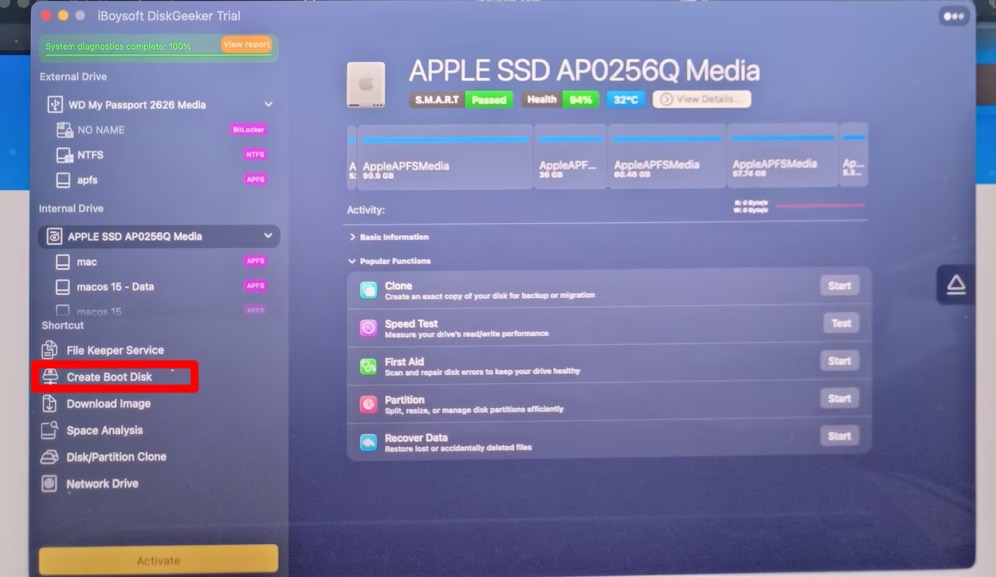
1. Download and install iBoysoft DiskGeeker for Mac on my M1 Apple Silicon Mac.
2. Click "Create Boot Disk" at the left panel.
3. Choose an external drive and tap Select.
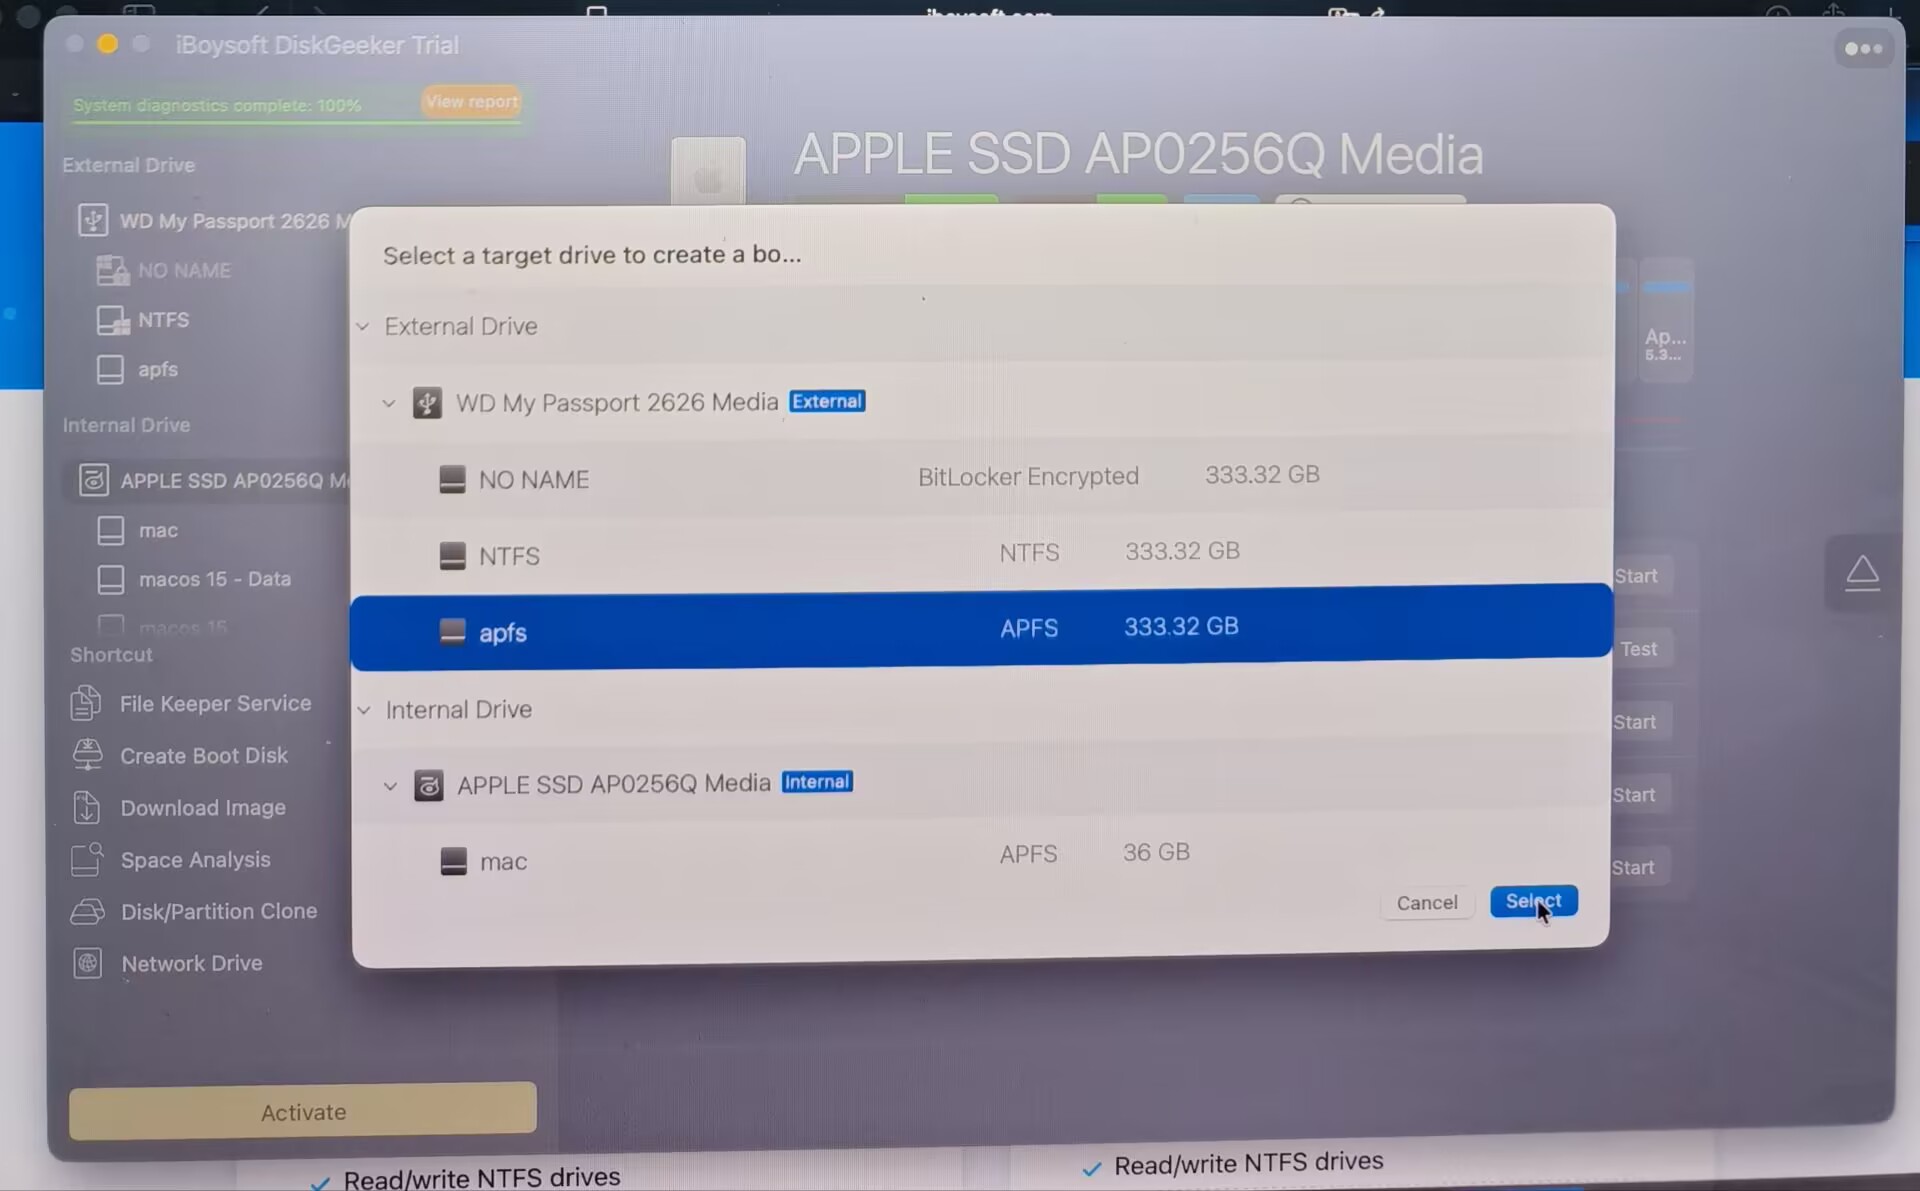
A warm prompt will show up: when creating a bootable disk, your selected volume will be formatted. Tap Continue if the target volume is empty or has been backed up. Or back up file data first.
4. Select macOS 27 Golden Gate Beta (16.99 GB) and tap Create Boot Disk.
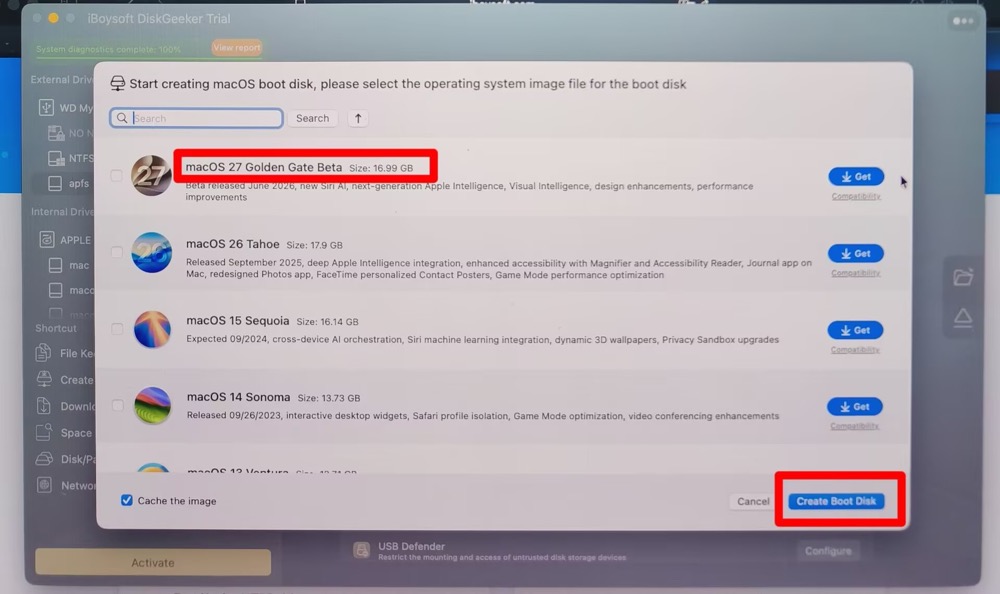
5. Wait for the macOS 27 beta bootable installer to be created.
Download & Install macOS 27 Golden Gate Beta via Terminal
What I learned:
Using Terminal to download the macOS 27 beta installer is not complicated; it only requires two command lines. What I learned from this process is that having enough free storage space is the most critical factor for a successful upgrade.
The installer itself requires more space than its listed size. For example, although the macOS 27 beta installer is 15.9 GB, you cannot simply leave only 15.9 GB of available space. Apple recommends having at least 21.81 GB of free storage. Therefore, always remember to back up your files and free up additional space before starting the upgrade process.
Here's how:
1. I simultaneously press Command+Space to open Spotlight, type Terminal, and press Return.
2. I run the following command to see the list of full installers compatible with my M1 Apple Silicon MacBook.
softwareupdate --list-full-installers
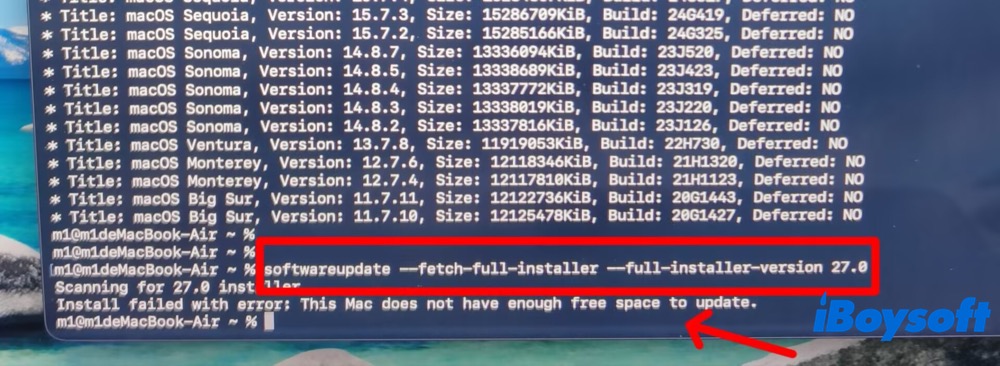
I identified the macOS 27 public beta version number, size, and build date. The latest version 27.0 is available on my Apple Silicon Mac. Beyond macOS 27 beta, there are other macOS older versions, like macOS Tahoe, macOS Sequoia, macOS Sonoma, etc., available for me to downgrade macOS if needed.
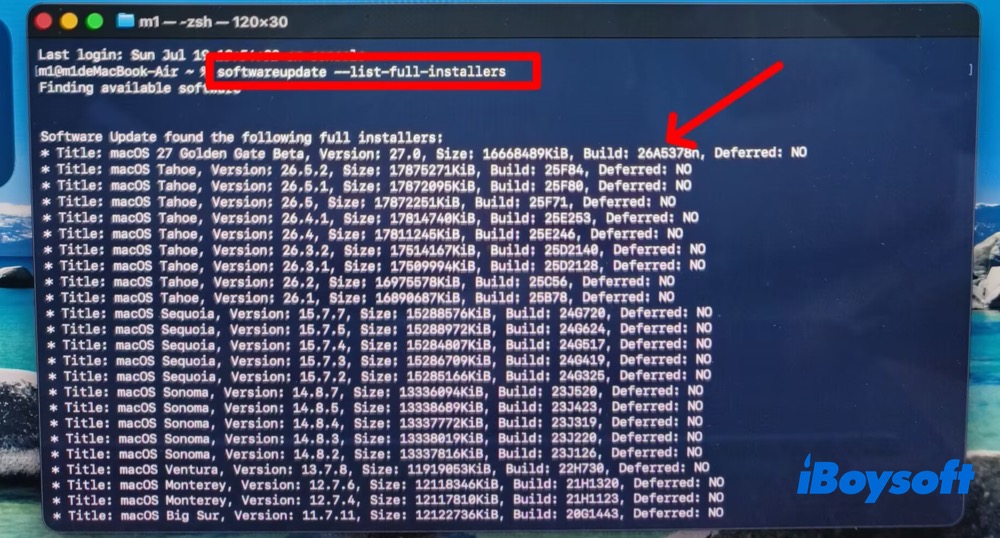
The full installer list was not displayed immediately on my Mac. Terminal required a few minutes to scan and detect the available installers before showing the results.
3. Download the macOS 27.0 public beta full installer by typing the following command:
softwareupdate --fetch-full-installer --full-installer-version 27.0
For the later version, you just need to change the version number to the specific one you download.
The macOS 27 Golden Gate beta 27.0 installer has a size of 15.9 GB (16,668,489 KiB). During the installation process, Terminal reported a failure caused by insufficient available storage space (83.62GB of 90.9GB used). I forgot to remove the macOS 27 beta installers downloaded before. I deleted the previous installers to free up space.
If your Mac is still running out of space for an update, iBoysoft DiskGeeker for Mac can be the ideal solution. Its Space Analysis feature instantly scans your storage usage and organizes files through an intuitive directory view and visual breakdown. With AI-powered cleanup recommendations, you can quickly identify unnecessary files and safely reclaim valuable disk space.
4. I re-download the macOS 27 beta installer. Once the download is complete, I go to /Applications folder in Finder and find the Install macOS 27 Beta.app file there.
5. Double-click the installer and follow the standard wizard to install it on my Mac.
Install macOS 27 Beta on a Separate Volume
My M1 MacBook Air currently runs three macOS versions: macOS Tahoe 26.5.1, macOS Sequoia 15.7.5, and macOS Sonoma 14.8.5. For this test, I want to install the macOS 27 public beta on a separate volume without removing my existing macOS systems. If you are interested in creating a similar setup, follow my detailed how-to guide:
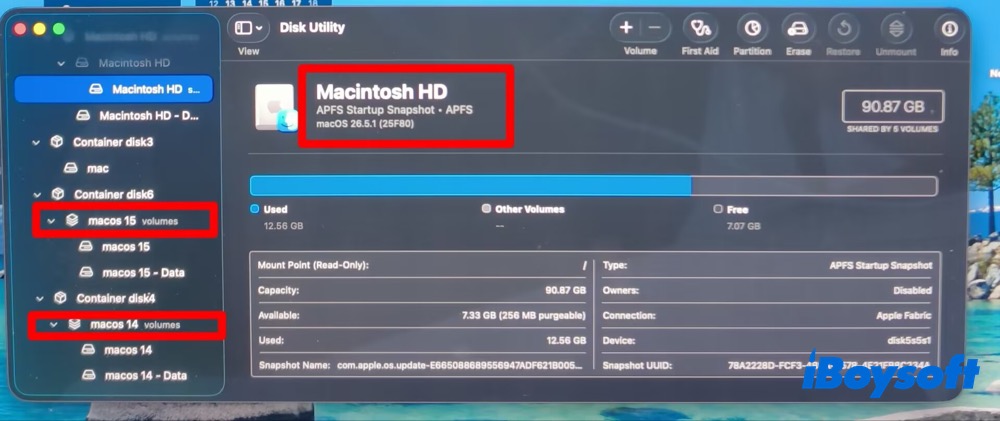
1. Download the macOS 27 Golden Gate beta from Apple Server or iBoysoft DiskGeeker for Mac.
2. Tap Apps > type "Disk Utility" in the Spotlight search > open Disk Utility. You can access Finder to find Disk Utility under Applications category.
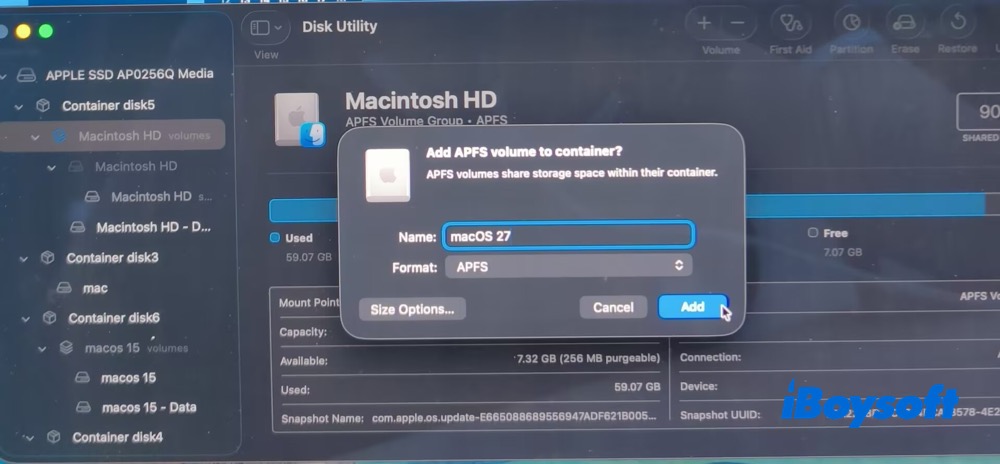
3. Choose Macintosh HD or macOS (APFS volume group) > tap the + (volume) icon at the upper right corner of the bar.
4. Name the new volume "macOS 27" > hit "Add" > Done.
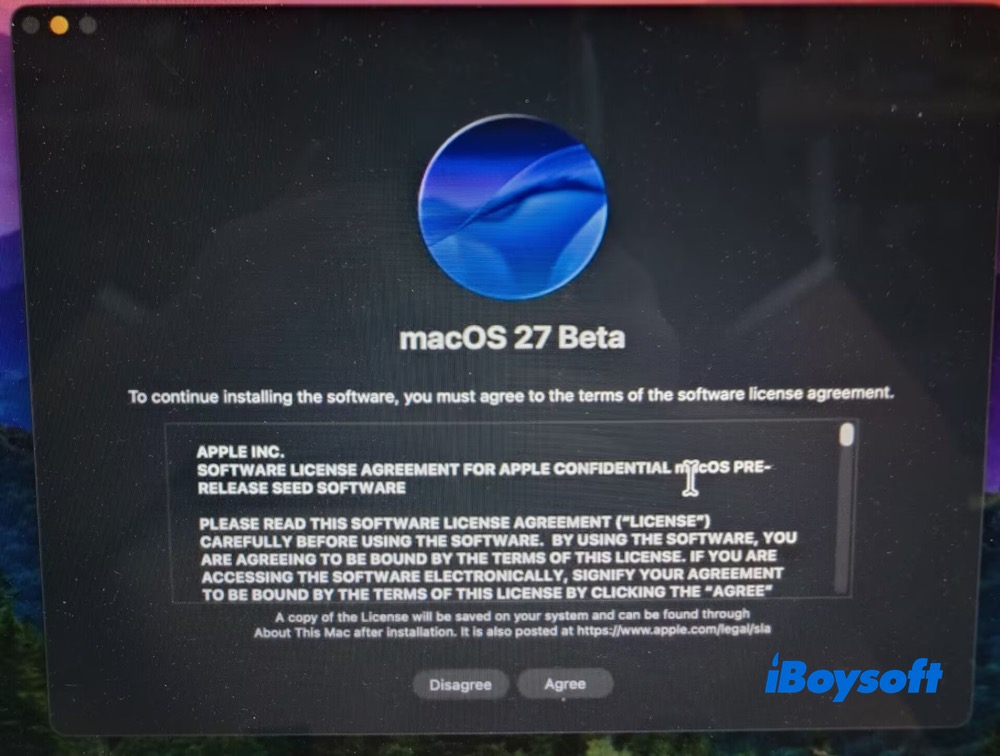
5. Open the macOS 27 beta full installer > click "Continue" > Agree.
6. Click “Show All Disks" > choose the newly created macOS 27 volume > Continue.
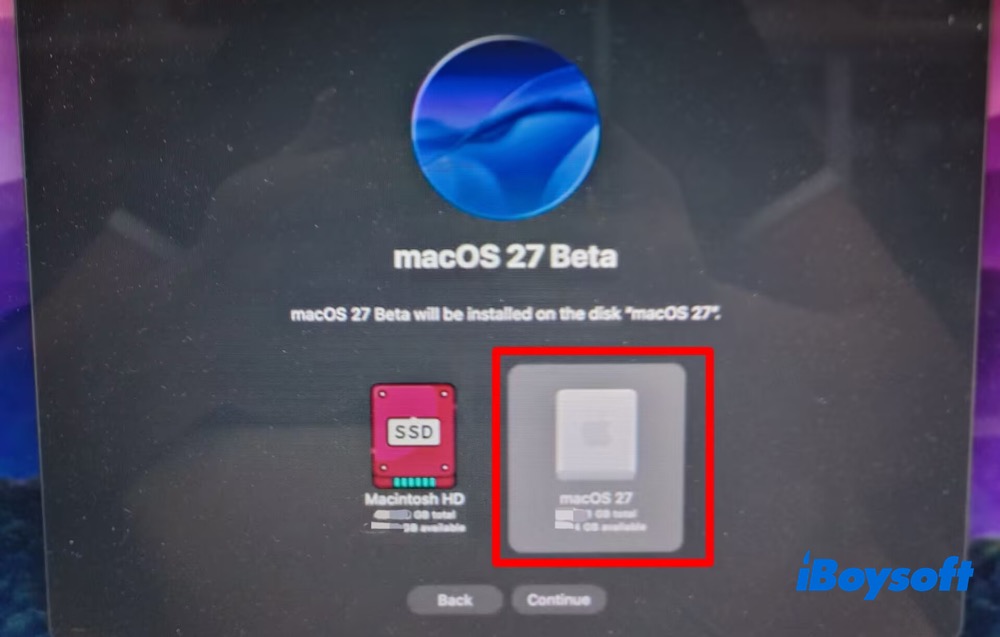
6. Select your username and make sure “Copy account settings from your username" is checked.
8. Tap "Install" > enter your password > tap "Unlock". The installation has started.
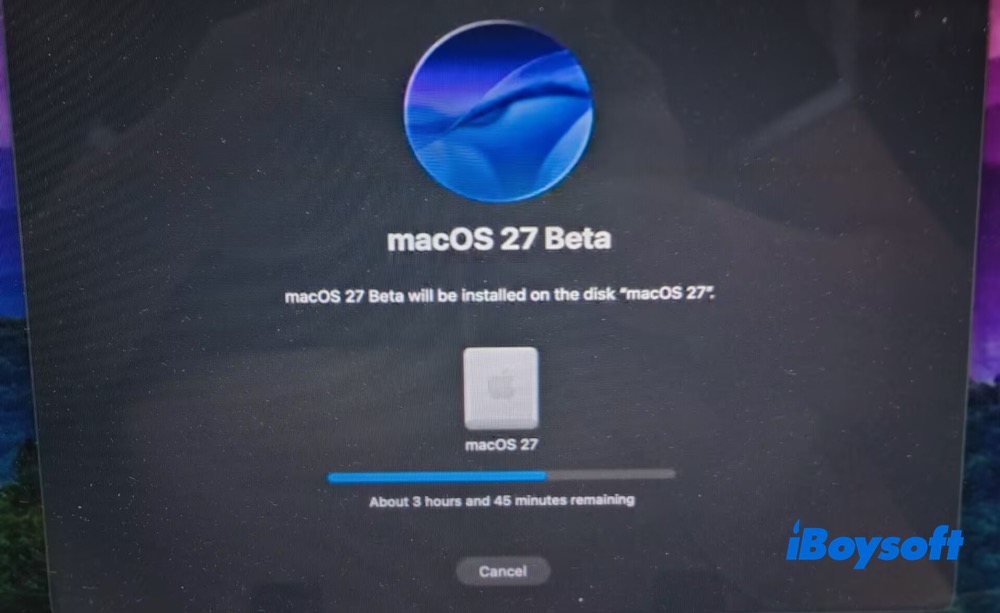
The installer estimated that 3 hours and 45 minutes would be required. However, the actual installation took me approximately 1 hour to complete. During the process, my MacBook Air restarted twice. Each time, the screen displayed the Apple logo along with a progress bar. Based on my experience, patience is essential during the installation process.
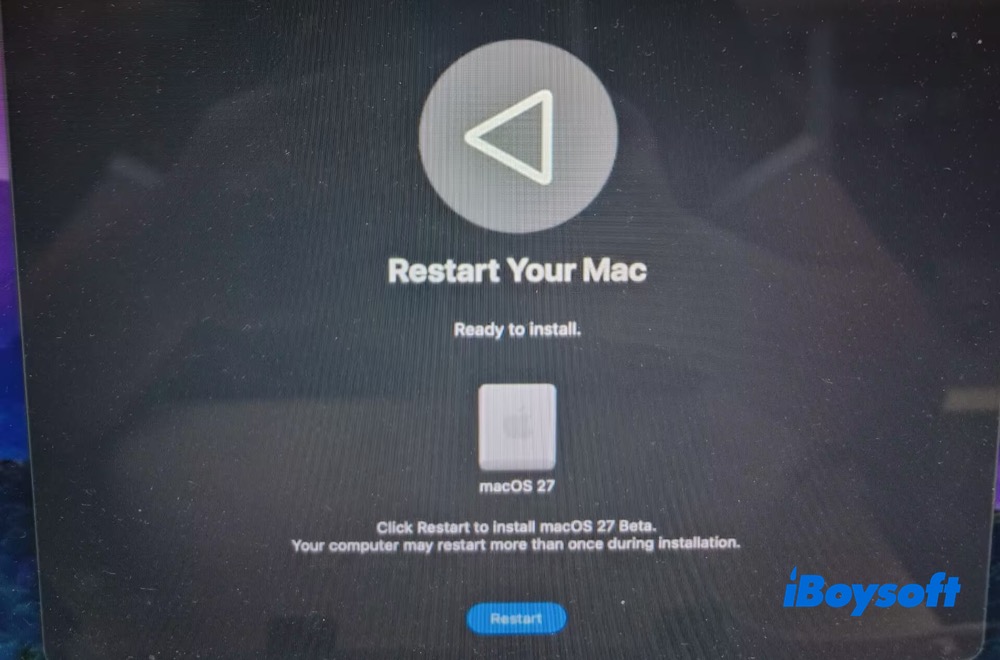
9. Click "Restart" to restart your Mac. Then follow the on-screen instructions to complete initial setup or configurations.
Final thoughts:
All five methods introduced in this guide are straightforward and reliable. Choose the approach that matches your situation, whether you need to update macOS, perform a clean install, create a bootable USB installer, or reinstall the system.
From my experience, the most important things to keep in mind are having sufficient storage space, creating a proper backup, and allowing enough time for the process to complete. With everything ready, you can confidently start your macOS 27 beta installation journey!
FAQs about macOS 27 Beta Installation
- QHow do I download and install macOS 27 Developer beta?
-
A
1. Backup your Mac first.
2. Link your Apple ID.
3. Enable beta updates under Software Updates.
4. Select macOS Developer Beta.
5. Download and install macOS Developer Beta.
- QHow do I install macOS 27 public beta from macOS Recovery mode?
-
A
1. Shut down your Mac.
2. Press and hold the power button until the startup options screen appears, showing your system volume and the Options button.
3. Select Options and click Continue.
4. If prompted, select a volume to proceed.
5. Choose an administrator account and click Next.
6. Enter your administrator password and click Continue.
7. Select “Reinstall macOS Tahoe” and click Next.
8. Follow the on-screen instructions to complete the reinstallation process.