Before you convert a USB drive into a macOS 27 Golden Gate beta bootable installer, there are a couple of preparations you will need:
- A USB drive with a minimum 20 GB of storage
- The macOS 27 beta installer downloaded from App Store, System Setting or a trusted 3rd party resource
- Administrator access on your Mac
- A backup of any important data on your USB drive
Note: Creating a bootable installer will erase everything currently stored on the USB drive.
Upon finalizing all preparatory steps, download the macOS 27 beta ISO image and create a bootable USB installer for macOS via the below much more straightforward approach:
Make a macOS 27 Beta Bootable USB Installer the Easy Way
Not a Terminal fan? No problem. Instead of dealing with complicated commands, casual users can turn to iBoysoft DiskGeeker for Mac for a much simpler, stress-free installation process.
This Mac disk management toolkit enables you to create a macOS 27 Golden Gate beta bootable USB installer with simple 3 clicks, no command line/tech skill level required. It also allows you to create macOS Tahoe/Sequoia or Sonoma bootable USB installer if you need to downgrade macOS.
Let's get it started:
Step 1. Download and install iBoysoft DiskGeeker for Mac.
Step 2. Once installed, fire up this Mac disk manager and connect your external USB drive to your Mac.
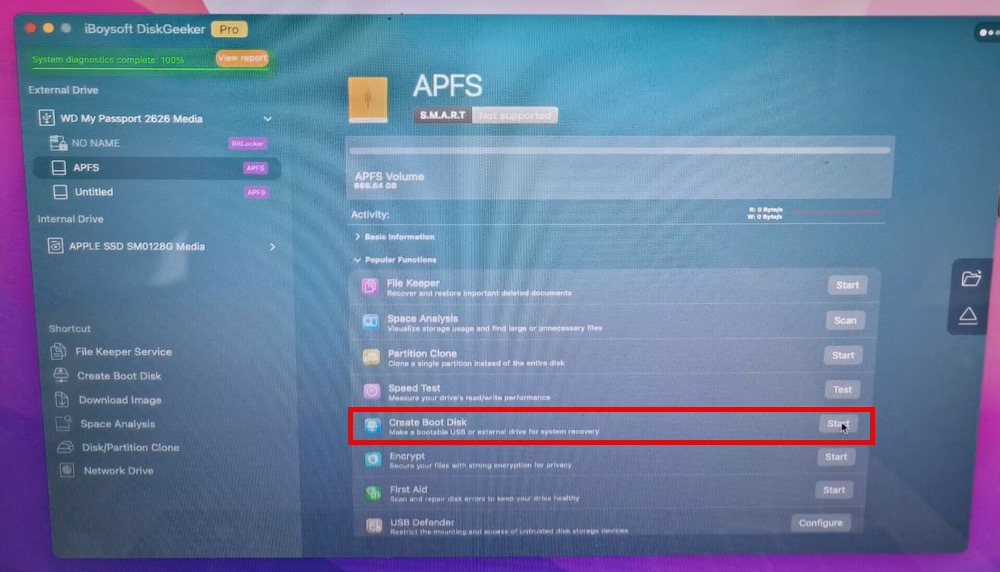
Step 3. Select a volume (even a BitLocker-encrypted one) from your external USB drive. And move your mouse to "Create Boot Disk” on the right-hand panel > tap "Start".
Step 4. Choose "Continue” on the pop-up window.
Step 5. Opt for the macOS 27 Golden Gate beta ISO image file and click "Create boot disk” at the bottom of the interface.
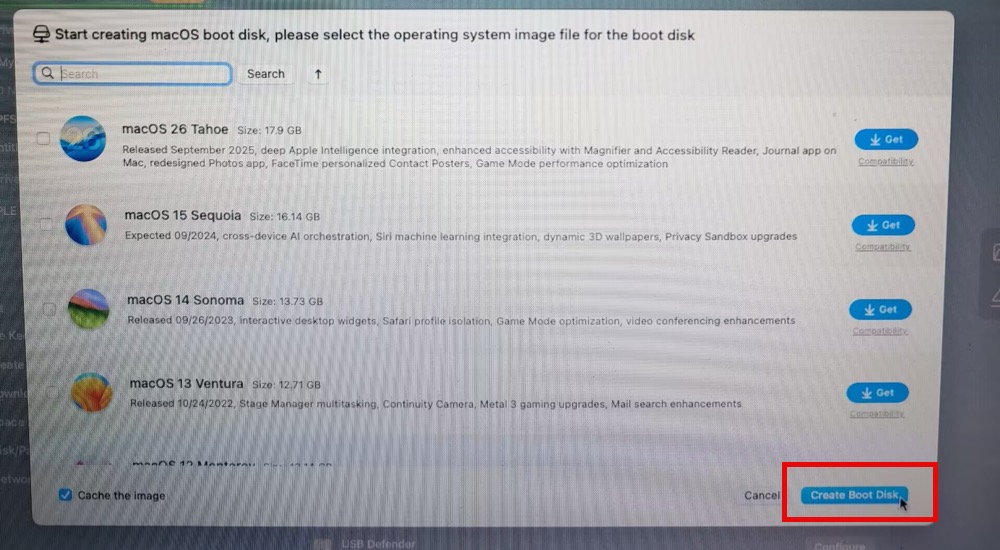
By the way, not only does iBoysoft provide macOS 27 beta ISO file, but it also offers other formats for macOS 27 beta download, including macOS 27 beta DMG, macOS 27 beta VMDK, pkg, app, etc. Access to its Download Center to download the latest macOS 27 and older versions.
Step 6. Click OK and wait for the macOS 27 beta ISO download process to finish.
Step 7. Wait for the bootable installer to be created.
The same also applies to creating a macOS Tahoe bootable installer and a macOS Sonoma bootable USB. Try it out if you need to downgrade to macOS Sonoma or Sierra.
Upon successful creation of the macOS 27 beta bootable USB installer, directly refer to Part 4 to install macOS from USB (if you're short on time).
How to Create a USB Installer for macOS 27 Beta Using Terminal Commands
Casual users, beginner users, or users who don't understand Disk Identifiers, you can stop here. Cuz the Terminal method is not suitable for you. One wrong diskutil command can erase your internal Macintosh HD instead of your USB drive. Or you are highly likely to destroy your operating system if you don't know how to run diskutil list to verify.
The Terminal-based createinstallmedia method is best suited for technical, administrative, or highly enthusiastic users who are experts in command lines and need to manage multiple Macs in most cases.
Step 1. Format the USB drive
- Open Disk Utility.
- Select the USB drive from the sidebar and choose Erase.
- Use these settings:
Format: APFS
Scheme: GUID Partition Map
Name: MyVolume
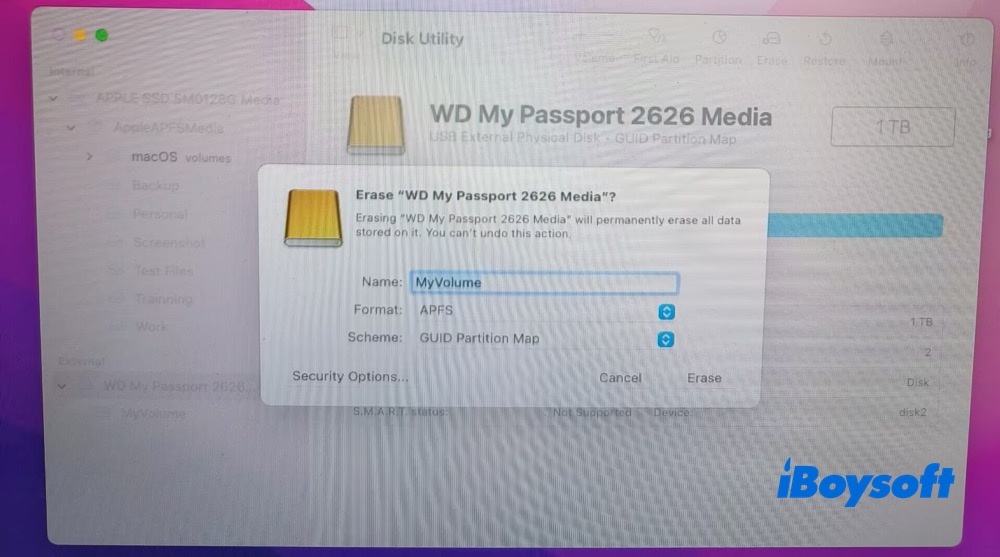
The drive name matters because the Terminal command references it directly. If you use a different name, you'll need to adjust the command accordingly. This is one of the most common mistakes I see people make when following installer creation guides.
Step 2. Download the macOS 27 beta installer
- 1. Download the macOS 27 developer beta file directly from Apple using this link.
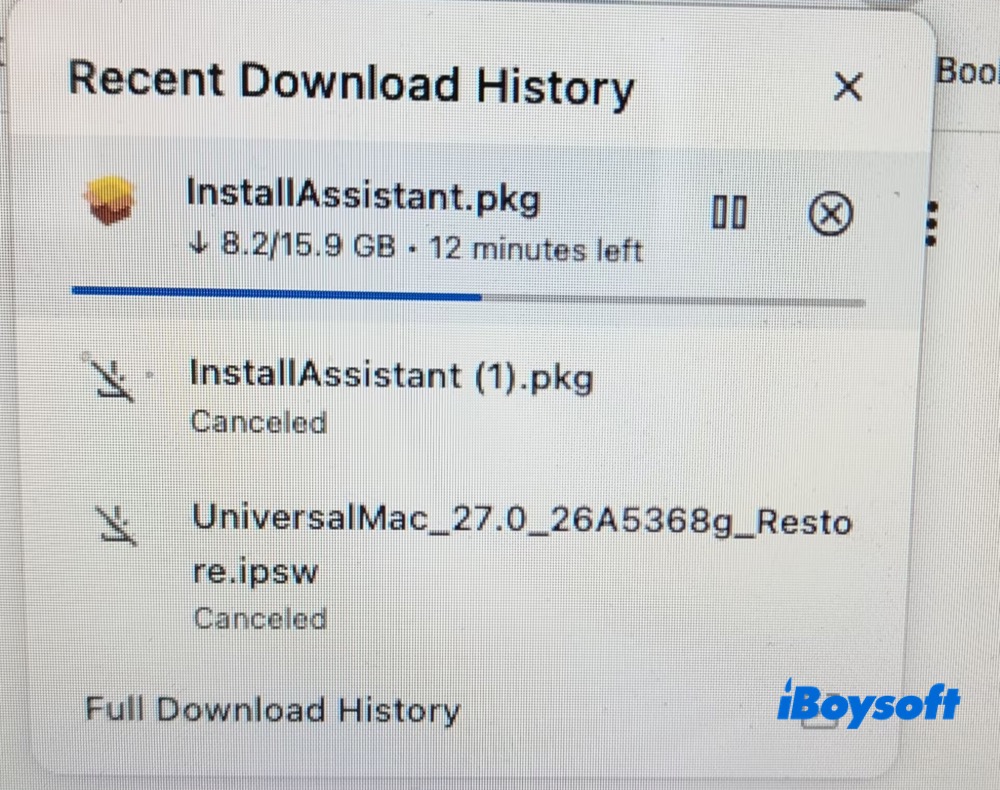
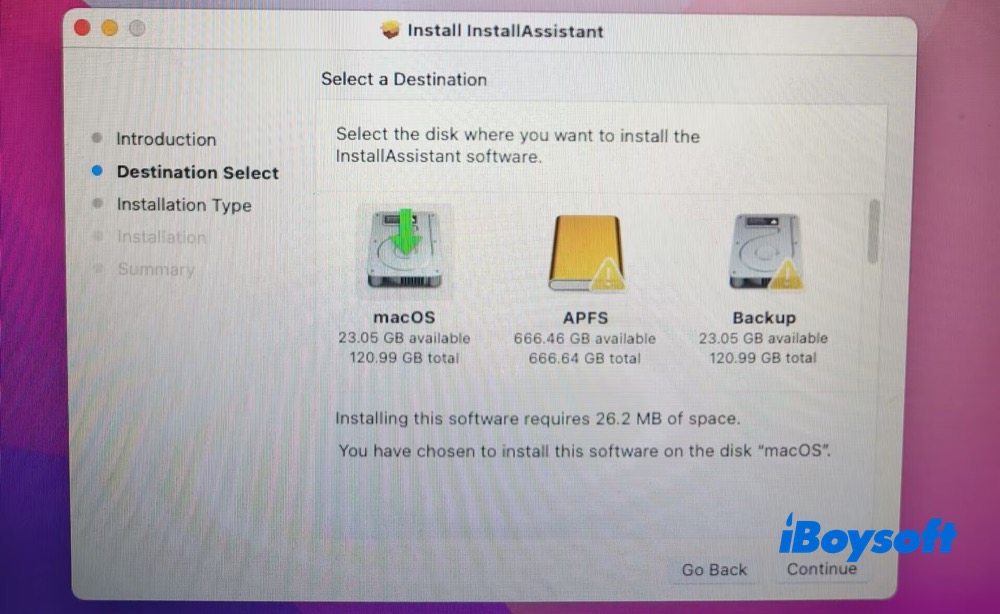
2. After downloading the 15.9 GB macOS 27 installer, double-click InstallAssistant.pkg and follow the on-screen prompts: Continue > Select a destination > Continue > Install > enter your Mac password > Close.
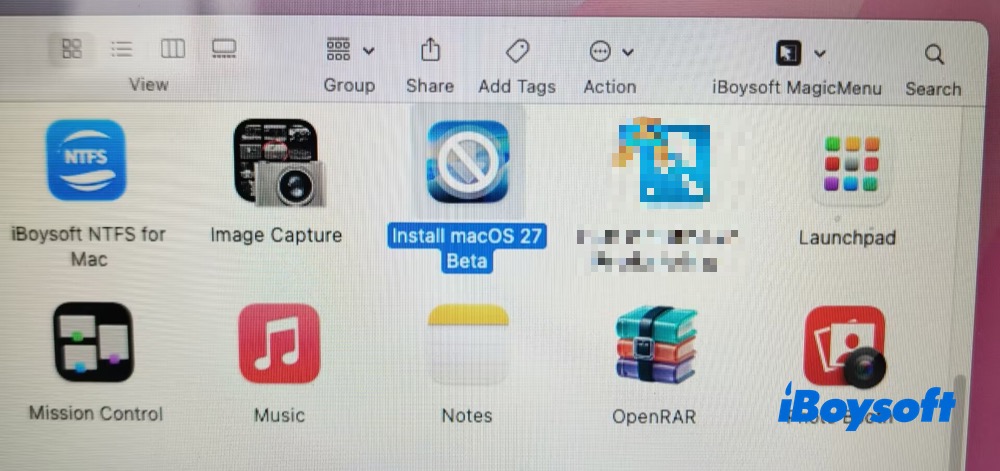
3. Access to Finder Applications folder, and you ought to see the 'Install macOS 27 Beta' app there. Confirm the installer launches normally.
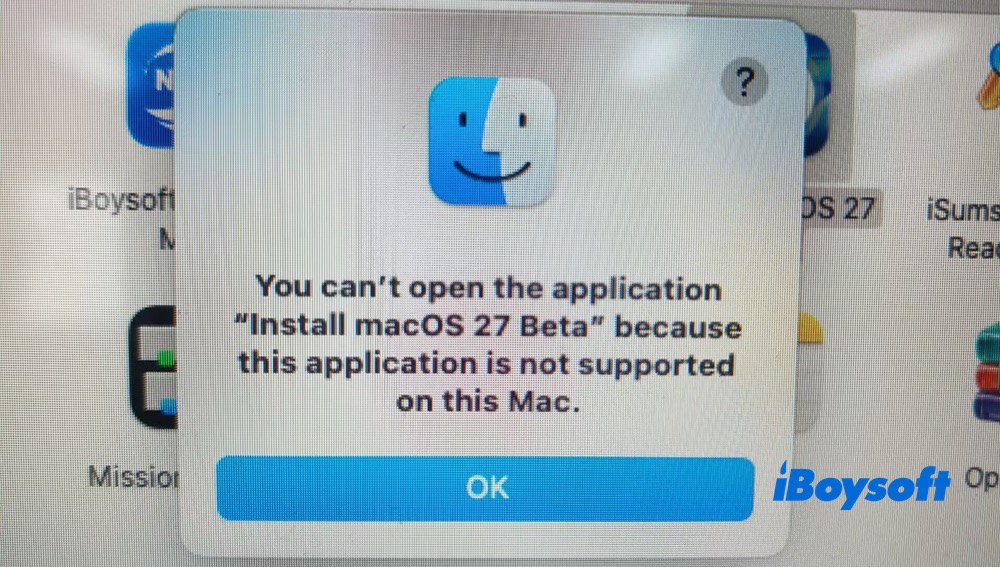
If you're running on an Intel-based Mac, you will get the below notice since macOS 27 beta doesn't support Intel Macs.
Step 3. Run the createinstallmedia Command in Terminal
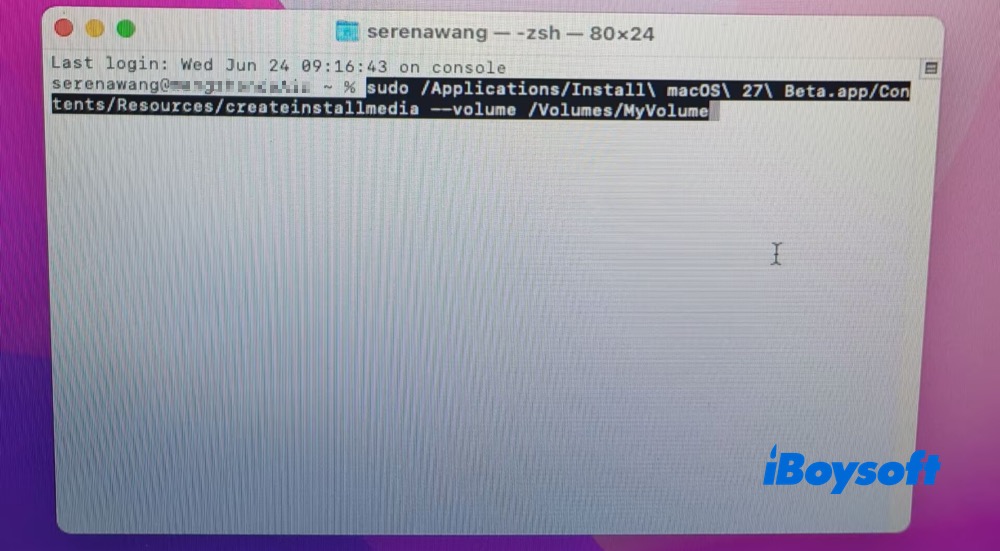
- 1. Open Terminal and enter:
sudo /Applications/Install\ macOS\ 27\ Beta.app/Contents/Resources/createinstallmedia --volume /Volumes/MyVolume
Press Return.
2. Enter your administrator password when prompted and hit Return.
3. When prompted to confirm the erase sequence, type Y and press Return.
4. Click OK if a system window pops up requesting Terminal permission to modify a removable drive.
Do not disconnect the USB drive until Terminal reports completion.
Step 4: Confirm the installer was created successfully
When the process finishes, Terminal should display a completion message - "Install media now available". And the USB drive name may automatically change to something similar to: Install macOS 27 Beta
I recommend opening the drive in Finder and confirming the installation files are present before using it on another Mac. This simple check can prevent troubleshooting later if the creation process was interrupted.
Note: The above procedure is for Mac computers. If you only have a Windows PC, please refer to this tutorial to create a macOS bootable USB installer on Windows.
How to Boot Your Apple Silicon Mac From the macOS 27 Beta USB Installer
To run macOS 27 Golden Gate beta, you will need an Apple Silicon Mac equipped with an M-series (M1, M2, M3, M4, M5) or newer Apple chip. Intel-based Macs are permanently locked out of this release.
Meanwhile, before booting from USB on your Apple Silicon Mac, you must allow external media in Startup Security Utility. When everything is ready, do as follow to install macOS 27 beta using the bootable USB installer.
Step 1. Completely shut down your target Apple Silicon Mac
Step 2. Plug in your newly created macOS 27 bootable USB drive
Step 3. Press and hold the power button
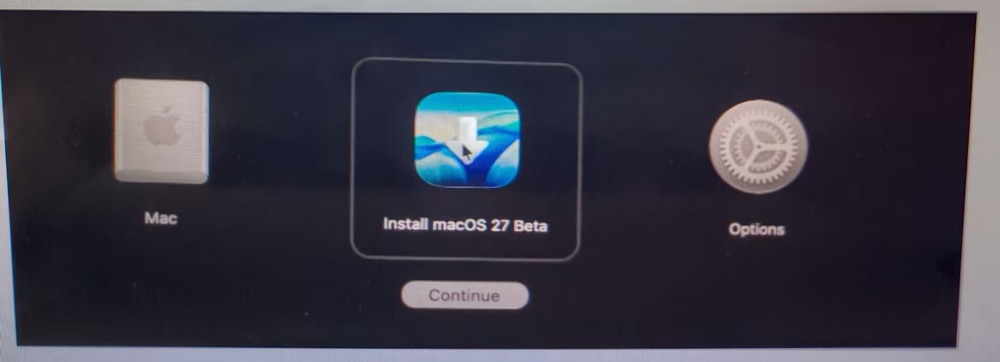
Step 4. Wait for startup options to show up
Step 5. Select the bootable installer - install macOS 27 beta from the listed volumes.
Step 6. Continue with installation
The exact installation screens may change during beta releases, so expect minor differences between beta versions. After the installation is finished, you can eventually enjoy macOS 27 Golden Gate new features like new Siri AI, next-generation Apple Intelligence, visual intelligence, etc., on your Apple Silicon Mac.
If you encounter some unexpected macOS 27 beta issues during the bootable USB installer creation and usage, check the FAQs below to find approaches.
FAQs about macOS 27 Beta Bootable USB Installer
- Q1.Terminal says command not found when creating a bootable USB installer for macOS 27 beta?
-
A
This usually means:
The installer is not in the Applications folder
The installer filename differs from the command
The macOS 27 beta installer was not downloaded completely
Verify the installer name and path before running the command again.
- Q2. Why my USB drive not appear as a startup option?
-
A
Please check below:
The drive was formatted using GUID Partition Map
The installer creation completed successfully
The Mac supports the macOS 27 beta version being installed
- Q3. Why my macOS 27 beta USB installer creation stops midway?
-
A
In my experience, slower or older USB drives are often the cause. Try:
Reformatting the drive
Using a higher-quality USB device
Downloading the installer again if corruption is suspected
- Q4. Why error Bad CPU type in executable appears on my MacBook Air when creating macOS 27 beta bootable installer?
-
A
This error means you are trying to run a program built for a different computer architecture than your Mac's processor. It happens when you try to run an Apple Silicon (M1/M2/M3/M4/M5) based macOS 27 beta app on an older Intel-based (x86_64) Mac without the necessary translation software.
The straightforward workaround is to create macOS 27 beta bootable installer on an Apple Silicon Mac.
- Q5. Can I boot my Intel Mac from the macOS 27 beta bootable USB installer?
-
A
No. you can't. macOS 27 are only supported by Apple Silicon Macs. Intel-based Macs are excluded by macOS 27 this time.