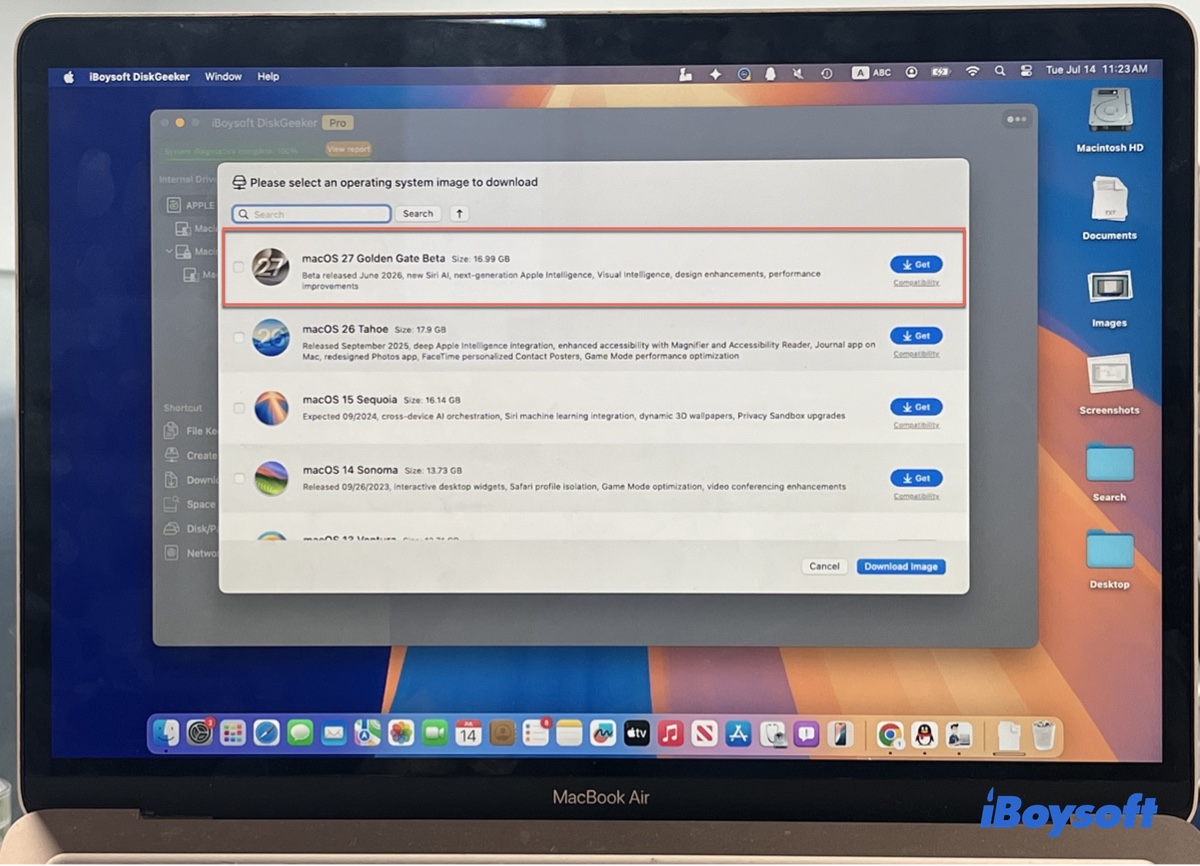
At WWDC 2026, Apple announced the successor to macOS 26 Tahoe, macOS 27 Golden Gate. It's the first version of macOS to run exclusively on Apple Silicon. By dropping dual-architecture support in macOS 27, Apple stripped out decades of x86 legacy code, resulting in a faster system that uses less memory, takes up less storage, and extends battery life.
It also brings the biggest functional shift to the Mac experience in years. Before macOS 27, AI tools operated primarily as text tools. macOS 27 transforms Siri and Apple Intelligence into a true system agent.
If you want to try out the new features of macOS 27, the DMG file is convenient. You can use it to create a macOS 27 bootable USB installer on a Windows PC or a compatible Mac. This is ideal for recovering a Mac that won't boot, sharing the installer with others, performing a clean installation of macOS Golden Gate, or offline storage.
In this guide, we'll tell you how to download the macOS 27 beta DMG file directly or create one yourself.
Warning: macOS 27 Golden Gate is still in its beta testing phase, which likely bears bugs and other unexpected issues. Try not to install it on your primary Mac. Instead, install it on an external drive, a separate internal APFS volume, or on a virtual machine like UTM.
Download macOS 27 beta DMG directly
If you don't have an Apple Silicon Mac or prefer getting macOS 27 directly, download the macOS Golden Gate DMG file from a reliable third-party source like iBoysoft DiskGeeker. It holds a full library of macOS DMG files available for both Windows PCs and Mac computers (Intel & Apple Silicon included).
This tool isn't merely a macOS DMG downloader; it's especially useful for those who want to create a macOS 27 Golden Gate bootable USB installer on macOS or Windows since it simplifies the process and doesn't require any command-line knowledge.
Follow the steps below to download the macOS 27 beta DMG file:
First, free download, install, and launch iBoysoft DiskGeeker.
Then, take the corresponding steps based on your computer.
💻 On a Mac (Intel, T2 & Apple Silicon):
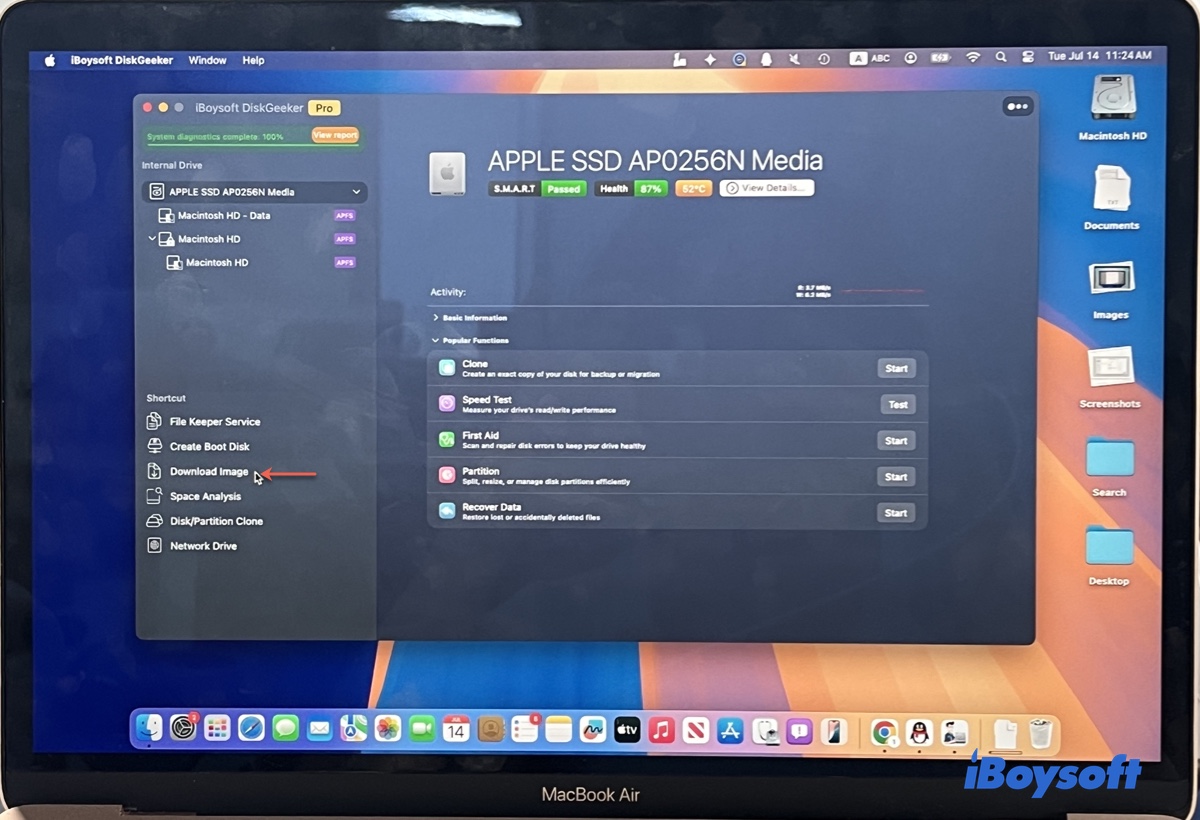
- Tap Download Image from the left.
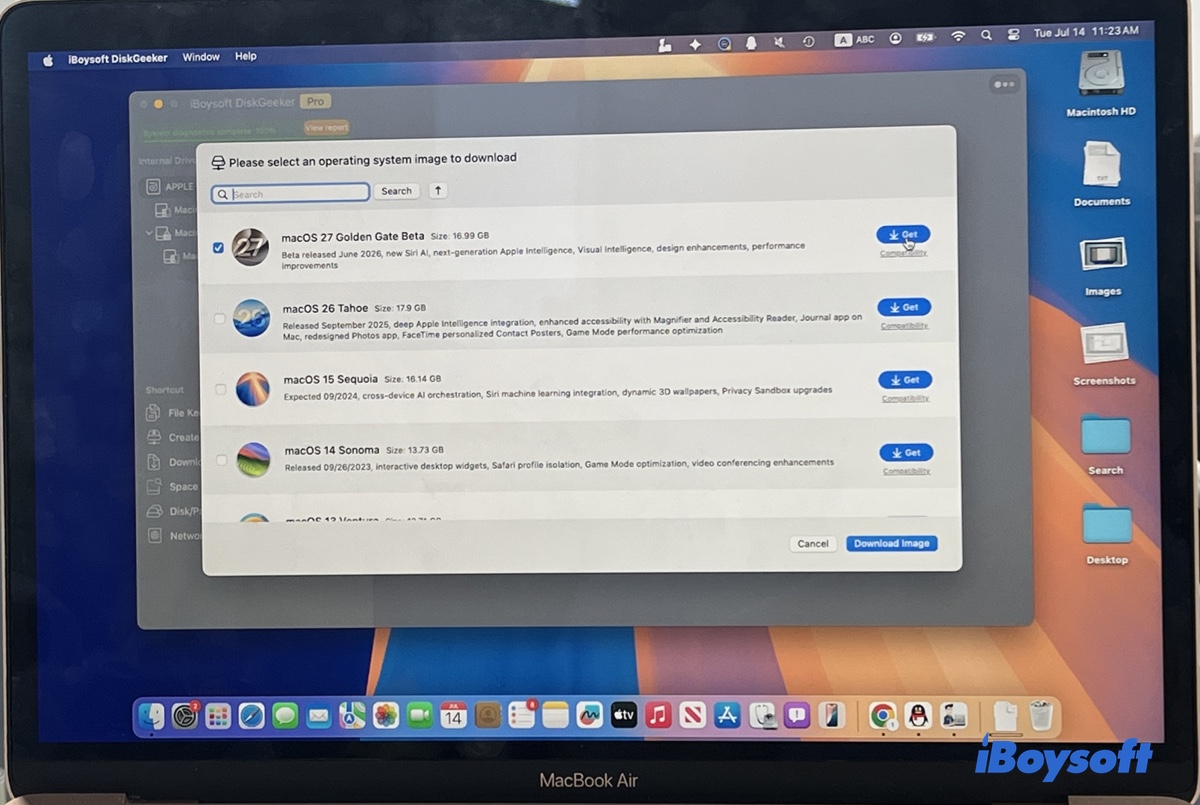
- Select macOS 27 Golden Gate Beta and click Get.
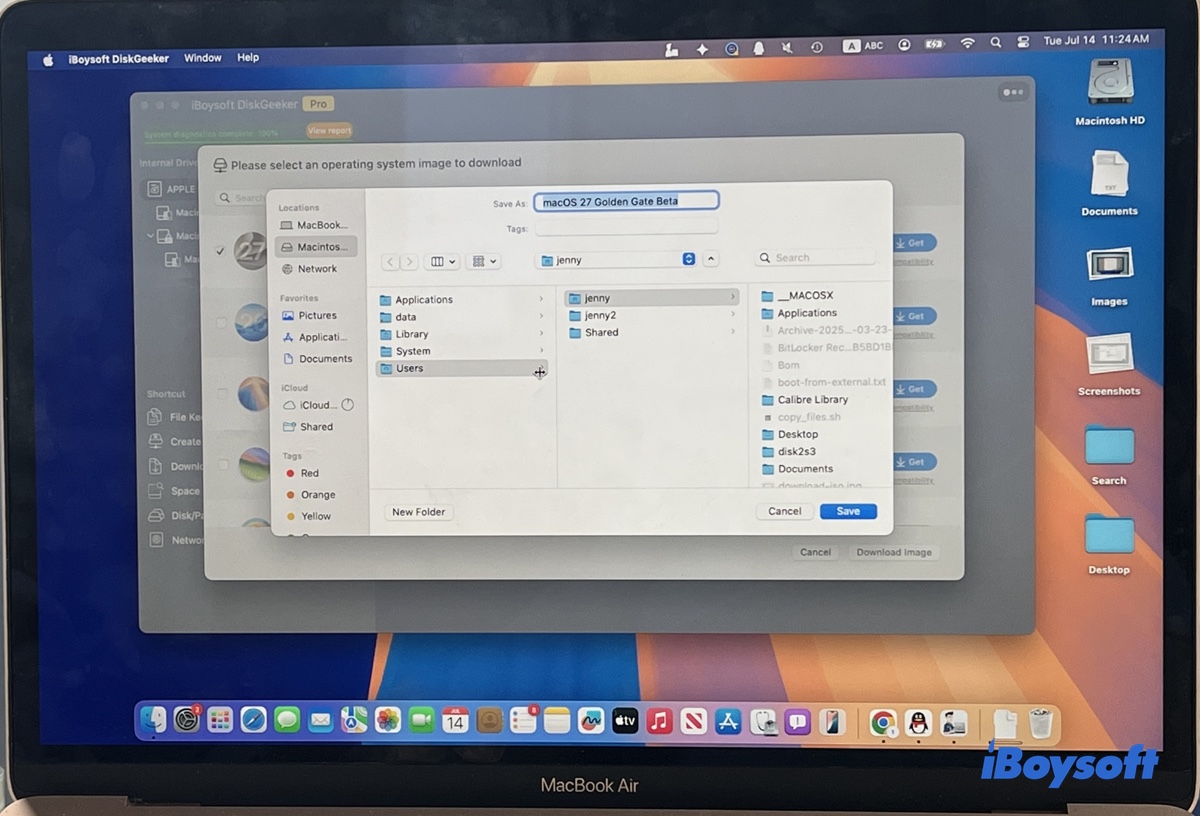
- Choose where to save the DMG file.
- Wait for the download to finish.
🖥️ On a Windows PC:
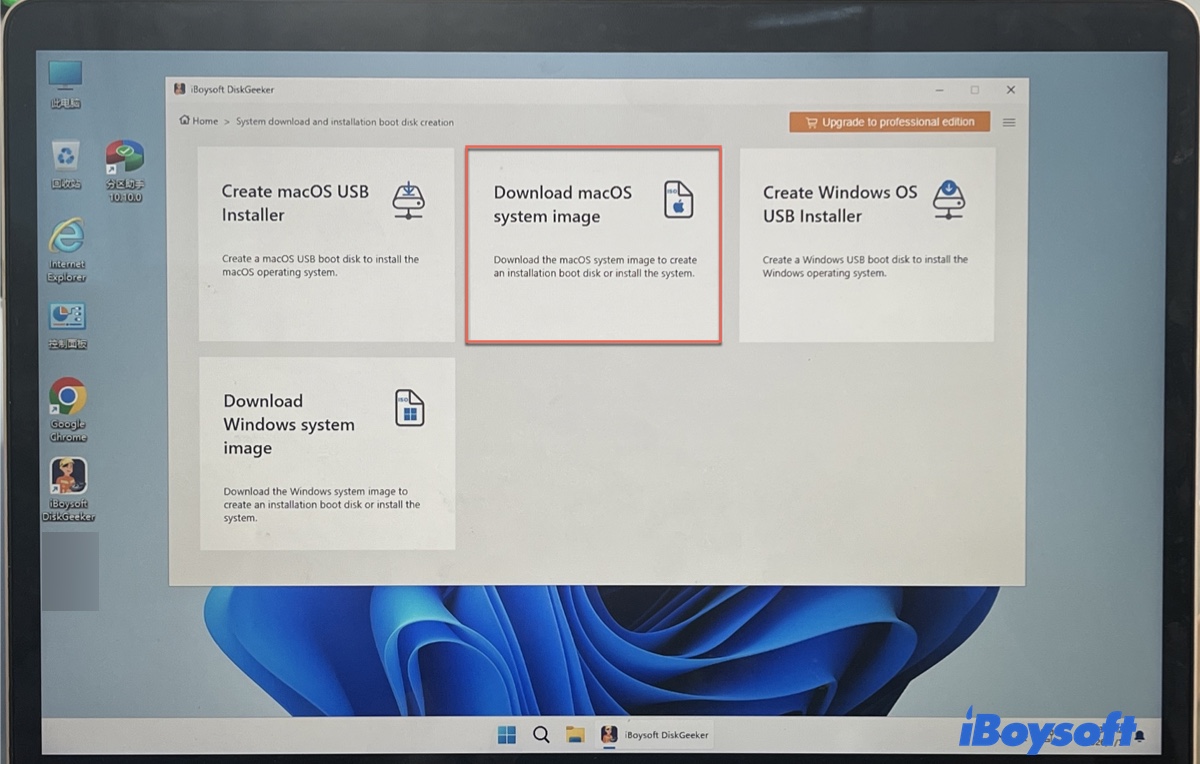
- Click Download and create boot disk > Download macOS system image.
- Select macOS 27 Golden Gate Beta and click Get.
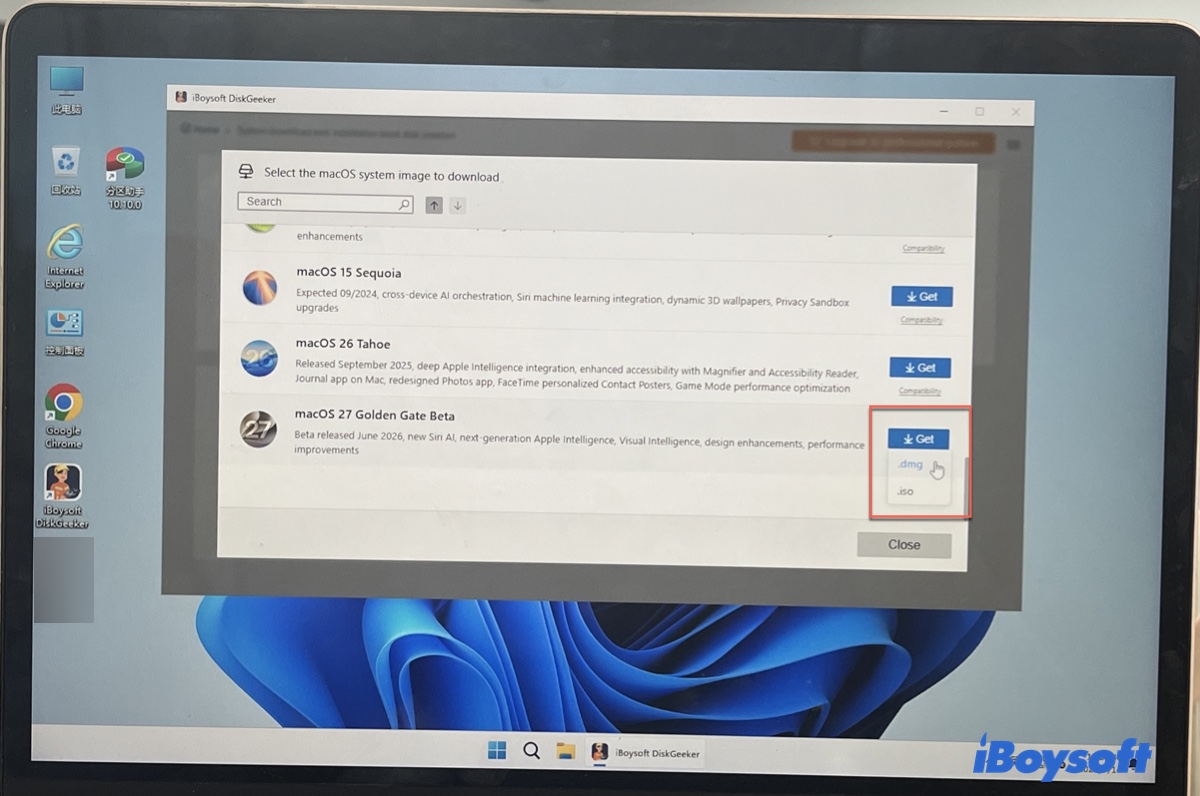
- Select the .dmg format.
- Decide where to store the DMG file.
- Wait until the file is downloaded.
Suppose you're looking to create a macOS 27 bootable USB; then choose Create boot disk or Create macOS USB installer in Step 1.
Tips: If you want to install the macOS 27 beta directly on an external drive or a separate APFS partition, double-click to open the DMG file, then run the installer inside and select the external drive or APFS partition as the destination.
Create macOS 27 beta DMG manually
If you have an Apple Silicon Mac, try creating the macOS 27 beta DMG file manually. This way, you have full control over the process and the final DMG file. Before getting started, ensure your Mac has more than 35 GB of free space to accommodate the app installer and DMG image.
Step 1: Download the macOS 27 Golden Gate full installer
Apple provides the macOS 27 Golden Gate full installer in .pkg format on its server. You can download it from the link below.
macOS 27 Public Beta Download from Apple
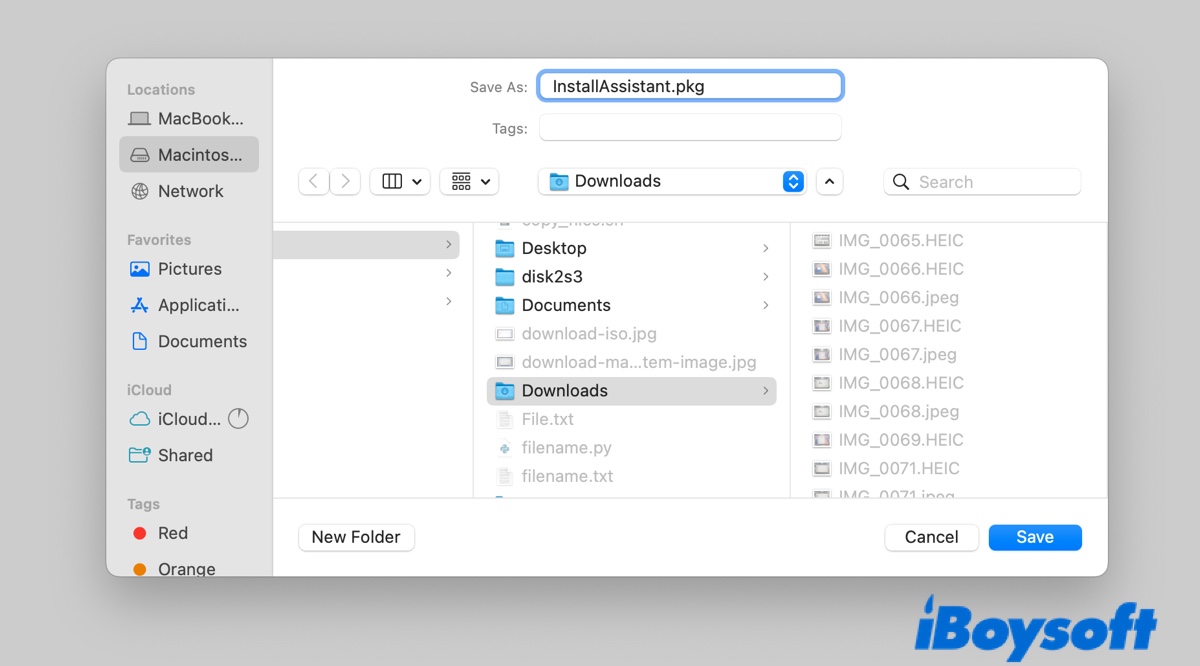
The file is labeled as InstallAssistant.pkg and is around 16 GB.
Once it's downloaded, double-click and follow the on-screen prompts to extract the file, then drop the clean Install macOS 27 Beta.app straight into your Applications folder. If an installer setup window pops up, press Command + Q to quit it.
Step 2: Create a raw blank virtual disk image for macOS 27
Now that you have the macOS 27 installer sitting in your Applications folder, open the Terminal app and execute the command below to create a blank image:
hdiutil create -o /tmp/GoldenGate.dmg -size 18000m -layout SPUD -fs HFS+J
This command creates an 18 GB disk image file named GoldenGate.dmg in the /tmp directory, using a single partition layout and formatted with the HFS+ file system with journaling.
Command Breakdown:
hdiutil create: This is the command to create a new disk image using the hdiutil tool.
-o /tmp/GoldenGate.dmg: The -o option specifies the output file path for the disk image. In this case, the disk image will be created at /tmp/GoldenGate.dmg.
-size 18000m: The -size option defines the size of the disk image. Here, 18000m means the image will be 18,000 megabytes (or approximately 18 GB).
-layout SPUD: The -layout option specifies the partition layout of the disk image. SPUD stands for "Single Partition, Unformatted Disk", which is a common layout for disk images.
-fs HFS+J: The -fs option sets the file system type for the disk image. HFS+J refers to the HFS Plus file system with journaling enabled. HFS+ is the file system used by macOS prior to APFS (Apple File System).
Step 3: Mount the blank image
This tricks your Mac into treating the blank image as a physical volume plugged into your machine. Run the following command:
hdiutil attach /tmp/GoldenGate.dmg -noverify -mountpoint /Volumes/GoldenGate
This command mounts the GoldenGate.dmg disk image located in the /tmp directory to the /Volumes/GoldenGate directory without verifying the image beforehand.
Command Breakdown:
hdiutil attach: This part of the command tells macOS to mount the specified disk image.
/tmp/GoldenGate.dmg: This is the path to the disk image file you want to mount.
-noverify: This option skips the verification process when mounting the disk image, which can save time.
-mountpoint /Volumes/GoldenGate: This specifies the location where the disk image will be mounted. The contents of the disk image will be accessible at this path.
Step 4: Flash the macOS 27 installer into the mounted image
We'll use Mac's built-in utility, createinstallmedia, to rewrite the mounted disk image structure into a bootable installer.
sudo /Applications/Install\ macOS\ 27\ Beta.app/Contents/Resources/createinstallmedia --volume /Volumes/GoldenGate --nointeraction
You'll be asked to enter your Mac's administrator login password to approve this step. Just type it and hit Enter. Terminal won't show characters.
This command creates a bootable macOS installer on the volume located at /Volumes/GoldenGate using the createinstallmedia tool from the specified macOS installer application.
Command Breakdown:
sudo: This command is used to execute the following command with superuser (administrative) privileges. It may prompt you for your password.
/Applications/Install\ macOS\ 27\ Beta.app/Contents/Resources/createinstallmedia: This is the path to the createinstallmedia tool within the macOS installer application. The backslashes (\) are used to escape spaces in the file path, allowing the terminal to recognize it correctly.
--volume /Volumes/GoldenGate: The --volume option specifies the target volume where the bootable installer will be created. In this case, it points to the mounted volume at /Volumes/GoldenGate. This volume should be formatted as macOS Extended (Journaled) or APFS and should be empty.
--nointeraction: This option tells the createinstallmedia tool to run without any user interaction. It will proceed with creating the bootable installer without prompting for confirmation or any additional input.
Step 5: Unmount the bootable volume
After the bootable media is created, detach the completed volume so that the file isn't locked by your system processes.
hdiutil detach /Volumes/Install\ macOS\ 27\ Beta
This command unmounts the volume named Install macOS 27 Beta from the /Volumes directory.
Command Breakdown:
hdiutil detach: This command is used to unmount a disk image or volume that has been previously mounted. It ensures that the system releases any resources associated with the mounted volume.
/Volumes/Install\ macOS\ 27: This is the path to the mounted volume that you want to detach. The backslashes (\) are used to escape the spaces in the volume name, allowing the terminal to understand the full path correctly.
Step 6: Convert the disk image into a compressed DMG file
This step shrinks the disk image block down significantly, stripping out all empty space and crushing the actual installer file into a neat package.
hdiutil convert /tmp/GoldenGate.dmg -format UDZO -o ~/Desktop/macOS_27.dmg
This command converts the disk image located at /tmp/GoldenGate.dmg into a compressed disk image in the UDZO format and saves the output as macOS_27.dmg on the Desktop.
Command breakdown:
hdiutil convert: This command is used to convert a disk image from one format to another.
/tmp/GoldenGate.dmg: This is the path to the source disk image file that you want to convert. In this case, it's the GoldenGate.dmg file located in the /tmp directory.
-format UDZO: The -format option specifies the format to which you want to convert the disk image. UDZO stands for "Universal Disk Image Format, compressed." This format compresses the disk image, making it smaller in size while preserving its contents.
-o ~/Desktop/macOS_27.dmg: The -o option specifies the output file path for the converted disk image. In this case, the converted image will be saved as macOS_27.dmg on the user's Desktop (~/Desktop).
Step 7: Clean the disk image in the /tmp directory
Remember the empty disk image created in the /tmp directory? It's no longer useful, and you can run the following command to delete it.
rm /tmp/GoldenGate.dmg
You'll now have a flawless macOS 27 beta DMG file sitting right on your desktop. Share this article if it's helpful!
FAQs
- QHow do I burn a bootable macOS 27 Golden Gate USB installer using a Windows computer?
-
A
You can use a tool like iBoysoft DiskGeeker or Rufus to create the macOS 27 bootable USB with the DMG file.
- QHow do I deploy macOS 27 across 20 Macs without destroying my bandwidth?
-
A
Follow the steps in this guide to create a neat, compressed macOS 27 DMG file so that you can update multiple devices entirely offline.
- QIs a DMG file what I need to boot a macOS 27 virtual machine?
-
A
No, the DMG file won't work. To create a macOS 27 virtual machine, you must use the IPSW file with an application built directly on Apple's architecture, such as the free UTM or paid Parallels Desktop.
- QCan I flash this DMG to force macOS 27 onto my old Intel MacBook Pro?
-
A
No, macOS 27 Golden Gate has completely removed all x86 Intel processing instructions. You can't install it on an unsupported Intel Mac like you used to with OCLP.