Upgrading to a new macOS version like macOS Tahoe (macOS 26) can be exciting, but not everyone has a smooth experience. Some Mac users encounter macOS Tahoe issues like apps not working on macOS Tahoe, system bugs, or performance drops.
Downgrading macOS to Sequoia or an earlier macOS version may be a solution.
Since Apple does not provide a built-in "downgrade" button, you need to erase your Mac and reinstall the older system. Keep reading, this guide explains the safest ways to downgrade macOS 26 Tahoe step by step.
Tips: Instead of downgrading, you can also make a macOS Tahoe bootable USB to clean reinstall macOS Tahoe.
Preparations before downgrading macOS Tahoe
Here we list the necessary things you need to finish before the macOS 26 Tahoe downgrade.
(1) Back up data
Downgrading macOS requires erasing the startup disk, which means all files, apps, and settings will be deleted. To avoid permanent data loss, you should:
- Copy important files manually to an external hard drive or USB flash drive if you only need to keep a few documents.
- Use iCloud Drive to sync files, photos, and other data. Make sure you have enough available storage space in your iCloud plan.
- Create a Time Machine backup to restore everything, including apps, system settings, and user accounts, after the downgrade.
Note: Don't forget your saved passwords. Downgrading erases login details stored on your Mac. Enable iCloud Keychain to sync passwords, or write them down before proceeding.
(2) Check compatibility
Not every Mac can run every version of macOS. Before downloading an earlier macOS, confirm that your Mac model supports it.
- Go to Apple menu > About This Mac to check your model and year.
- Compare it with Apple's official compatibility list for the macOS version you want to install (Sequoia, Sonoma, Ventura, etc.).
- If your Mac doesn't support the earlier system, the downgrade will fail.
(3) Create the macOS installer
You'll need the installer for the macOS version you want to roll back to. There are several ways to get it:
- Apple Support Page or App Store: Some earlier versions are still available for direct download. Then use Terminal to create the bootable USB for Mac with the commands like sudo /Applications/Install\ macOS\ Sequoia.app/Contents/Resources/createinstallmedia --volume /Volumes/MyVolume.
- For unsupported Macs and an easy macOS installer without commands, iBoysoft DiskGeeker for Mac provides reliable and direct download links for older macOS installers and even helps you create a bootable USB installer with fewer steps.
Let's save time and effort to create a bootable installer with iBoysoft Diskgeeker:
- Free download, install, and open iBoysoft DiskGeeker for Mac. (Connect an external hard drive to Mac.)
- Click Create boot disk on the left side, then select the external drive, and click Select > Continue.
- Click your needed macOS version and click Create boot disk > OK.
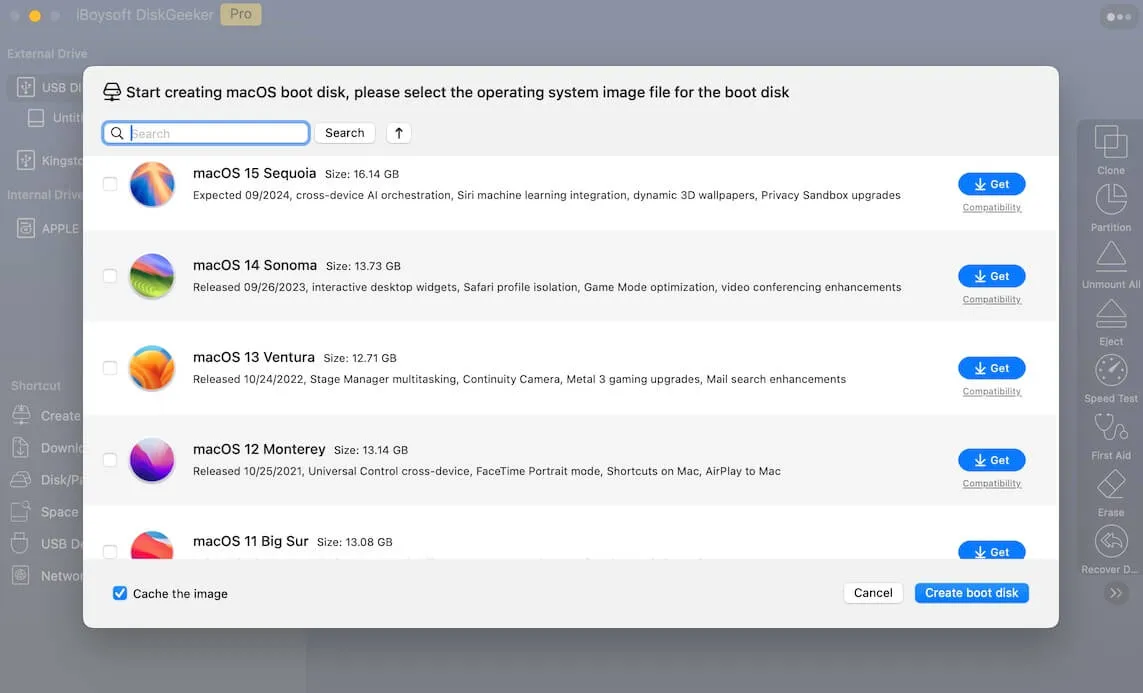
Then the macOS DMG file is downloaded after waiting a little, and the bootable installer is ready to downgrade macOS Tahoe now~ Just have a try.
(4) Ensure Stable Internet Connection
If you're using Recovery Mode or Internet Recovery Mode, a strong and stable internet connection is essential, as macOS needs to download installation files directly from Apple's servers.
- Prefer a wired Ethernet connection or a reliable Wi-Fi network.
- Avoid downgrading when your connection is unstable, as the download may fail or corrupt the installation files.
Share these preparations, and let's begin our downgrade.
How to downgrade macOS Tahoe
Regardless of why you want to revert from macOS Tahoe to a previous version, there are several reliable methods available:
Option 1: Restore from a Time Machine backup Option 2: Reinstall using macOS Internet Recovery Mode Option 3: Create and use a macOS Sonoma bootable installer Option 4: Use Apple Configurator (for Apple Silicon Macs) |
These are the most common approaches to downgrading macOS. Each method comes with its own conditions and is best suited for different situations. After reviewing them, you can select the option that works best for your needs.
Option 1: Use Time Machine backup
If you created a Time Machine backup before upgrading to the current macOS, downgrading becomes much simpler since the backup already includes your previous macOS system files.
- Connect your Time Machine backup drive.
- Restart your Mac and hold Command and R to enter macOS Recovery Mode.
- Select Disk Utility, then right-click macOS-Data volume and click Delete APFS Volume.
- Choose the macOS volume and click Erase.
- Rename it, and choose APFS in the Format, then click Erase.
- Click Disk Utility > Quit Disk Utility.
- Select Restore from Time Machine backup.
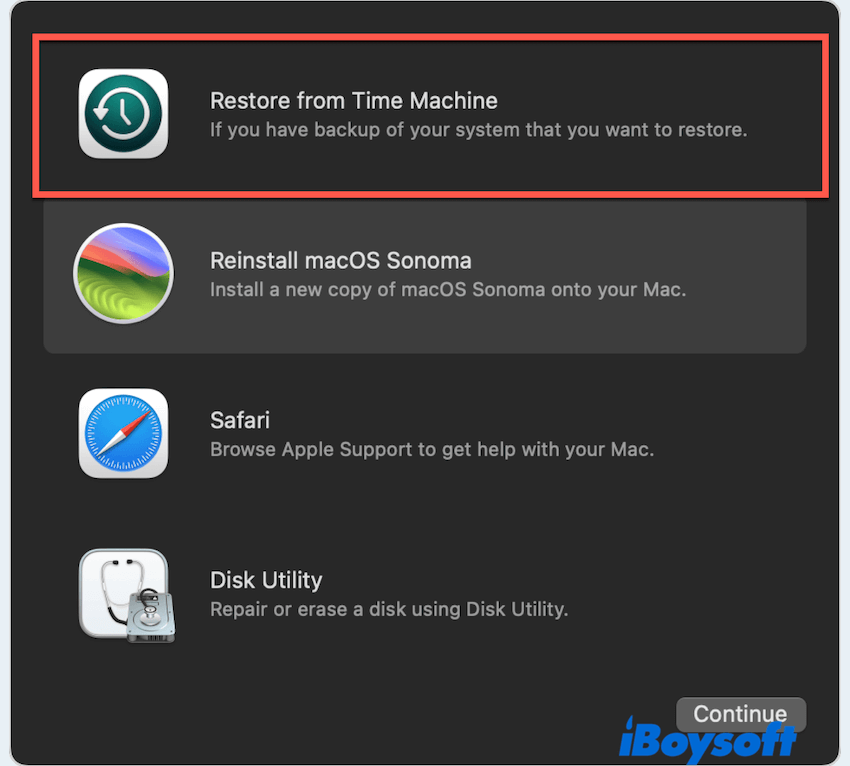
- Choose the backup and follow the instructions to restore your Mac and roll back from macOS Tahoe to macOS Sequoia or another earlier version.
Option 2: Reinstall macOS via Recovery Mode
But what if you don't have a Time Machine backup—how can you downgrade macOS Tahoe or another version?
In this case, you can start your Mac in Internet Recovery Mode and use the Reinstall macOS option to roll back to an earlier system. This approach works on virtually all Mac models, making it a practical way to downgrade macOS Tahoe to macOS Sequoia without relying on a backup.
- Restart your Mac and hold Option + Command + R to launch Internet Recovery.
- Open Disk Utility, select your startup disk, and click Erase.
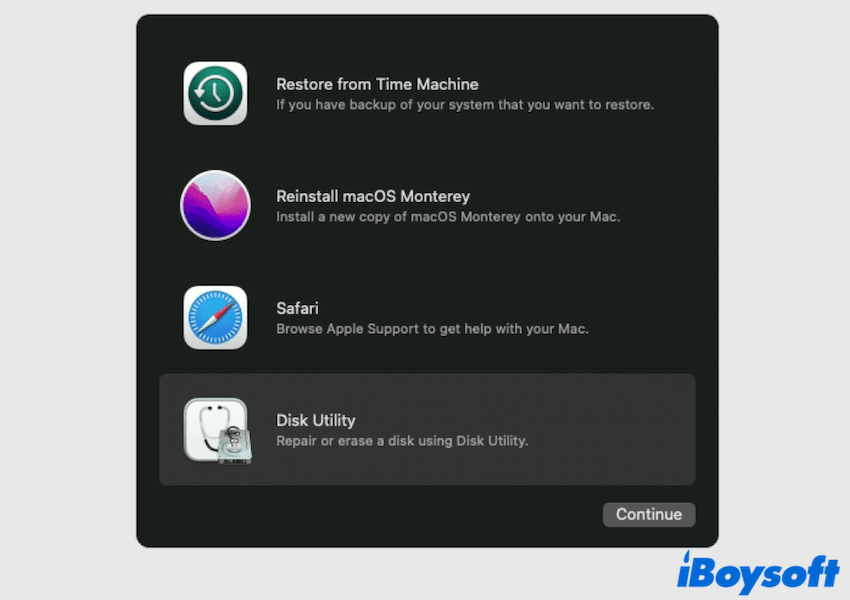
- Return to the Recovery screen and select Reinstall macOS.
- Your Mac will download and install the version it originally shipped with or the closest available version.
Option 3: Install macOS Tahoe bootable installer
This way is so helpful if you have no Time Machine Backup or no idea how to clean macOS. We have already created a bootable macOS installer with iBoysoft DiskGeeker for Mac in preparation, so:
- Insert the USB you created before with iBoysoft DiskGeeker for Mac.
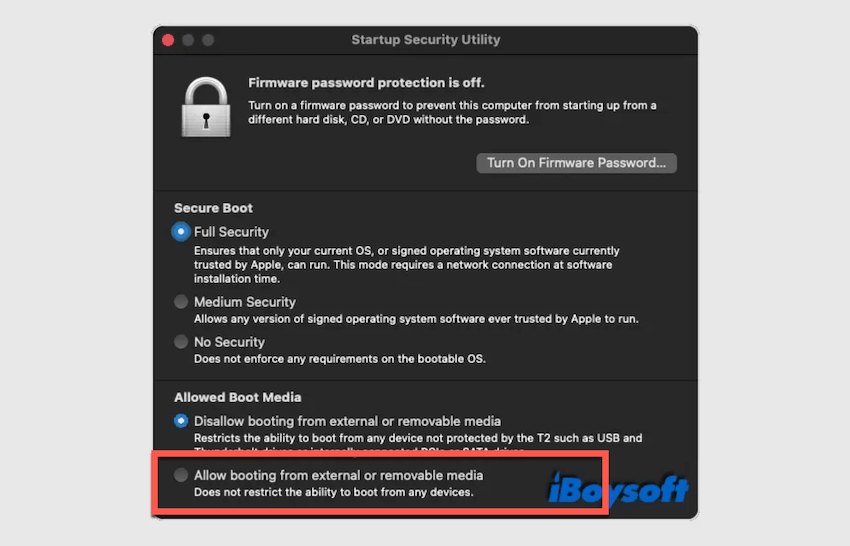
- Enter into macOS Recovery Mode, select Utilities > Startup Security Utility.
- Check Allow booting from external media.
- Restart your Mac and hold down the Option (⌥) key until the available startup disks appear.
- Select the drive containing your desired macOS installer, then click Restart.
- Allow your Mac to boot from the installer you created.
Once your Mac starts up from that installer, the downgrade from macOS Tahoe to your chosen version is underway successfully.
Option 4: Use Apple Configurator (Apple Silicon Macs)
If you own an Apple Silicon Mac and need a clean reinstall with IPSW file:
- On another Mac, install Apple Configurator 2.
- Download the IPSW file for the earlier macOS version you want.
- Put your target Mac into DFU mode.
- Use Apple Configurator to restore the Mac with the IPSW file.
By following one of these methods, you can safely downgrade from macOS Tahoe to macOS Sequoia or an earlier supported version, regaining stability and compatibility on your Mac. Please share our post.
FAQs about downgrading macOS Tahoe
- QCan I go back to macOS Sequoia from macOS Tahoe?
-
A
Yes, you can downgrade to macOS Sequoia using Time Machine, Recovery Mode, or a bootable installer with iBoysoft DiskGeeker for Mac.
- QHow to remove macOS Tahoe?
-
A
Erase your startup disk in Recovery Mode, then reinstall macOS Sequoia or another earlier version.
- QHow long will it take to upgrade Tahoe to Sequoia?
-
A
The process usually takes 1–3 hours, depending on your Mac's speed and internet connection.