The file system is a method and data structure used by operating systems to store, organize, and retrieve data on the storage media. There are several standard file systems such as HFS+, APFS, exFAT, FAT32, NTFS, etc., and each has its pros and cons. The compatibility between operating systems and the file system is one of the biggest concerns. If you want to change APFS for exFAT, this post is right for you.
Share this post with others who want to change APFS to exFAT, just click the button below.
APFS and exFAT explained
APFS(Apple file system) is a proprietary file system developed and deployed by Apple Inc. for Mac computers. It made its debut on macOS 10.13 and replaced the previous Mac OS Extended as the default file system on macOS High Sierra and later. Featured with strong encryption, space sharing, snapshots, and so forth, APFS is the most powerful file system for modern Macs.
Convert External Hard Drive to APFS Without Losing Data
This post guides you to convert an external hard drive to APFS without losing data. An external hard drive formatted with HFS+, exFAT, FAT32, or NTFS can be converted to APFS on Mac. Read more >>
However, the limitations of APFS are obvious. It is optimized for SSDs and flash drives, therefore it could be unfriendly for other types of storage media, including HDDs and Fusion drives. APFS is only compatible with macOS 10.13 and later, Windows and Linux can not have full read-write permissions. And APFS formatted drive for Time Machine backup can't be used on macOS Catalina or previous releases.
exFAT (Extensible File Allocation Table), another proprietary file system, was introduced by Microsoft in 2006. This newer version of FAT 32 is designed for flash drives like USB flash drives, SD cards, and so on. Although exFAT doesn't provide powerful features compared with APFS, better compatibility is the most highlighted advantage of it. It works on both Windows and macOS.
[Answered] Can Mac Recognize and Read exFAT External Drives?
This article answers the question "Can Mac read exFAT" and the answer is yes. Find out what exFAT is, how an exFAT device performs on Mac, and how to get exFAT on Mac. Read more >>
Should I change APFS to exFAT?
In case it is an internal hard drive on your Mac, especially a built-in SSD, it is recommended to use APFS on macOS High Sierra to enjoy better performance. If you attempt to run Windows on an Intel Mac with Boot Camp Assistant, you can change the files system of a certain partition to exFAT so that you can access it when booting into Windows OS on your computer.
In case there is an APFS formatted external drive, and you want to use the drive for both macOS and Windows, then you need to format the APFS drive to macOS- and Windows-compatible file systems such as exFAT, as the APFS drive on Windows is read-only.
In a nutshell, when you want to get rid of the incompatibility of APFS, you can change APFS to exFAT to access the exFAT partition when you run Windows via Boot Camp Assistant or use the same external hard drive on both macOS and Windows to share files, backup partitions, store documents, etc.
You can share this informative post with more people to convert APFS to exFAT.
How to change APFS to exFAT on Mac without losing data?
You will need the macOS built-in disk manager - Disk Utility to convert the file system of the hard drive from APFS to exFAT on Mac.
To format APFS to exFAT will delete all data on the drive, you should create a backup for the important files to avoid data loss before you move to the detailed steps to change APFS to exFAT on Mac.
You can back up your Mac with Time Machine, move files to another external drive, upload important files to cloud storage, etc. Among them, using third-party cloning software such as iBoysoft DiskGeeker for Mac is recommended, such a tool can quickly clone the target drive to protect your important files.
Steps to clone an external hard drive on Mac:
- Free download, install, and launch iBoysoft DiskGeeker on your Mac.
- Connect the source drive you want to clone and the destination drive used to keep the cloned data, make sure there are important files on the destination disk, because the cloning process will overwrite it, and the capacity of the destination disk should be larger than the source drive.
- Select the source disk, you should select the entire disk instead of a volume.
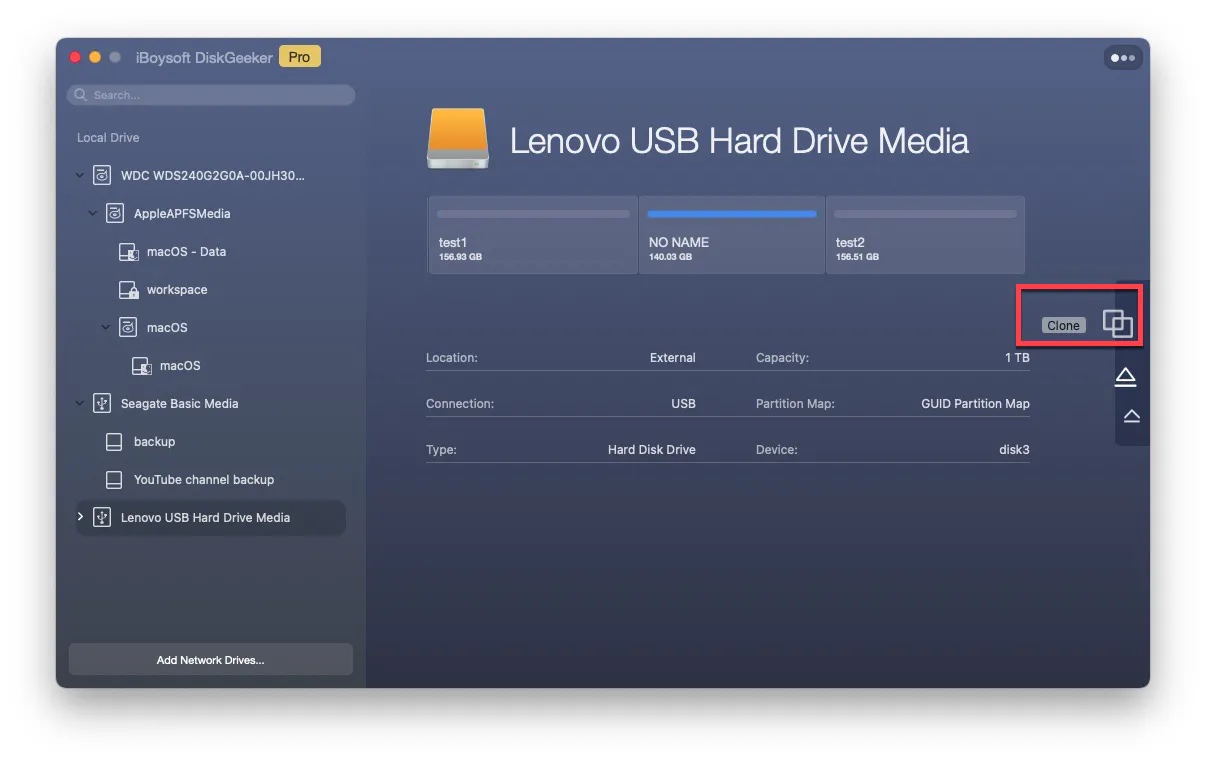
- Click "Clone" from the toolbar.
- Select a destination device in the list.
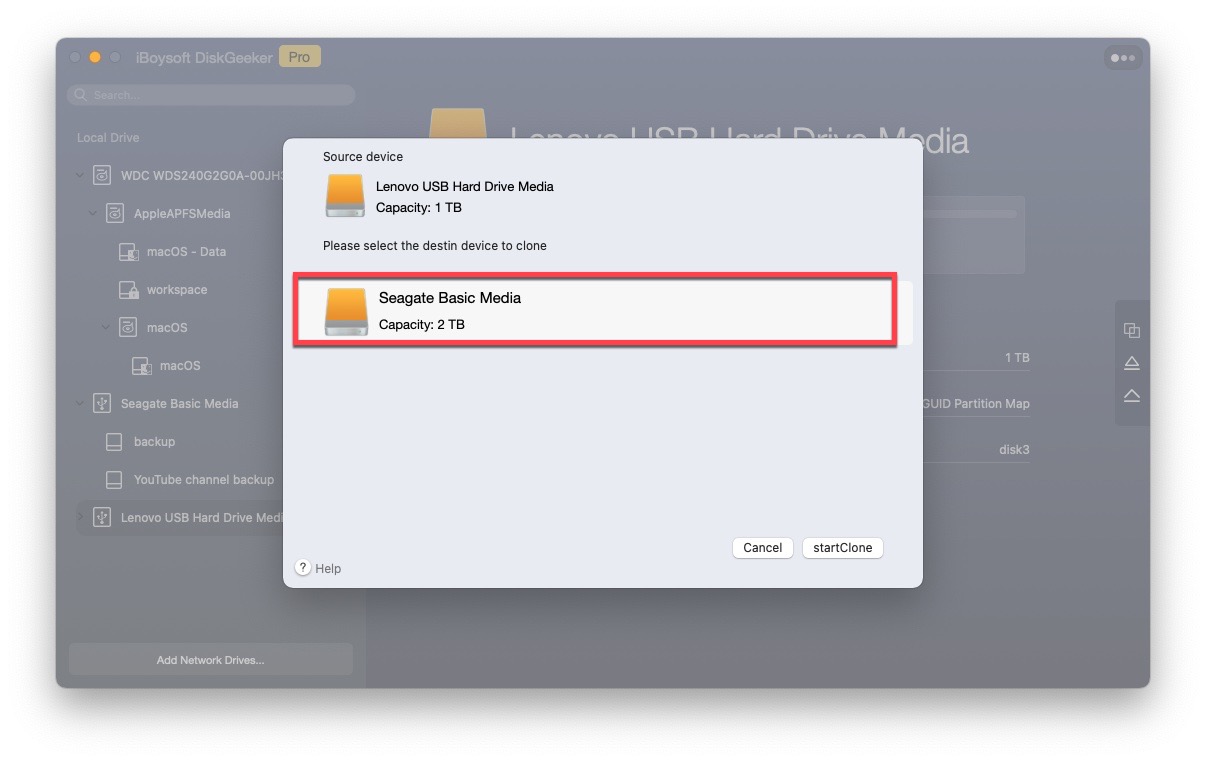
- Then click "Start clone".
Then, you can follow the steps below to change APFS to exFAT:
- Navigate to Finder > Applications > Utilities, find and launch the Disk Utility tool.
- Tap on the View button and select Show All Devices.
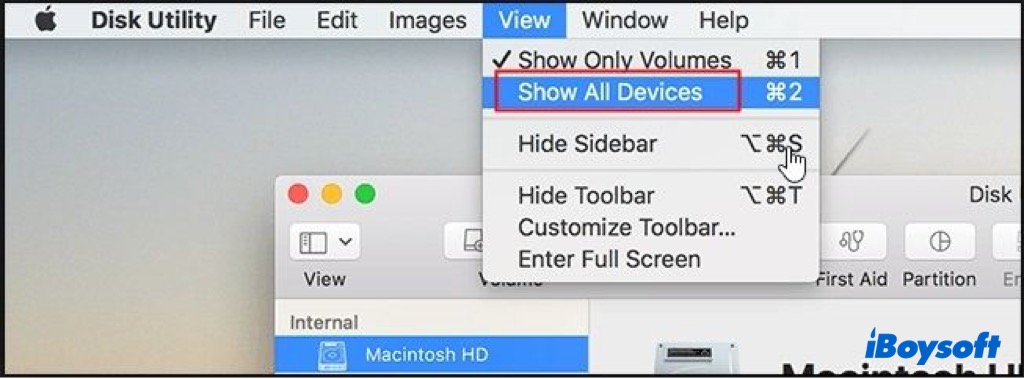
- On the left sidebar, select the target APFS partition on the internal drive, or the whole external hard drive that you want to change to exFAT. Make sure you have chosen the correct one.
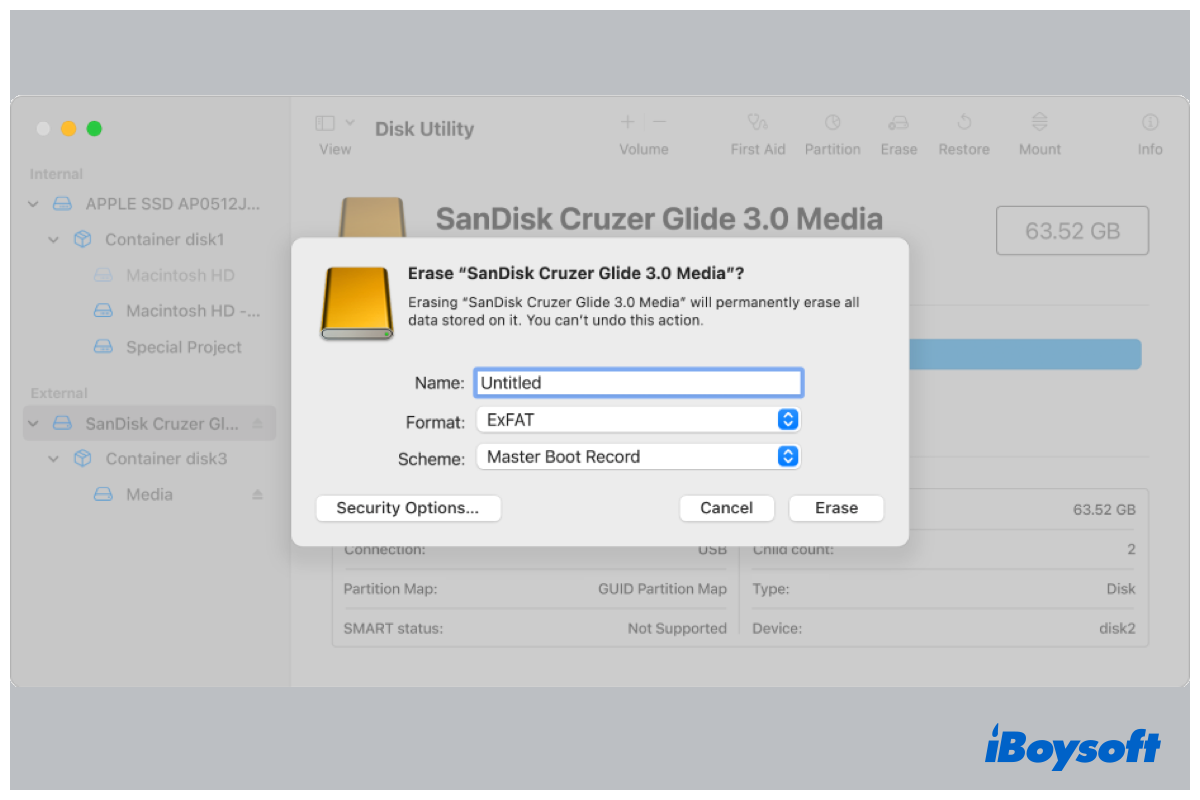
- Use the Erase button of Disk Utility.
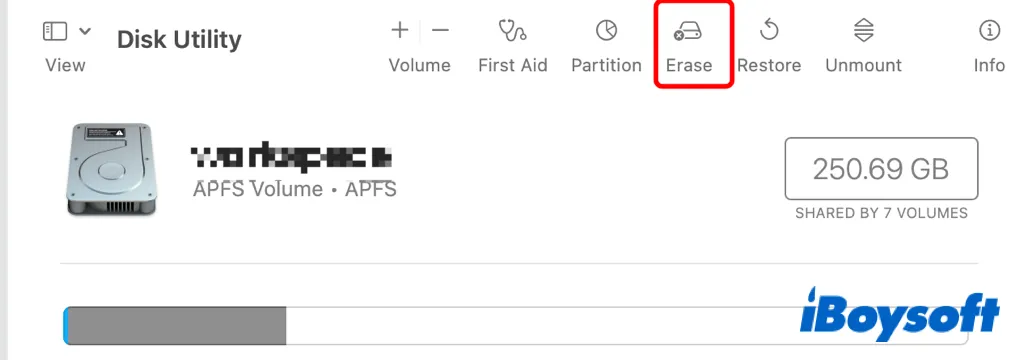
- Enter a new name for the drive and select the format as ExFAT from the drop-down menu.
- Click the Scheme menu and choose Master Boot Record.
- Click the Erase button to start to change APFS to exFAT.
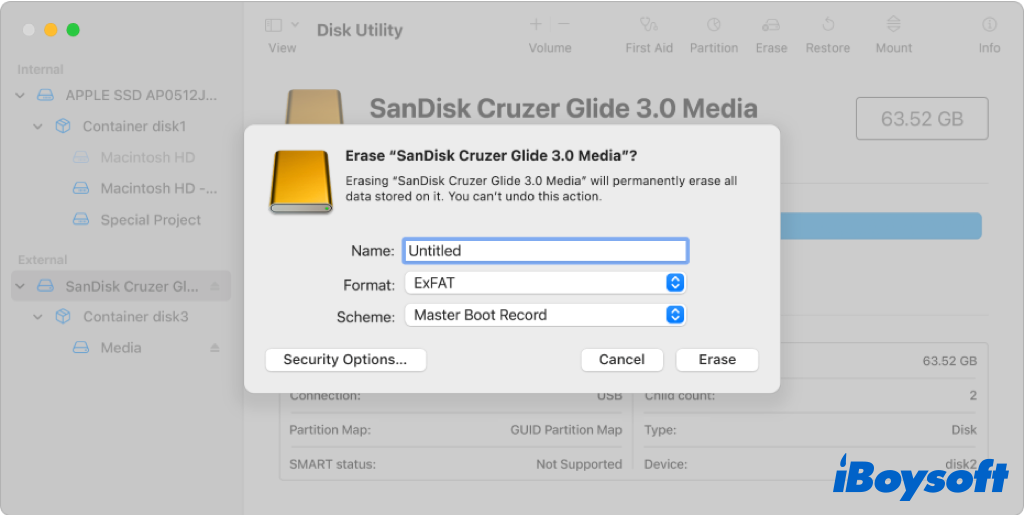
- Click Done when the process completes.
Note: If you want the change the startup disk from APFS to exFAT, you will use Disk Utility in Recovery Mode. As for an APFS drive, the volumes within the container can only be APFS, in such a case, you should format the whole APFS drive instead of a volume to change APFS to exFAT.
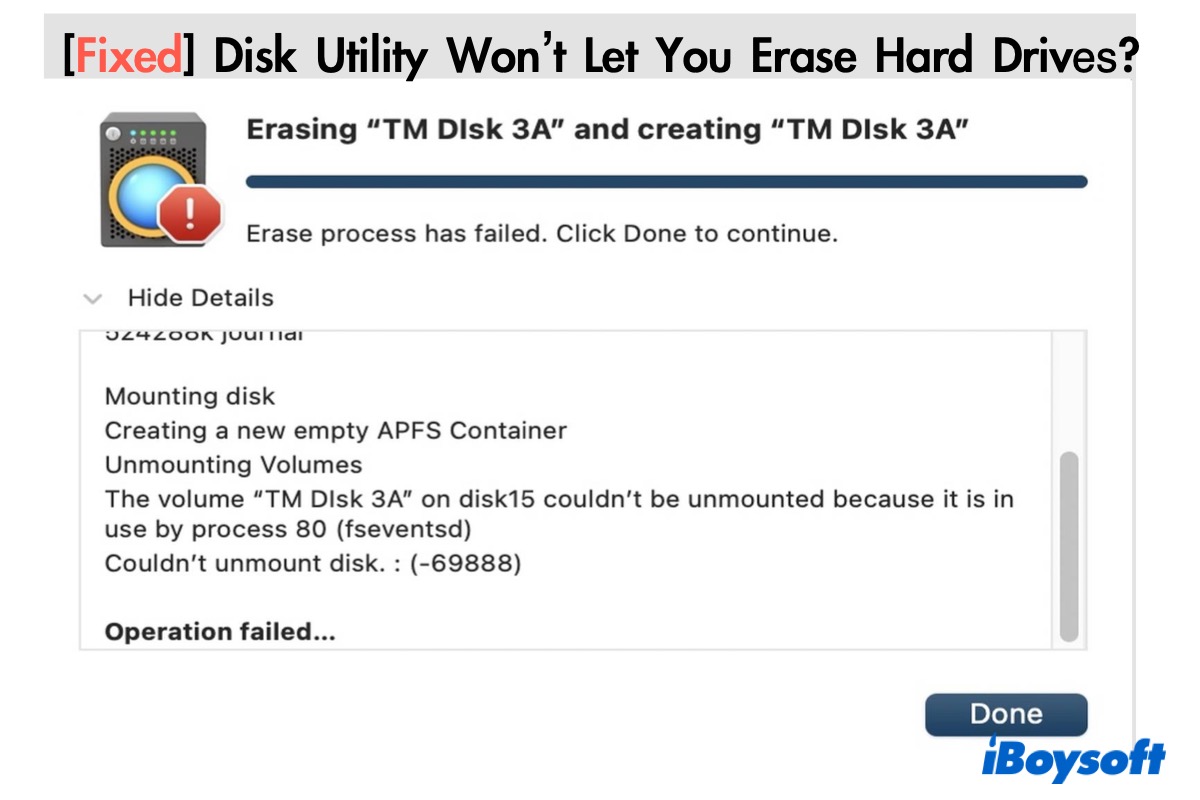
[Fixed] Disk Utility Won't Let You Erase Hard Drives
Disk Utility won't let you erase hard drives? This post includes all possible solutions to fix the "Erase process has failed" error, and the Erase button grayed out in Mac Disk Utility. Read more >>
Reddit discussion on how to covert APFS to exFAT
The OP in the following post has tried to format an APFS external hard drive to exFAT, but only to find that there is no exFAT option in Mac Disk Utility, there are only APFS, APFS (encrypted), APFS (case-sensitive), and APFS (encrypted, case-sensitive) to choose from.
How do I format an external hard drive to exFAT on Mac?
by u/FactoryBuilder in applehelp
From the discussion, it seems that the OP selected volume within the APFS drive, so there are only APFS formats available. The right way to convert APFS to exFAT is selecting the entire drive to erase, then, you can see the exFAT option from the drop-down menu.
How to change APFS to exFAT on Windows?
If that is an external hard drive you need to change APFS to exFAT, and there is only a Windows PC available, you can also make it on Windows. Similarly, you need to back up the drive in the first place, and then proceed to change APFS to exFAT to make the drive work with Windows OS. Here's how:
- Connect the APFS formatted external drive to your Windows PC.
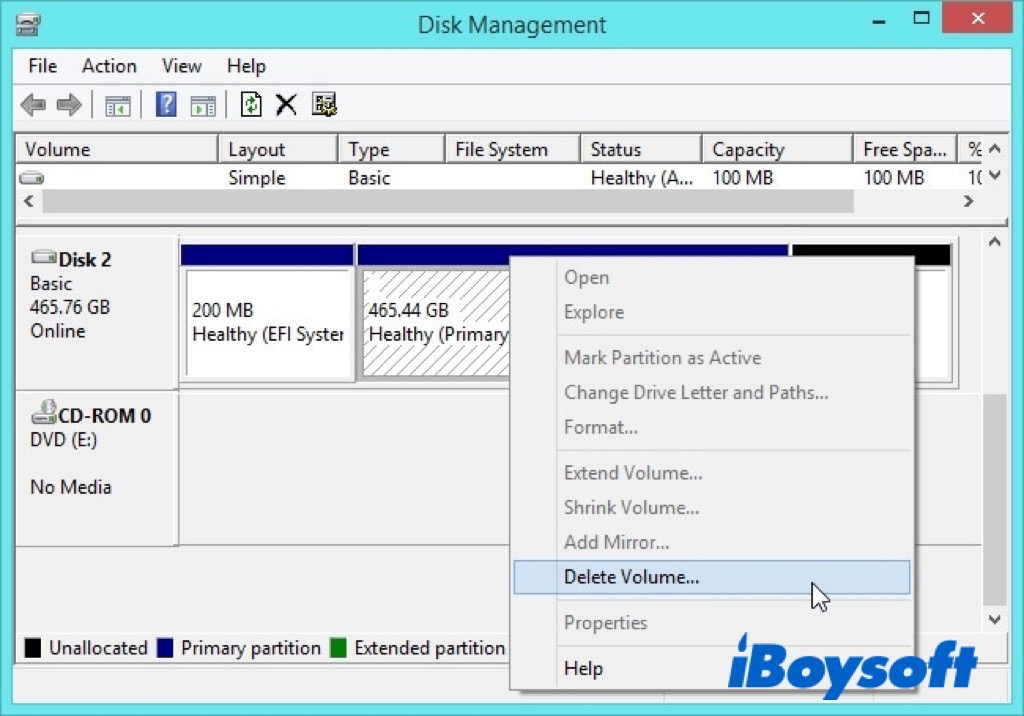
- Press the Windows Key + R to launch the Run prompt and enter the diskmgmt.msc command to load the Disk Management application.
- You can find the connected APFS drive with its EFI partition.
- Select the EFI partition, right-click it and choose Delete Volume.
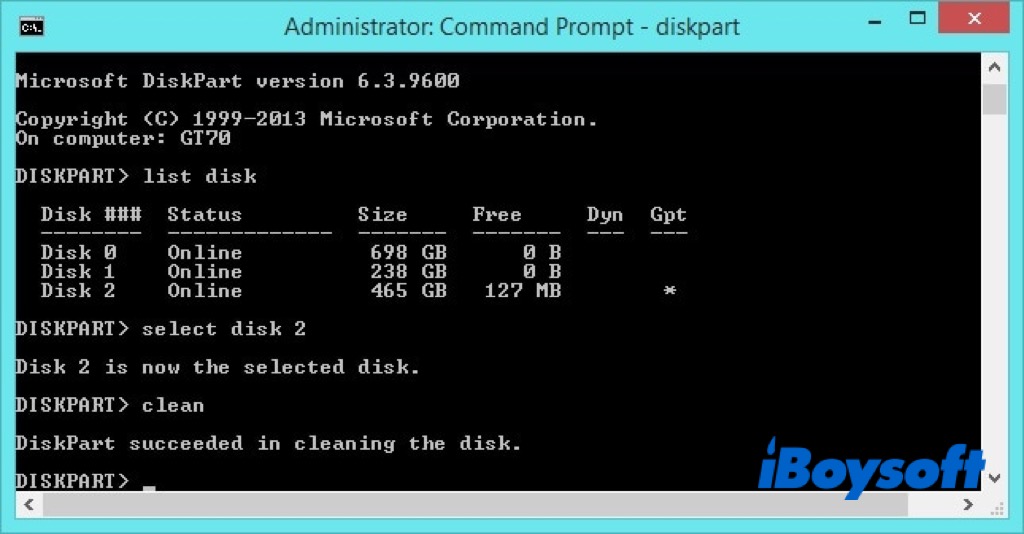
- Launch Command Prompt on your computer as an administrator to format the drive.
- Type and enter the DISKPART command to load the Disk Partition module.
- Enter the list disk command to display all the connected drives and partitions.
- Then type select disk 2(replace 2 with the identifier of your APFS drive).
- Enter the clean command to remove all the existing data from the disk.
- Launch Disk Management again, and find the Mac drive with a Not Initialized message.
- Right-click it to initialize the external disk with the onscreen guide.
- Then the Mac drive turns to be unallocated disk in Disk Management, right-click it again and choose New Simple Volume.
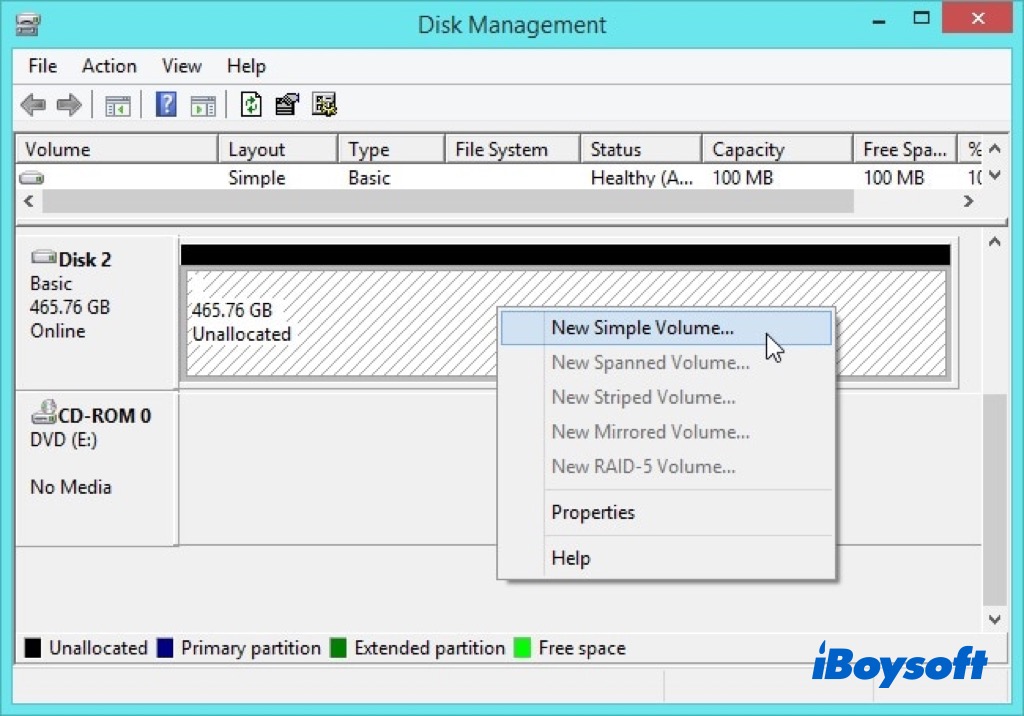
- Follow the new wizard to format the drive, and select exFAT as the file system.
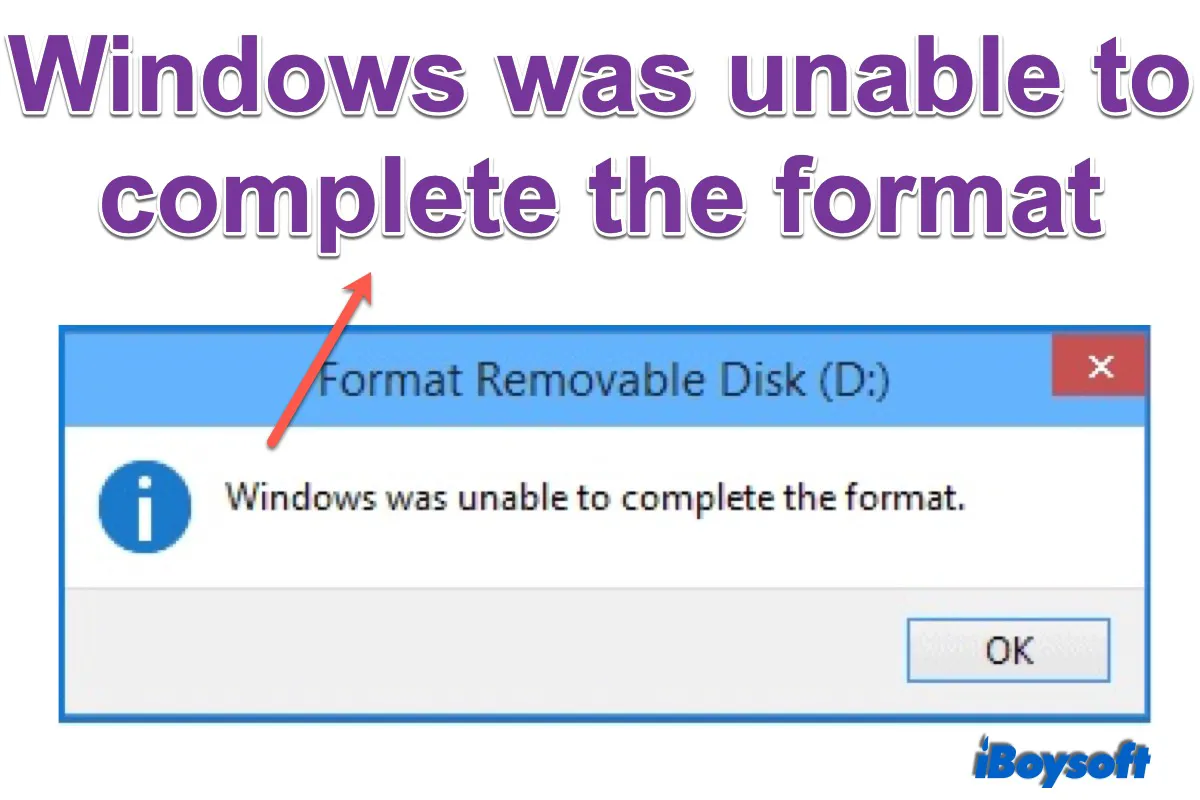
Solutions for Error Windows Was Unable to Complete the Format
This post explains why the error Windows was unable to complete the format appears and provides 6 solutions to fix the unable to format problem. Plus, it also guides you on how to recover data from formatted drives on Windows. Read more >>
If any data loss, try to recover data from formatted drive
Unluckily, you mistakenly formatted a drive with crucial files kept and there is no backup available to retrieve your data. Formatting a drive erases all the content and you can't undo the action. Thereafter comes the data recovery software to recover data from accidental data loss.
iBoysoft Data Recovery stands out among the data recovery software in the market with fast data recovery and a high success rate. It is 100% clean & secure to recover data. This professional data recovery application applies to a variety of situations such as Deleted file recovery, Mac HFS partition recovery, BitLocker recovery, RAW drive recovery, etc. It is pretty simple to use, just connect the drive, scan the drive, and recover the files.
The bottom line
When you need to use the same drive on both Windows and macOS operating systems, you need to change the file system of the drive from macOS-exclusive APFS to a more inclusive one like exFAT. This post guides you on how to change APFS to exFAT on a Mac and a Windows PC to make it work with both. And you should always back up the drive if you have stored important files on it.
Have changed APFS to exFAT to make your hard drive work with both macOS and Windows? Click the button below to share it on your social media!
