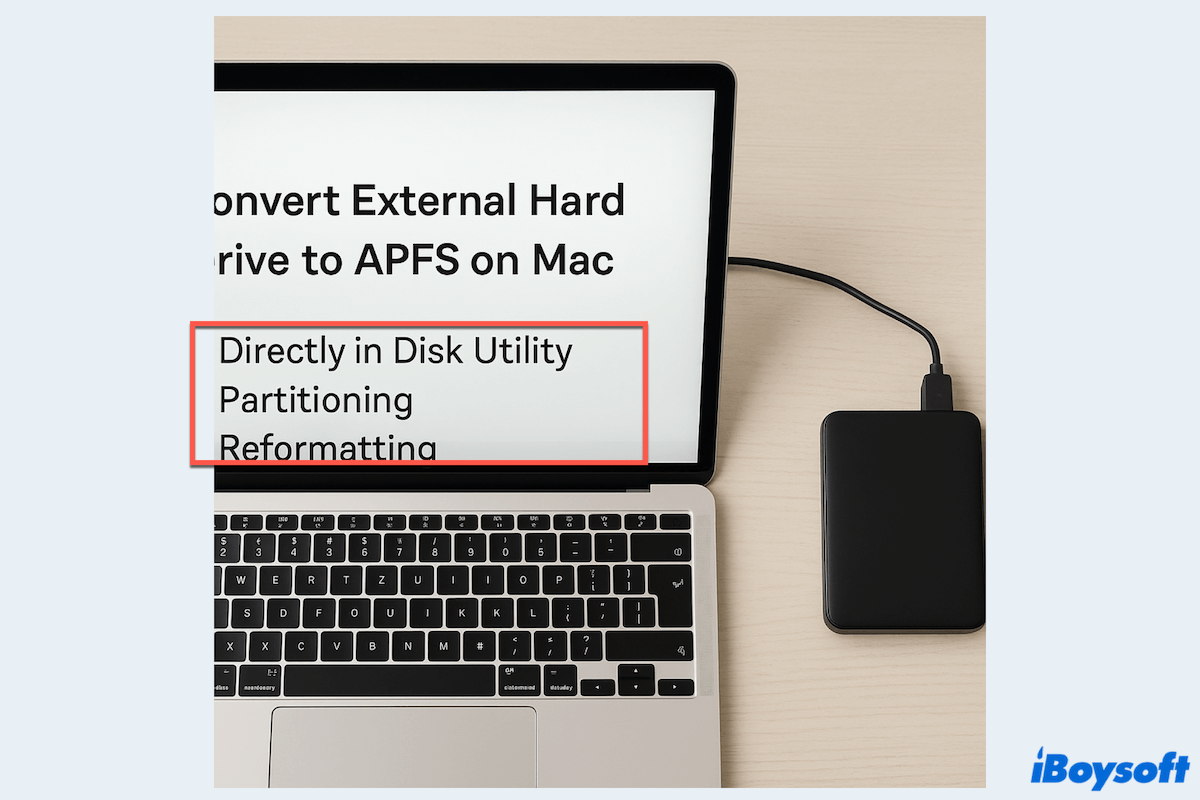
As the most suitable and powerful file system for Mac running macOS High Sierra and later, many people would like to use APFS on their external hard drives to enjoy a better experience. This post will provide 3 ways to convert an external drive to APFS.
- Use Disk Utility (Suits for Mac OS Extended drive)
- Use the partitioning way (Suits for exFAT/FAT32 drive)
- Use the reformatting way (Suits for NTFS formatted drive)
Let's start it~
The preparation before converting the external drive to APFS
Before you proceed to the detailed step of converting the file system of the external hard drive to APFS format, you need to make some essential preparations.
Back up important files on the disk
Whenever you attempt to operate on a drive with your important files kept, especially a startup disk, you should create a backup for it in the first place. Even if some operations, such as converting HFS+ to APFS don't affect the stored data of the drive, you should always be cautious to avoid data loss from a hard drive failure or misoperation.
If you want to clone the whole drive, it is recommended to clone the entire drive. The cloning software, such as iBoysoft DiskGeeker for Mac can help you to create a 1-to-1 copy of the target disk easily and quickly. Free download it if you need this all-in-one disk management tool for macOS.
Upgrade macOS to High Sierra or later
Using APFS requires that your Mac run on macOS 10.13 and later versions; therefore, you need to upgrade macOS on your Mac to be compatible with APFS. Not all Mac models support macOS High Sierra and later versions, so you need to identify which macOS can your Mac run.
If you are prepared well to convert the external hard drive to APFS, now you can follow our steps to dive into different ways, even without losing data on the external disk. Share this post with others with the same needs.
Way 1: Convert external hard drive to APFS directly in Disk Utility
In case the file system of your external hard drive is HFS+, also called Mac OS Extended(Journaled), Apple enables you to convert it to APFS directly in Disk Utility, the built-in macOS disk manager. This method can convert external hard drives to APFS without losing data. Here is how:
- Connect the external hard drive to your Mac.
- Open the Disk Utility tool from Finder > Applications > Utilities.
- Tap the View button and choose Show All Devices.
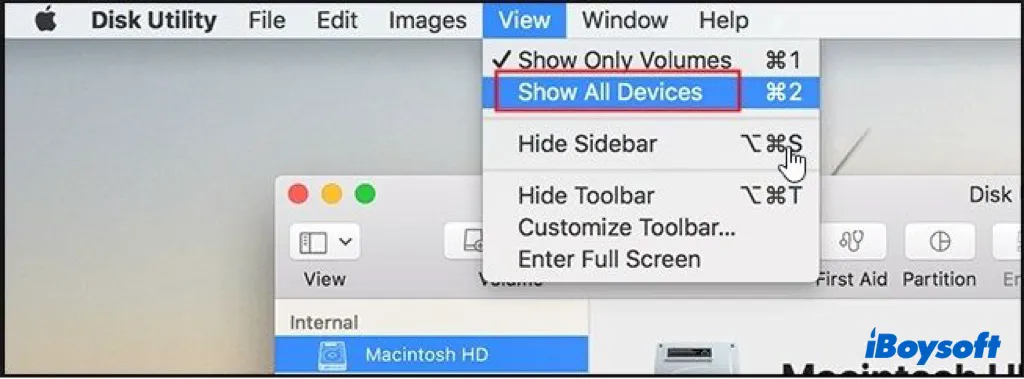
- Find and highlight your external drive on the left sidebar; the drive information displayed on the right side tells you it is an HFS+ volume/partition.
- Control-click the HFS+ volume and choose the Convert to APFS option on the menu.
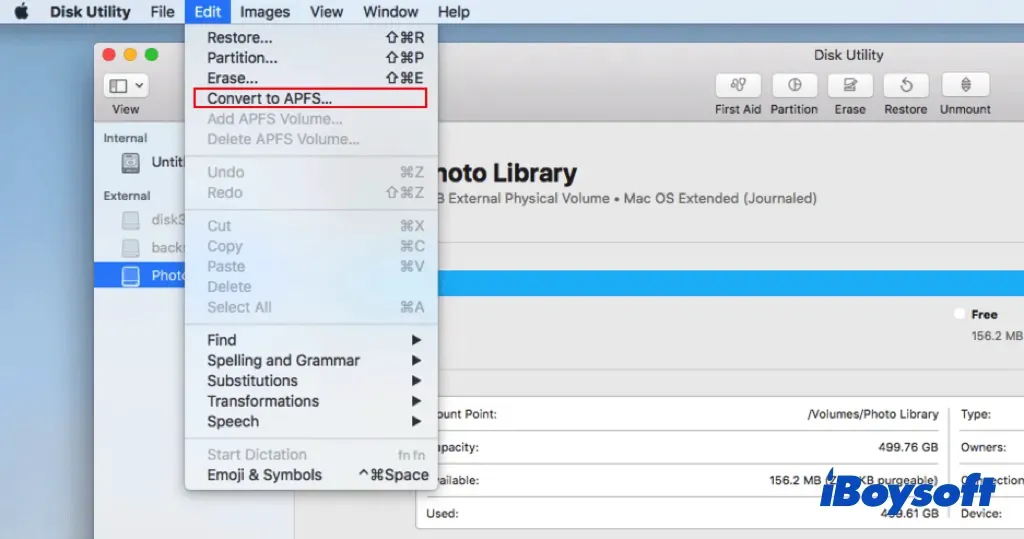
- Tap on the Convert button to convert the external drive to APFS.
- When it completes, you can use the APFS external drive on your Mac now.
If the above steps help to convert the external hard drive to APFS without losing data, share it with more by clicking the button below.
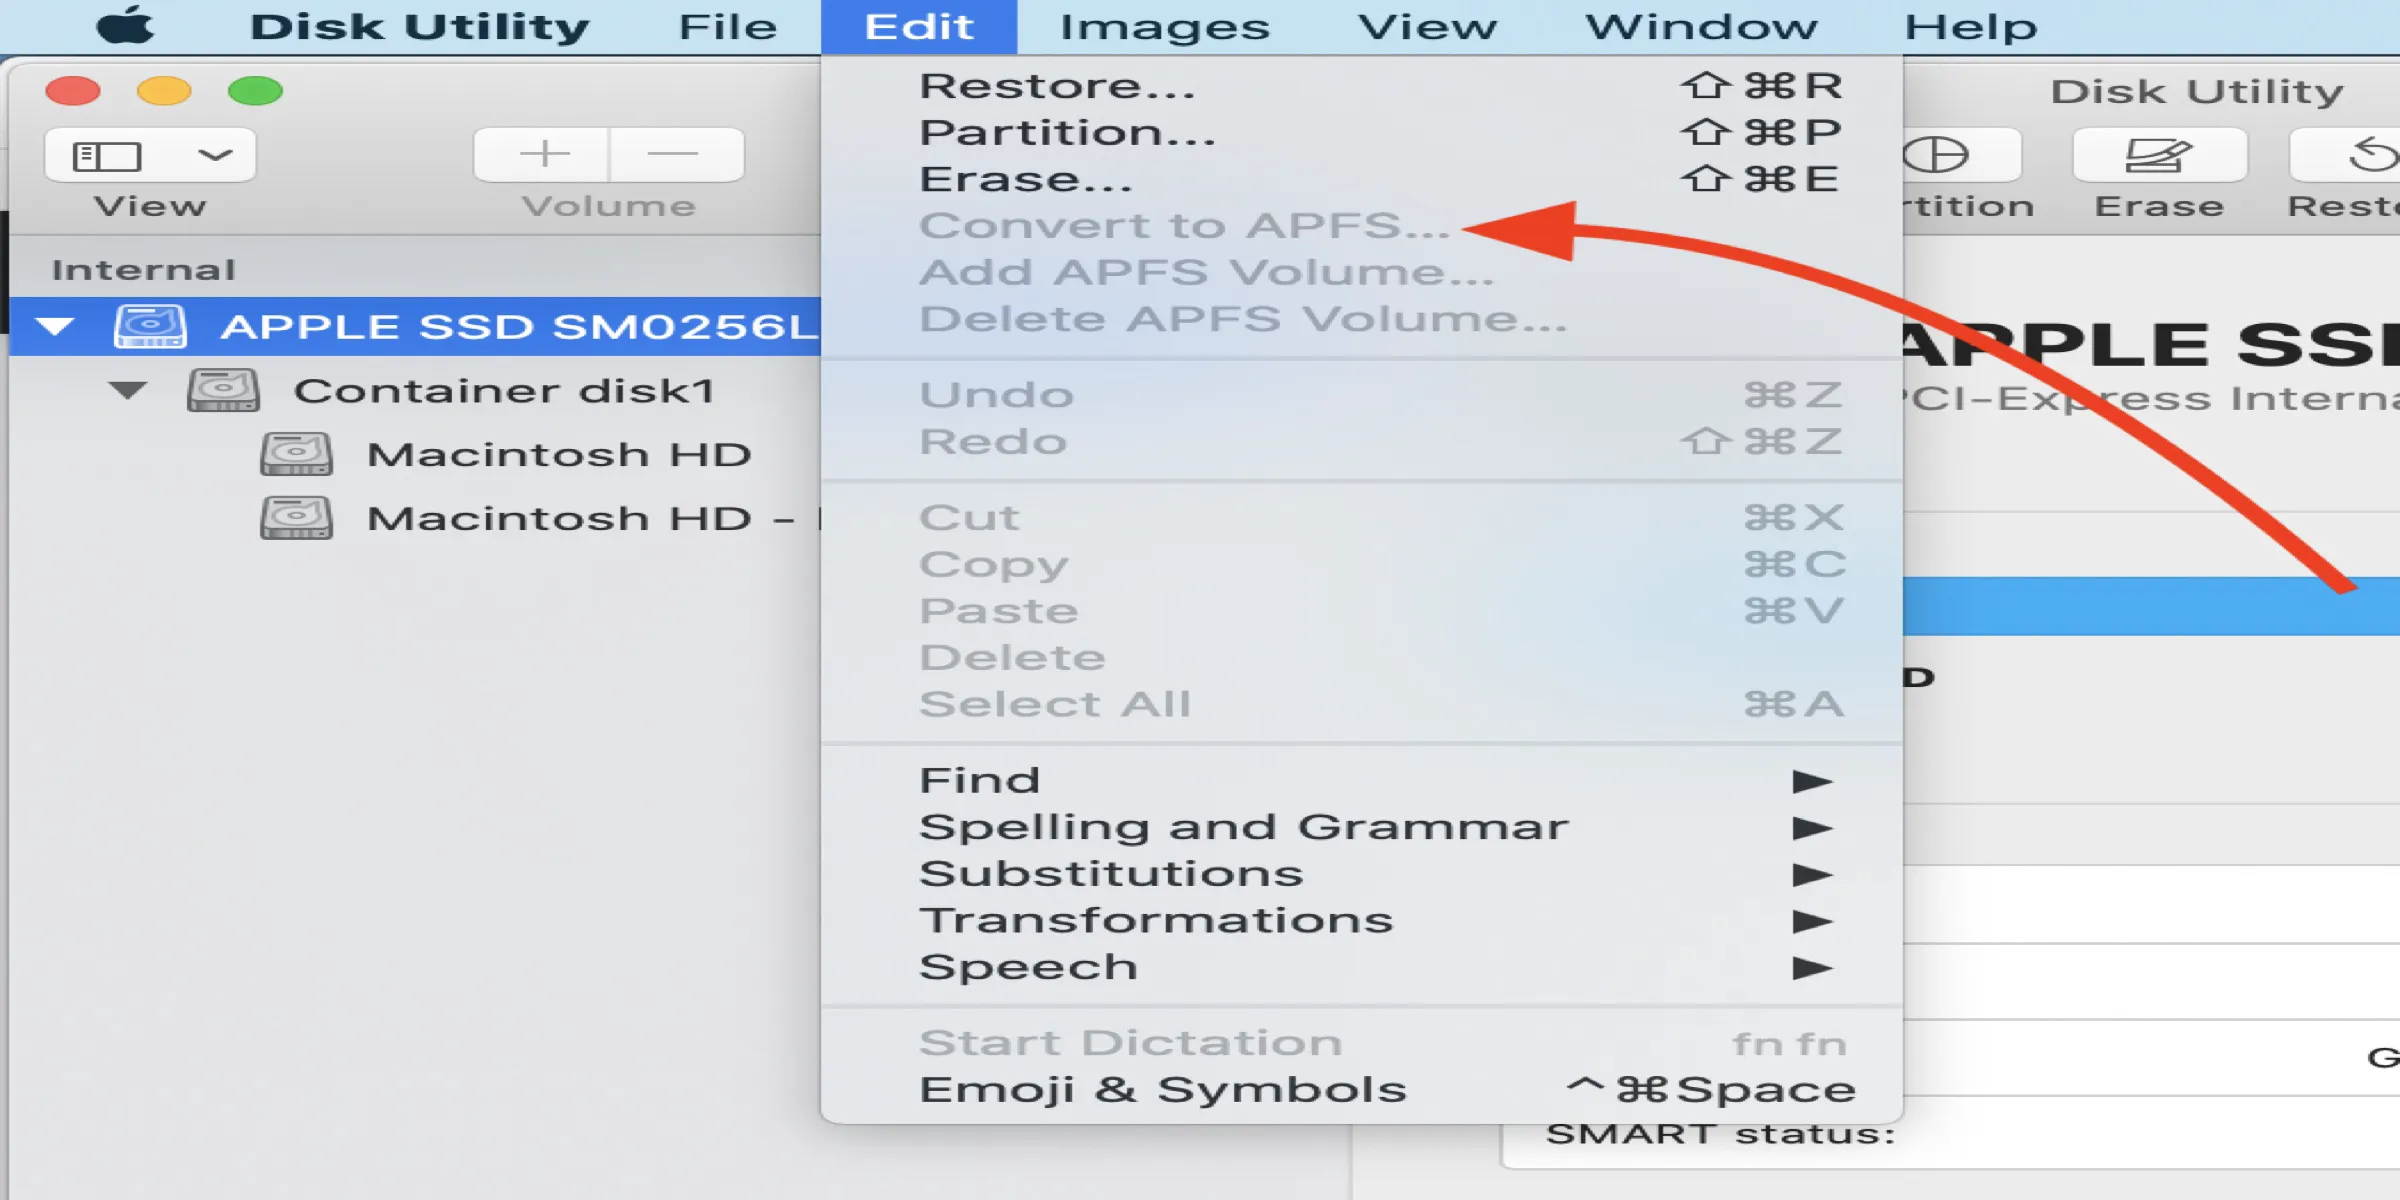
Convert to APFS Option is not Available or Greyed Out in macOS
This article will show you how to fix the "Convert to APFS" option that greyed out or is not available in the Disk Utility issue. Read more >>
Way 2: Convert external hard drive to APFS by partitioning
Perhaps the file system of the external hard drive is exFAT or FAT32, a format compatible with both Windows and macOS, then there is no Convert to APFS option you can use to convert the external drive to APFS. But you can partition a hard drive on a Mac. Here are the steps to partition a drive on a Mac.
- Finder > Applications > Utilities > Disk Utility.
- Click View and choose Show All Devices to display all drives on the left side.
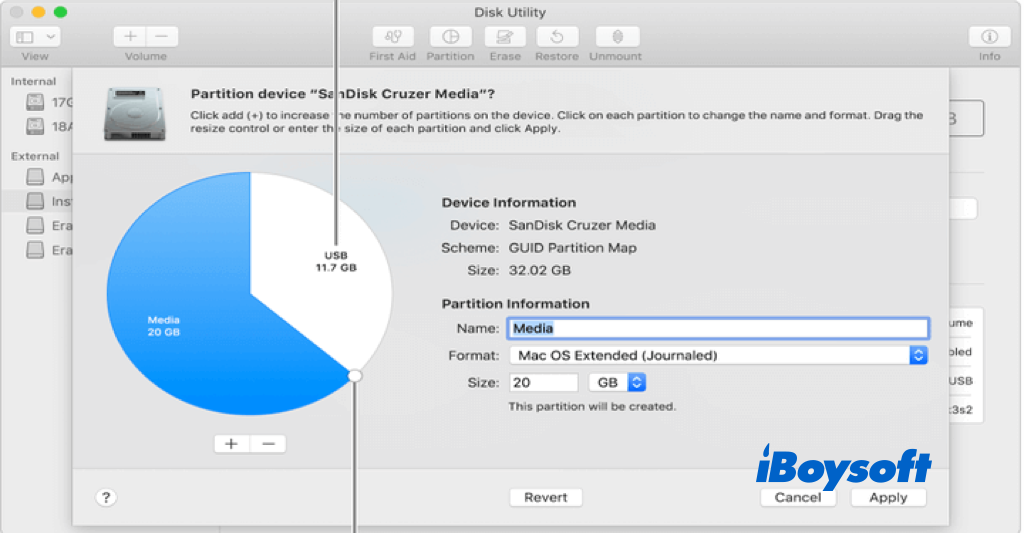
- Select the external hard drive on the left panel, and choose the Partition option on the toolbar of Disk Utility.
- Make sure the scheme listed for the device information is "GUID Partition Map".
- Name the drive and choose Mac OS Extended (Journaled) from the format drop-down menu.
- Click Apply to partition the external hard drive.
- Now continue to convert HFS+ to APFS with the same steps in way 1.
Way 3: Convert external hard drive to APFS via reformatting
For file systems like NTFS, you can only read the drive on a Mac — you can't move, copy, add, or delete files. You also can't directly convert or partition an NTFS drive to APFS on macOS because it's not fully supported. To use the drive with full access, your only option is to reformat it to APFS, which will erase all data.
If you want to use the same drive on both Mac and Windows without losing data, consider using a professional NTFS for Mac tool to enable full read/write access.
iBoysoft NTFS for Mac automatically mounts the NTFS drive on Mac in read-write mode, enabling you to access the NTFS drive on Mac without any limitations, just as you use the drive on a Windows PC. You can view, copy, move, and edit NTFS files on a Mac without formatting the drive.
(1) Reformat the external drive to APFS with Disk Utility
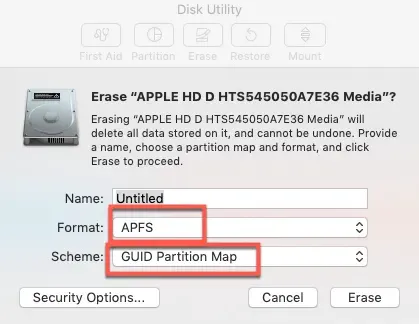
- Connect the NTFS-formatted external hard drive to your Mac and open Disk Utility.
- Click the View button and select Show All Devices.
- Under the External area on the left, select the target external hard drive.
- Use the Erase button of Disk Utility to format the NTFS drive.
- Name the drive as you prefer, then choose the format as APFS.
- Choose Erase to start the reformatting process.
(2) Reformat the external drive to APFS with Terminal
- Finder > Applications > Utilities > Terminal.
- Type diskutil list and find your external drive's name.
- Type diskutil eraseDisk APFS "NewDriveName" diskN.
(Replace NewDriveName with your desired name and diskN with your disk identifier.) - You can optionally add encryption or case-sensitivity.
Have you got an APFS external hard drive now? If so, share this useful post with more people.
The bottom line
We provide 3 ways to convert external hard drives to APFS on Mac. If the file format of the external drive is Mac OS Extended (Journaled), you can directly convert the external hard drive to APFS without losing data in Disk Utility. For an exFAT/FAT32-formatted drive, you can change the file system by partitioning. In case it is an NTFS drive you want to change to APFS, you can use an NTFS driver or format it to APFS.
FAQs about converting external drive to APFS
- QHow to create APFS volume on an external hard drive?
-
A
Use Disk Utility > Select your external drive > Click Partition or Add Volume > Choose APFS format > Confirm.
- QShould I use APFS for external SSD?
-
A
For macOS, APFS is optimized for SSDs and offers better performance and features like snapshots.
- QWhat is the best format for Mac external drive?
-
A
APFS for SSDs used with macOS only; Mac OS Extended (Journaled) for HDDs or older macOS; ExFAT for cross-platform use.