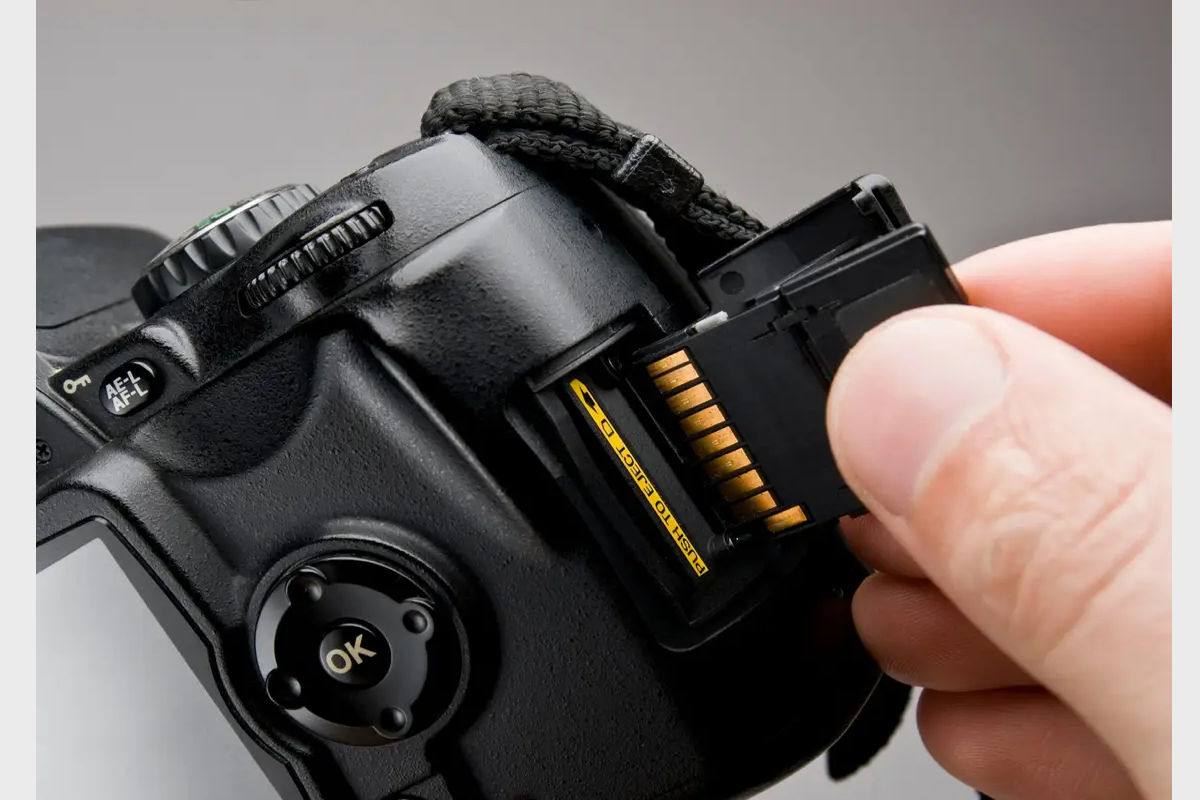
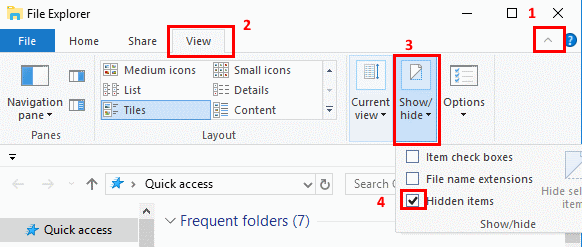
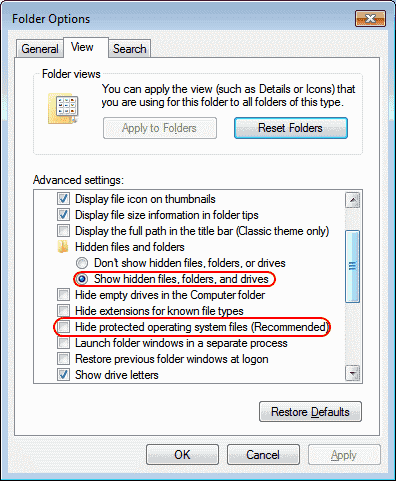
Frustration hits you when you insert the SD card into your camera only to find that pictures on the memory card not showing up. While the reasons that make your pictures on the SD card invisible are various, you can take a quick glance at the reasons that cause your SD card files not showing on the camera here first:
- Poor connection between your SD card and the camera
- Pictures on the SD card are set as hidden files
- Pictures on the SD card are deleted accidentally
- SD card is formatted
- SD card file system is corrupted or damaged
- SD card is encrypted or write-protected
- Sd card is physically damaged
Don't be puzzled by the causes listed above, this article offers you comprehensive solutions to handle pictures disappeared from SD card on the camera. Moreover, you can get free data recovery solutions to restore them with simple operations if you suffer from any unexpected files or data loss.
Case 1: Poor connection between the SD card and camera
Sometimes, unstable or poor contact between the SD card and your camera makes your camera fail to detect or recognize the SD card, so you find that photos on the SD card not showing on the Canon camera.
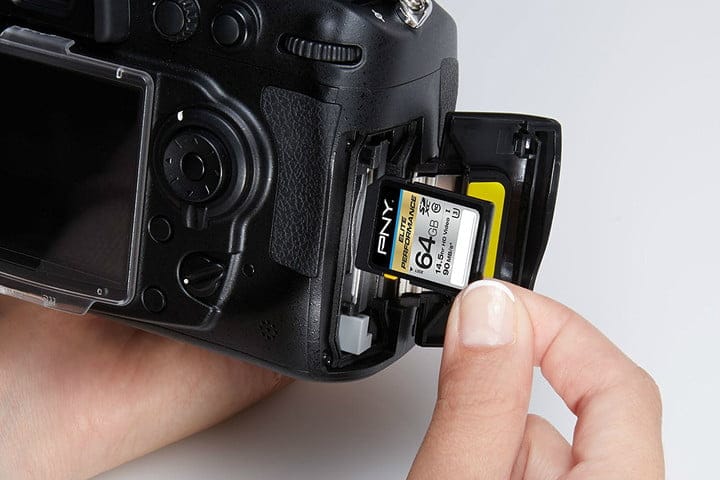
To solve the connection fault, you can try an additional USB port or SD card adapter to bridge your SD card to the camera instead. Or, you can insert the SD card into another camera straightforwardly to check if your pictures show on it.
No matter whether you try a USB port/SD card adapter to make a new connection or you insert the SD card into an alternative camera, it is the connection's fault if you can access all pictures on the alternative camera without a hitch.
If you still cannot view any SD card pictures on your camera, don't be upset, you can get them showing on your camera with the following professional approaches.
Case 3: Pictures on the SD card are deleted or the SD card is formatted
Once you accidentally delete photos on your SD card or format your SD card on Windows, the photo files stored on it will undoubtedly be erased. You can read the following guidelines to know how to fix if SD card photos are deleted or the SD card is formatted.
Recover deleted photos on the SD card in Recycle Bin
Accidental deletion or complete cleanup of the SD card on your computer takes all your photos away so you cannot view them on your camera. However, you can restore them back from the Recycle Bin or Trash on your computer if you have not emptied your Recycle Bin yet or if the cleanup work is carried out in 30 days.
- Double-click the Recycle Bin icon on the desktop to open it.
- Select the deleted photos you want to recover.
- Right-click the file or folder.
- Select Restore. Or you can go to the Manage tab in Recycle Bin window and click Restore the selected items.
These operations will recover the photos to their original location. You can also drag the file to the desktop or another location.
Recover deleted photos with iBoysoft Data Recovery Software
If you force delete photos with the Shift + Delete keys or empty the Recycle Bin, you can only recover them with professional iBoysoft Data Recovery software. In addition, if the SD card is formatted but non-overwritten, the pictures can be recovered also with this fantastic toolset.
iBoysoft Data Recovery software is designed with advanced disk scanning and recovery algorithms to recover deleted files more successfully. It is fully compatible with Windows 11/10/8/7/Vista/XP and Windows servers.
You can apply it on your PC to recover deleted photos, recover unsaved or deleted PPT files, Office documents, videos, audio, etc from unmounted, unreadable, inaccessible, corrupted SD cards, USB drives, and other external hard drives.
- Download and install iBoysoft Data Recovery software on your computer.
- Insert the SD card that your pictures have disappeared to your PC.
- Launch this data recovery helper and choose Data Recovery Module to recover lost photos from the corrupted or formatted SD card.

- Select your SD card and click Next to start scanning for your deleted or lost picture files.
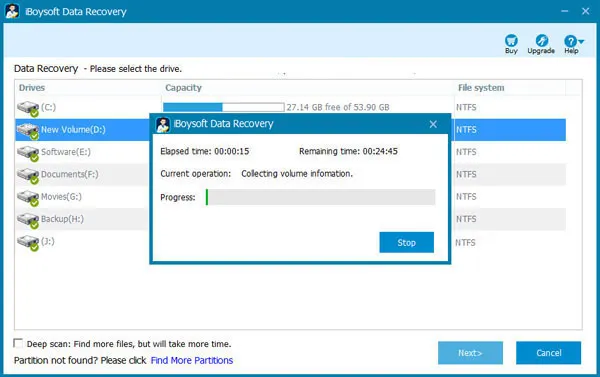
- When the scanning process ends, you can control-click the files and select Preview to check your wanted photos in advance.
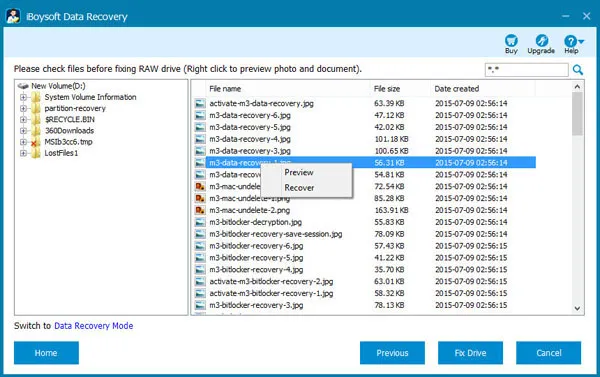
- Select the checkbox in front of the files you want to restore and click the Recover button. Note that you should save the recovered results to another drive in case you suffer from data loss again.
You can also select RAW Drive Recovery mode to perform SD card RAW recovery before you want to format the RAW SD card for further use.
If iBoysoft Data Recovery Software recovers all your photos back, why not share this excellent tool to help more people?
Case 4: The SD card file system is corrupted or damaged
If your SD card is corrupted or damaged, it's inevitable that you can view no photo on your SD card when you insert it into the camera. This article leads you through how to fix a corrupted or damaged SD card in this part.
Run CHKDSK to repair the SD card
CHKDSK is a powerful and versatile toolset used to fix any tiny errors on your storage devices. It is able to find out bad sectors on your SD card and mark them as "bad" to avoid their later uses, which indicates part of your files will be lost.
Therefore, previous data recovery or backup is indispensable before you want to run this wonderful toolset.
You can walk along the following instructions to run CHKDSK to check and repair the disk errors on your PC:
- Insert your SD card into your PC.
- Press Windows + X keys on your keyboard to launch Command Prompt or PowerShell.
- Type the following command line to fix the file format of your SD card, change the drive letter to your SD card letter, and then hit Enter to run the command line.chkdsk /f drive letter
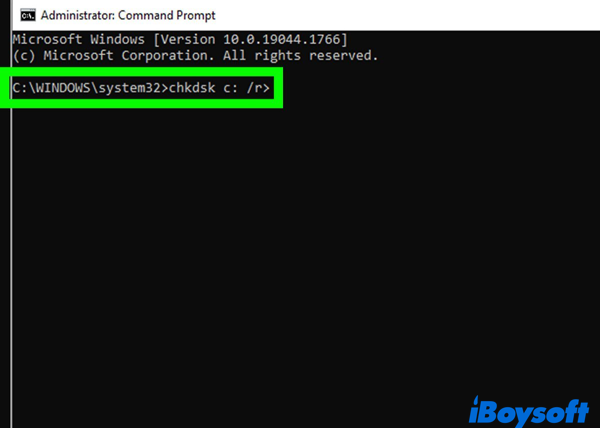
The /f characters enable CHKDSK to find the bad sectors and attempt to repair the readable information on your SD card, while /r characters go deeper to repair the disk errors and recover your files. You can run them both or either according to your requirements.
However, CHKDSK's function is limited and you may receive the notification that CHKDSK is not available for the RAW drive sometimes. Hence, a method to format the RAW drive is the only fix if you want to use the SD card in the future.
Format the SD card
Facing an incurably corrupted or damaged file system, formatting is the last solution. You can perform the format task easily with the following guidelines here:
- Connect your SD card to the computer device.
- Go to This PC and control-click This PC on your computer.
- Select Management and choose Disk Management from the dropdown menu.
- Locate your SD card and right-click it in Disk Management.
- Select Format from the context menu.
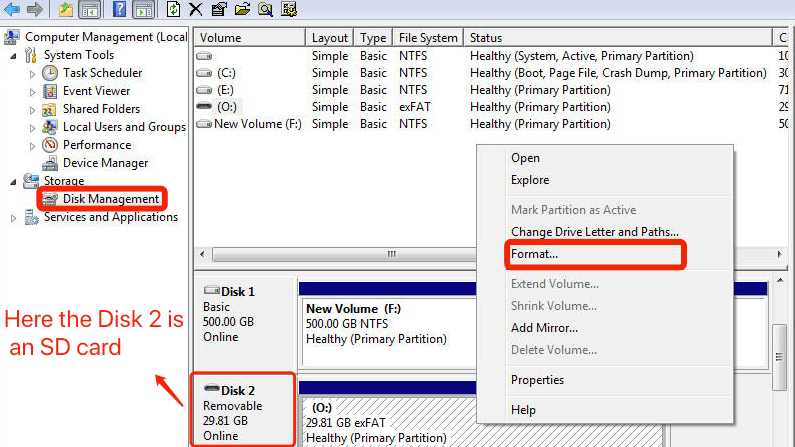
- Input all needed information and make sure Quick Format is checked.
- Click Start to begin formatting, and click OK when the formatting process ends.
With a new file system, you can use your SD card to store photos, videos, audio, presentations, Word documents, Excel files, PDFs, and so on.
Thanks in advance for sharing this post on your social platform.
Case 4: SD card is encrypted or write-protected
Once your SD card is encrypted or write-protected, it's impossible for you to view or access the pictures housed on your SD card. You, therefore, need to decrypt your SD card or remove the write protection first before you make your pictures show on the camera.
Decrypt the SD card on your computer
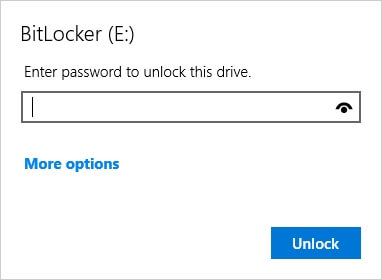
You can access a BitLocker-encrypted drive either using the BitLocker password or the BitLocker drive encryption recovery key. This post teaches you how to unlock the SD card with BitLocker encryption by password here:
- Insert your SD card into your PC and navigate to File Explorer.
- Locate your BitLocker-encrypted SD card.
- Double-click the BitLocker drive or external drive, and enter your password in the pop-up window.
- Click the Unlock button to decrypt your SD card.
Remove the write protection on your SD card
Changing the write-protected settings on your SD card can enable you to have full read and write access to it. This digital write protection on your SD card can be removed using Diskpart on Windows 10/8/7.
Make sure you are the administrator and carefully operate the following actions:
- Click Start in the bottom-left corner of your desktop.
- Type in: command prompt for search and run Command Prompt as an administrator from the results.
- Type in the command line into Command Prompt followed by pressing the Enter key.diskpart
- After allowing it to make changes, type in the command line and press Enter.list disk
- Locate your SD card according to the disk information and remember its disk number.
- Type in the command line and replace "number" with your SD card, then press Enter key.select disk number
- Type the following command line and press Enter.attributes disk clear readonly
You will not encounter the SD card write protection error anymore if you receive the "Disk attributes cleared successfully" message in the command prompt window.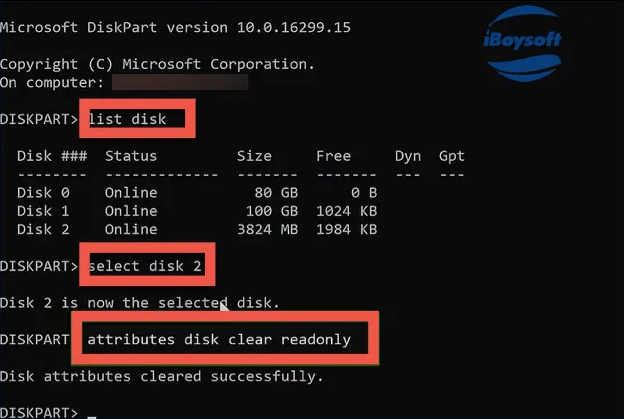
Case 5: SD card has some physical damage
If all of these mentioned approaches fail to make your pictures on the SD card appear on your camera, physical damage is the last possible reason that brings your SD card pictures invisible on your digital camera.
Under such a circumstance, you should bring your SD card to the local professional data recovery center to rescue your files and data as much as possible.
Moreover, replace this damaged SD card with a new one for your device because the damaged SD card is unable to store files and data normally anymore.
Final thoughts
SD card pictures not showing on the camera can hit in various scenarios and approaches to deal with these scenarios are multiple and comprehensive.
Luckily, this article offers you full and effective solutions to fix this problem. Read this post to fix SD card pictures not showing on the camera right now!
Much appreciation for your sharing with others!
