Numerous Mac users are encountering the "The disk you attached was not readable by this computer" error when connecting external hard drives, SD cards, or USB flash drives to their Mac devices.
For some users, the issue occurs consistently with every external drive, while others experience the unreadable disk error only with a specific external drive. If you're facing this disk not readable error on Mac, you're in the right spot. In this article, we provide 7 practical methods to resolve the disk unreadable error on Mac. Keep reading for solutions.
Quick Takeaways:
| Workable Solutions | Step-by-step Instructions | Difficulty Level |
| Recover data from unreadable disk | Download iBoysoft Data Recovery for Mac > Scan unreadable disk for lost data > Recover data to another location | Easy |
| Basic toubleshooting | Check the disk encryption/file system compatibility/uninitialized hard drive/USB port/USB cable/ | Easy |
| Reconnect the unreadable disk | Safely eject the problematic disk > re-plug it back to the Mac | Easy |
| Update drivers | Open Apple menu > System Settings > Software Update > Update Now | Moderate |
| Repair unreadable drive with First Aid | Open Finder > Applications > Utilities > Disk Utility, select the unreadable device, and click First Aid | Easy |
| Initialize the not readable disk | Click Initialize on the error message to open Disk Utility, select the unreadable device, click Erase | Moderate |
| Ask for help | Contact Apple Support or a local disk repair expert | Moderate |
| Consider a replacement | Replace the malfunctioning storage device | Easy |
Different Errors for The disk you attached was not readable by this computer
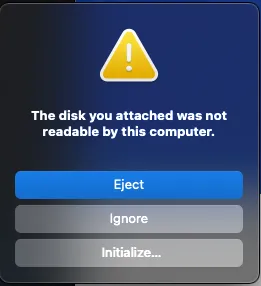
When your Mac operates on macOS Sonoma, Ventura, Monterey, or Big Sur and you plug in an external drive, SD card, or pen drive, an error message appears: The disk you attached was not readable by this computer. The pop-up presents only three options: Eject, Ignore, and Initialize.
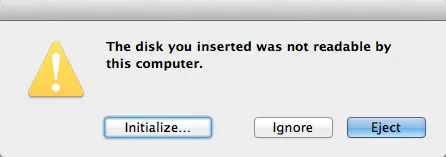
If you're using a Mac computer with Catalina, Mojave, or High Sierra installed, the non-readable error message takes a slightly different form. It will showcase: The disk you inserted was not readable by this computer.
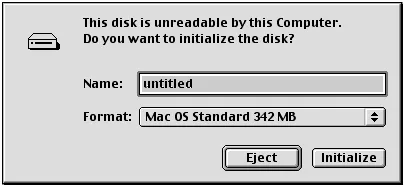
On older Mac OS X versions, encountering an unreadable disk on Mac prompts the message: "The disk is unreadable by this computer. Do you want to initialize the disk?"
Regardless of the specific error message you encounter, accessing files on this storage device becomes impossible. You can attempt the following solutions to repair the unreadable USB on Mac.
Recover data from the unreadable external drive
When macOS encounters difficulty reading the disk, if you've got a backup stored elsewhere, use it to access the data on the external storage device. In case you don't have a backup, consider using professional Mac data recovery software to recover your valuable data, such as iBoysoft Data Recovery for Mac.
As one of the leading Mac data recovery software, iBoysoft Data Recovery for Mac can recover files in different data loss scenarios, including data recovery from unreadable drives, with a high success rate. It can recognize and recover 1000+ file types including documents, videos, audio, emails, and many more from the disk that can't be read on Mac. Featuring a user-friendly interface, iBoysoft Data Recovery for Mac supports quick data recovery from HDDs, SSDs, SD cards, USB flash drives, and more.
iBoysoft Data Recovery for Mac is fully compatible with the latest macOS 14 Sonoma and Mac computer with new Apple Silicons.
Tutorial to recover data from the unreadable disk on Mac:
- Download, install, and launch iBoysoft Data Recovery for Mac software on your Mac.
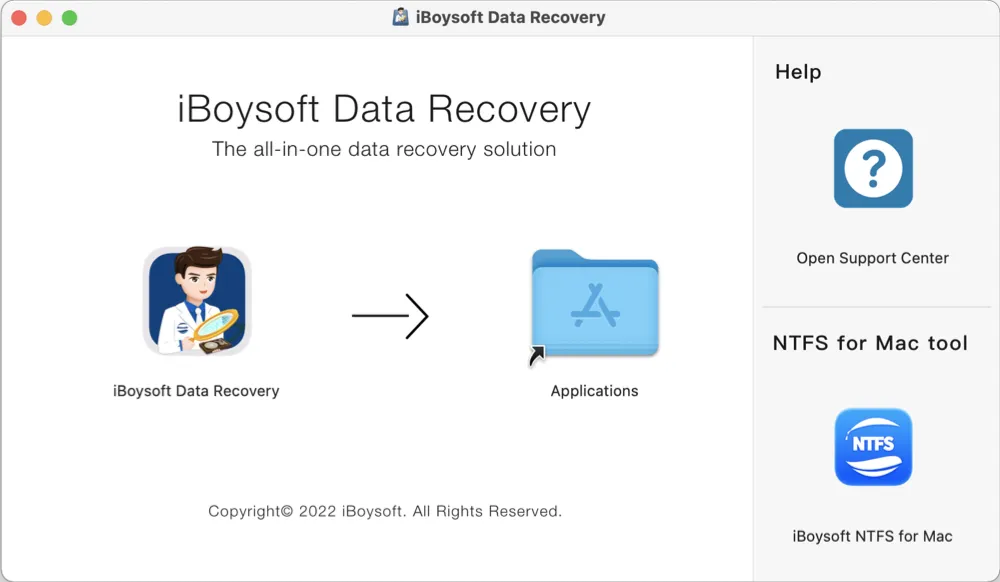
- Connect the unreadable external disk to your Mac, select it from the list from the home window, and click the Search for Lost Data button to start scanning.
- Wait for the scan process to finish. You have the option to pause or stop the process and initiate recovery at any point during the ongoing scan. However, for optimal recovery results, we strongly recommend waiting for the entire process to complete.
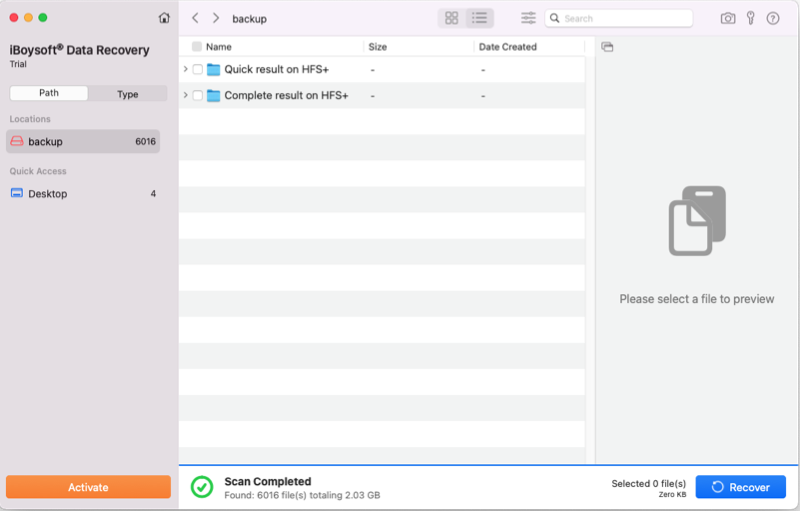
- Once the scan is complete, you can sort or filter the found files based on different parameters if needed. Click the Preview button to check if your wanted file is corrupted.
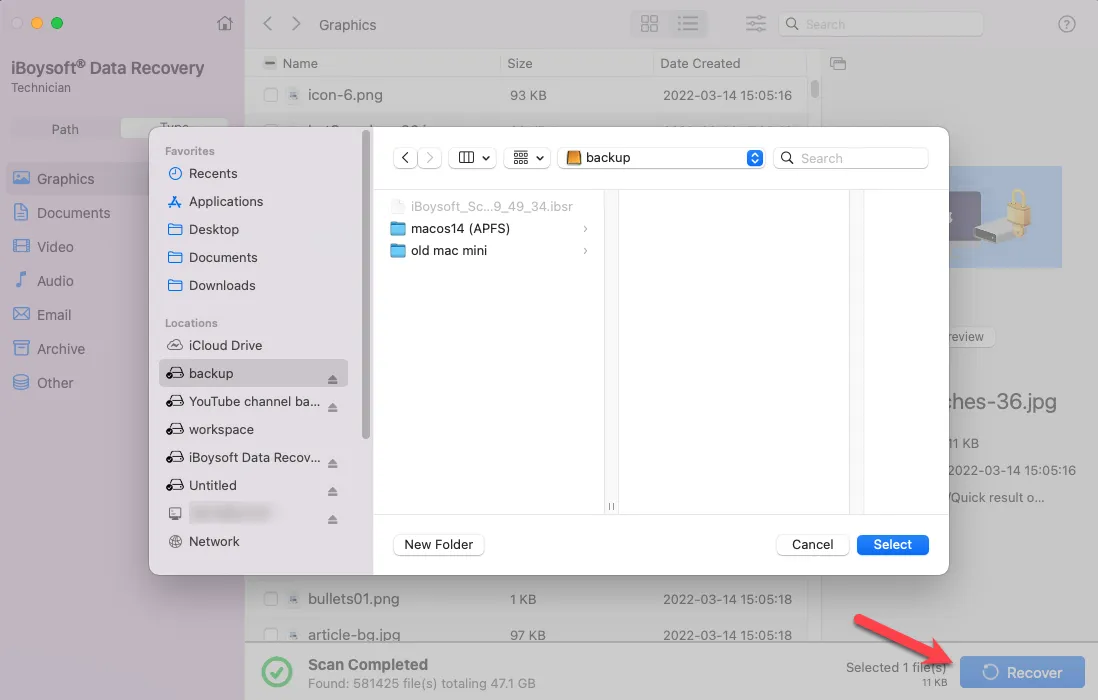
- Choose the files or folders you wish to recover from your unreadable external disk, then click the Recover button to restore them. Keep in mind that you cannot save them back to the malfunctioning external disk; instead, save them to either the Mac internal disk or another external storage device.
Have you recovered your data successfully from the unreadable disk? If you have, help others in the same situation.
Solved: The disk you attached is not readable by this computer
Here, we provide seven methods to resolve the issue of "The disk you attached is not readable by this computer" on your Mac. Feel free to try them one by one until the problem of unreadability is successfully addressed.
- Method 1: Do a basic troubleshooting
- Method 2: Re-insert the external hard drive
- Method 3: Update the drivers on your Mac
- Method 4: Run First Aid to fix the unreadable disk
- Method 5: Initialize the disk to repair the unreadable disk
- Method 6: Ask a professional for Help
- Method 7: Consider a replacement
Start by checking out our video tutorial for a visual guide on fixing an unreadable disk on Mac. If the steps in the video are a bit tricky to catch, don't worry—just keep reading the next part of this article for detailed instructions.
Fix 1: Do a basic troubleshooting
There are six steps for conducting basic troubleshooting to assess whether the unreadable disk (external hard drive, SD card, USB drive, flash drive, etc.) is experiencing an issue.
1. Check if the disk is encrypted
If you come across the disk not readable error while using an encrypted drive, simply open the drive with the appropriate application.
For instance, if the disk is encrypted with BitLocker, macOS may show the error message "The disk you attached is not readable by this computer" unless you have the BitLocker for Mac tool installed. In this case, you can use iBoysoft BitLocker for Mac to easily access the BitLocker encrypted drive on your Mac.
2. Check if the file system is not supported by macOS
Verify the file system of the external drive to ensure it is supported by macOS. If the file system is incompatible with macOS, the inserted disk will not be readable by the Mac. For instance, the ReFS file system is not supported by macOS.
3. Check if the disk is a new hard drive
In the case of a new hard drive, simply click the "Initialize" button after encountering the unreadable disk error. Once initialized, the new hard drive will be operational.
4. Check the disk on another computer
Connect the unreadable disk to another computer, be it Windows or Mac, and verify if it becomes readable.
5. Change the USB cable and USB port
A faulty USB cable or USB port can result in the inserted disk being unreadable by the computer. In such situations, switch to another USB cable or USB port and attempt the process again.
6. Reset USB port
If you suspect that the USB port is causing the issue rather than the device itself, reset the System Management Controller (SMC). It's a simple process, with slight variations depending on your Mac hardware.
Sharing is caring! Your sharing will encourage us to craft better content.
Fix 2: Re-insert the external hard drive
You may want to start by reconnecting the external storage device to your Mac. Safely remove it and then plug it back in. Afterward, try accessing it again to check if the disk you attached is still not readable by this computer on Mac. If the error persists, you can proceed to explore the following solutions.
Fix 3: Update the drivers on your Mac
'The disk you attached is not readable by this computer' can also be caused due to an outdated driver on your Mac. You can check the drivers on your Mac and update them via the following steps:
- Go to the Apple menu and select System Preferences.
- Click Software Update.
- Check for any available updates for your system and applications.
Fix 4: Run First Aid to fix the unreadable disk
A number of Mac users have mentioned that the issue of 'the disk you attached is not readable by this computer on Mac' can potentially be resolved through Disk Utility First Aid. While it may not guarantee a 100% success rate, it's worth giving it a try.
Steps to fix the unreadable disk with First Aid:
- Click Ignore to dismiss the error message "The disk you inserted/attached was not readable by this computer".
- Open Applications > Utilities > Disk Utility.
- In the left panel of Disk Utility, select the unreadable disk.
- Click the First Aid button in the toolbar of Disk Utility.
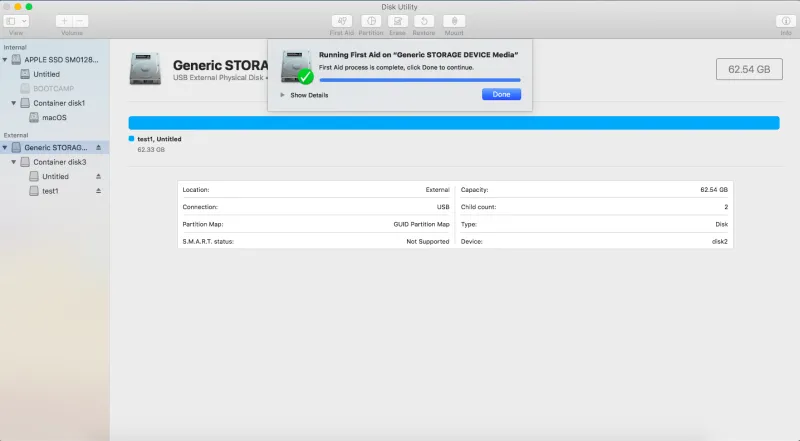
- Click the Run button, First Aid will check the volume for errors and then fix the problem on the unreadable disk if possible.
Wait for the process to finish. If you receive a success message, restart your Mac and check if the disk is now readable. If First Aid repair failed on the external drive, try the next solutions.
Fix 5: Initialize the disk to repair the unreadable disk
If the “The disk you attached was not readable by this computer” issue continues on your Mac, you might need to initialize your disk to provide it with a fresh start. Keep in mind that initializing the disk will erase all data, so it's crucial to perform data recovery with iBoysoft Data Recovery for Mac. Once initialized, your disk will have a new, functional file system with empty storage space.
Steps to repair the unreadable disk by initializing:
- When the initial prompt message 'The disk you attached was not readable by this computer' appears, click Initialize to open the Disk Utility.
- Once Disk Utility is open, from the menu bar, click View > Show All Devices, and you will see a list of drives attached to the system. Select the problematic disk you wish to initialize.
- Click on the Erase tab on the top.
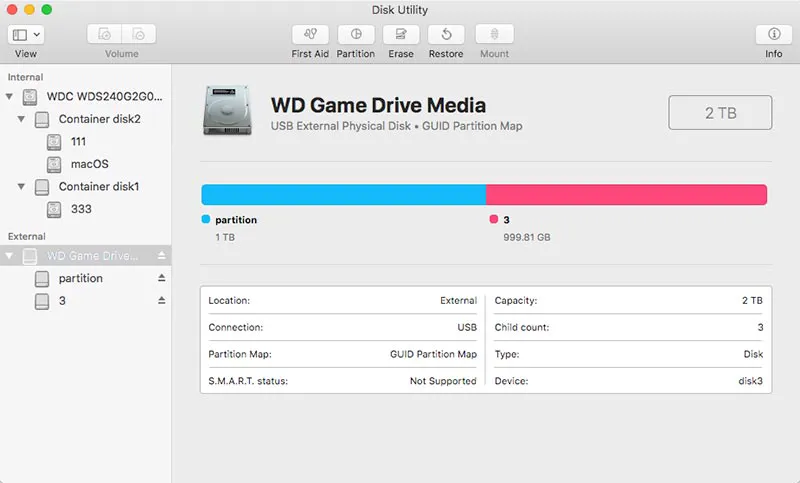
- Name the drive, select a file format, and partition scheme. Click Erase once again. This will format your drive with the correct file system.
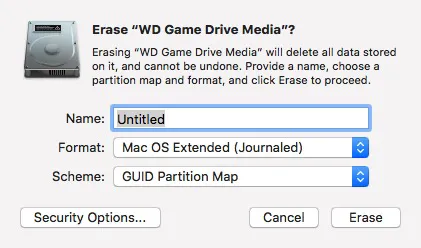
After the formatting process is complete, you can access this disk as normal.
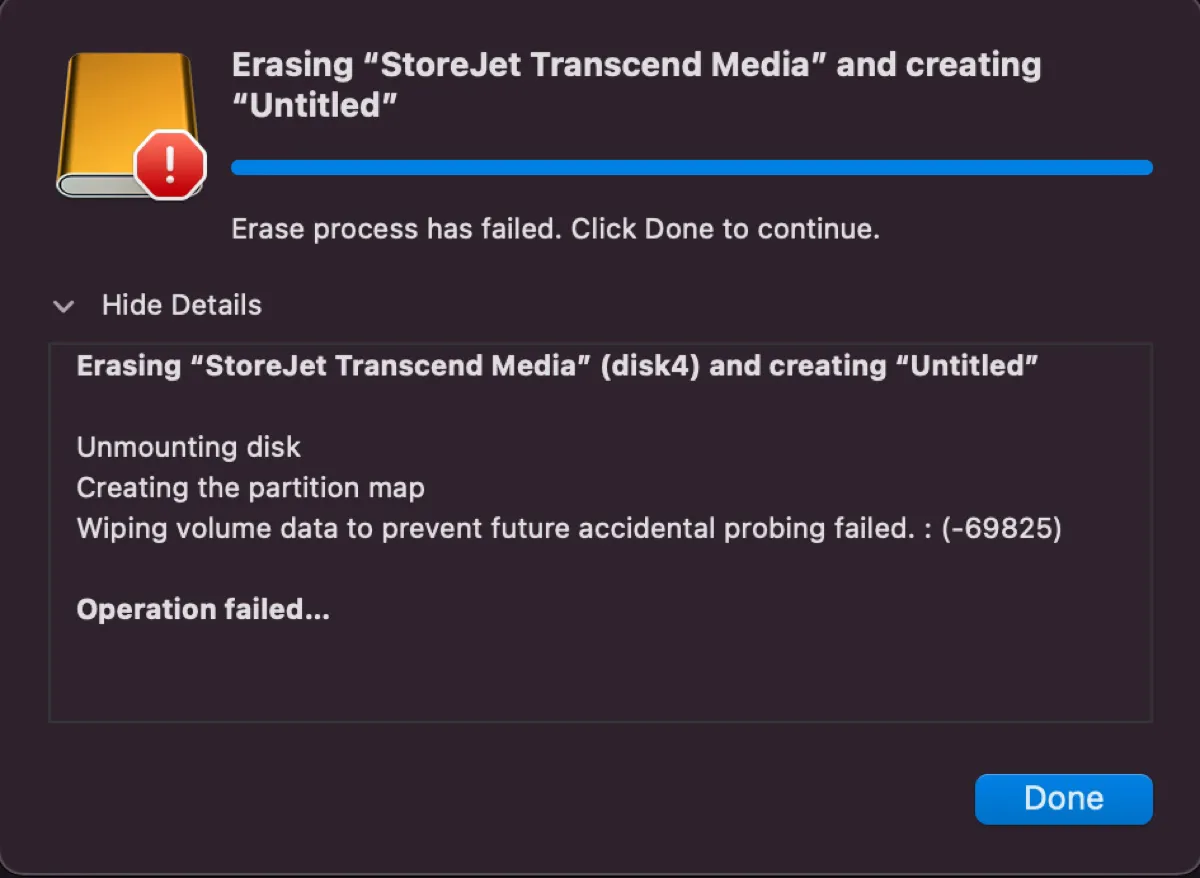
If the error "Wiping volume data to prevent future accidental probing failed" pops up when you're trying to format the drive, keep reading this article to figure out the solutions.
Fix 6: Ask a professional for Help
If you worry that their own improper operations will cause further damage to their hard drives. In this scenario, you'd better take it to a local professional. They can provide accurate guidance to help resolve this error.
Fix 7: Consider a replacement
If you don't require the data and the drive is still under warranty, consider getting the drive replaced or requesting a refund.
It would be so nice of you if you would help us reach more people.
Why does Mac say The disk you inserted was not readable by this computer
Many reasons could cause the disk you attached unreadable by your Mac computer. Namely, they're:
- Virus infection or hardware issue
- The disk is not formatted
- Catalog file corruption
- The disk structure is corrupted or the system files are corrupted
- The file system format of the disk is not supported by macOS
- Disconnecting or powering off the drive without unmounting it
- Experiencing a software lockup while writing to the drive
- Turning the computer off without doing a proper shutdown
- Disk failure - Either the disk itself or just its USB interface may have failed. In this case, a data recovery solution is advisable.
How to avoid the disk not readable error again
1. Eject the external drive properly
Ejecting the external drive improperly can lead to its corruption. If you remove an external drive from the computer while it's in use, it may also get corrupted. Therefore, it's essential to safely remove your external drive from the Mac by selecting the "Safely Remove Hardware" option.
2. Back up important data
Backing up data is the most effective way to prevent data loss. Time Machine is a built-in data backup software for macOS that can automatically back up all your files.
3. Use an advanced file system
For enhanced security control and a lower risk of file system corruption, consider using the APFS or HFS+ file system for your external hard drive, rather than the FAT32/exFAT file system. Additionally, opting for APFS or HFS+ increases the likelihood of successful data recovery in the event of drive corruption.
Conclusion
Don't worry when you come across the error prompt "The disk you attached/inserted was not readable by this computer." Utilize iBoysoft Data Recovery for Mac to safeguard your crucial data. After that, apply the suggested methods to resolve the issue and restore functionality to your external storage device.
If you find this article helpful, please share it with your followers!
- QWill fixing 'The disk you inserted was not readable by this computer' delete my data?
-
A
While certain solutions for an unreadable disk on Mac, like changing the USB cable/port or connecting the disk to another computer, won't erase your data, be aware that other fixes may result in file deletion. For instance, initializing your disk and running First Aid could lead to data loss.
- QWhy is my USB not readable by my Mac?
-
A
If your USB drive is not readable on your Mac computer, the USB port might be the culprit. Consider restarting your Mac or using a different USB port for the connection.
