It is inevitable to transfer some files from your Mac to other devices in daily life. Well, Apple has designed a handy feature called Airdrop to help you share files with ease.
Perhaps, you've never used Airdrop till now. Or, you've forgotten how to use it. In this post, we'll show you the detailed steps about how to turn on AirDrop on your Mac, including MacBook Air, MacBook Pro, Mac mini, etc. Besides, you can also learn about how to use and turn off AirDrop on a Mac.

How does AirDrop Work?
You need to know something before learning how to turn on AirDrop on Mac, which is how AirDrop works.
AirDrop transfers files from one Apple device to other Apple devices via Bluetooth and Wi-Fi functions, and it's particularly worth noting that you don't need to be connected to the router or internet when using AirDrop!
Simply speaking, to use AirDrop smoothly, you need to ensure that both your Mac and the target Apple devices meet the requirements below:
- Bluetooth is turned on.
- Wi-Fi is turned on.
- 2 Devices are within about 30 feet / 10 meters(effective range may vary depending on the environment).
Do you wanna further improve your efficiency when transferring files via AirDrop? iBoysoft MagicMenu is highly recommended.
iBoysoft MagicMenu, a lightweight tool and right-click enhancer, allows you to customize the right-click context menu on Mac. It can help you use AirDrop to transfer files with fewer steps and less time.
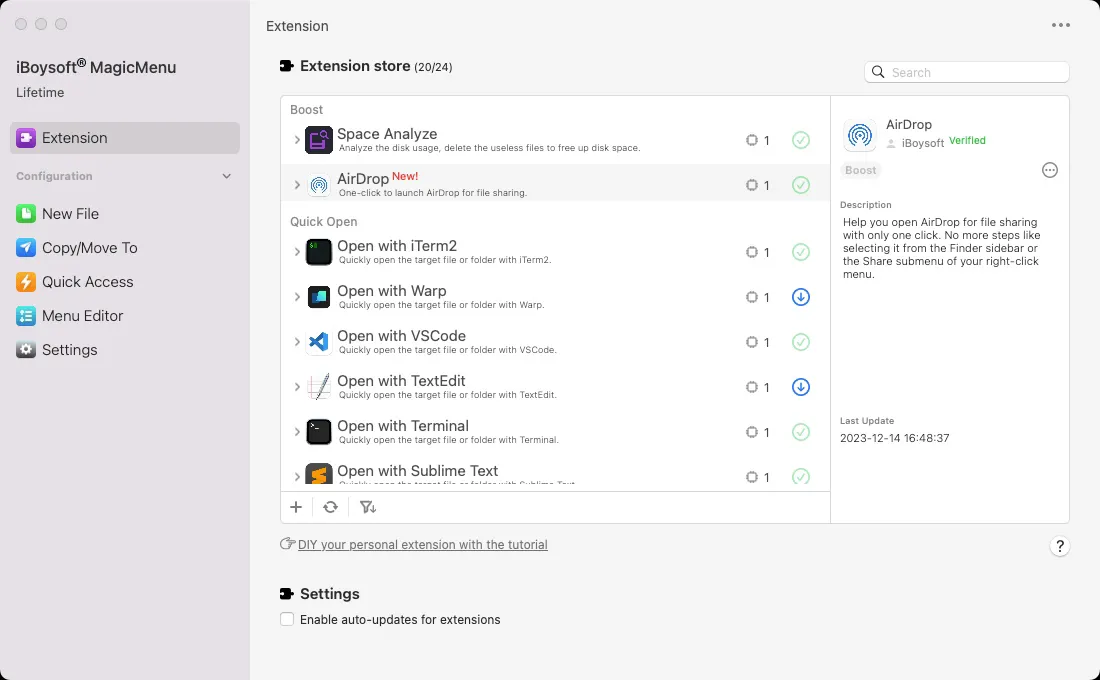
- Download and install iBoysoft MagicMenu, then launch the software.
- Select Extension on the left sidebar.
- Find AirDrop and click the download icon next to it to add this function to your right-click menu.
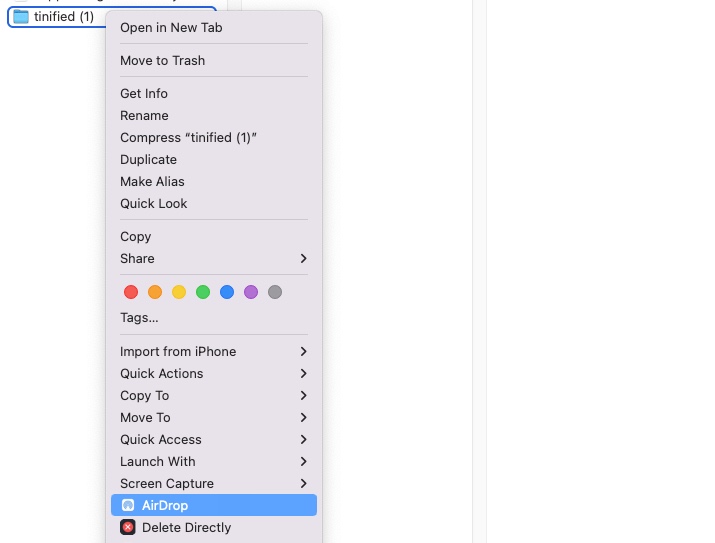
- Right-click on the file or folder you want to transfer and click Airdrop.
How to turn on AirDrop on Mac?
If you want to share files from your Mac to other Apple devices or anyone else prepare to send you some files via AirDrop, the first thing you need to do is to enable it on your Mac.
Follow the steps below to learn how to turn on AirDrop on Mac:
- Open Finder and move to the top Finder menu to select Go > AirDrop. Or, Open Finder and select AirDrop at the left sidebar of the Finder window.
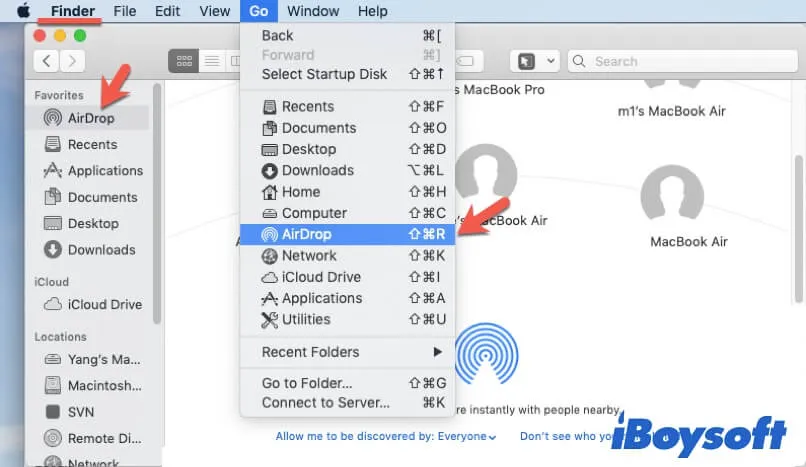
- Select "Everyone" or "Contacts Only" beside "Allow me to be discovered by" at the bottom.
Note: If you choose Everyone, any Apple devices within the range can send files to your Mac via AirDrop. If you select Contacts Only, only the devices in your Contacts list can share files with you.
You can also turn on AirDrop in Finder with the keyboard shortcut Command Shift R. After reading, if you've learned about how to turn on AirDrop on your Mac, just share the way with your friends.
How to use AirDrop on Mac?
As AirDrop uses Bluetooth to find target Apple devices and utilizes WiFi to share files, you need to ensure that both your Mac and the target Apple devices connect to the same WiFi and turn on Bluetooth.
Then, you can follow the following steps to share documents, videos, folders, or other files from your Mac to another Mac or other Apple devices or conversely.
How to airdrop from Mac to iPhone
- Turn on AirDrop on the target iPhone.
- Open Settings > General > AirDrop and select Contacts Only or Everyone according to your situation.
- Turn on WiFi and Bluetooth on the iPhone in Settings.
- Right-click the content ( a document, video, or so) on your Mac that you prepare to share and select Share > AirDrop.
- Click the target iPhone from the list to send the content from your Mac.

Tips: Conversely, you can adopt the steps above to airdrop from iPhone to Mac.
How to airdrop from one Mac to another Mac
- You need to turn on AirDrop on the other Mac machine as the step mentioned above.
- Right-click the content you want to share and select Share > AirDrop.
- Select the target Mac computer to transfer the files.
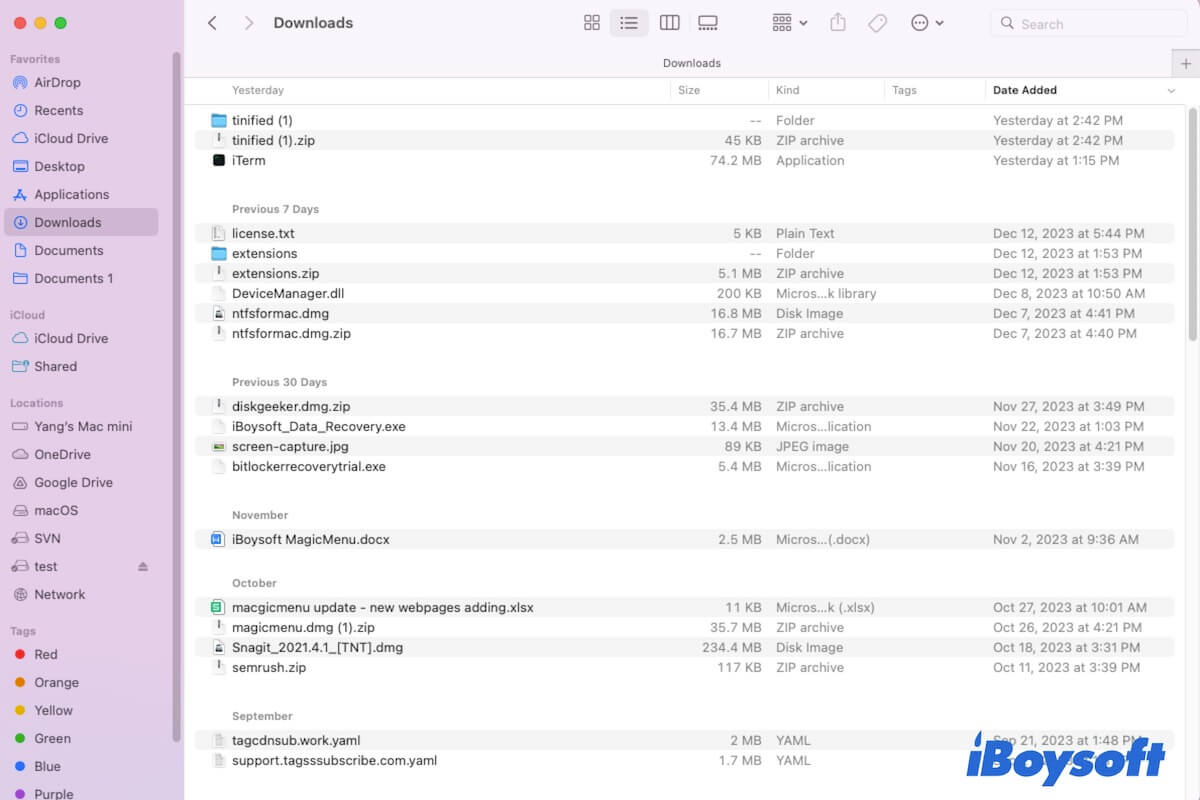
If you don't know where the airdropped files are stored after accepting them, follow this post to get the answer.
Please share this post with more people on how to airdrop from Mac to other Apple devices.
How to turn off AirDrop on Mac?
If you've finished data transferring and want to close AirDrop on your Mac for security,
- Open Go > AirDrop from the Finder menu.
- Change the option to No One in the Allow me to be discovered by drop-down menu to prevent your Mac from being discovered.

How to Use Pages on Mac: A Guide for Beginners
Pages is a word-processing application developed by Apple. This article tells you what exactly is Mac Pages, and explains how to use Pages on Mac. Read more >>
AirDrop not working on your Mac, Why & How to fix it?
If AirDrop is not showing up on your Mac, you need to check if your Mac supports it first. Only Mac computers introduced in 2012 and later and running Mac OS X 10.10 or later are featured with AirDrop.
However, your Mac has the AirDrop utility but you can't enable it or fail to share content with other Apple devices. Here, we've summarized the common causes for AirDrop not working on Mac:
- The target device is not set to be discoverable.
- You haven't turned on Bluetooth on your Mac or the target device.
- 2 devices are not within about 30 feet / 10 meters range(effective range may vary depending on the environment).
- The target Apple device doesn't have the AirDrop feature.
Thus, to fix the faulty AirDrop on your Mac, you need to check if AirDrop is enabled and set discoverable on Mac and the destination devices. Also, you should ensure these devices are on the same WiFi and the network is stable. If you want to get detailed solutions for fixing the AirDrop not working on Mac issue, you can follow this guide: How to fix AirDrop not working on Mac, iPhone, or iPad.