A portable computer drive that uses flash memory is called a flash drive. You may also call flash drives jump drives, pen drives, or thumb drives.
While the phrases "USB drive" and "solid-state drive" (SSD) are occasionally used as well, they mostly relate to larger, less portable USB-based storage devices such as external hard drives.
Can I format a flash drive to NTFS on Mac
When it comes to formatting the internal and external drives on Mac, Disk Utility, the macOS built-in disk management tool, is the first choice. However, you may find that the available file formats when formatting the disk in Disk Utility are APFS, HFS+, exFAT, and FAT32.
Therefore, you can't format the flash drive to NTFS with Disk Utility by default. But if you have installed a third-party NTFS for Mac driver, you may find there is a Windows NTFS option for file format in Disk Utility.
These NTFS for Mac drivers also enable you to format SD cards to NTFS or format a flash drive to NTFS on a Mac. Alternatively, you can also try Terminal to format USB flash drives to NTFS.
Let more people know how to format flash drives to NTFS on Mac!
How to format a flash drive to NTFS on a Mac
As mentioned before, there are two ways to format a flash drive to NTFS on a Mac: using Terminal commands or an NTFS for Mac tool. We'll go over both methods in detail so you can choose the one that works best for you.
| Methods to format a flash drive to NTFS on Mac | Applicable scenarios | Difficulty level |
| Use iBoysoft NTFS for Mac | Support Intel & M1/M2/M3/M4 Macs running macOS High Sierra - Tahoe | Easy |
| Run Terminal commands | Only works on Macs running macOS Monterey and earlier | Hard |
Method 1. Format flash drive to NTFS with NTFS for Mac
Using an NTFS for Mac driver is the best solution to format a USB flash drive/SSD/HDD/SD card to NTFS on Mac. iBoysoft NTFS for Mac is a good choice.
It extends the format options with NTFS and allows you to format flash drives to NTFS with ease. It widely supports macOS Tahoe and earlier and is compatible with Intel and Apple Silicon Macs.
Here is how to format a flash drive to NTFS with iBoysoft NTFS for Mac:
- Download and install iBoysoft NTFS for Mac.
- Make sure the external flash drive is connected to your Mac.
- Open iBoysoft NTFS for Mac, on the left sidebar, select your USB flash drive under "Other disk."
- Click the Erase to NTFS button on the toolbar.
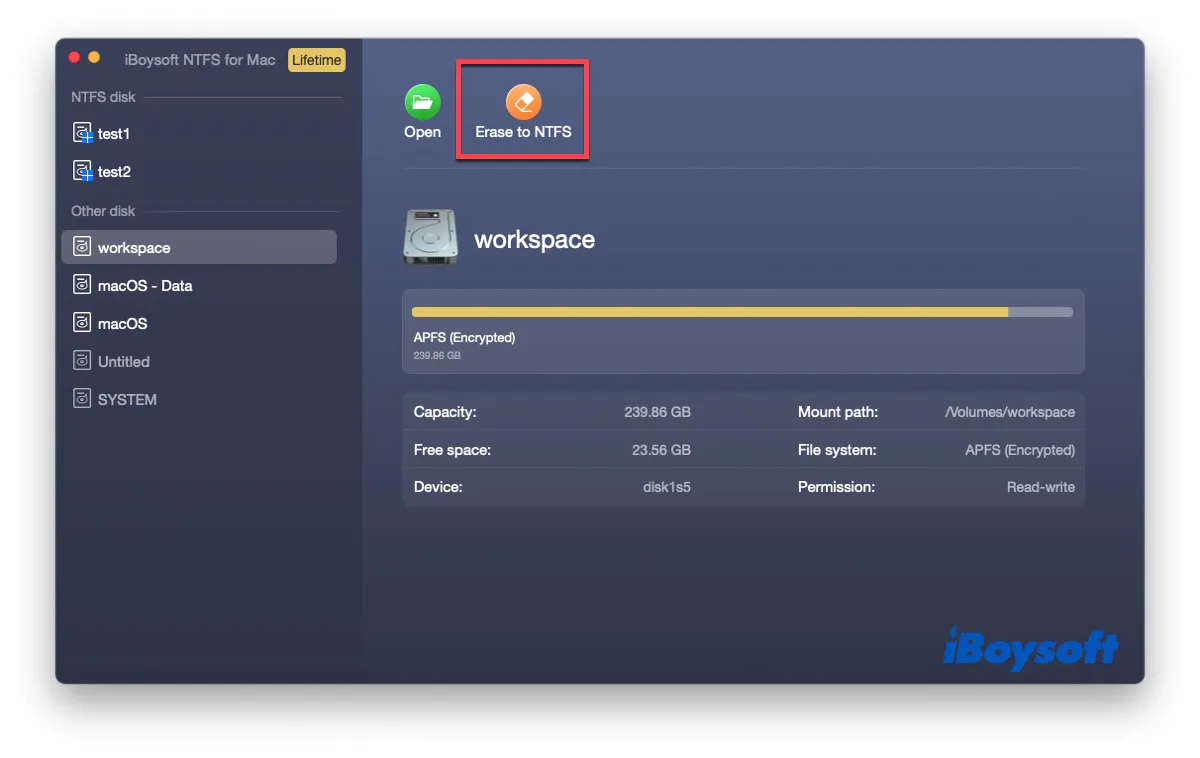
- Click OK to confirm and start the process, then click Complete.
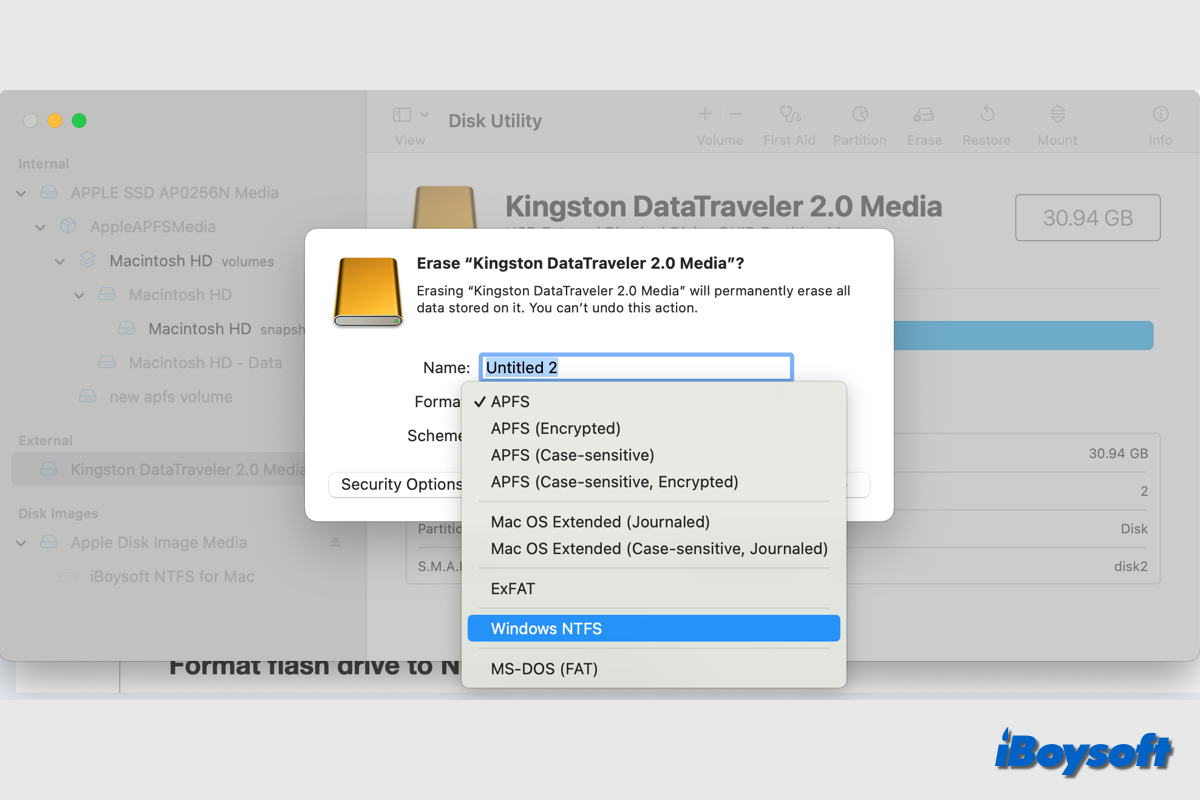
And now, you can also format the flash drive or other external disk to NTFS via the Disk Utility; the Windows NTFS file format is available after you have installed the third-party NTFS for Mac.
- Open the Disk Utility from Finder > Applications > Utilities.
- Click the View button and choose Show All Devices.
- Select the flash drive that you want to format to NTFS.
- Click the Erase button on the toolbar of Disk Utility.
- Click the format box and select Windows NTFS from the drop-down menu.
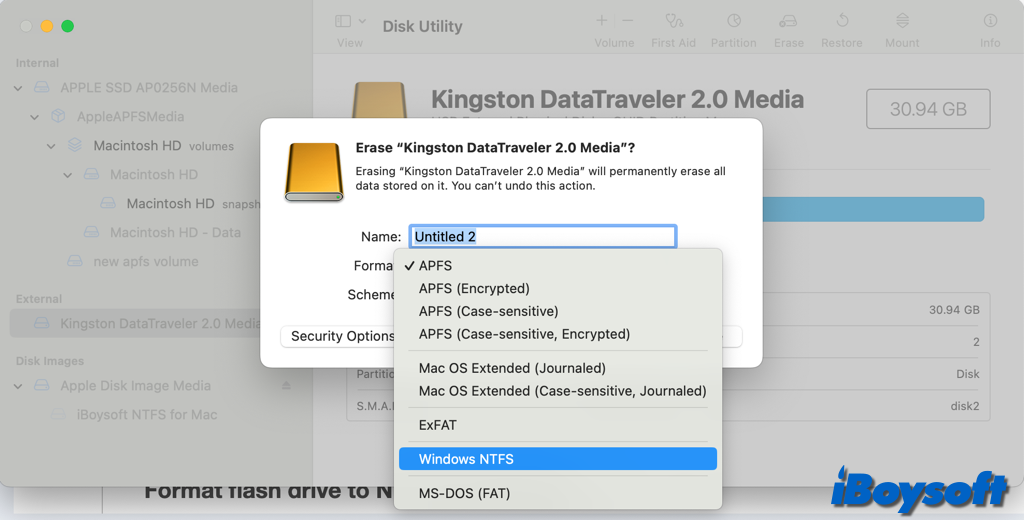
- Then click Erase to start the formatting process.
Share these steps to help others format flash drives to NTFS on Mac!
Method 2. Format flash drive to NTFS via Terminal
There is an alternative method you can choose to format a flash drive to NTFS, using Terminal. However, it only works on macOS Monterey and earlier versions. On macOS Ventura and later, you will need iBoysoft NTFS for Mac.
Follow the steps below to format the flash drive to NTFS via Terminal:
- Open Terminal from the Launchpad.
- Type the following command in the Terminal window and press Enter.diskutil list
- When it returns all disk info, note down the disk identifier of the target flash drive.
- Type the command below to format the flash drive to NTFS on Mac, and replace disk2 with the disk identifier of your flash drive.sudo newfs_ntfs -Q -v USB /dev/disk2s1
- Wait for the process to complete and quit Terminal.
Now you check the drive info of the formatted flash drive on Mac, it should be NTFS formatted. However, you may receive the error "Formatting is not supported by: NTFS ntfs windows NT file system (NTFS)" while formatting the drive to NTFS via Terminal, then move to method 1.
How to write to NTFS drive on Mac
macOS doesn't support NTFS file format, even on the latest macOS Tahoe, you can't directly write to an NTFS drive. If you use the Terminal command to convert the file format to NTFS on the flash drive, it is only a read-only drive on Mac, you can't move, delete, or modifier files to it.
However, even if macOS is not compatible with NTFS, you can also enable NTFS writing support on Mac in multiple ways so that you can use the NTFS drive on Mac with full read and write access.
| Options to write to NTFS drive on Mac without reformatting | Applicable scenarios | Difficulty level |
| iBoysoft NTFS for Mac | Fully compatible with macOS High Sierra - Tahoe and Intel and Apple silicon Macs | Easy |
| Boot Camp Assistant | Limited to Intel Macs | Hard |
| Terminal | Only to macOS Monterey and earlier | Hard |
Among these workable solutions for writing to NTFS drive on Mac, using a third-party tool like iBoysoft NTFS for Mac is the first choice, given that it is the easiest way to make the drive writable. You just need to download and install this NTFS mounter for Mac, select the disk under "NTFS disk", and click Open, then you can use it without any limitations.
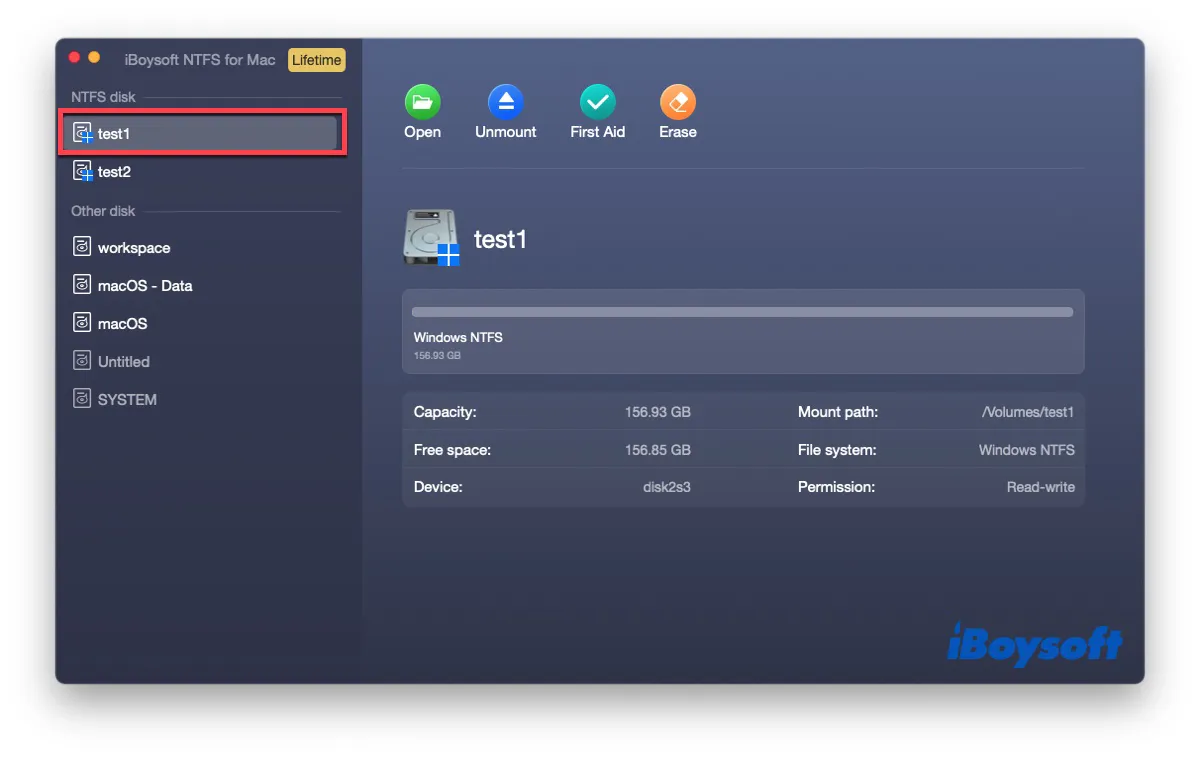
It automatically mounts the NTFS drive in read-write mode, so that you can directly access the NTFS drive within the iBoysoft NTFS for Mac. You can do all the operations to the NTFS formatted flash drive on Mac just as you do on Windows.
In addition to third-party NTFS for Mac, Boot Camp Assistant is also a way to use NTFS drive on Intel Macs. If you are not running an Apple silicon Mac, you use the preinstalled Boot Camp Assistant to create a Windows partition, after you boot up the Mac into Windows, you can open the NTFS drive to read and write.
If your Mac running macOS Monterey and earlier versions, you can also choose to run Terminal commands to enable NTFS writing support. This whole process is a little complicated and you'd better back up the drive first to avoid data loss. Here's how:
- Open the Terminal program from Finder > Applications > Utilities > Terminal.
- Enter the following command to edit the fstab file. sudo nano /etc/fstab
- Type your admin account password when asked. Make sure you enter the right one and no letters will show up on the screen.
- Type the following command in the editor window, replace DISKNAME with the name of your NTFS drive.LABEL=DISKNAME none ntfs rw,auto,nobrowse
- Press Control + O, hit Enter, and press Control + C, then Control + X.
- Reconnect the NTFS drive to your Mac and you can read-write it now.
In case the commands above don't work, try another set of sudo commands to make the NTFS drive writable on Mac.
- Launch Terminal and input the following command, replace the DISKNAME with the name of your device, and hit Return to unmount the disk. sudo umount Volumes/DISKNAME
- Enter the following command to create a mount point for your NTFS volume. sudo mkdir /Volumes/1
- Run the command below to mount the NTFS in read and write mode, and replace"disk2s2" with the Device info of your NTFS drive in Disk Utility. sudo mount -t ntfs -o rw, auto, nobrowse /dev/disk2s2 /Volumes/1
Related readings:
How to Change FAT32 to NTFS on Mac without Losing Data?
Convert exFAT to NTFS without Losing Data on Mac & Windows 11/10/8/7
If you think this post is helpful, share it with more people!