Despite its age, FAT32 is still widely used for USB drives, digital cameras, MP3 players, and other environments where older computer systems are still in use, thanks to its compatibility across different operating systems and devices.
However, FAT32's limitations, including a 4GB file size cap, a maximum volume size of 2TB, and a lack of security and reliability features, might prompt a switch to NTFS. As Windows' default file system, NTFS excels FAT32 with larger file and volume support, enhanced performance, faster file handling, and improved security and data integrity.
If you're considering making this transition, I will guide you through it in this post. Keep reading to discover the steps to convert your USB, pendrive, SD card, or external hard drive from FAT32 to NTFS on Mac.
| How to convert FAT32 to NTFS on Mac | Effectiveness | Recommendation |
| Use FAT32 to NTFS converter | High - Easily format FAT32 to NTFS on Mac; full read/write access to NTFS; user-friendly interface; applicable to macOS High Sierra and later | |
| Use Terminal | Low - May encounter error; no write support for NTFS; need advanced command knowledge; complex command-line interface; inapplicable to macOS Ventura or later. |
Get the FAT32 to NTFS converter on Mac below!
How to change FAT32 to NTFS without formatting on a Mac?
Wondering whether you can change FAT32 to NTFS on Mac without formatting?
The answer is no. The process of changing file systems on Mac, especially from something as different as FAT32 to NTFS, inherently requires formatting. This is because each file system has its own way of managing data, and these methods are not directly compatible with each other.
When you format a drive from FAT32 to NTFS on Mac, the following processes are involved:
Data Erasure: All existing data on the drive is erased. This is necessary because the way data is stored and managed in FAT32 is fundamentally different from how it's done in NTFS.
File System Structure: Formatting establishes a new file system structure on the drive, including its method of storing files, directories, and the metadata associated with them.
Feature Utilization: NTFS has features that FAT32 does not, like enhanced support for larger files and volumes, improved security with file-level permissions, efficient file management, and journaling to ensure file system integrity by logging transactions. These features can only be implemented by establishing NTFS from scratch.
Share the information if you find it helpful!
Reddit discussions on how to change USB from FAT32 to NTFS on Mac
There are a few discussions on Reddit about how to change a USB from FAT32 to exFAT on Mac. The major issue posters experience is either no NTFS format in Disk Utility or the error "Formatting is not supported by: NTFS ntfs Windows NT File System (NTFS)" when formatting in Terminal.
The Reddit post below falls into the second issue. Some suggested the OP format on a Windows PC or use the free macFUSE for Mac to work with NTFS on Mac. While the first suggestion is viable when a PC is available, the second doesn't resolve the issue. macFUSE may allow you to write to NTFS on Mac if combined with Mounty and NTFS-3G, but it can't convert FAT32 to NTFS on Mac.
In the following paragraphs, I'll show you how to convert from FAT32 to NTFS without losing data on Mac.
How to convert FAT32 to NTFS on Mac without losing data?
If you want to change FAT32 to NTFS without losing data on Mac, you must first back up the drive. The easiest way to do that is to transfer the important files to another external drive or your Mac. Once your data is backed up, choose one of the following ways to format it from FAT32 to NTFS.
Warning: Ensure you have backed up files on the FAT32 drive before proceeding!
Way 1: Change from FAT32 to NTFS on Mac with iBoysoft NTFS for Mac
If you've previously formatted a drive on Mac, you likely have noticed that NTFS is not available in Disk Utility.
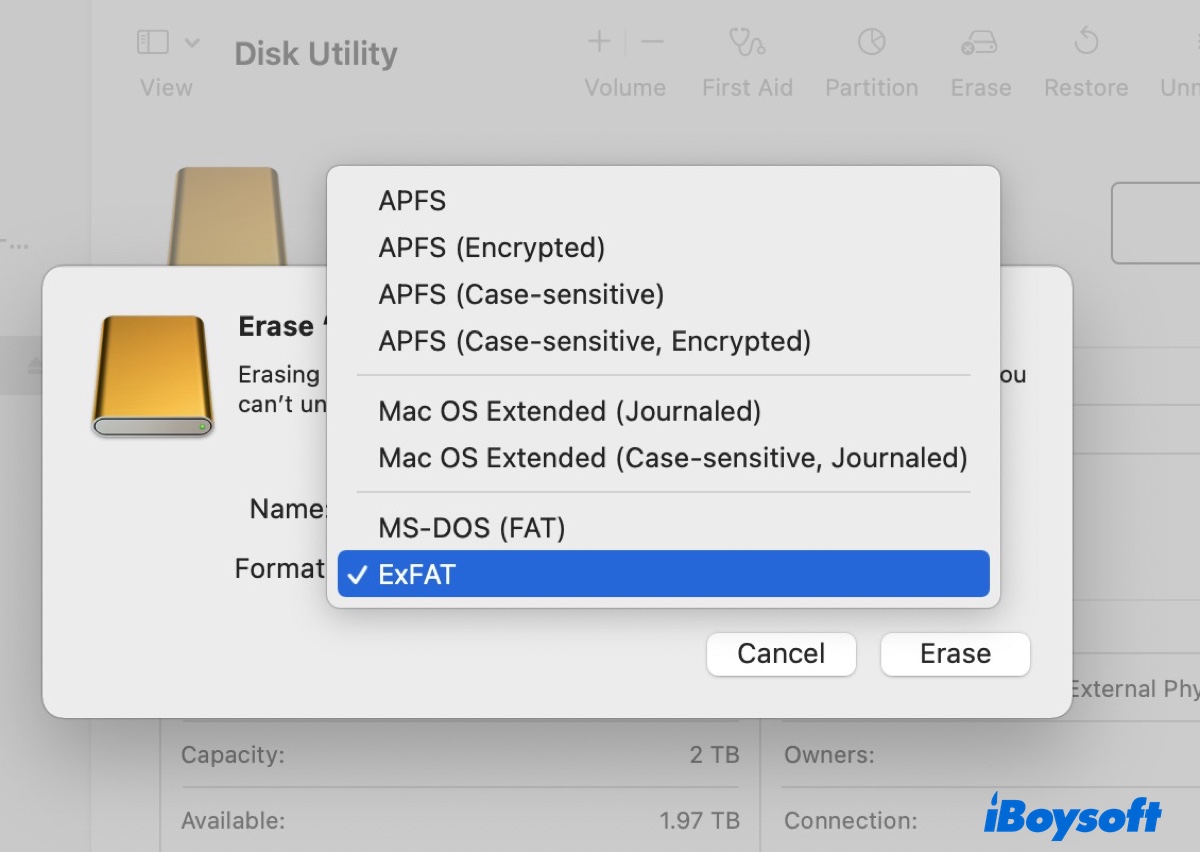
That's because MacOS only has read access to NTFS but can't write to it by default. This is also the reason why you'll need a free NTFS for Mac or a professional NTFS driver like iBoysoft NTFS for Mac to format drives to NTFS on Mac.
This tool grants you full read/write access on Mac, enabling you to convert non-NTFS formats (including FAT32) to NTFS, repair, mount, and rename NTFS drives, and copy, move, delete, modify, and create new folders on the NTFS drive. It is compatible with all macOS versions from macOS 10.13 High Sierra onwards and supports Intel-based, T2, M1, M2, and M3 Macs.
An additional notable feature is its ability to automatically mount NTFS drives connected to your Mac without requiring you to launch the app first. That said, you can plug and play with your NTFS drives on Mac.
Without further ado, let's learn how to change your USB, pendrive, SD card, SSD, or external hard drive from FAT32 to NTFS on Mac.
How to format USB to NTFS on Mac:
Step 1: Download and install iBoysoft NTFS for Mac.
Step 2: Ensure the FAT32 drive is plugged into your Mac.
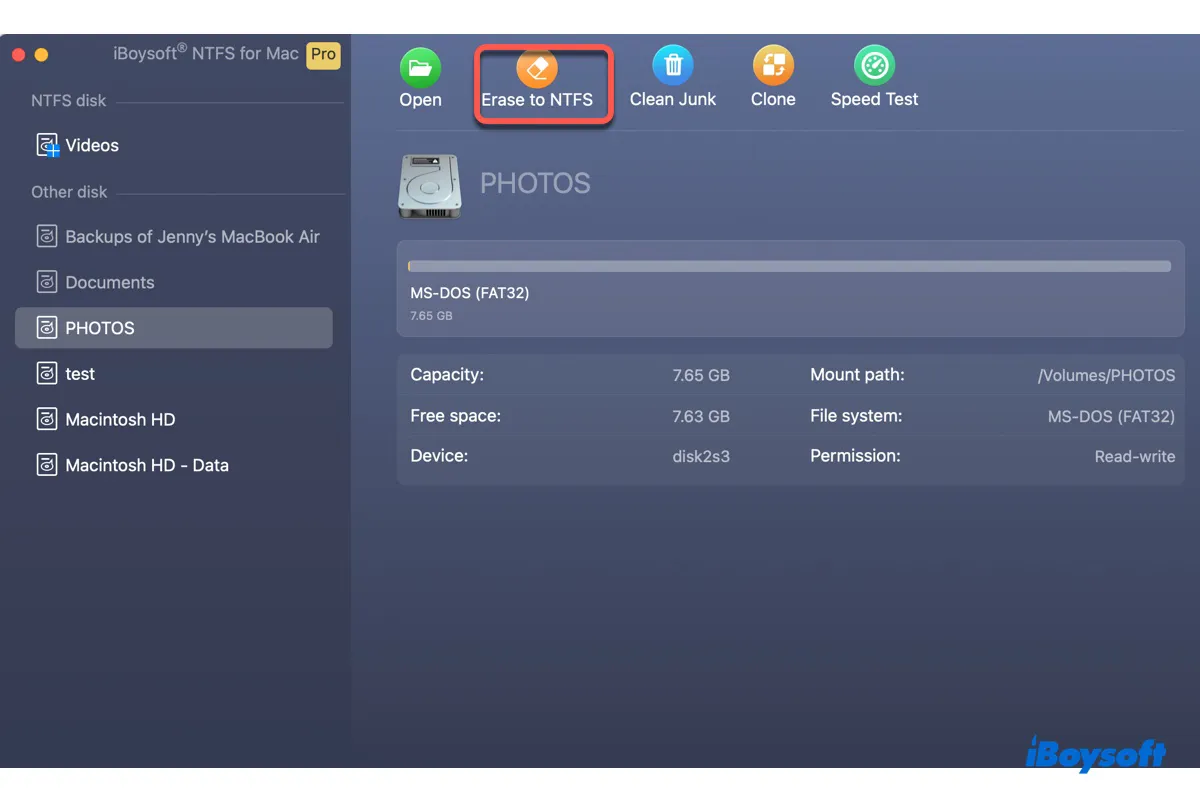
Step 3: Open the FAT32 to NTFS converter on Mac, select the FAT32-formatted drive from the left side, and click "Erase to NTFS."
Tips: With iBoysoft NTFS for Mac installed, you can also convert the drive from FAT32 to NTFS in Disk Utility.

Share this article to help others convert FAT32 to NTFS on Mac.
Way 2: Change from FAT32 to NTFS on Mac via Terminal
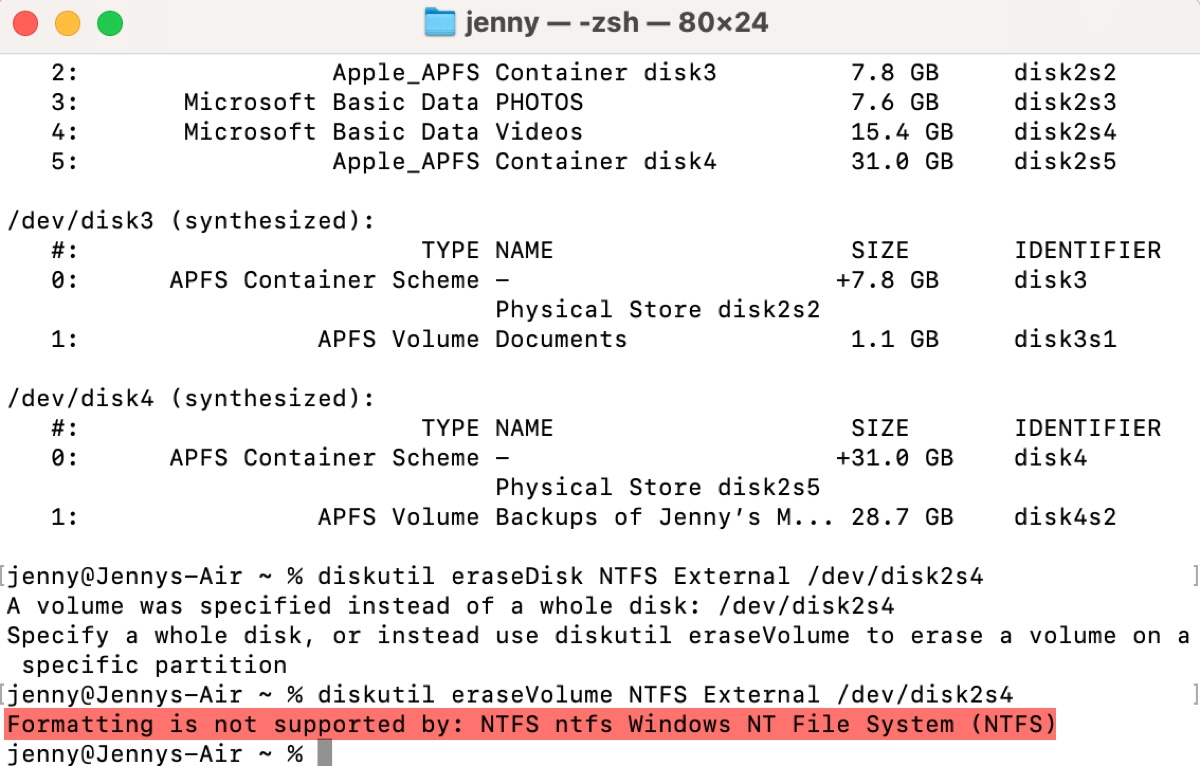
There's also a less-recommended way to format FAT32 to NTFS on Mac: by running commands in Terminal. It's only applicable on macOS Monterey or earlier versions. On macOS Ventura or later, it will return the error "Formatting is not supported by: NTFS ntfs Windows NT File System (NTFS)."
Besides, it doesn't empower you to write data to the formatted NTFS drive, although it allows you to format it to NTFS. If you want to work with the NTFS drive on Mac, you'll still need a third-party driver like iBoysoft NTFS for Mac.
If you still decide to give it a try, use the following steps:
- Open Finder, then launch Terminal from the Applications/Utilities folder.
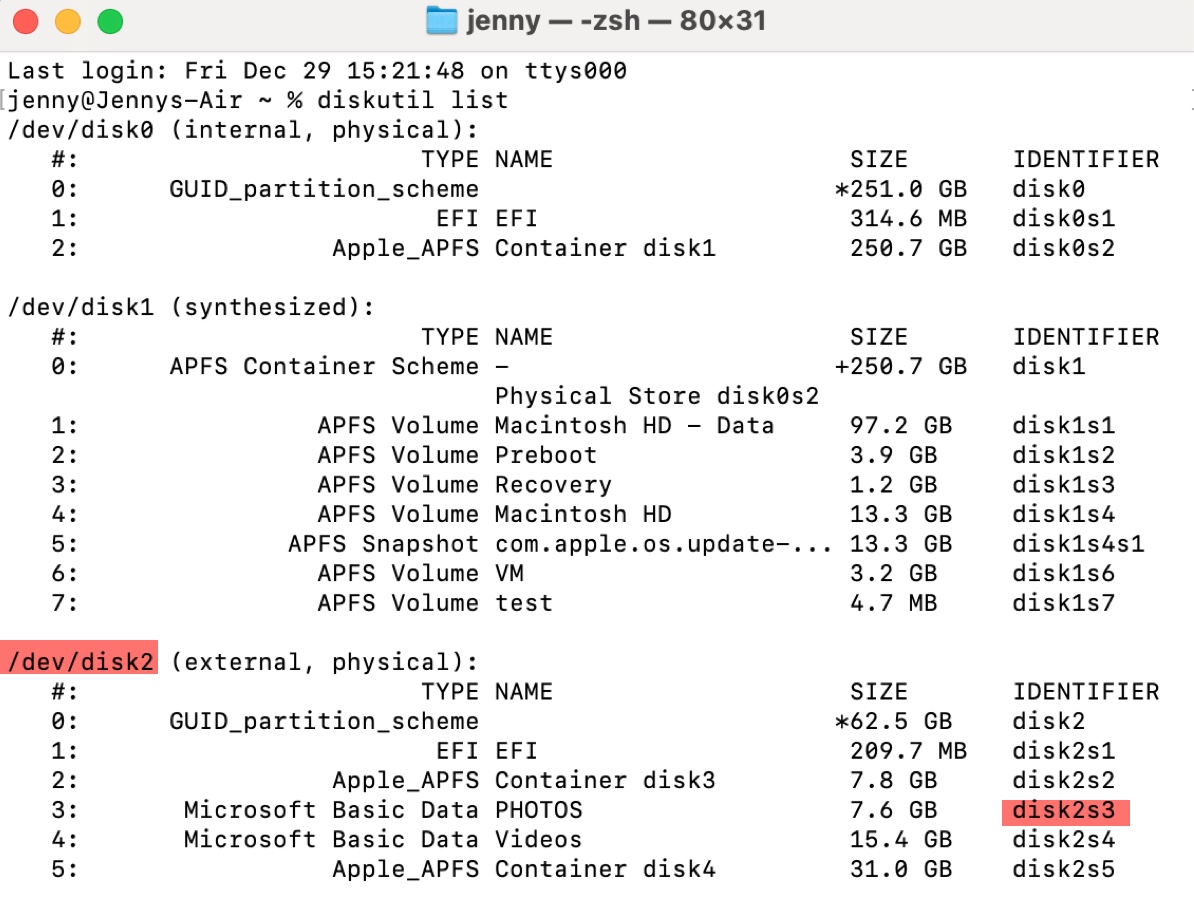
- Type the following command and hit Enter to list all drives connected to your Mac.diskutil list
- Look for the disk identifier of your FAT32 drive or partition. (For example, if it's a drive, the identifier could be disk2; if it's a partition, the identifier may be disk2s3.)
- Input one of the following commands and hit Enter to convert FAT32 to NTFS.
For a FAT32 drive:diskutil eraseDisk NTFS name /dev/disk_identifierE.g., diskutil eraseDisk NTFS Backup /dev/disk2
For a FAT32 partition:diskutil eraseVolume NTFS name /dev/disk_identifierE.g., diskutil eraseVolume NTFS Backup /dev/disk2s3 - Wait for the erase process to complete.
Help others learn how to convert FAT32 to NTFS without losing data on Mac by sharing this post.
FAQs about how to change FAT32 to NTFS on Mac
- QCan a Mac write to an NTFS drive?
-
A
A Mac can't write to an NTFS drive without a third-party NTFS driver like iBoysoft NTFS for Mac.
- QDoes Mac support NTFS format?
-
A
Mac supports reading to NTFS-formatted drives. In other words, you can view and copy files from the NTFS drives on Mac but can't change their contents.
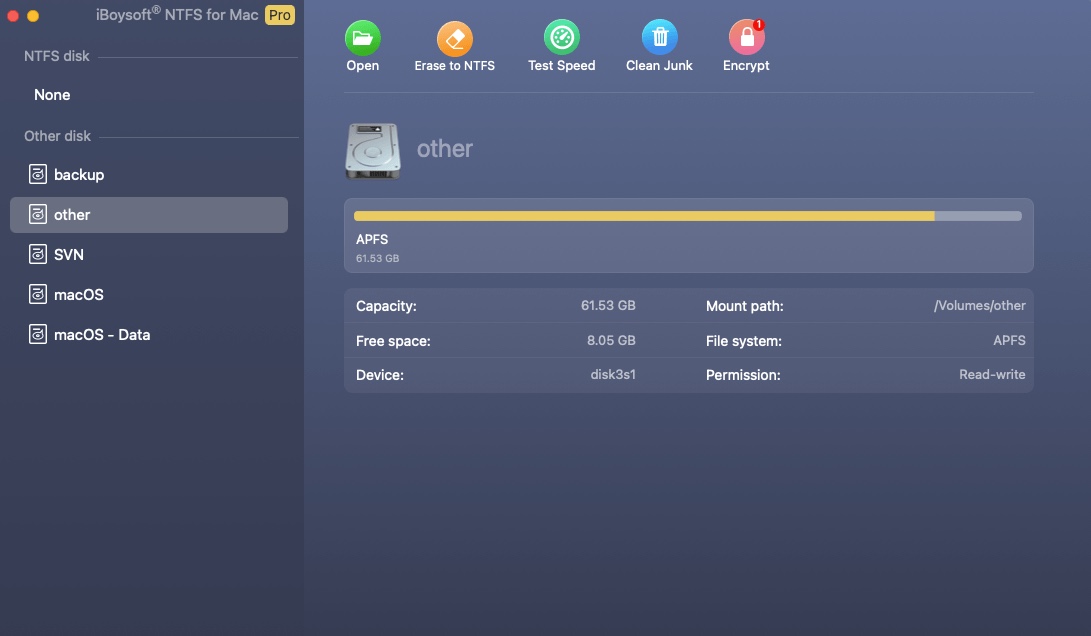
- QHow do I change from APFS to NTFS?
-
A
The steps to change from APFS to NTFS are essentially the same as changing from FAT32 to NTFS. You can either use iBoysoft NTFS for Mac or Terminal if running macOS Monterey or earlier.