Not all Word documents are recoverable on Mac. Whether recovery is possible depends on one key factor: whether the document data still exists on the drive or in a backup system.
If you clicked "Don't Save" and the document was never saved manually, recovery is usually impossible because the file was never written to disk.
If Microsoft Word crashed unexpectedly or macOS shut down, recovery may still be possible. In these cases, success largely depends on whether AutoRecover (Microsoft Word's built-in crash recovery feature)or OneDrive version history was enabled before the data loss occurred.
In the next few minutes, this guide will help you determine whether your Word document is recoverable, which recovery methods apply to your situation, and which fixes you should try first.
Here is a video tutorial helping you perform unsaved Word document recovery on Mac.
![How to Recover Unsaved/Lost Word Documents on Mac [4 Ways]](https://img.youtube.com/vi/4_rRFU1T0Yo/0.jpg)
Which Situation Are You In? (Read This First)
The correct recovery method depends entirely on how the Word document was lost. Use the decision tree below to identify your situation and jump directly to the section that applies.
Did Microsoft Word crash or macOS shut down unexpectedly?
├─ Yes → Section A (AutoRecover & Temp Files) → Consider data recovery tool
└─ No
├─ Clicked "Don't Save"? → Section B (Recovery Conditions)
└─ No
├─ File was saved before → Section C (Recovery Options) → Consider data recovery tool
└─ No → Recovery is not possible (File never written to disk)
Note: Before proceeding with the recovery, stop saving new files to your Mac. Also, remember not to save recovered files to the original location.
Section A: Word Crashed/Power Outage/Force Quit
Use this section only if:
- Microsoft Word crashed unexpectedly.
- macOS shut down due to a power outage.
- The Word document was force-quit before it was saved.
Recover unsaved Word documents on Mac with AutoRecover (Highest success rate)
According to the official Microsoft documentation, AutoRecover is a Microsoft Word feature that automatically saves open Word documents every 10 minutes by default. It works only when Word has been open long enough to create at least one recovery file, and the app or system crashes unexpectedly before the document is manually saved.
When AutoRecover will definitely fail:
- You clicked the "Don't Save" button.
- Microsoft Word crashed before the first AutoRecover interval completed.
- AutoRecover was not enabled in Word settings.
AutoRecover success rate:
While AutoRecover can recover unsaved Word documents after a crash, its reliability varies depending on different macOS and Word versions.
| macOS Versions | AutoRecover reliability |
|---|---|
| macOS ≤ Mojave (10.14) | High |
| Catalina → Big Sur | Medium (sandboxing starts to interfere) |
| Monterey → Tahoe | Medium–Low (containerized paths, stricter cleanup) |
| Word Versions | AutoRecover reliability |
|---|---|
| Word 365 (subscription) | Medium–Low (cloud-first design, reliance on version history) |
| Word 2019 | Medium (hybrid local recovery + early cloud integration) |
| Word 2016 and earlier | High |
AutoRecover ≠ AutoSave:
Some may confuse AutoRecover with AutoSave, but they work very differently.
AutoRecover: creates temporary recovery files and is triggered mainly after crashes or forced quits.
AutoSave: continuously saves changes in real time and works only for cloud-stored documents. It saves the file rather than recovering from it. It activates only when a file is actively opened from, or saved directly to, OneDrive or SharePoint Online.
| AutoRecovery helps after a crash. AutoSave helps prevent loss before it happens. |
How to recover unsaved Word files from AutoRecover:
Usually, all you need to do to recover an unsaved Word document on your Mac is to reopen Microsoft Word. Then, a Document Recovery window will pop up to help you grab the unsaved Word file you were working on before the Microsoft Word crash.
If that fails, you can manually find the auto-recovered Microsoft Word documents on Mac.
Now, let's get through the details of how to recover a Word document that was not saved on Mac with AutoRecovery.
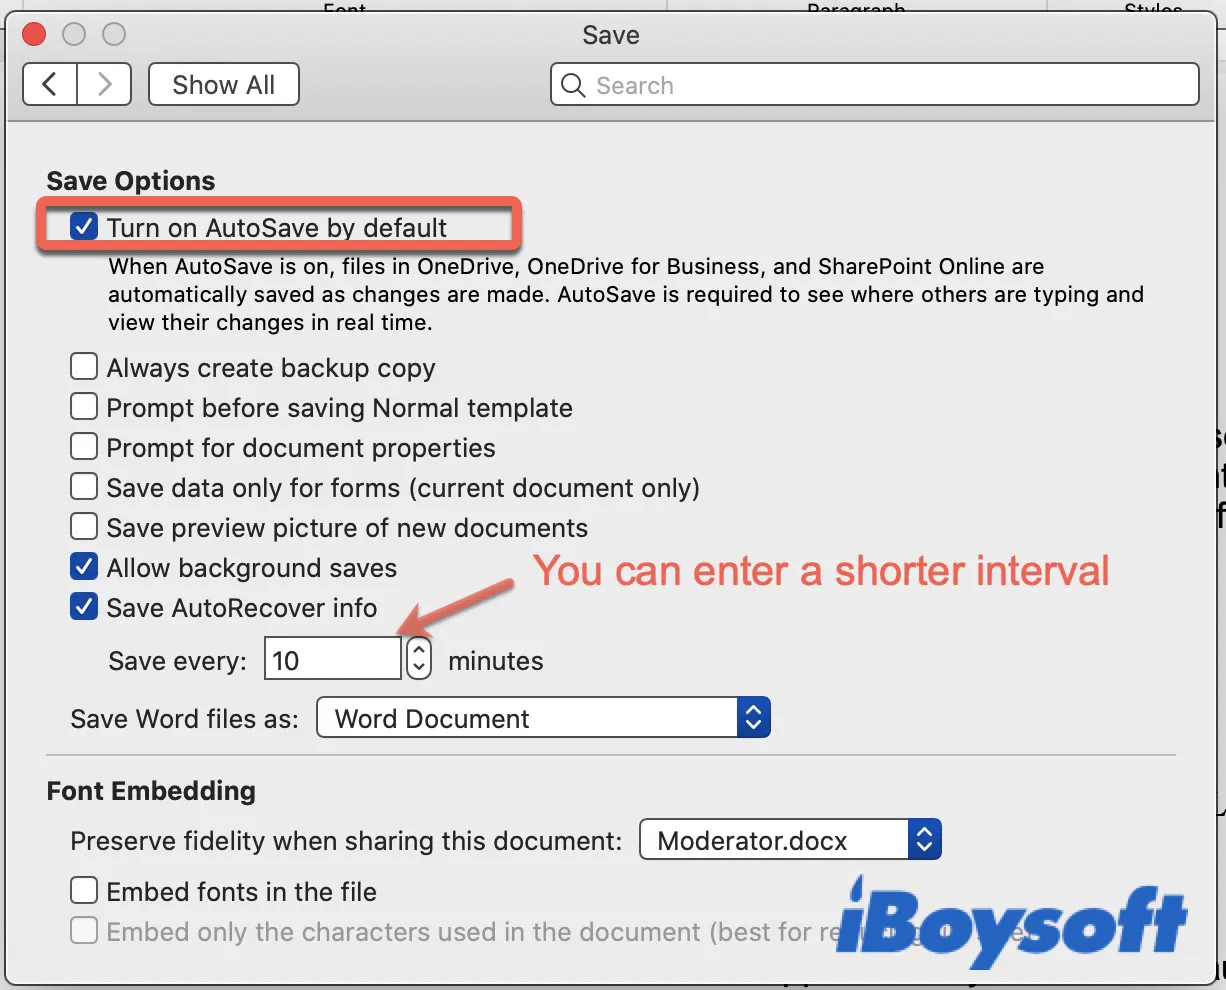
If you are unsure whether AutoRecover is enabled, go to Word > Preferences, and click Save under the Output and Sharing tab. Then check the box for "Save AutoRecover info every X minutes" (or "Turn on AutoSave by Default" if using OneDrive).
Step 1: Find AutoRecovery files in Word for Mac
Here, we'll discuss three ways to get to the AutoRecovery file location on Mac.
Method 1: Find AutoRecover files through Finder search.
- Open a new Finder window (Apple's version of Windows File Explorer).
- Enter "autorecovery" in the top-right search box.
- Finder will then show you all files containing the word automatically.
Method 2: Locate AutoRecover files via the folder path.
- Open Finder.
- Select the Go menu at the top and click Go to Folder.
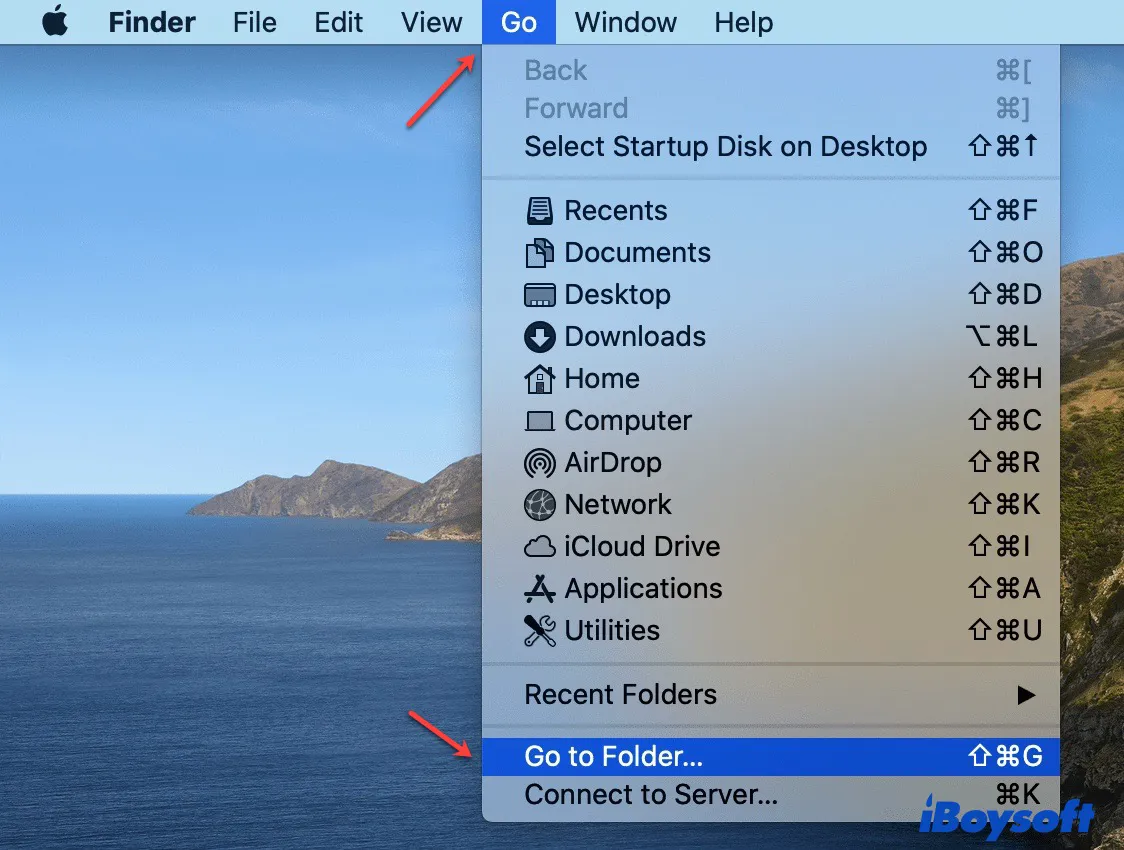
- Enter the file path based on your Word version.
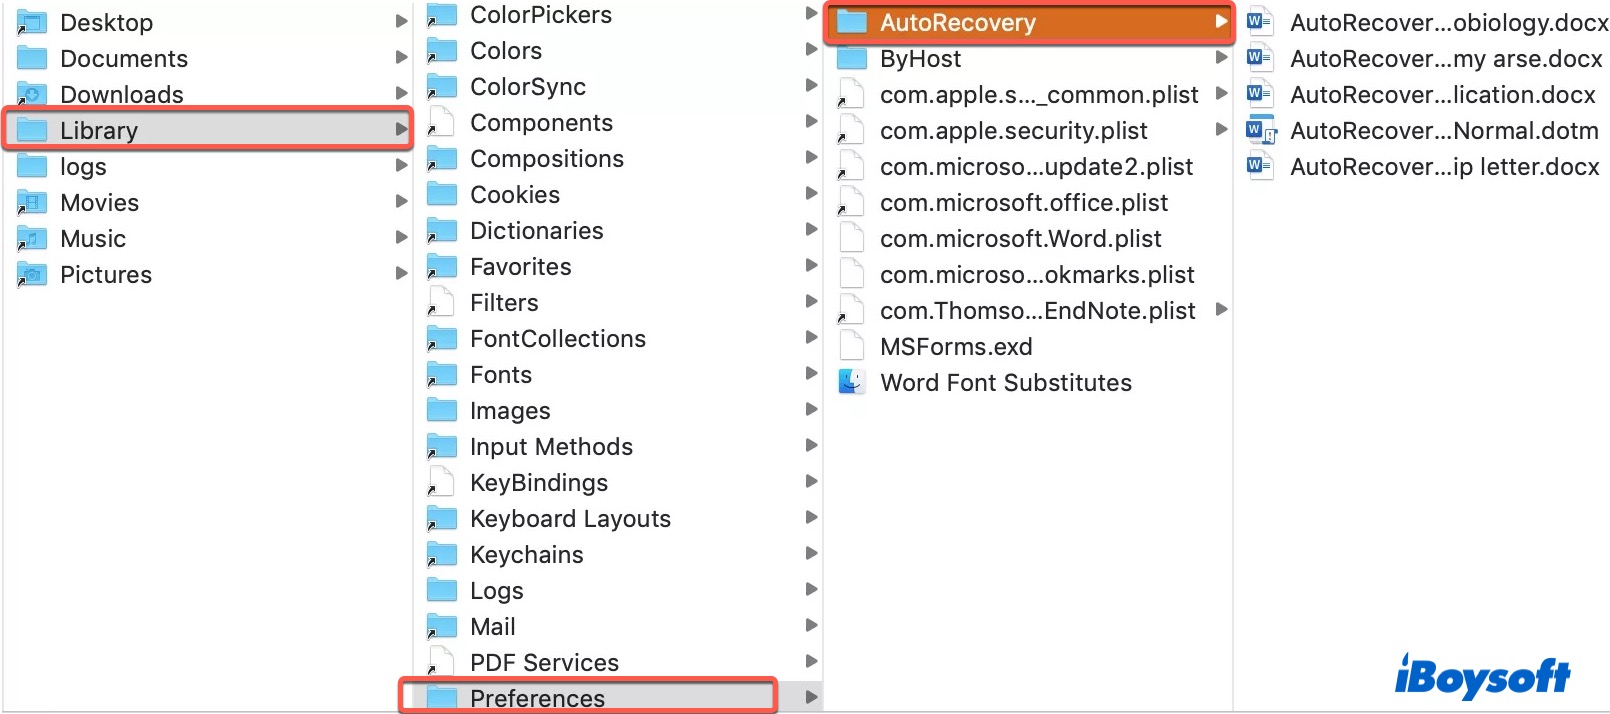
| Microsoft Office Versions | AutoRecover File Locations |
| Microsoft Office 2019/2016/Office 365 in 2020/2021 | ~/Library/Containers/com.Microsoft/Data/Library/Preferences/AutoRecovery |
| Microsoft Office 2011 | ~/Library/Application Support/Microsoft/Office/Office 2011 AutoRecovery |
| Microsoft Office 2008 | /Documents/Microsoft User Data/Office 2008 AutoRecovery |
| If the above paths fail | ~/Library/Containers/com.microsoft.Word/Data/Library/Preferences/AutoRecovery |
Method 3: Use "Manage Document"
- Open Microsoft Word.
- Click File > Manage Document in the menu bar.
- Choose "Recover Unsaved Documents."
- When a new window shows you a list of unsaved documents, select the file you want to retrieve.
- Click the Open button and review the recovered document.
- Save the document to avoid losing it again.
Tips: Where is the Manage Document button on Word on Mac? It's located in the dropdown menu of the File tab in the top-left menu bar.
Bear in mind that some missing files may be hidden. You can open Finder, then press Command + Shift + Period to show the hidden files on Mac and then recover them.
Step 2: Recover Word documents from AutoRecover files
After locating the AutoRecovery folder on Mac, take the steps below to recover unsaved Word document from Word 2021/2020/2019/2016/2011/2008.
- Find the unsaved files you want to recover, and double-click to open them in Microsoft Word.
- Click File menu > Save As to save AutoRecover files in a preferred location.
To eliminate the possibility of losing valuable content in the future, change the saving frequency to a shorter interval with the following steps.
Tips: Change how frequently AutoRecovery files are saved in Word
For newer Office versions:
- Launch Word for Mac.
- On the top Word menu, click Preferences > Save.
- In the Save AutoRecover info box, enter a time interval you want Word to save documents.
For Office 2011:
- Launch Word for Mac.
- Click Word > Preferences.
- Under Output and Sharing, click Save.
- In the Save AutoRecover info or AutoSave or AutoRecover information box, enter a number such as 5 minutes or less.
Recover unsaved Word documents on Mac with Temporary folder (High Risk)
Temporary files are created by macOS or applications to enable quick data retrieval, facilitate communication between different processes, and assist in recovering deleted or unsaved Office files. It's one way to recover unsaved Word documents on Mac, but the recovery success rate is significantly lower than it was in 2018.
Modern versions of macOS and Microsoft Word use app sandboxing and aggressive memory and temporary file cleanup. As a result, temporary data may be removed automatically after crashes or restarts.
When it usually fails:
- Newer macOS versions like macOS Monterey
- SSD with TRIM enabled
- Word restarted normally after the crash
You can still use the steps below to attempt unsaved Word document recovery.
How to recover a lost Word document on Mac from the Mac's Temporary Folder:
- Navigate to Finder > Applications > Utilities > Terminal.
- Type in open $TMPDIR and press Enter.
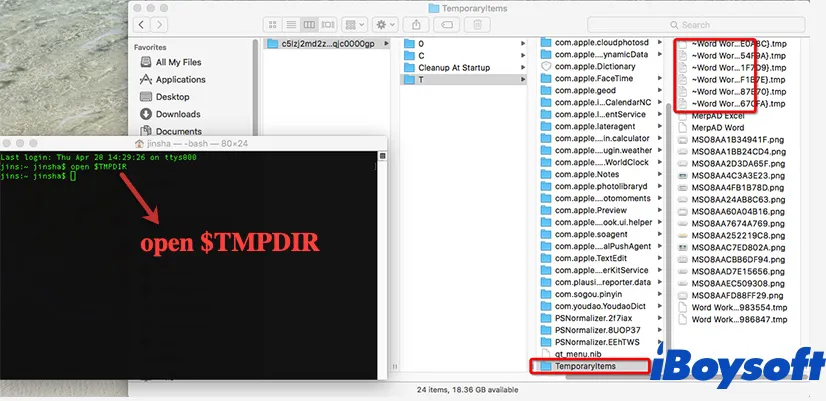
- Open the Temporaryitems folder and locate files beginning with ~Word Word.
- You can open the file with TextEdit, and then copy and paste the text to a new Word document.
- Alternatively, you can drag the unsaved Word file to the desktop and then open it in Word to find the one you need.
- Once you find the unsaved Word document you are looking for, click File > Save As to save it to the desired destination.
Section B: Clicked 'Don't Save?' Read This Carefully
Can a Word document be recovered after clicking "Don't Save"?
Short answer: In most cases, no.
When you click "Don't Save", Microsoft Word intentionally discards the document. Since no AutoRecover file or temporary data is written, you can't restore the document from AutoRecover or temporary files. Once it happens, even data recovery tools can't get your files back because nothing was ever saved to the storage.
On rare occasions, recovery might be possible if one of the following is true:
- A backup system captured a prior version. (e.g., Time Machine is set to back up automatically, and it happens to take a snapshot of your Word file.)
- The file was synced to OneDrive or iCloud with version history.
Section C: Word File Was Saved (Deleted/Overwritten/Replaced)
- If the Word file was deleted but not emptied from the Trash, recover it from the Trash with Method 1.
- If your Mac has Time Machine enabled, open the app to check if your Word document is captured using Method 2.
- If OneDrive was turned on, check version history as in Methods 3 & 4.
- If your Word file was corrupted, go to Method 5.
Can you recover replaced or overwritten Word documents on Mac?
Short answer: Usually, no — replaced or overwritten Word documents on Mac are only recoverable if a previous version exists in a backup or version history.
When you replace a Word file with another file using the same name, macOS overwrites the original file at the file-system level.
Due to APFS behavior, atomic file replacement, and SSD TRIM operations, the original file data is usually discarded immediately. Once the file is overwritten and saved, the original content is not recoverable unless a previous version exists in a backup or version history system.
Method 1: Recover deleted Word documents from Trash
If the Word document is moved to the Trash, you can easily recover it within 30 days.
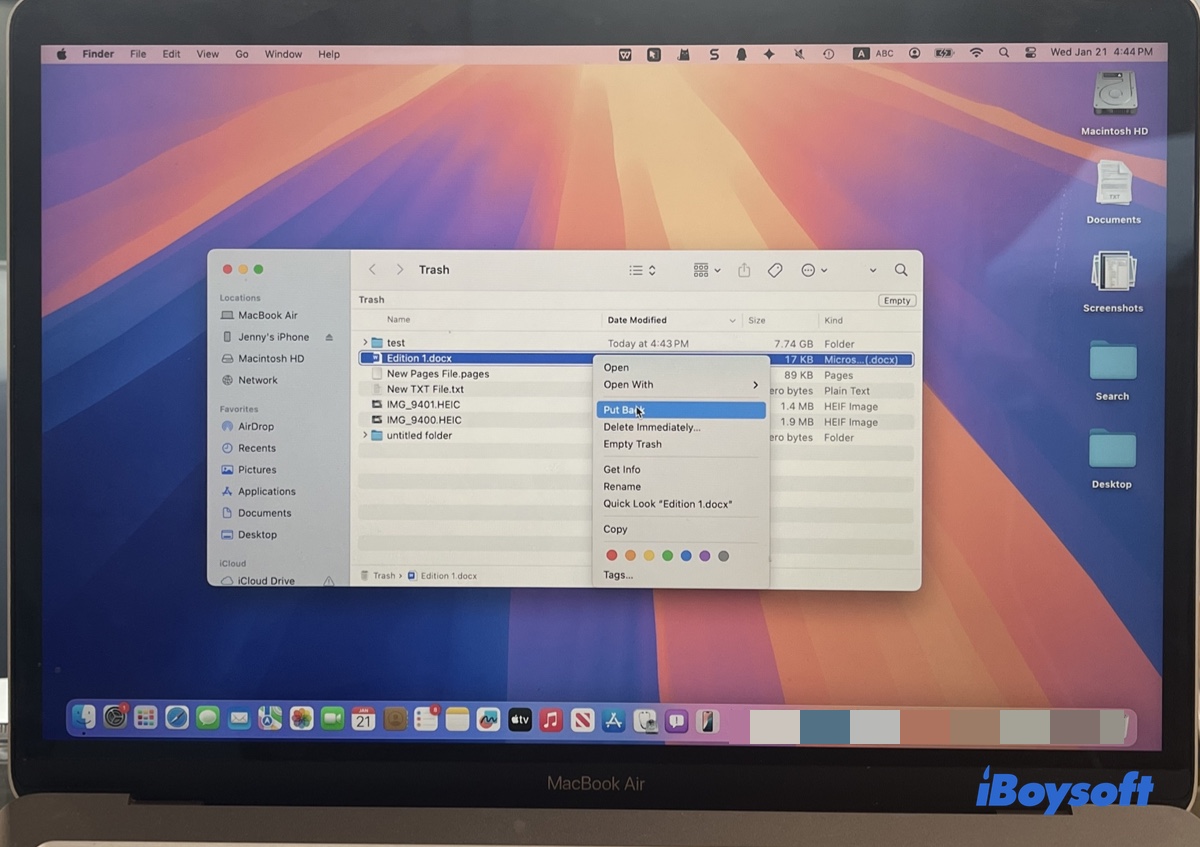
How to recover a deleted Word document from Trash:
- Click on the Trash icon on the right side of your Dock.
- Browse the list of deleted files to find the one you want to recover.
- Right-click on the file and select Put Back. Drag and drop it to your desktop if you don't recall the original location.
If the document was emptied from Trash or permanently deleted using the Delete Immediately command or the keyboard shortcut Option + Command + Delete, you can recover permanently deleted files on Mac from a backup that likely already exists.
Method 2: Recover lost Word files on Mac with Time Machine
Here is how to recover deleted Word documents or lost Word files on Mac via Time Machine backup files:
- Connect the Time Machine backup disk to Mac.
- Open the folder where the deleted Word files were stored.
- Launch Time Machine by clicking the Time Machine icon in the top-right corner or by navigating to Launchpad > Other > Time Machine.
- Use the timeline and arrows to find the deleted or lost Word files you want to restore.
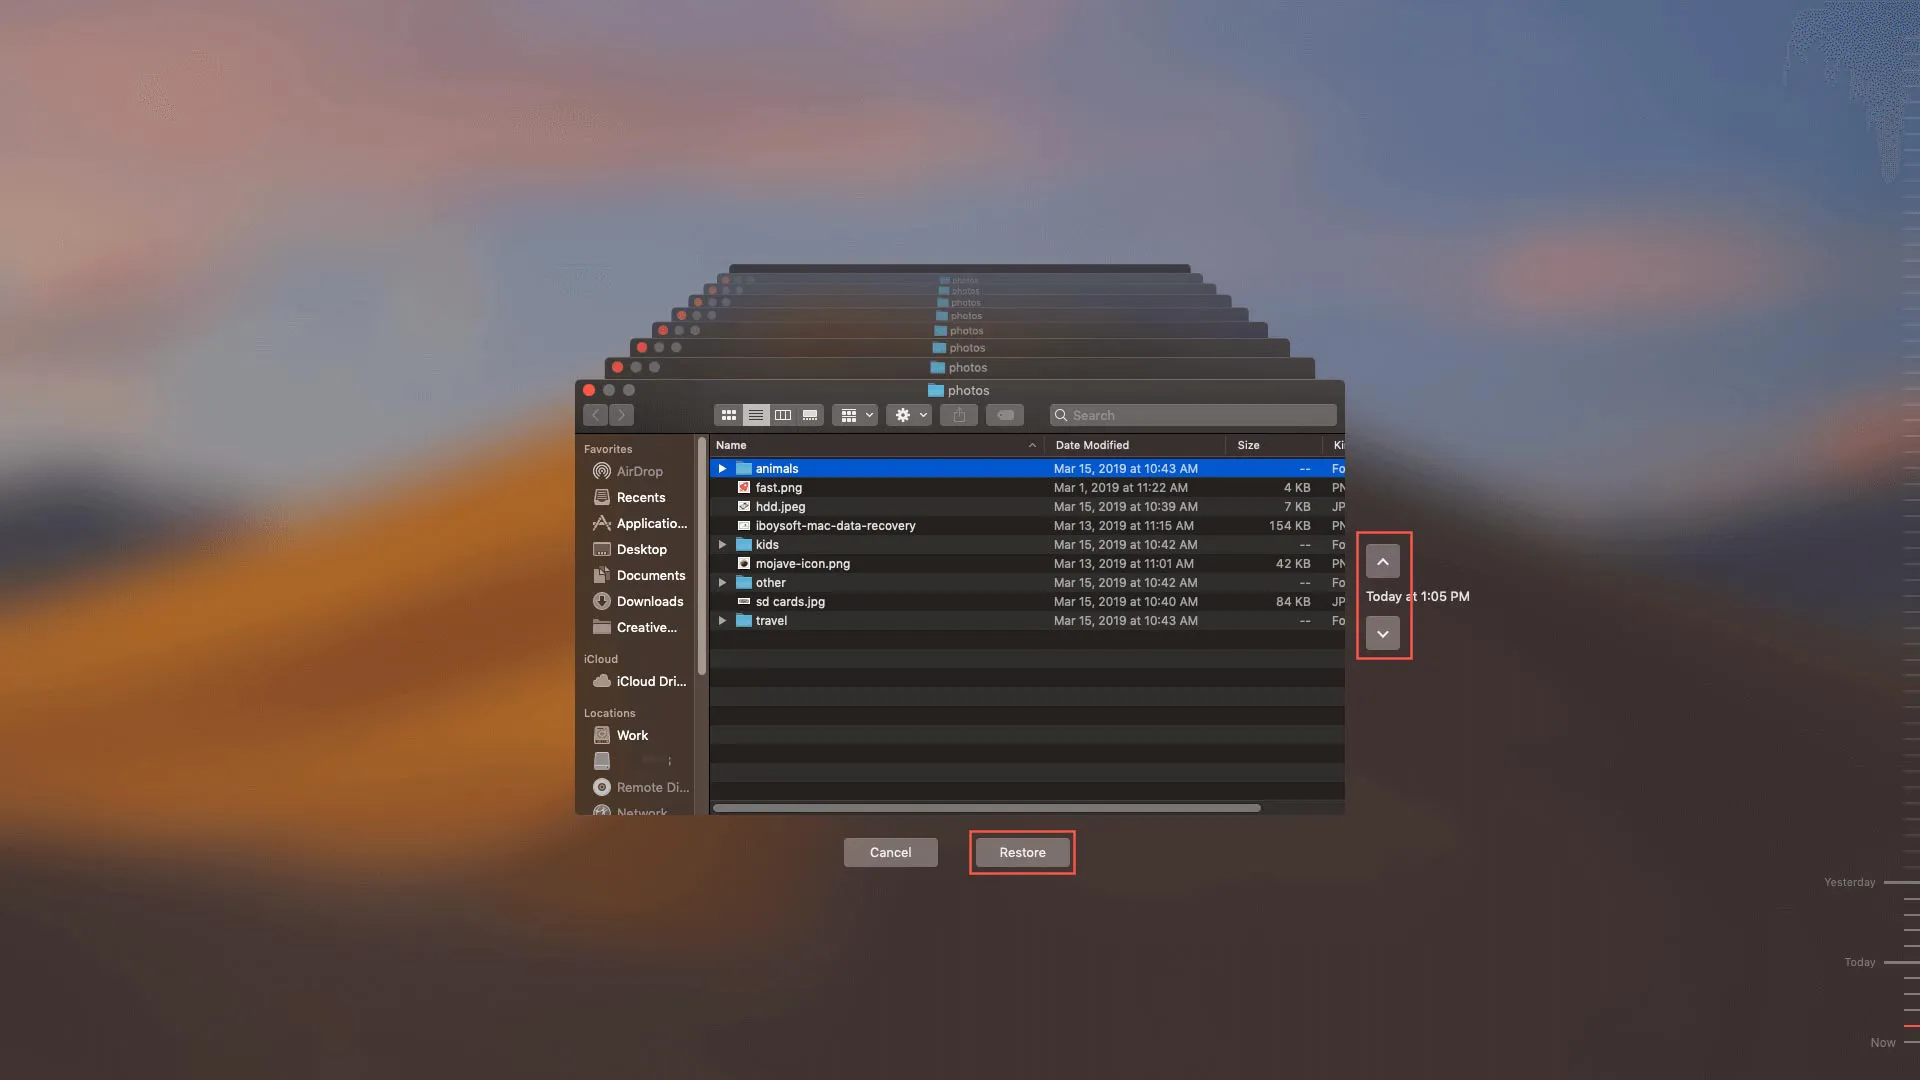
- Select the file and click the Restore button. You can then see the recovered Word document in its original location.
To get more details, read about Time Machine backup and restore.
If you have OneDrive turned on, you can return to an older version quickly. Depending on the Word version you use, there are two ways to recover a previous version of a Word doc.
Method 3: Restore old versions of Word documents on Mac with Restore
- Open Microsoft Word, then click the File menu > Restore.
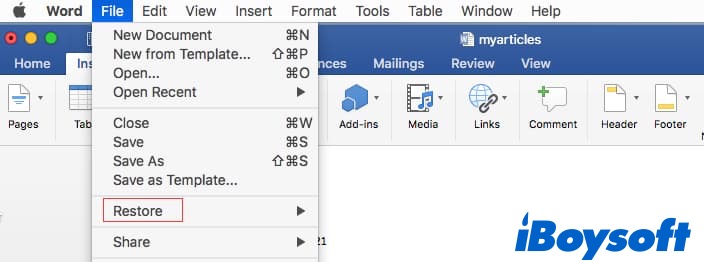
- Browse through the versions you want to restore.
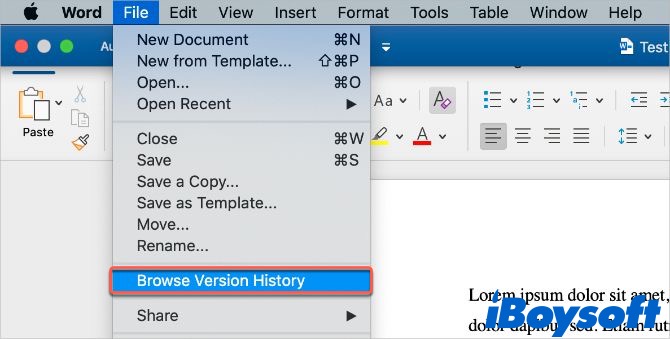
Method 4: Restore a previous version of a Word document with Browse Version History
- Open the most recent version of the file you want to recover.
- Click File tab > Browse Version History from the top menu bar. (Browse Version History grayed out?)
If you are using the Office website, select File > Info > Previous Versions. - You will see a panel displaying all the previously saved versions of the current file.
- Decide which version you want to go back to using the timestamps.
- Click the file to preview it, then click Restore to recover a Microsoft Word document on Mac.
Method 5: Recover text from a damaged file in Word
Occasionally, a Word document may be corrupted and refuse to open on Mac. Fortunately, you can retrieve lost Word docs due to corruption within Word.
Steps to recover damaged files on Mac:
On newer Word versions:
- Open Microsoft Word.
- Click Word > Preferences from the top menu.
- Under Authoring and Proofing Tools, click the General tab.

- Ensure that the Confirm file format conversion at Open box is selected, then close the dialog box.
- Click File > Open.
- Choose the damaged file with lost data.
- Click the arrow on the bottom-right of the Open button, then select Recover Text.

- Open the document.
On Office 2011:
- Launch Word.
- Click Word > Preferences from the top.
- Beneath Authoring and Proofing Tools, click General.
- Be sure that the Confirm conversion at Open check box is chosen, and then click OK.
- On the Standard toolbar, click Open.
- On the Enable pop-up menu, select Recover Text from Any File.
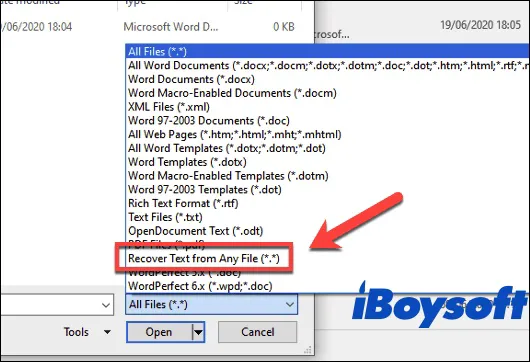
- Open the Word file.
When Recovery Software Actually Makes Sense
If previous methods didn't find the deleted or unsaved Word document, and you aren't in one of the following cases, it's time to try a reliable data recovery tool like iBoysoft Data Recovery for Mac.
🚫 Not recoverable cases:
- You clicked "Don't Save" when closing the Word document.
- You replaced the file with a new edition.
- You overwrote new content on the same document and saved it.
- The Word file was permanently deleted on a Mac with TRIM enabled.
This Word document recovery software can recover unsaved, lost, or accidentally deleted files that users cannot otherwise retrieve from all Office versions, including Office 2019/2018/2011 and Office 365 in 2021/2020. It employs an advanced scanning algorithm to recover permanently deleted files that are still on your hard drive but invisible to human eyes, and unsaved Word files hidden on the hard drive.
It can scan every corner of your hard drive to retrieve the Word document that was not saved or deleted on Mac. This tool is simple to use and supports all Mac models running Mac OS X El Capitan and later. Besides, it also has rich filters for locating the deleted or unsaved Word files quickly.
To improve the chances of getting the deleted Word file back, you are recommended to stop saving any files to your Mac as soon as possible. Then, start the recovery with these steps right away.
In addition to Word documents, it's also compatible with Excel sheets, PPTs, videos, audio, emails, photos, etc.
- What this data recovery tool can achieve:
- Recover deleted Word documents that were written to the disk and not overwritten
- Recover unsaved Word documents due to sudden crashes
- What this data recovery tool can't achieve:
- Recover replaced or overwritten Word files
- Recover files that are not saved to the disk after clicking "Don't Save"
If you understand this tool and decide to try it out, follow the steps below to test whether the tool can find Word documents for free!
How to recover unsaved or deleted Word document on Mac:
Step 1: Download and install iBoysoft Data Recovery for Mac.
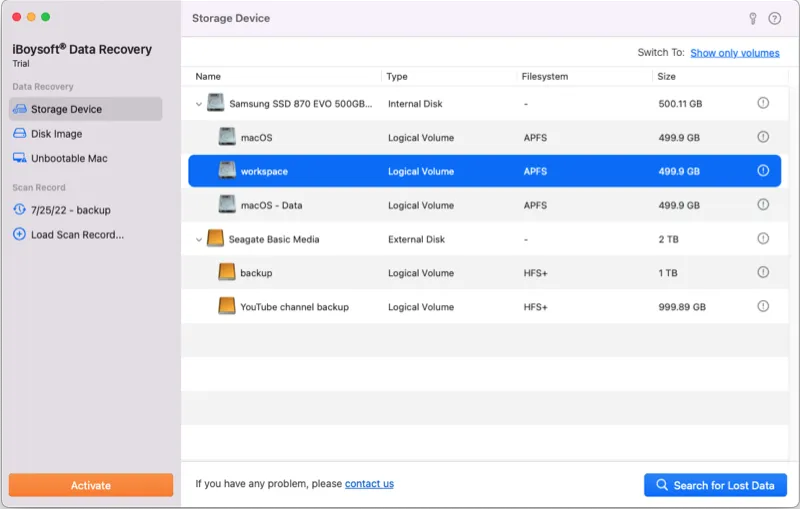
Step 2: Open the Word document recovery tool, select your internal hard drive, and click Search for Lost Data.
Step 3: After the scan, select Documents from the left, and search for the name or keywords to find the deleted or unsaved Word document.
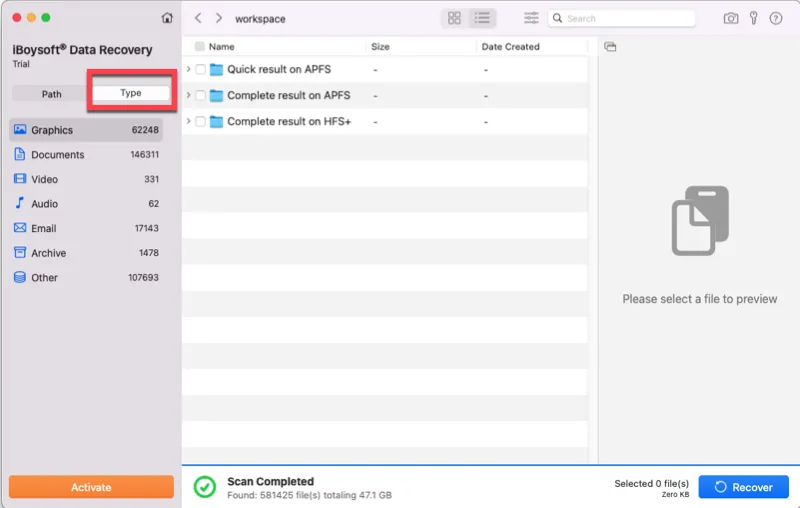
Step 4: Select the Word document you want to recover and click Recover.
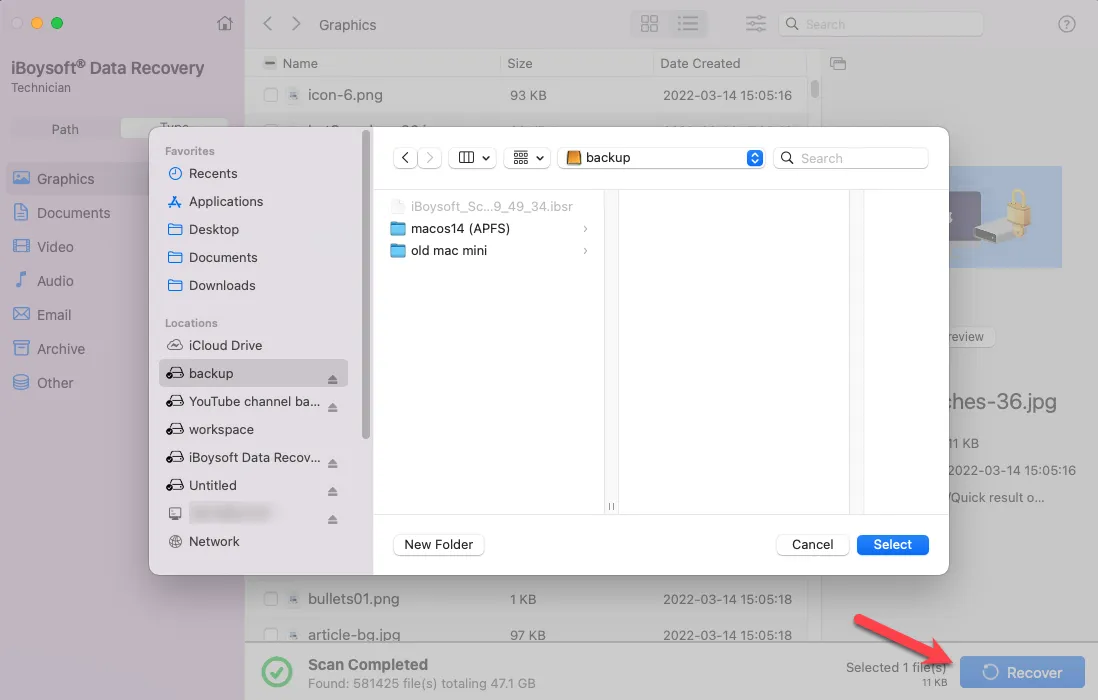
Step 5: Save the recovered Word documents to another storage device.
How to Avoid This Next Time
Hopefully, you have learned how to recover Microsoft Word documents on Mac by following the best practices outlined here. Here are some tips you can follow to prevent losing files in the future:
- Making pressing Command + S a habit after editing parts of an important Word file.
- Enable AutoRecover and reduce the interval between saves to 5 minutes or so. Note that Word's performance will be hampered slightly if it's saving every minute, especially for large files.
- Make sure that no important files are in the Trash before emptying it.
- Always back up essential data.
- Consider getting a surge protector to prevent unexpected system crashes due to power spikes.
FAQs
- QDoes AutoRecovery work if Word was force quit?
-
A
Yes - if AutoRecover was enabled before the force quit and an AutoRecover file was saved.
- QWhere are Word temp files stored on modern macOS?
-
A
1. Word’s sandbox container (e.g., ~/Library/Containers/com.microsoft.Word/Data/Library/Preferences/AutoRecovery/).
2. macOS per-session temporary directory ($TMPDIR).
3. Older Word / older macOS locations (/private/var/folders/).
- QCan a Word document be recovered?
-
A
Yes, you can recover unsaved Word document on Mac. If your Word has AutoRecover turned on, you can locate the unsaved Word document from the AutoRecovery folder using the method described in this post.
Also, you can recover unsaved Word document on Mac from the Temporary folder using Terminal. If none of these suggestions work, opt for restoring an earlier version of the file from Time Machine or OneDrive.
On top of that, you can employ a Word document recovery application to scan all corners of your Mac's hard drive to recover unsaved, deleted, or lost Word documents efficiently.
- QHow to recover unsaved Word document on Mac without AutoRecovery?
-
A
There are two ways to recover an unsaved Word document on Mac without AutoRecovery. One is to check the Temporary folder by typing open $TMPDIR in Terminal > opening the Temporaryitems folder > dragging files starting with ~Word Word to the desktop > opening the file in Word > saving the unsaved document to a preferred location.
- QCan software recover a Word file after clicking Don't Save?
-
A
Generally no, but there is a slight chance.
When you click 'Don't Save,' Word assumes you mean it and immediately wipes out its temporary AutoRecover cache files from your drive.
The only way data recovery software can help is if it manages to scan the raw storage blocks of your Mac and piece together those deleted temporary fragments before your operating system overwrites that specific part of the hard drive with new data.
- QWhere are Word AutoRecover files on Mac?
-
A
The Word AutoRecover files on Mac are usually stored on ~/Library/Containers/com.microsoft.Word/Data/Library/Preferences/AutoRecovery.