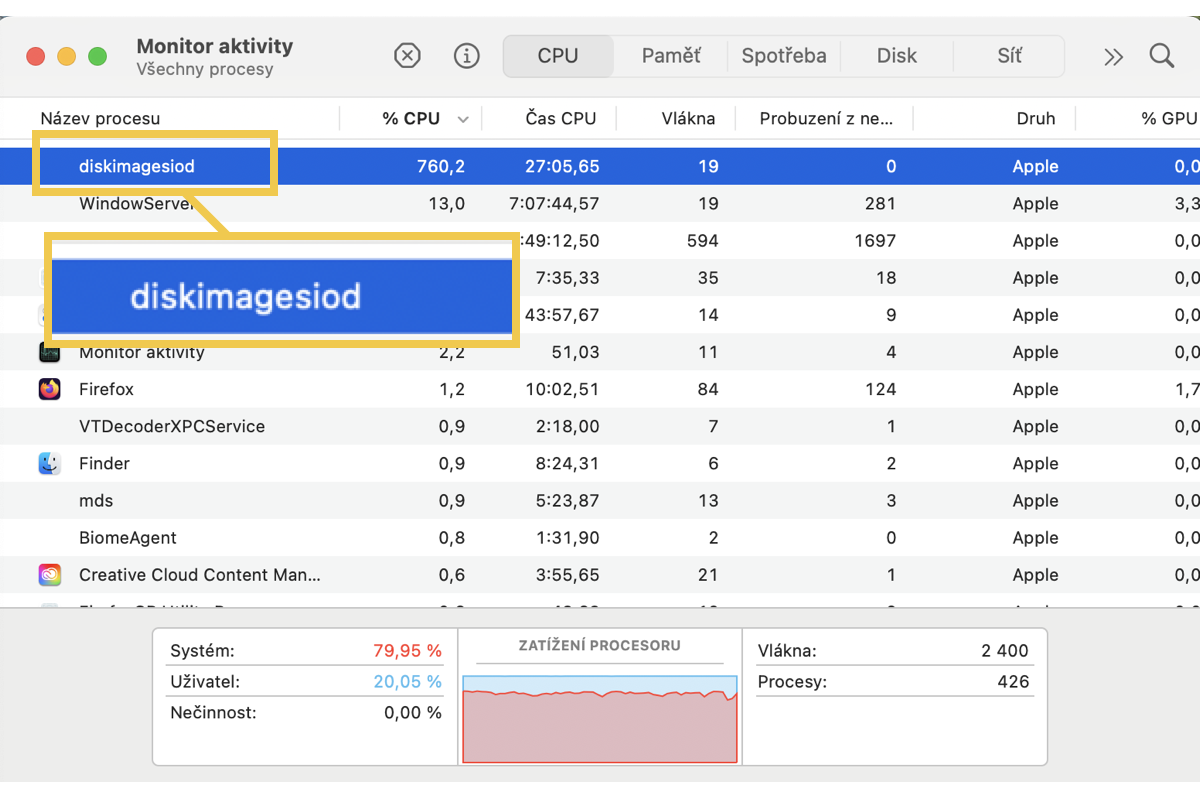
202 5K iMac running Sequoia 15.0. Since upgrading when diskimagesiod is running it is absolutely HAMMERING the CPU. Currently backing up and fluctuating between 160-515%. Fans are running full blast and the machine is hot. I've tried a new Time Machine backup but same. This is to a Synology NAS that I've been using for a year or so, other machines backing up to it using TM are fine. It's not just the first backup hammering things, it's all subsequent backups. Is this a known issue?
In fact, the issue of the diskimagesiod process maxing out the CPU already happened on macOS Sonoma, yet it draws great attention again when it shows up on macOS Sequoia. It most often warms up the machine and causes abnormal CPU usage on Mac when Time Machine backs up the hard drive.
The diskimagesiod process eats up almost the CPU, barely leaving the CPU for the machine to work. Luckily, this post sheds light on how to resolve the diskimagesiod on Mac with all possible workarounds, so the machine can complete the backup task without a hitch.
What is diskimagesiod on Mac?
diskimagesiod is a part of the DiskImages2 framework that handles I/O for disk images and manages attached disk images. DiskImages 2 is a private system framework first introduced in iOS 14, a successor to the original DiskImages framework, if you want to know what is DiskImages2 framework. The main difference is that the original DiskImages framework was written in C while DiskImages2 was written in objective-c and centered around Objective Oriented Programming.

Generally, the diskimagesiod process cannot opened or created by users manually, which always shows up along with the Time Machine's backup process. It swallows most of the CPU and takes hours of CPU time which implies the backup time, which accompanies a blustering fan and a warm machine. What's worse, the appearance of diskimagesiod makes the rest of the hard drive space inadequate for the machine to operate as expected.
Yet do not worry, please. Read on to learn how to resolve this strange program with effective workarounds. If you find this article informative, please click the Share button to help more people who run into the same trouble.
How to back up your Mac before fixing diskimagesiod?
Since the diskimagesiod comes out with the start of Time Machine backup, resulting in the backup mission on its way to finish, it's worthwhile to try an alternative utility to carry out the hard drive backup task. The File Keeper function of iBoysoft DiskGeeker records the data changes of the APFS volumes (Macintosh HD) within the specified time range for later recovery or restoration, which is a fine utility for hard drive backup.
With this software replacing Time Machine's backup mission, diskimagesiod will disappear and the issues caused by it will fade away from your machine.
You can launch this versatile utility to make a full snapshot for capturing the target volumes hourly, weekly, or monthly. When any unexpected data deletion or data loss happens, you can run this File Keeper feature to restore it with ease!
Here we will show you how to run this Time Machine alternative to carry out the backup task:
Step 1: Download and install iBoysoft DiskGeeker on your Mac device.
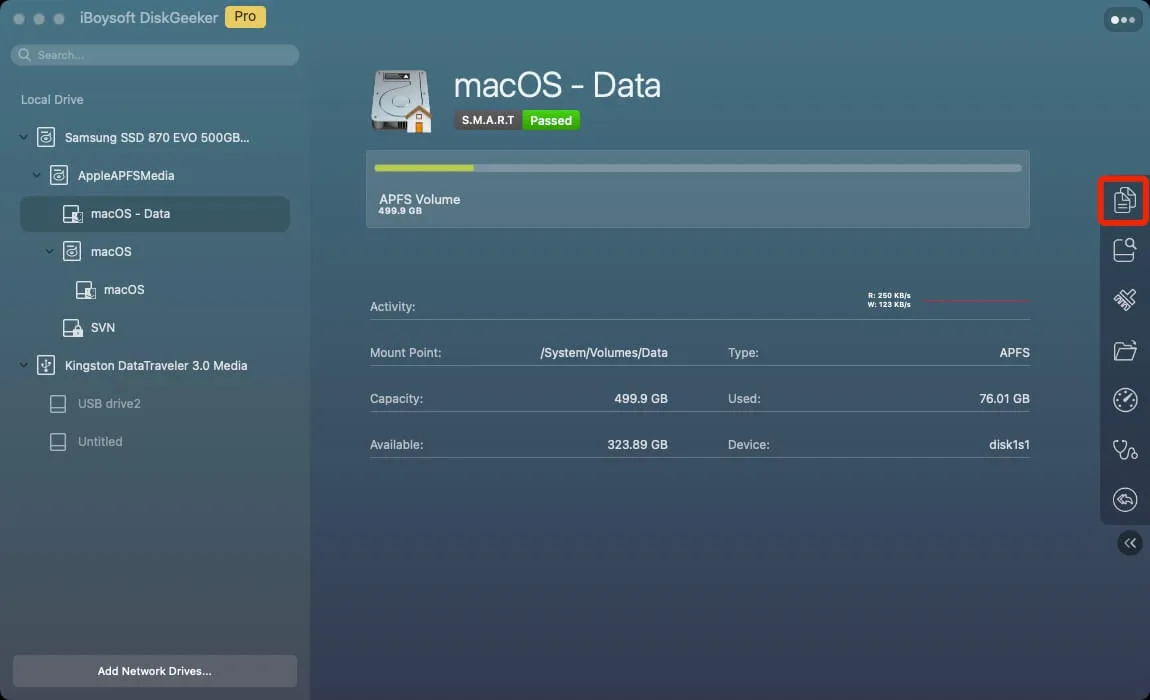
Step 2: Select the target APFS volume on the left sidebar.
Step 3: Click "File Keeper" from the right-side toolbar.
Step 4: Click "Turn On" on the popup window.
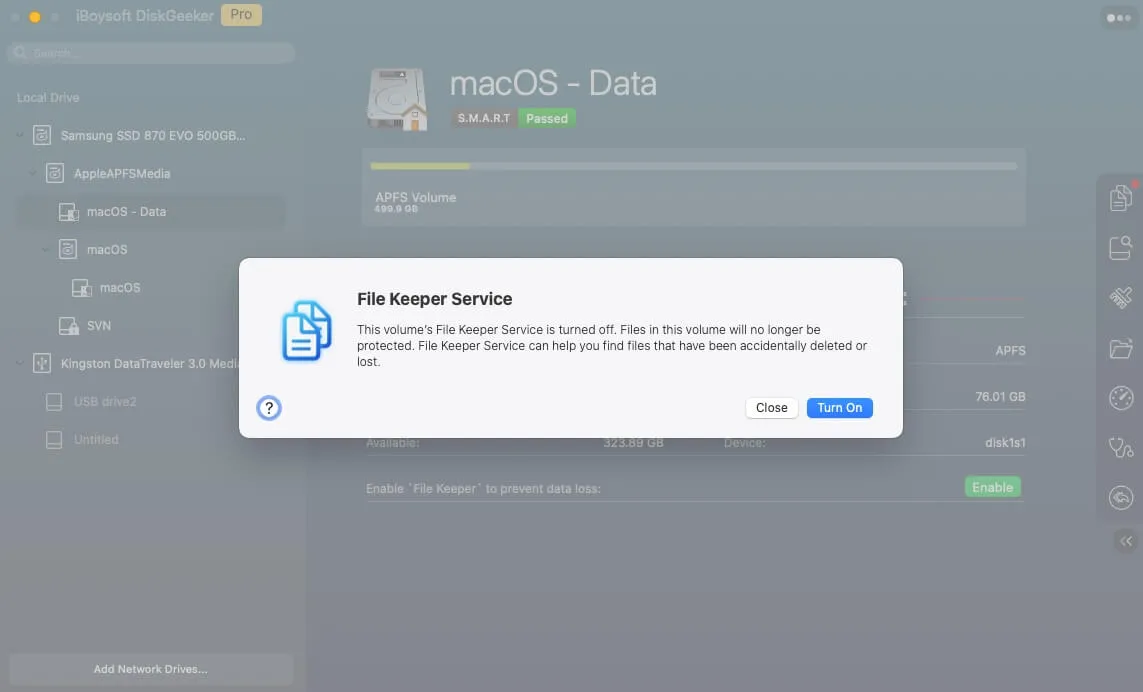
By default, once you enable File Keeper, it automatically backs up the target APFS volume as a snapshot. To disable File Keeper, click the gear icon at the upper right corner > "Turn Off."
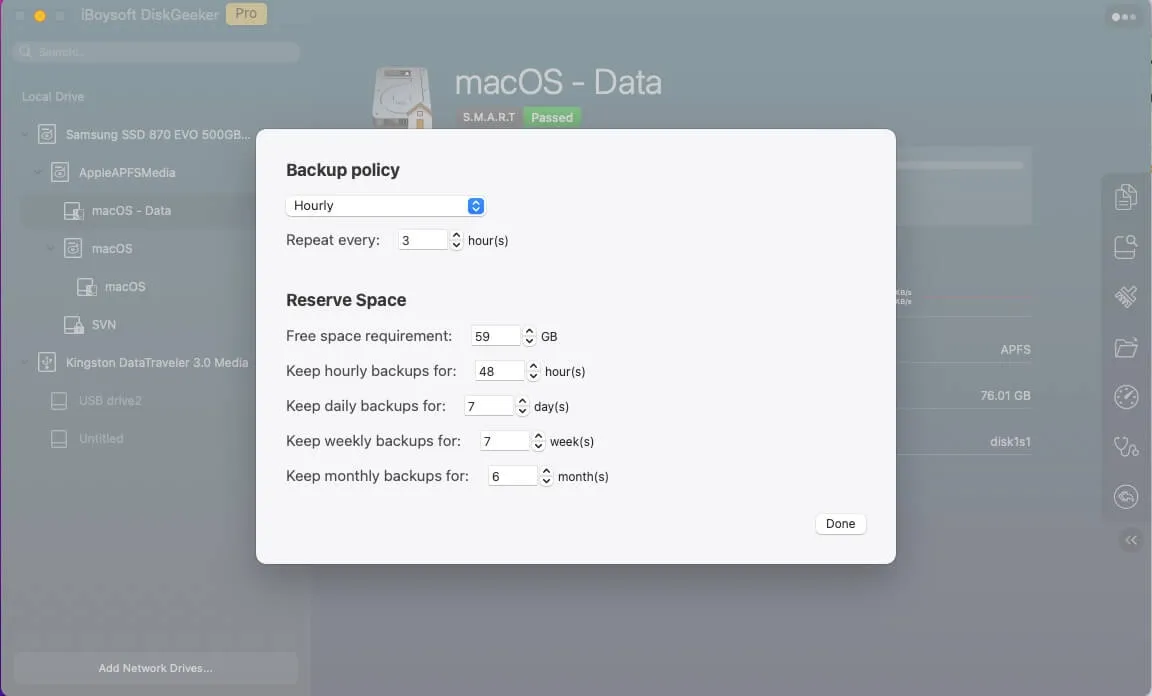
If you want to change the backup settings, click the gear icon > Options to open the backup preferences pane. Here are how to:
More specifically, in the Backup policy section:
1. You can set it to allow iBoysoft DiskGeeker to back up the target APFS volume hourly, weekly, daily, or monthly.
2. On the box next to Repeat every, set an interval time to repeat each backup.
In the Reserve Space section, you can:
1. Choose an amount of free storage capacity you want (the minimum requirement is 15GB) beside the Free space requirement box. Files on the target volume can be backed up only if the volume has the free space you set.
2. Set the retention time for hourly, daily, weekly, and monthly backups.
If you want to search files from File Keeper Backups, here is how to perform it:
Step 1: Select the target APFS volume on the left sidebar.
Step 2: Click "File Keeper" from the toolbar.
Step 3: On the pane, set the searching range from your backups to quickly locate the target backup files.
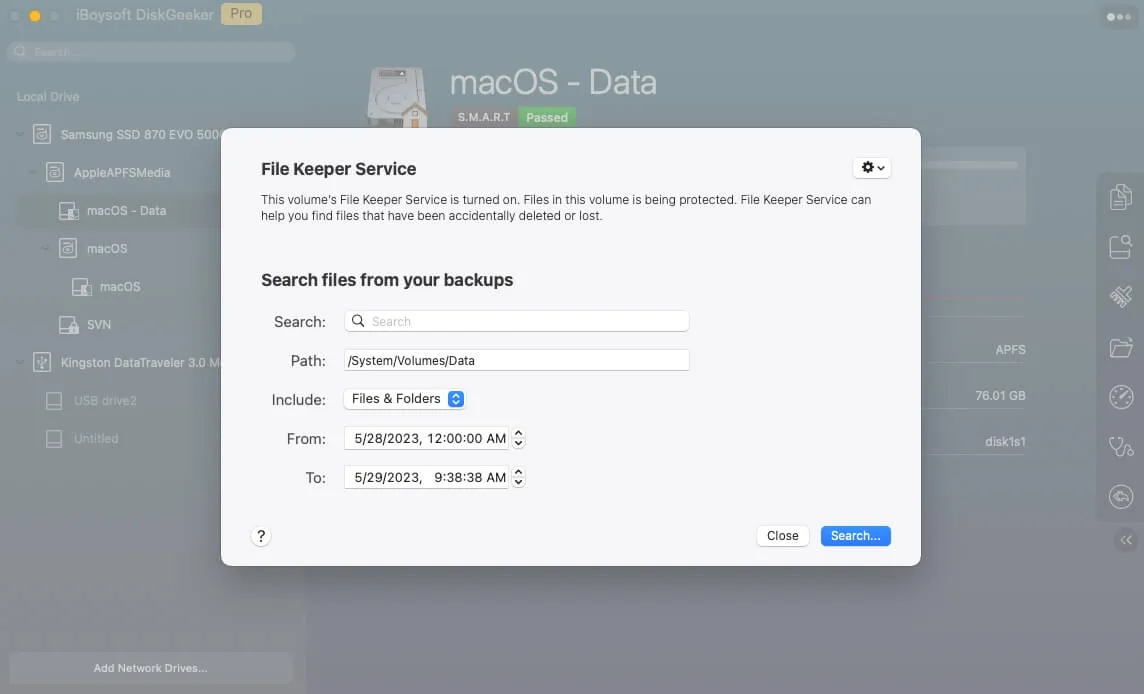
Step 4: Click "Search".
Step 5: Expand the backup folders and tick in your desired files.
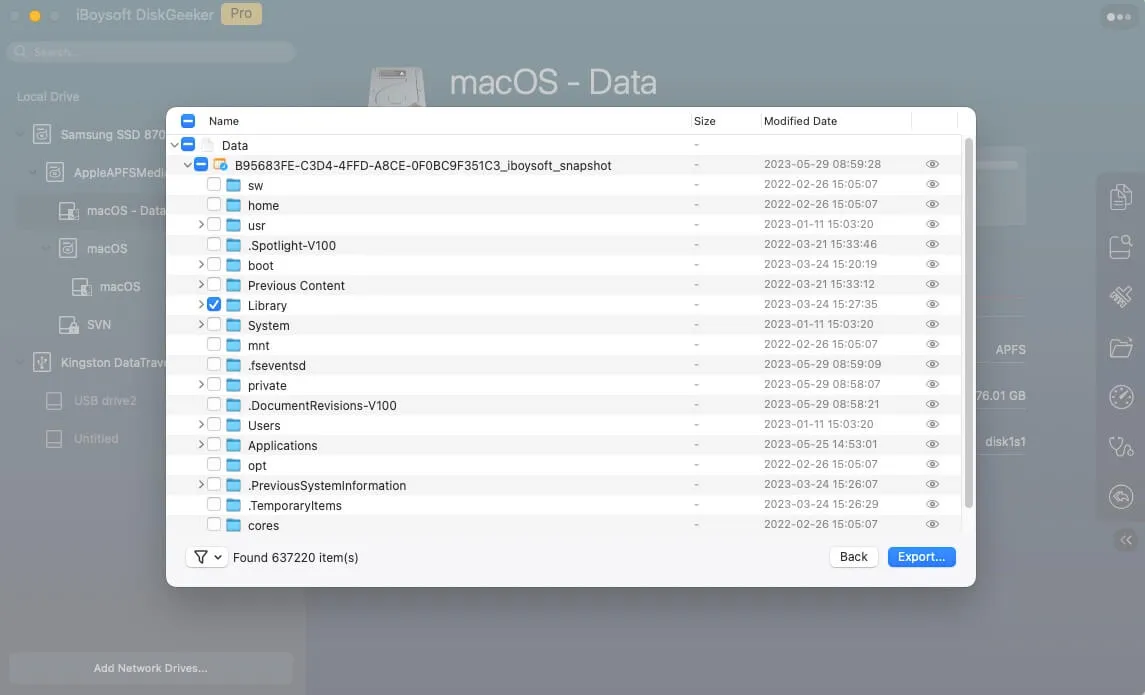
Step 6: Click "Export".
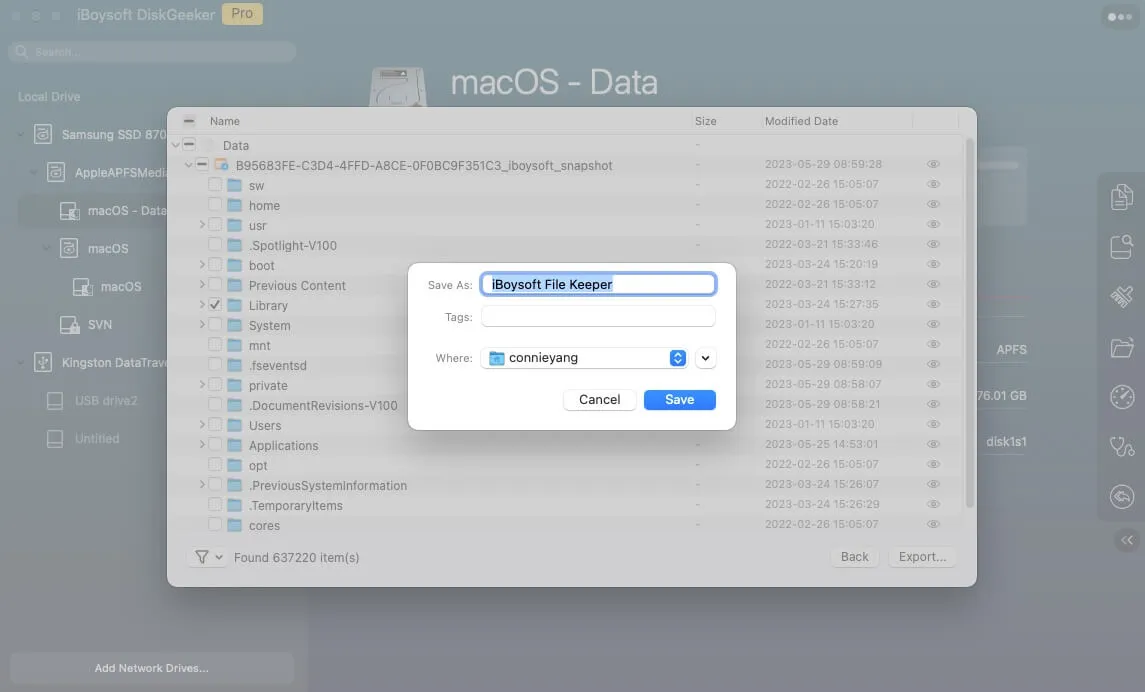
Step 7: Choose a destination to save the files and click "Save".
Many thanks if you'd like to share this post with more people on your social platform!
How to fix diskimagesiod on Mac?
If you prefer the built-in backup utility on Mac, you can try the following solutions. These aim to fix the issue of diskimagesiod maxing out the CPU and occupying long CPU time, and then the backup will proceed smoothly.
Solution 1: Restart your Mac
When diskimagesiod causes the machine to make noise wildly or misoperate, the priority should be given to Mac reboot. A device reboot always shuts down all glitches and bugs and gets the OS and hardware ready for further working, which also helps in terminating the diskimagesiod process: Apple Menu > Restart.
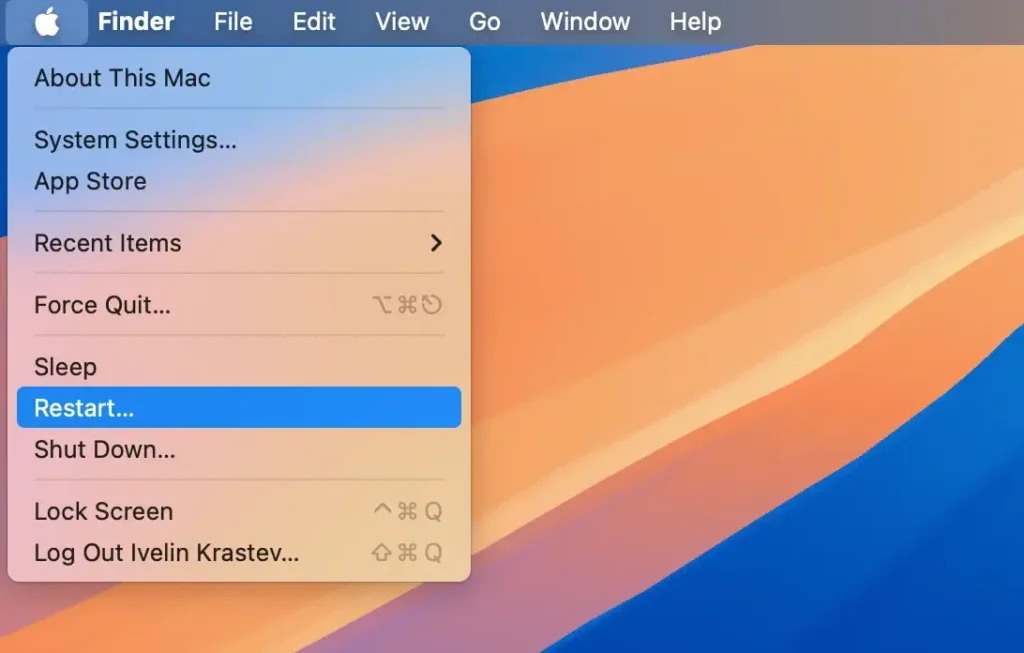
Once the Mac wakes from the reboot, check if the diskimagesiod process comes back again.
Solution 2: Kill diskimagesiod in Activity Monitor
Activity Monitor is an outstanding troubleshooter designed for fixing all kinds of massive CPU eaters on Mac. With almost the CPU being swallowed and CPU time concentrated on diskimagesiod, it's urgent to kill it with Activity Monitor. Anyway, we aren't willing to see a single process preventing the machine from operating.
- Open Activity Monitor with Spotlight Search shortcuts or any other way you like.
- Locate the diskimagesiod process in the program list. You even needn't to search for it as it must rank high based on its' high CPU usage.
- Select the diskimagesiod and click the "x" button on the top menu bar to quit it.

This temporary fix may be insufficient to remove this annoying program from Mac completely. Don't worry, please. Keep reading and we have more professional solutions below.
Solution 3: Check the available space left for backup
Check if there is enough available space on the drive for the backup matters here. Obviously, inadequate space sets obstacles for the backup work, making the backup hang on all the way. You can go to Disk Utility to see how much space is left on the external hard drive:
- Open Disk Utility with the Command + Space keys and enter Disk Utility to recall it.
- Select the external hard drive used as the backup destination, and Disk Utility will show you how much drive space is left there.
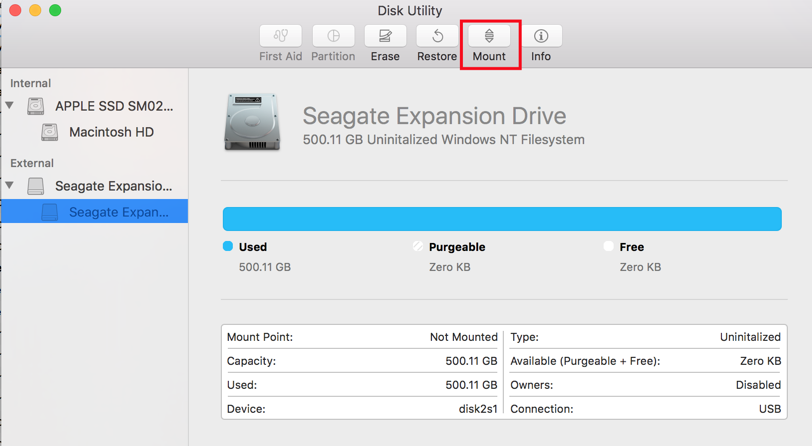
With inadequate space, Time Machine overwrites the old backup with a new one. If the space is too small to back up the new modifications on Mac, it may cause trouble unexpectedly. You can enlarge the available space by changing a drive with a bigger space or cleaning the junk in the drive.
If there is enough space while the backup still doesn't go well, you can run First Aid to fix unknown bugs hidden on the hard drive. Remember the previous backup is kept well in case it gets corrupted during the fix.
- Open Disk Utility on your Mac and control-click the backup drive from the left sidebar.
- Click the First Aid button on the top menu bar.
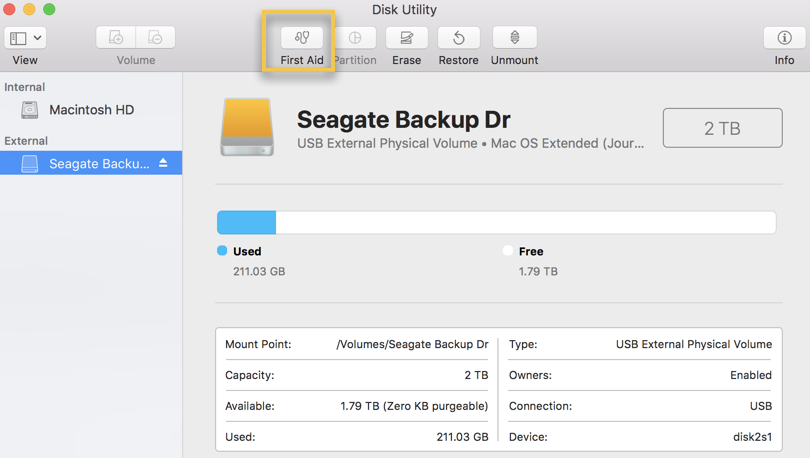
- Confirm your fixing purpose when asked, then Disk Utility begins to fix the problematic hard drive.
- Disk Utility will notify you when the repair finishes, and you can check if the diskimagesiod process still bothers you.
Solution 4: Change the backup storage
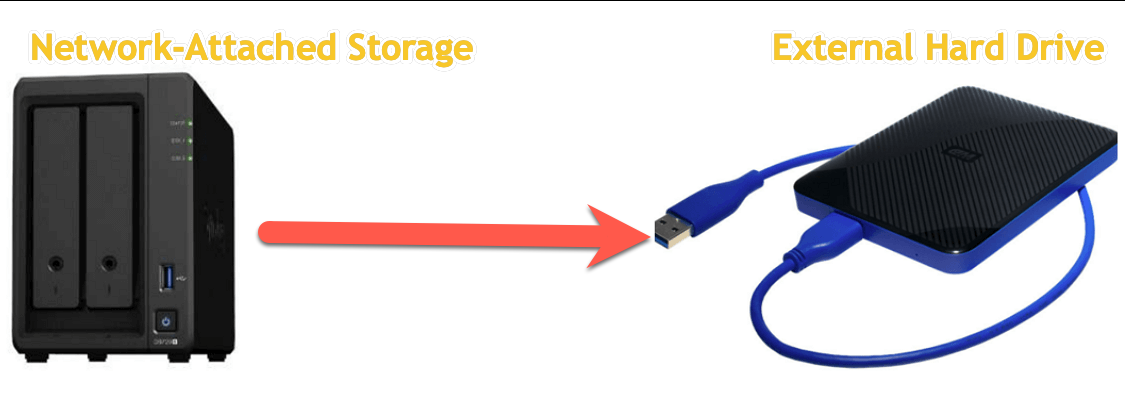
Since so many users have complained that the backup triggers the diskimagesiod issue when connected to the Network-Attached Storage, why don't we just change the backup storage? The simplest solution is to replace the internet-connected storage with a physical hard drive for the backup, then wait and see if the diskimagesiod still comes back.
Solution 5: Re-do the Time Machine backup from the start
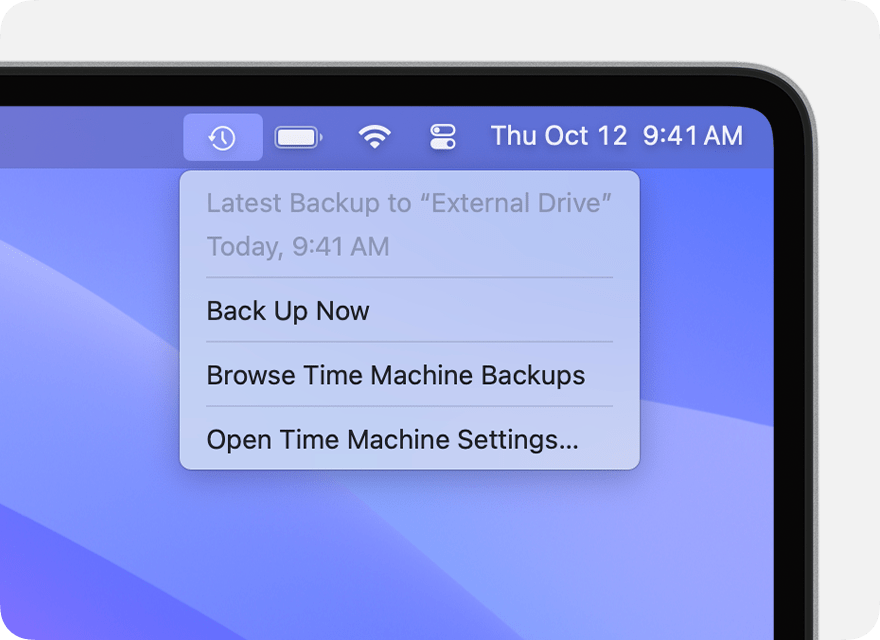
Terminate the on-going backup and restart a new one to remove the diskimagesiod program completely, here we'll show you how to perform that:
- On your Mac, click Time Machine in the top right menu bar.
- Choose Stop This Backup to terminate the backup.
- Clean the backup drive and then choose Back Up Now for a new circle of backup.
Solution 6: Use the macOS Safe Mode feature
macOS Safe Mode is included in Mac startup options to help you troubleshoot most OS-related problems. It can be considered as a diagnostic mode of the Mac operating system. When the diskimagesiod interferes still with all the solutions being implemented, you can try to boot into macOS Safe Mode to get it fixed:

Boot an Intel-based Mac in Safe Mode:
- Shut down your Mac computer and wait for 10 seconds.
- Press the power button to restart your Mac and simultaneously hold down the Shift key.
- Release the Shift key when seeing the login window.
Start a Mac with an Apple Silicon chip in Safe Mode:
- Shut down your Mac computer and wait for 10 seconds.
- Press down the power button until the startup options and the Options gear icon appear on the screen.
- Choose your startup disk.
- Hold down the Shift key and click Continue in Safe Mode. Then, release the Shift key.
Once booting in macOS Safe Mode, begin the backup work and check if the diskimagesiod eats up the CPU and occupies the CPU time wildly.
Solution 7: Reinstall macOS
Suppose all mentioned solutions make no sense in removing the diskimagesiod process, the final way you can take into consideration is macOS reinstallation. macOS reinstallation brings all culprits or troublemakers from the machine and refreshes the operating system with all components ready.
When you run into trouble that cannot be fixed with kinds of tricks and solutions, you can give macOS reinstallation a shot! Back up the Mac first in case any accident happens during the reinstallation. Since this post concentrates on the very point that Time Machine backup works improperly due to the diskimagesiod, you can give iBoysoft DiskGeeker's File Keeper a chance.
- Boot Mac into macOS Recovery Mode.
- Go to the macOS Utilities window and select Reinstall macOS.
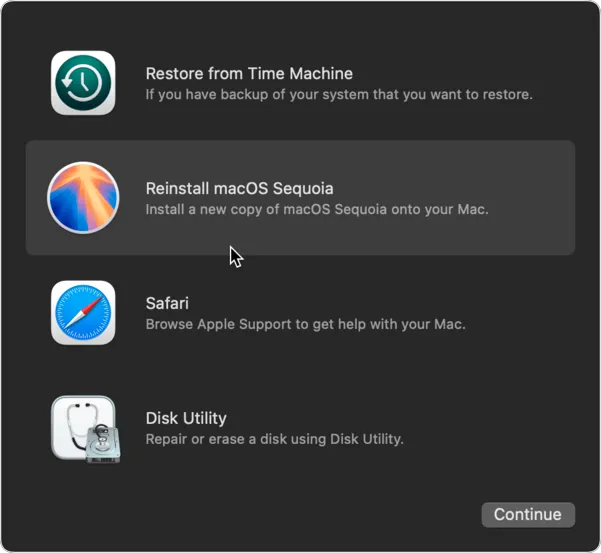
- Follow the on-screen wizard to complete the reinstallation.
With the new OS being installed, you can test if the diskimagesiod hits one more time. If does, file Apple a report discussing the issue and the solutions you have tried, then ask for their help.
Conclusion
This post gathers all workable solutions to fix the diskimagesiod process showing up on Mac, which prevents Time Machine from backing up the hard drive normally. You can try the Time Machine or NAS alternative to complete the backup, or, you can try the solutions mentioned here to drag diskimagesiod's CPU and CPU time usage to a normal/expected level.
No matter what way you choose, it's recommended to fix this issue ASAP since backup is quite important for the sake of data safety.
