Note: The latest macOS version is macOS Tahoe 26. If you want to install macOS Tahoe instead of macOS Sonoma on Windows without virtual machines, read: How to Install macOS Tahoe on Hackintosh?
macOS Sonoma comes to the public on 26, September 2023, which welcomes a rich set of new features and functions, including fantastic widgets and stunning screen savers, powerful productivity for video conferencing, enhanced browsing with Safari, an immersive gaming experience, and some updates to applications that comes with your Mac like Apple Notes, Passwords, Messages, Reminders, Keyboard, and screen sharing.
Some users can't help tasting macOS Sonoma but still have a liking to macOS Ventura so they choose to dual boot macOS Sonoma and Ventura on a Mac, and some other Windows users try to enjoy it with a virtual machine like install macOS Sonoma on VMware on Windows or install macOS Sonoma on VirtualBox on a PC. There are still people who look for methods to experience this amazing operating system on their Windows computers without a virtual machine.
Although complex, it is possible and worth having a try. Just follow this tutorial to learn how to install macOS Sonoma on Windows with no VirtualBox and VMware.
Tips: The process below requires using a Mac. If you don't have a Mac that's compatible with macOS Sonoma, download the Mac operating system on Windows and then create the macOS bootable USB from Windows.
If want to upgrade to macOS Sonoma or perform a clean macOS Sonoma installation on your Hackintosh, keep reading this guide to learn the steps.
What needs to be done beforehand
There are some crucial preparations you should make so that you can successfully install macOS 14 Sonoma on your machine with a Windows OS.
1. Free up space on the PC. A second operating system needs space to be installed, so you should clear unwanted large files, caches, applications, etc. from your machine for a smooth running of the macOS.
If you accidentally delete some important or useful, do not hesitate to use iBoysoft Data Recovery Software to restore them ASAP or they will be overwritten with new data.
2. Back up your computer. Whatever the changes you will make on your computer hard drive, you'd better back up your device in the first place to avoid data loss caused by accidental misoperations or unexpected errors. If anything goes wrong, you can retrieve lost data with the created backup and restore them to the original.
3. Some hardware requirements:
- A Windows computer
- A compatible HDD or SSD (NVMe/PCIe/SATA SSD)
- A working Internet connection
- A 16GB or larger USB flash drive
- A working computer running macOS Mojave or later
If you find this article informative and helpful, please share it with more people via your social platform!
How to install macOS Sonoma on a Windows (Intel/AMD)?
Now that you have completed all preparations discussed above, it's time to begin the macOS Sonoma installation on a PC right at this moment. Please carefully perform the operations elaborated on or any misoperation might leave your machine at risk.
Tips: For a more detailed guide, read: How to Install Mac OS on Windows PC?
Step 1: Download the macOS Sonoma installer on the working Mac
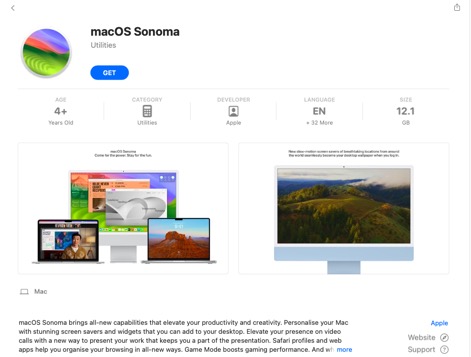
You can either download the macOS 14 Sonoma installer from the App Store or other trusted website:
macOS installer download directly ⬇️
1. Open the macOS Sonoma installer from the App Store: Open the functional Mac and go to the App Store to download the macOS Sonoma where macOS Sonoma is officially released.
2. Download the macOS Sonoma installer file from a reliable website like the Apple content delivery website. Press the Enter key to download the install assistant.pkg of Sonoma and you can find it from the Applications folder after downloading.
Step 2: Create a macOS Sonoma bootable USB
When the macOS Sonoma installation is done, you can follow the steps below to create a macOS Sonoma bootable USB.
- Connect the USB flash drive to your Mac and launch Disk Utility to erase it.
- Click on View and select Show All Devices.
- Select the USB drive in the left pane and click on the Erase button. Then fill in the Name, choose Mac OS Extended (Journaled) in Format and GUID Partition Map in Scheme.
- Open the Terminal app to run the following command line. Please replace "MyVolume" with the name of your USB flash drive.sudo /Applications/Install\ macOS\ Sonoma.app/Contents/Resources/createinstallmedia — volume /Volumes/MyVolume
- Enter your admin user account password to proceed while you cannot see the characters.
- You'll be then asked to confirm the erasure of the drive. Type Y and follow the Return key to proceed.
- The Terminal app will start to create the bootable macOS Sonoma USB drive, which might take some time. Once it's done, you'll see a message notifying you that the process was successful.
Step 3: Prepare OpenCore EFI for booting the installer
The OpenCore pkg file is essential in the OpenCore EFL preparations, you need to download it in advance.
- Visit the following website to download OpenCore and its auxiliary tool:
OpenCore Package: It is a bootloader for users to run macOS Sonoma on a Windows computer successfully.
OCAuxiliary tool: The OCAuxiliary tool is a GUI-based Configurator for editing files for Acidanthera's OpenCore Boot Manager.config.plist - The OpenCore pkg file comes in two variants: DEBUG and RELEASE. You're suggested to download the RELEASE version.
- Extract the zip file and you'll get 4 folders. Unzip the one that fits your System Type.
IA32 for 32-bot CPU
X64 for 64-bit CPU
Note that the OpenCore bootloader must be updated to the latest version available so that the installation process can go smoothly.
Step 4: Install OpenCore to the bootable USB flash drive
When the EFI is ready, the next step is to install OpenCore EFI to the bootable USB flash drive.
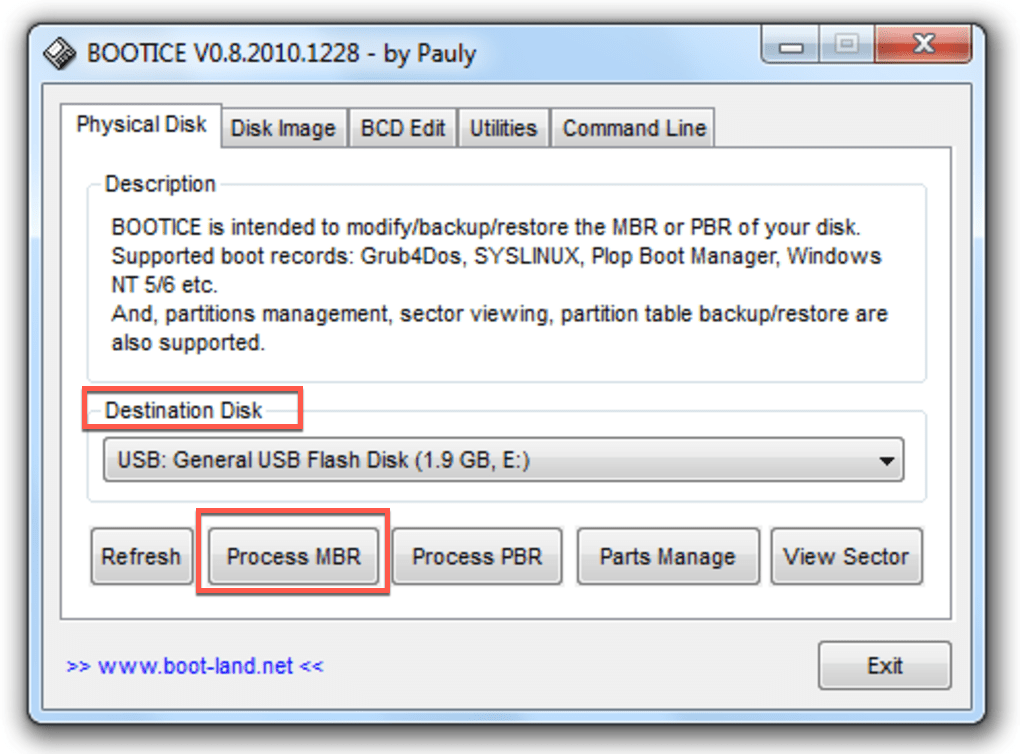
- Open BOOTICE and select the macOS installer USB drive as a Destination Disk.
- Click the Process MBR and then select Restore MBR.
- Select the boot0 file from the Utilities/LegacyBoot directory found in OpenCorePlg.
- Based on the target system, copy the bootx64 or bootia32 file from the Utilities/LegacyBoot directory in OpenCoreplg to the root of the USB flash drive.
- Rename bootx64 or bootia32 to boot to ensure it can boot properly.
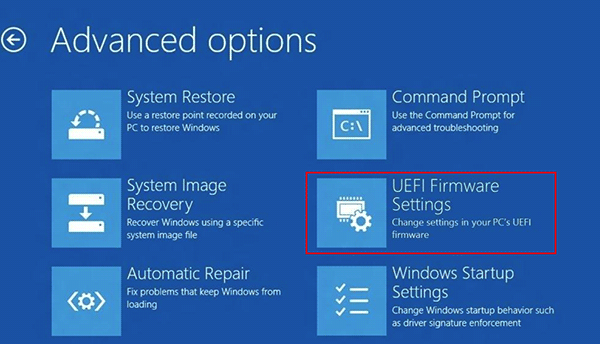
Step 5: Setup BIOS/UEFI
Before using the USB installer to boot, you need to set up the BIOS/FI on your Windows computer first.
Go to Settings > Update & Security > Recovery > Advanced Startup > Restart Now > Troubleshoot > Advanced options > UEFI Firmware Settings > Restart.
Step 6: Boot the macOS Sonoma installer
With all preparations and requirements being done, now you can boot your computer to macOS Sonoma via the USB drive. Here are how to do it:
- Turn on your computer and boot to Boot Menu from the Start menu. Or you can press the F8 key on your keyboard before the Windows starts.
- Select your USB flash drive with the UEFI Prefix and press the Enter key to boot.
- When the OC Boot picker shows up, select Install macOS 14 and press the Enter key to proceed.
- Once you come to the installation screen, select the preferred language and click Continue.
- Select Disk Utility in the new window and click Continue.
- Click View to select Show All Devices once you're in the Disk Utility window.
- Select a Windows hard drive or SSD where you want to install macOS and click Erase.
- Determine the following detail in each box:
Name: Macintosh HD
Format: APFS
Scheme: GUID Partition Map - Click Erase to confirm your operations.
- Select Install macOS 14 and click on Continue for further modifications.
- Select Macintosh HD and tap on the Continue button.
- macOS Sonoma starts installing on your selected disk.
- When your PC restarts, it will automatically boot from macOS Installer to continue the next stage of the installation. If for any reason, the installer doesn't boot automatically, select the macOS Installer in the boot picker then boot. The installation will continue and upon completion, your PC will restart automatically.
- Your PC will restart one more time and boot from Macintosh HD to complete the last stage of the installation.
Step 7: Finish macOsSonoma setup
After completing the macOS Sonoma installation, you can now set up the macOS for the first taste on your Windows computer.
When the welcome screen shows up, go to set up with the basic options like Keyboard setup, Network, Computer Account, and Privacy settings by following the onscreen wizard.
Conclusion
Installing macOS Sonoma on a Windows computer without a virtual machine is complex and challenging, but it's still possible if you carry patience and carefulness. This post gives stepwise and dealing instructions on how to complete that task. If you're interested in it, too, read it right now!