macOS Sonoma has attracted many installations with its array of new and improved features, including dynamic screensavers, desktop widgets, enhanced video conferencing, and better browsing security in Safari.
If you're wondering how to install macOS Sonoma on your Hackintosh computer, this article will give you the answer.
Whether you're aiming to upgrade from a previous macOS version or perform a clean installation of macOS Sonoma on your Windows PC, our step-by-step instructions will navigate you through the process, ensuring a smooth and successful upgrade.
How to upgrade to macOS Sonoma on Hackintosh?
If you're currently running Mac OS X El Capitan or later, you can upgrade to macOS Sonoma on your Hackintosh with the following steps:
Step 1: Back up your computer
A successful upgrade usually won't cause data loss. However, if the upgrade fails, you may lose access to your system, and consequently have to reformat the internal hard drive and reinstall macOS. That's why it's always recommended to back up your data before initiating any OS upgrade.
﹒How to Use Time Machine on Mac: Backup and Restore Tutorials
Step 2: Update the bootloader and kexts
Before upgrading to macOS Sonoma, you should also check if your current bootloader supports it. If you're using Clover, it needs to be version 5152 or later; if you're using OpenCore, ensure it's v0.9.3 or newer. Besides, it's also necessary to update the kexts, which is important for a smooth upgrade.
・Updating OpenCore and Kexts with OCAuxiliaryTools
Note: Apple has ended support for older hardware, including IGPU support up to Skylake, and has removed Broadcom WiFi support in macOS Sonoma.
Note that if your Hackintosh has AMD processors, you should also update the kernel patches.
Step 3: Update SMBIOS
To upgrade to macOS Sonoma, your Hackintosh needs to have compatible SMBIOS data. Ensure you're using one of the following SMBIOS for macOS Sonoma:
- iMac19,x, iMac20,x
- iMacPro1,1
- MacBookAir9,1
- MacBookPro15,x, MacBookPro16,x
- MacPro7,1
- Macmini8,1
If not, you can modify the config.plist file with a plist editor like ProperTree or Xcode.
Step 4: Download macOS Sonoma from App Store and install it
After checking that the relevant information is updated, reboot your Hackintosh. Then open the App Store to download macOS Sonoma and complete the installation. It's worth mentioning that the upgrade may sometimes fail. If it happens, you can delete the installer from your Applications folder and retry the process.
Hopefully, everything went well and macOS Sonoma is installed on your Hackintosh. Share this post if you find it helpful!
How to clean install macOS Sonoma on Hackintosh?
If you'd like to perform a clean installation of macOS Sonoma on your Windows PC, this section will walk you through the process.
Step 1: Check macOS Sonoma hardware compatibility
Apple supports a limited amount of hardware. With each macOS update, the limitation may be stricter. That's why you should ensure your computer's hardware is supported or has a patch to get around the issue.
Step 2: Preparation before installing macOS Sonoma
Before getting started, make sure you have a backup of the essential data on your computer and the following items prepared:
① A 16GB or larger USB drive
You'll need an external drive, like a USB stick, to create the macOS Sonoma bootable installer. It will be erased, so back up its data beforehand, if necessary.
② Access to a working computer that runs macOS Mojave or later
The Mac operating system is needed to create the bootable installer and the EFI folder. This can also be done on Windows, but it's more complicated.
③ At least 30GB of free space on your computer
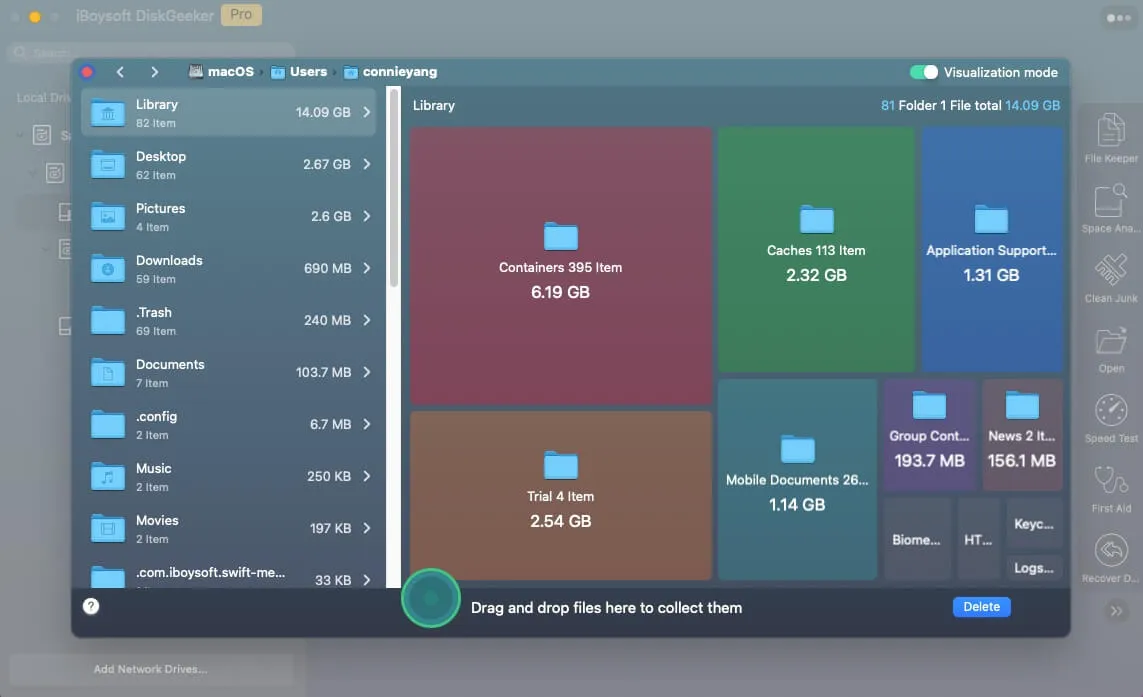
You should keep at least 30GB of available space on your computer to store the files needed for creating the bootable macOS Sonoma installer. If you don't want to manually go through different folders to remove unwanted files, you can download iBoysoft DiskGeeker and let it do the job for you.
It can scan the selected drive and display its folders and files in descending order based on their size. This allows you to easily spot and delete the files that take up the most space on your hard drive.
Besides, it can also gather junk files scattered around your drive, such as caches or log files, and enable you to quickly get rid of them.
④ OCAuxiliaryTools
OCAuxiliaryTools provides tools that can be used to configure and manage the OpenCore bootloader, troubleshoot problems, and customize the boot process for a Hackintosh system.
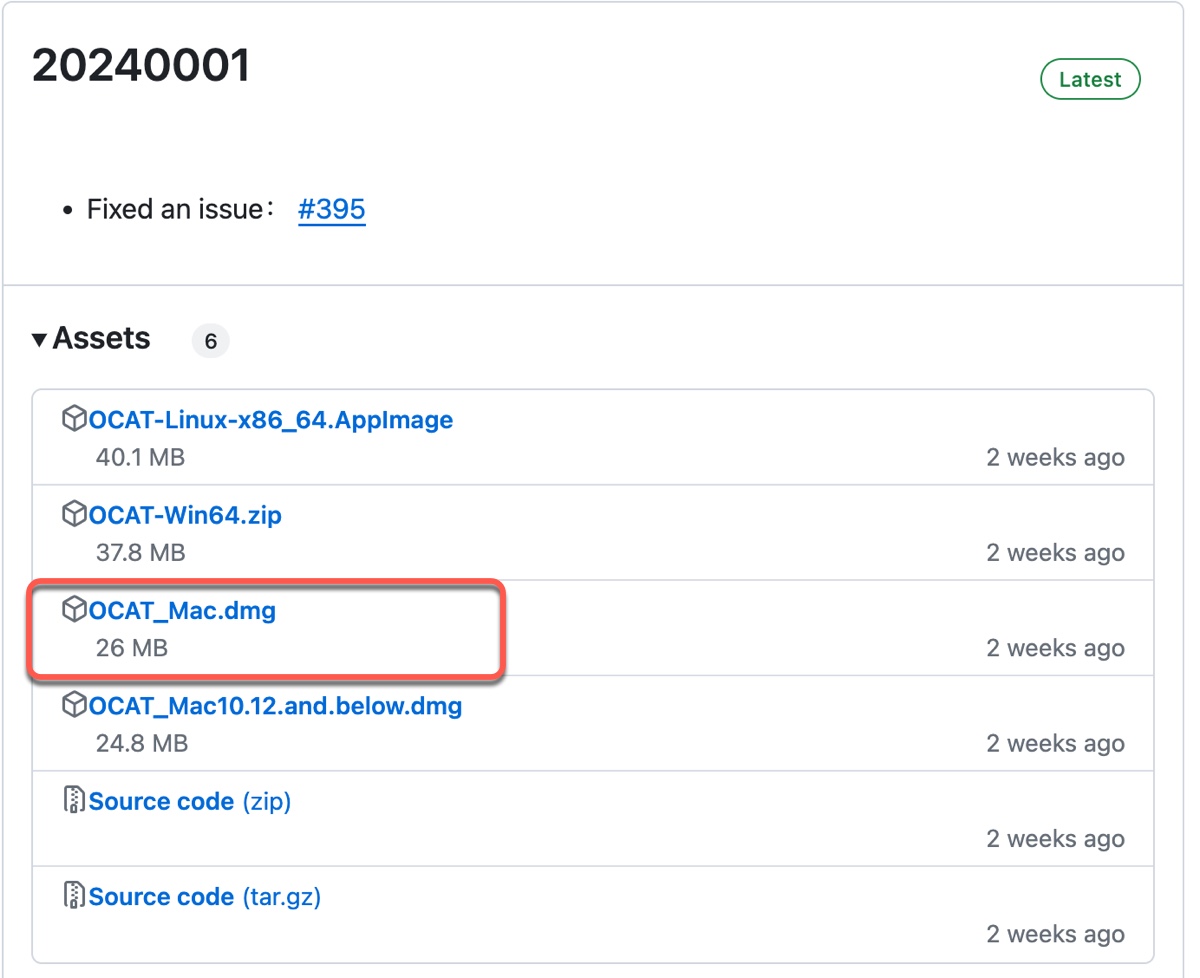
Download the OCAT_Mac.dmg file, open the disk image, and then drag and drop the OCAuxiliaryTools.app into your desktop.
⑤ macOS Sonoma installer
The macOS Sonoma installer is a must for creating a macOS Sonoma Hackintosh computer. You can get it from the App Store or simply download the macOS Sonoma DMG file. Note that the installer should be added to your Applications folder for later use.

Step 2: Create a bootable macOS Sonoma installer
Take the following steps to create a bootable macOS Sonoma installer first.
- Ensure you're logged in with an administrator account.
- Connect the external drive you prepared to your computer.
- Open Disk Utility.
- Click View > Show All Devices.
- Choose the uppermost level of your external drive and click Erase.
- Give it a name.
- Choose Mac OS Extended (Journaled) as the format.
- Select GUID Partition Map as the scheme, then click Erase.
- Wait until the erase process is complete.
- Open the Terminal app.
- After replacing MyVolume with the name you want to assign to the drive in the following command, execute it to create the bootable macOS Sonoma installer.sudo /Applications/Install\ macOS\ Sonoma.app/Contents/Resources/createinstallmedia --volume /Volumes/MyVolume
- Type your login password and hit Enter. (The password won't appear on the window.)
- Type y to confirm erasing the drive.
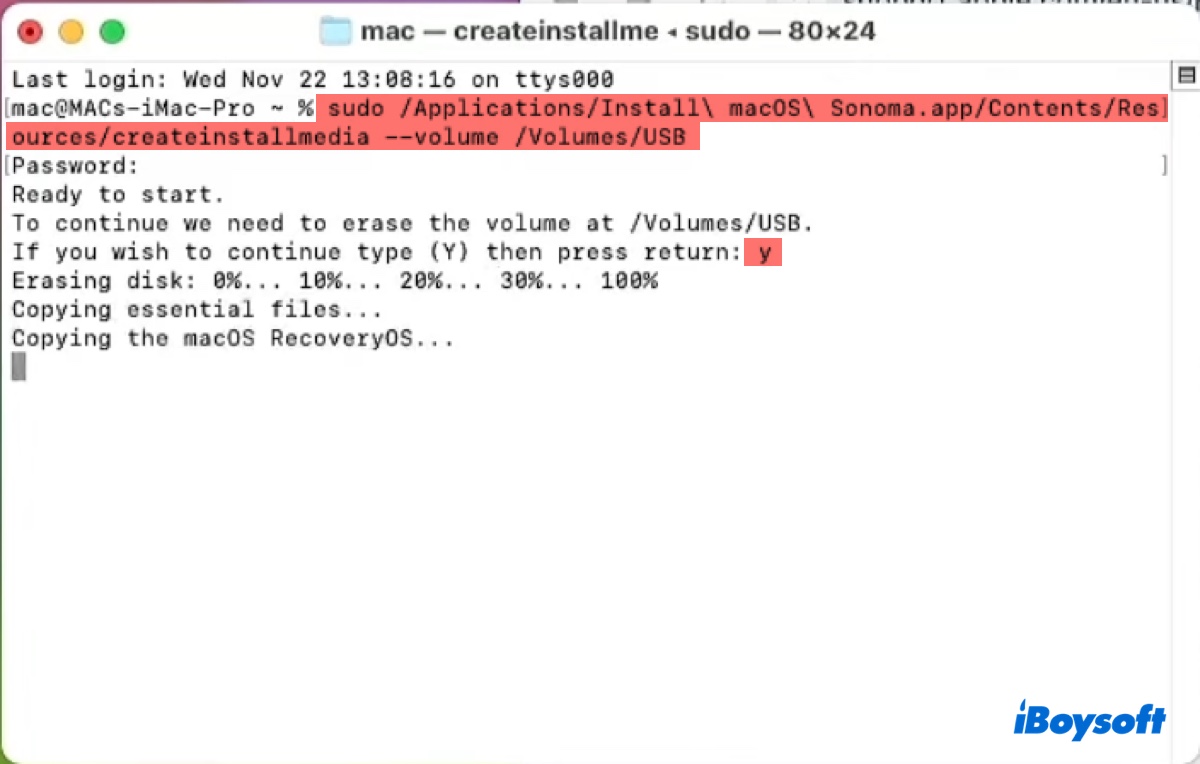
- Close Terminal when the bootable installer is created.
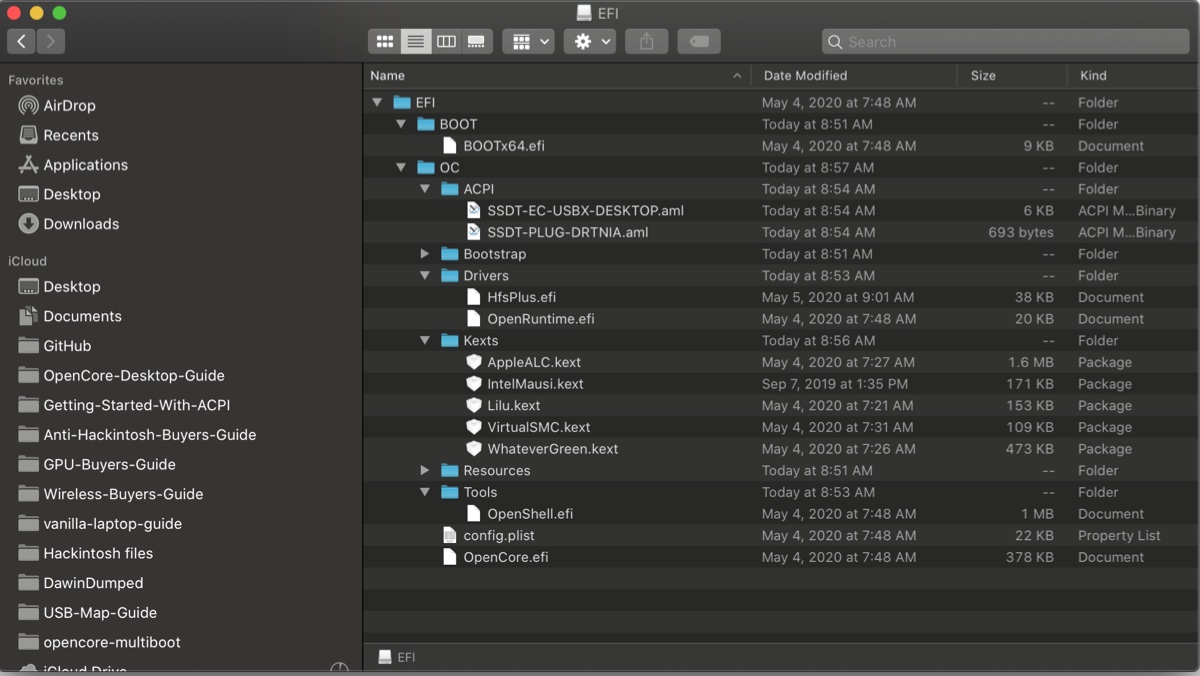
Step 3: Build the EFI folder
Now that we have macOS Sonoma ready to install, the next step is to build an EFI folder that contains the necessary drivers, kexts, tools, and other resources for booting macOS Sonoma on your computer.
Here, we'll show you the easiest way to create the EFI folder by utilizing the pre-created plist files. If you'd like to learn more details about the required files, take a look at the OpenCore guide.
- Right-click OCAuxiliaryTools and select Open.
- If a message says macOS can't verify it, click Cancel.
- Right-click on it, select Open, and click Open again.
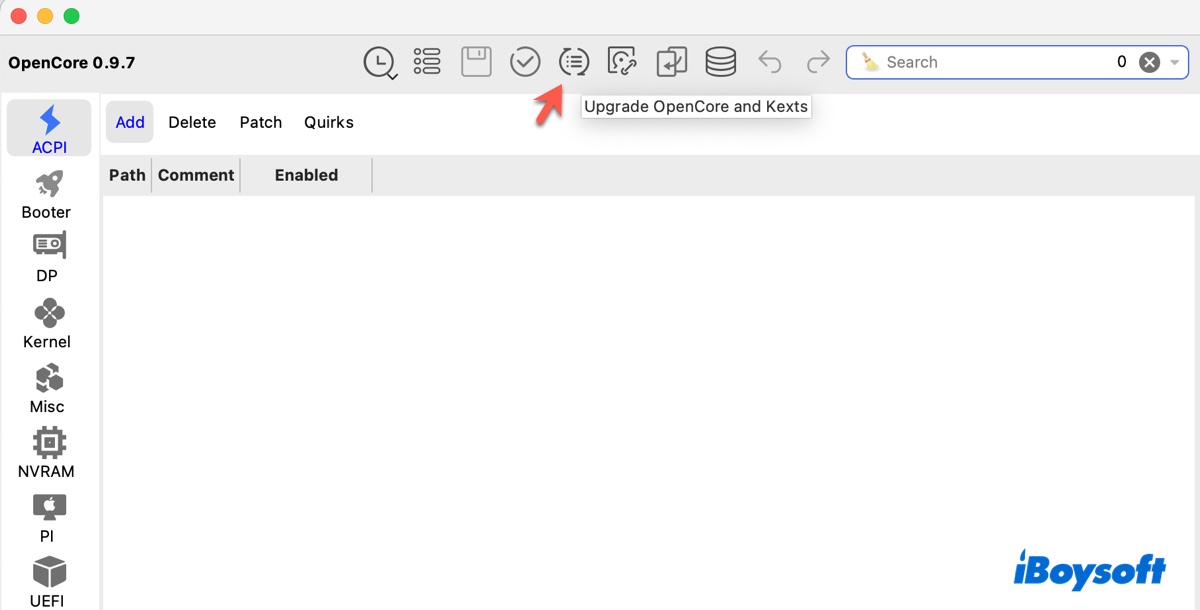
- Click "Update OpenCore and kexts."
- Select "Latest version" next to "Choose OpenCore Version."
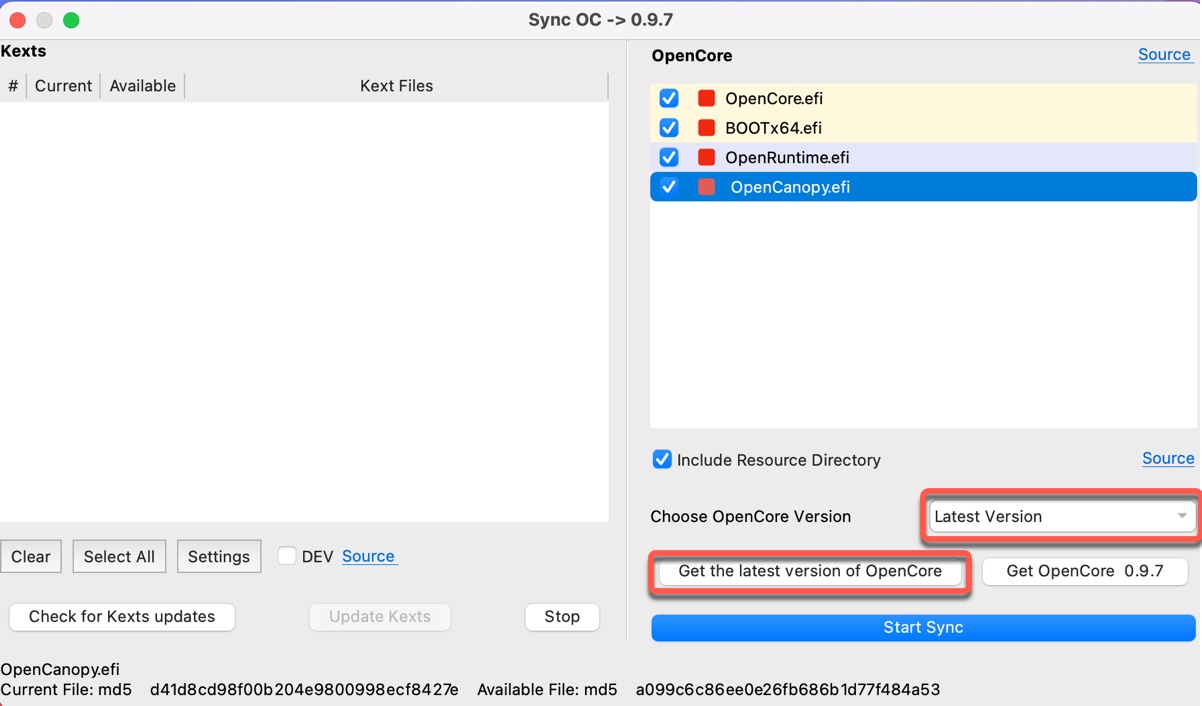
- Click "Get the latest version of OpenCore."
- Close the window and return to the main interface.
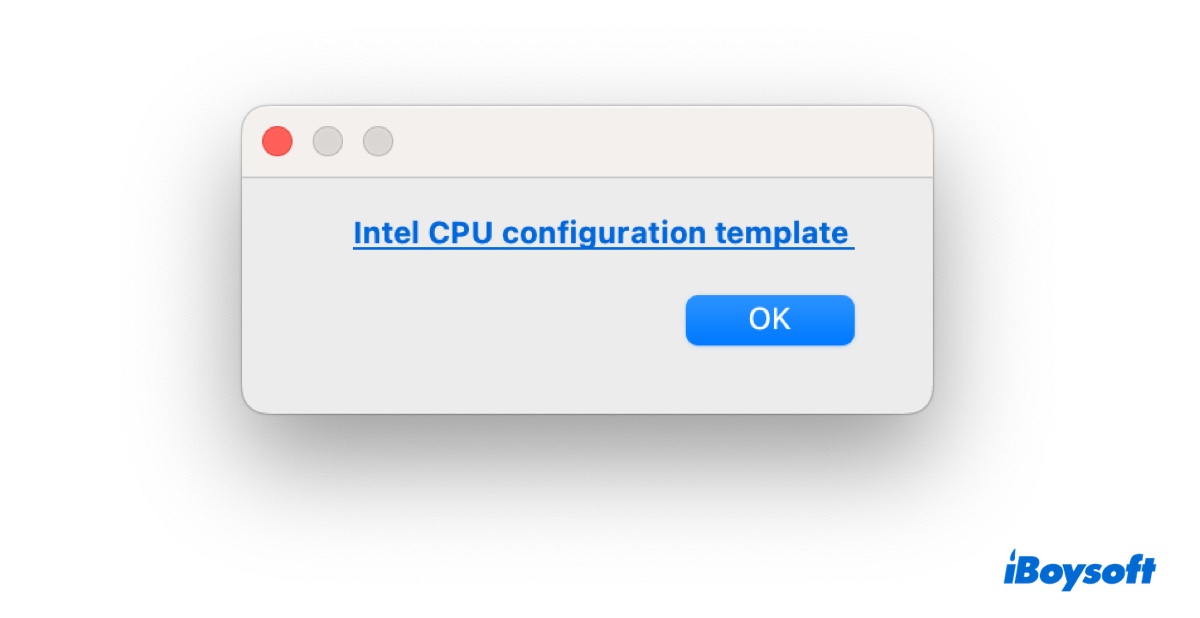
- Click "Configuration Template" from the menu bar.
- Then tap the blue link "Intel CPU configuration template."
- Open the plist folder.
- Download the plist file based on your hardware.
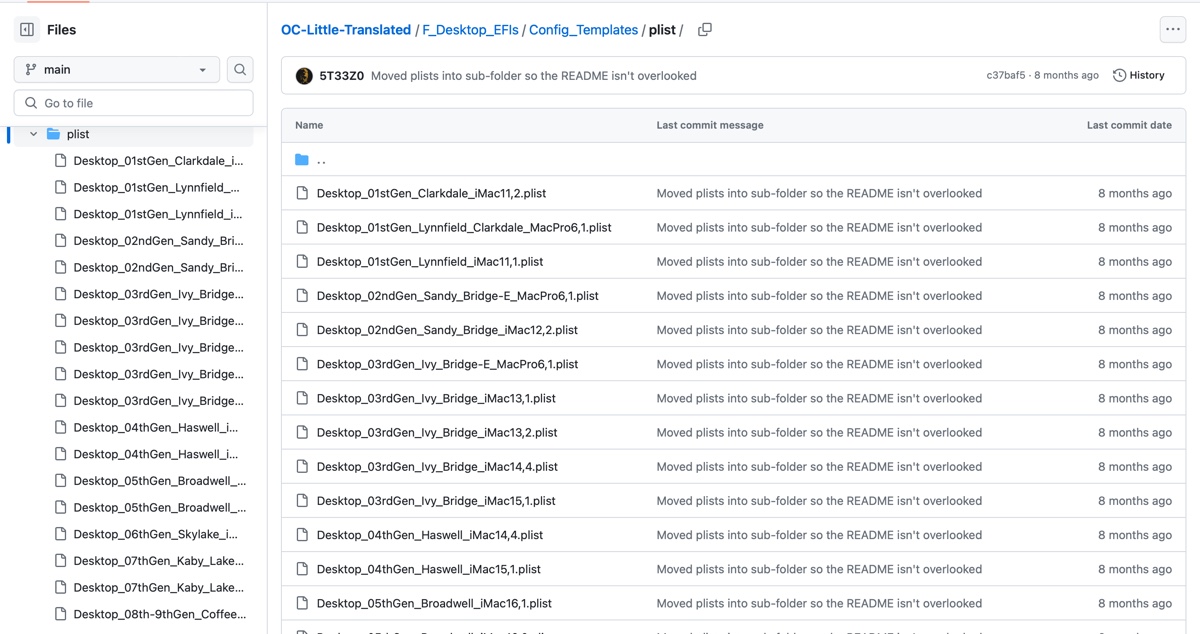
- Rename the file to config.plist.
- In OCAuxiliaryTools, click File > Open and select the config.plist file to open it.
- Click Edit > Generate EFI on the Desktop.
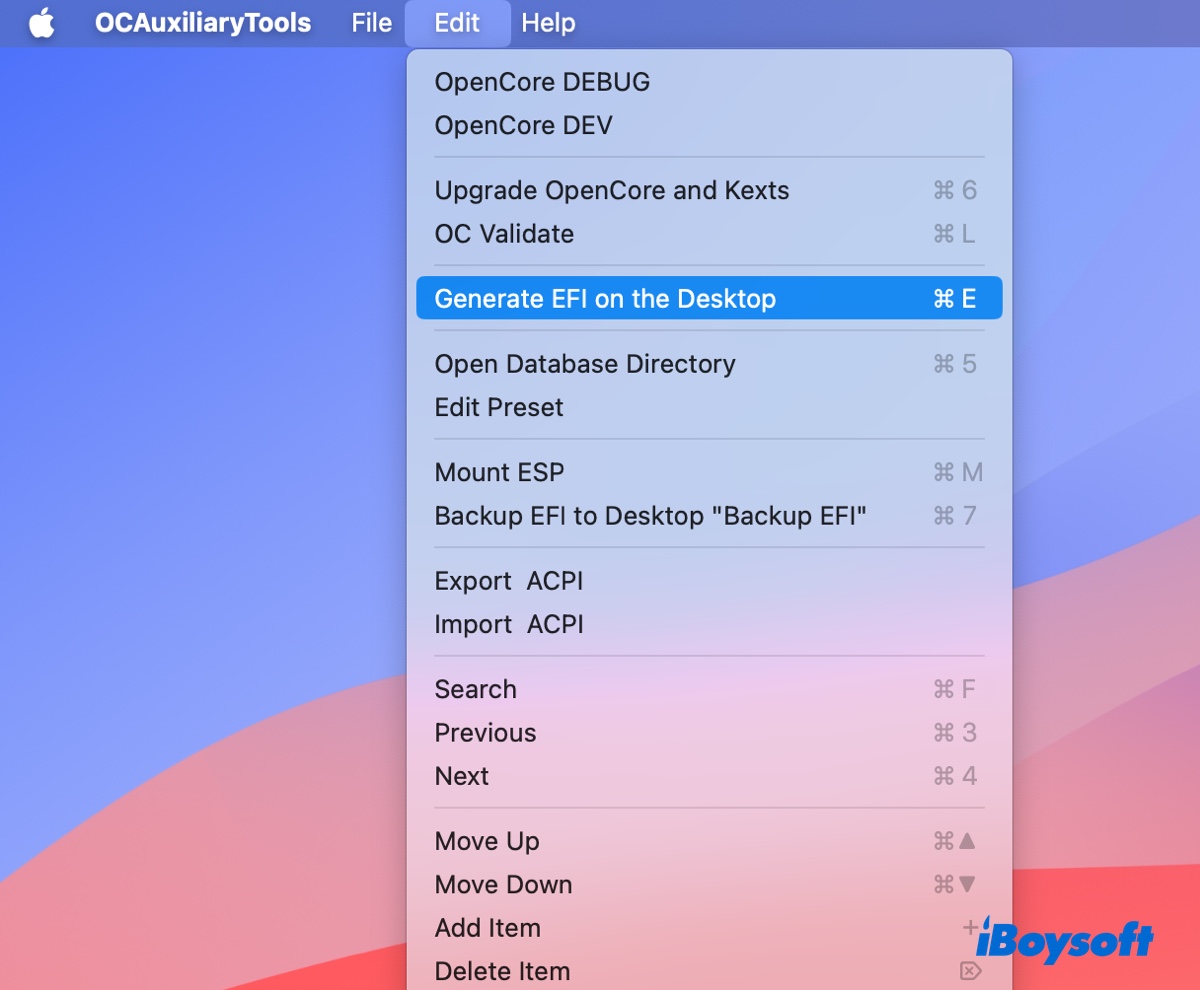
- Tap OK.
- Click Kernel and delete kexts that have a red dot.
- Click NVRAM.
- Set the boot-args value to -v keepsyms=1 debug=0x100 alcid=1 and hit Enter.
- Click the Save button.
- Click PI from the left.
- Select a SystemProductName that's supported by macOS Sonoma.(Check out OpenCore's guide for choosing the best SMBIOS.)
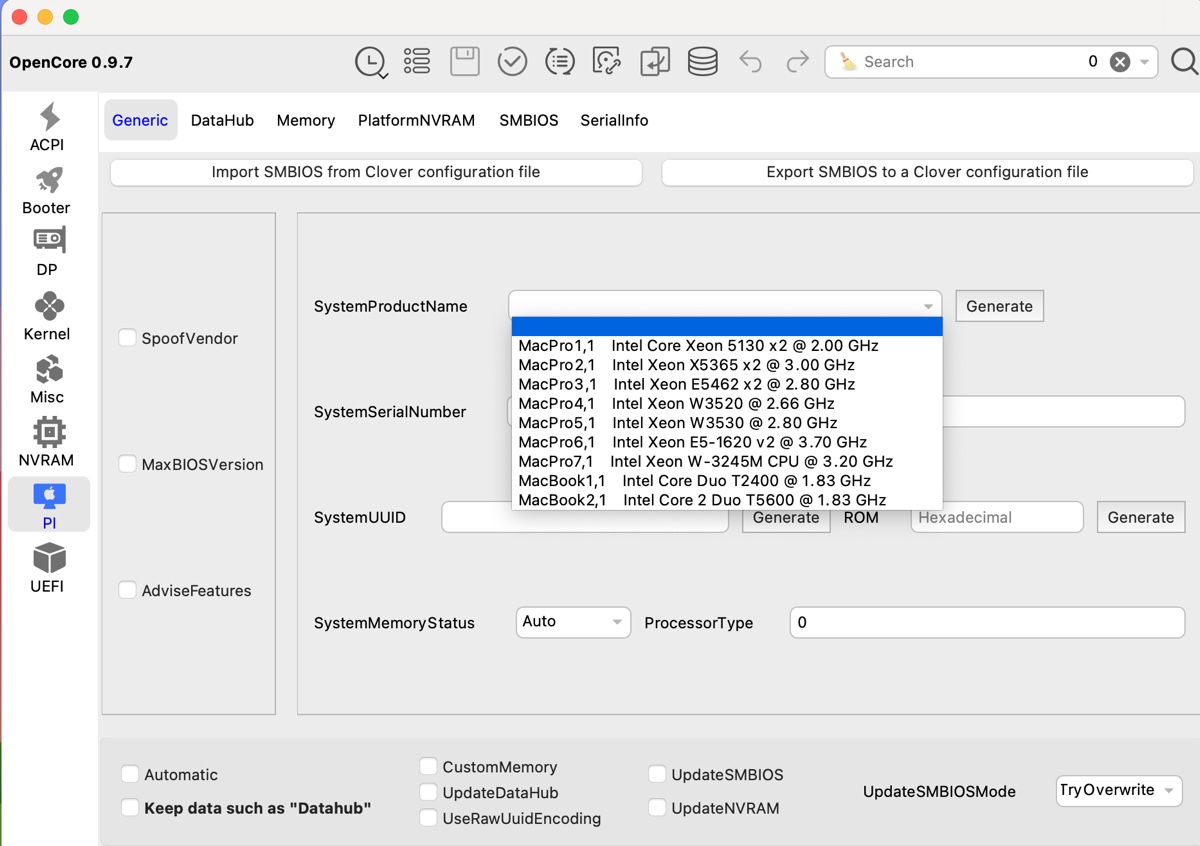
Supported SMBIOS includes:
iMac19,x; Mac20,x
iMacPro1,1
MacBookAir9,1
MacBookPro15,x; MacBookPro16,x
MacPro7,1
Macmini8,1 - Click Generate to generate the serial number, UUID, and MLB, and click Save.
- Download the right kexts for Ethernet & WiFi and Bluetooth.
- Put the downloaded Kext files into the Kexts folder.
Step 4: Place the EFI folder into the USB installer
When the EFI folder is ready, you need to place it into the EFI partition of the USB installer using the following steps:
- In OCAuxiliaryTools, click the "Mount ESP" button.
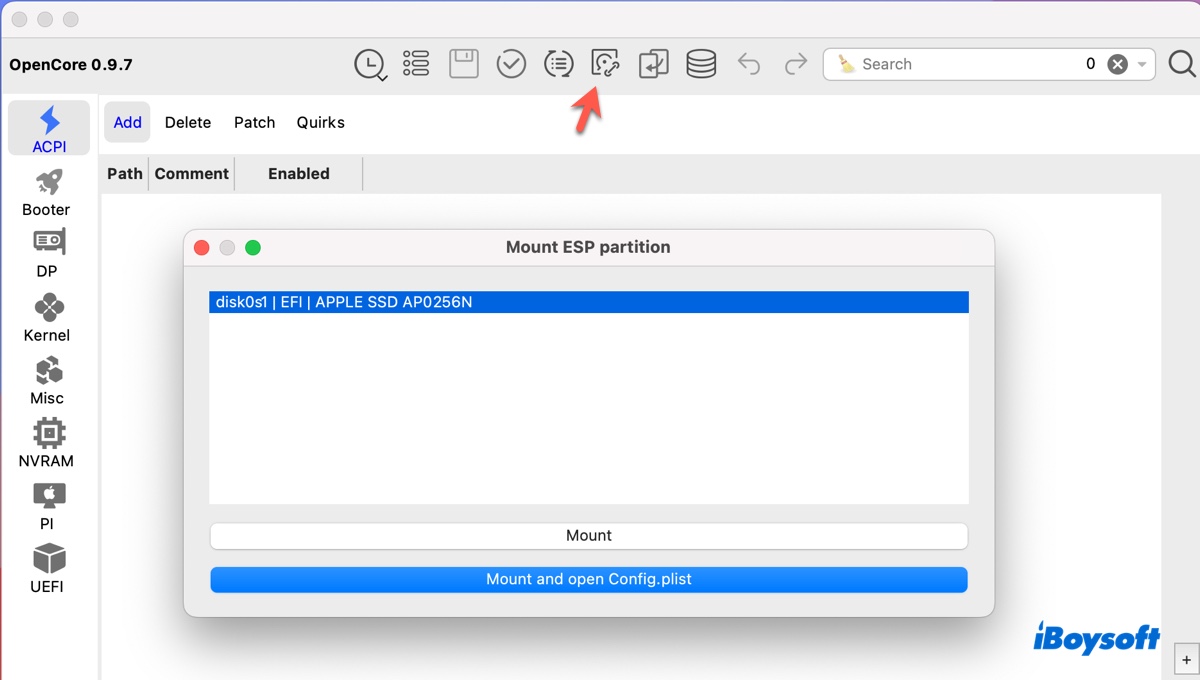
- Select your bootable installer and click Mount.
- Drag and drop the EFI folder into the EFI partition.
Step 5: Configure BIOS/UEFI
Some systems may need to change the BIOS/UEFI settings for optimal performance. To access your computer's BIOS/UEFI, you can press and hold the BIOS key set by your manufacturer, which could be F10, F2, F12, F1, or Delete. Then check the recommended settings in EliteMacx86.
Step 6: Boot from the macOS Sonoma installer
After the USB installer and BIOS/UEFI settings are prepared, you're set to install macOS Sonoma on your Hackintosh.
- Enter the Boot Menu of your target system.
- Select the bootable drive and press Enter.
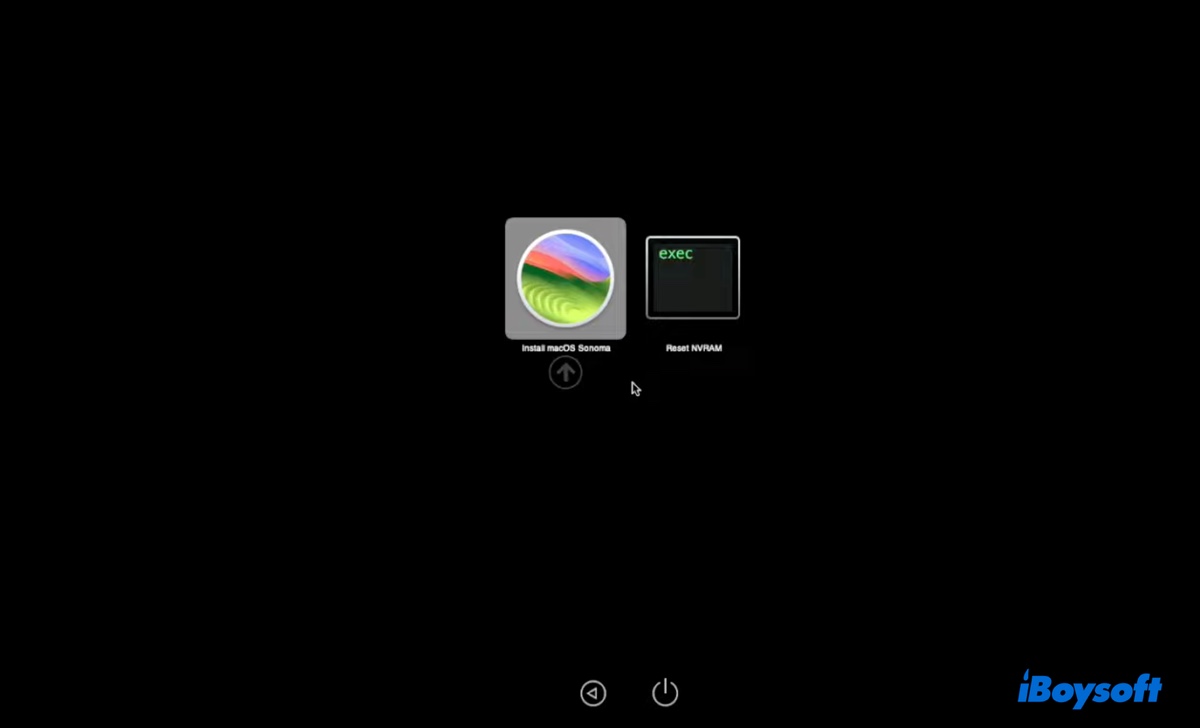
- At the OpenCore Boot picker, select Install macOS Sonoma and press Enter.
Step 7: Install macOS Sonoma on Hackintosh
Once the system boots up, you can open Disk Utility to erase the drive and clean install macOS Sonoma.
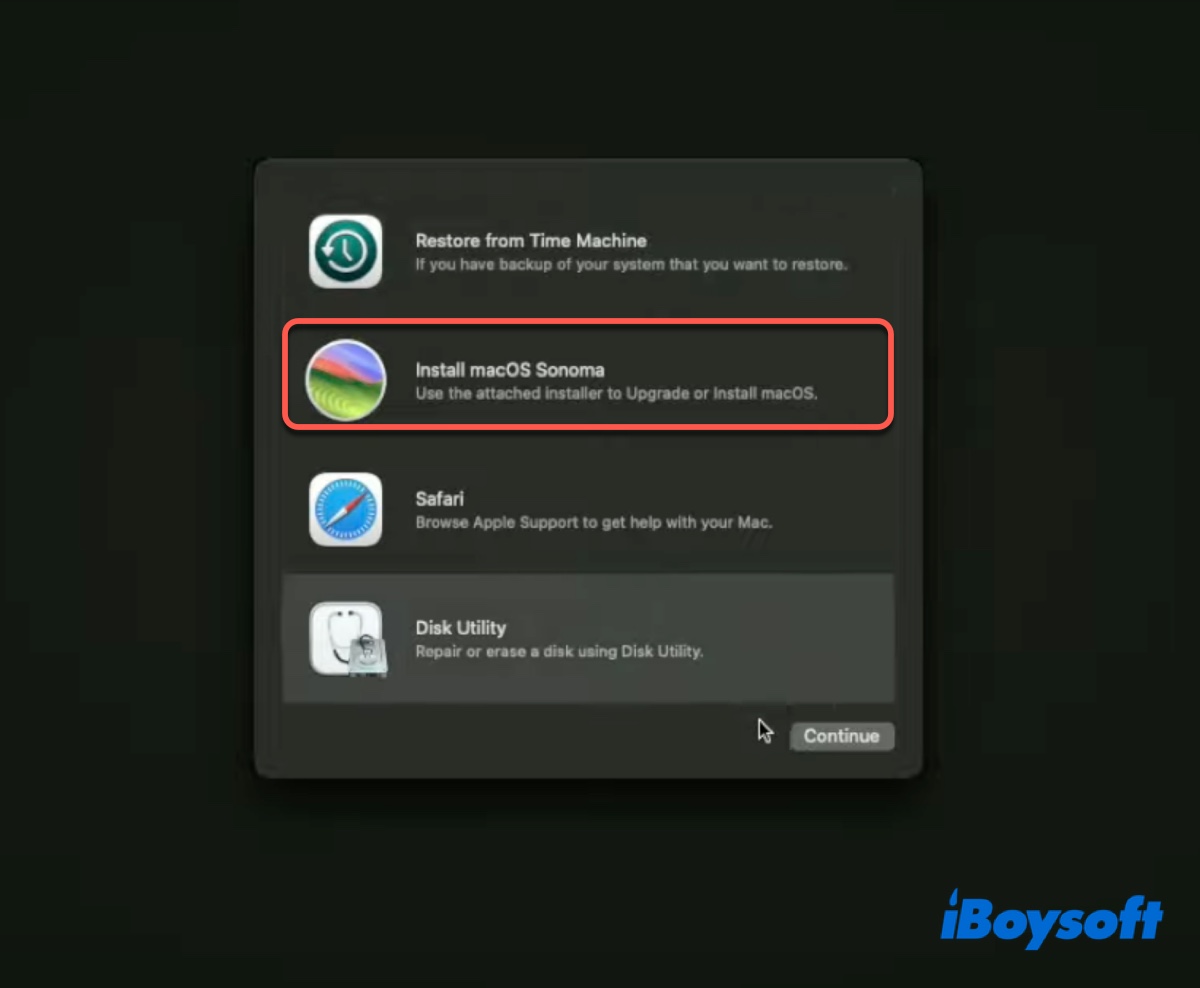
- Select Disk Utility > Continue.
- Click View > Show All Devices.
- Select the top-level physical disk of your internal drive and click Erase.
- Name it Macintosh HD.
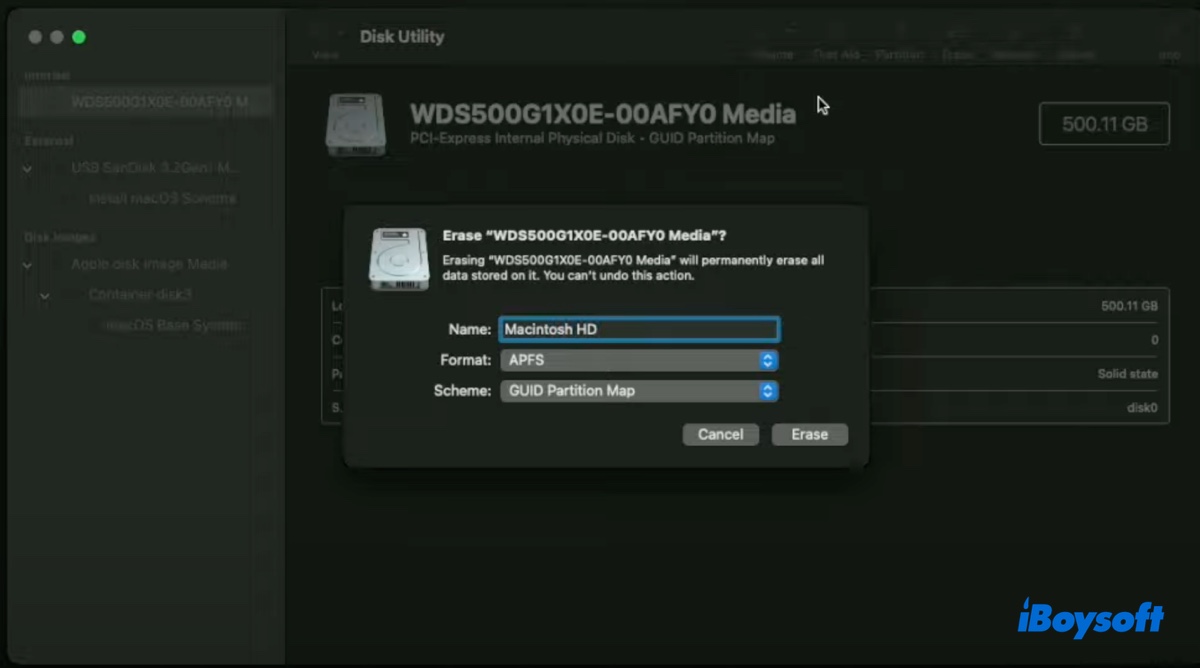
- Choose APFS as the format.
- Set the scheme to GUID Partition Map.
- Click Erase.
- Exit Disk Utility.
- Click Install macOS Sonoma > Continue.
- Finish the installation with the on-screen instructions.
Share this post to help others install macOS Sonoma on Hackintosh.