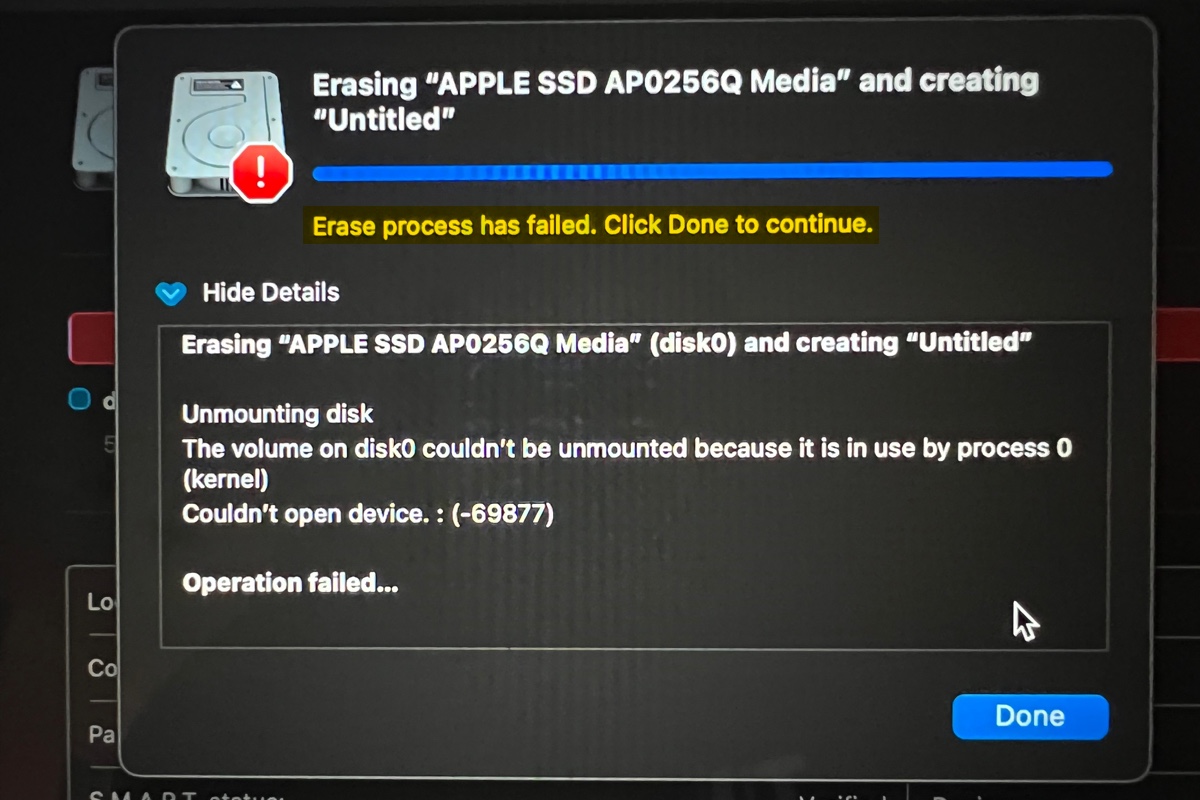
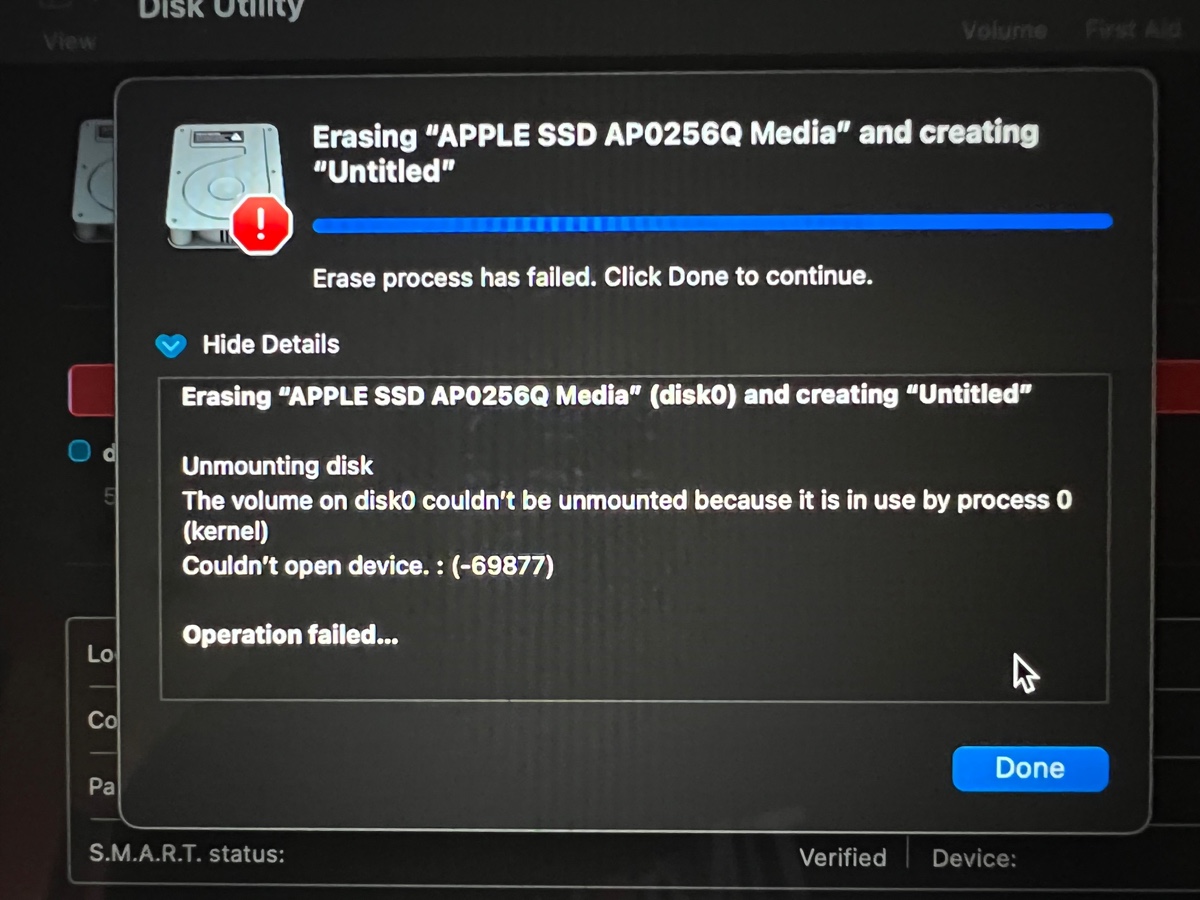
"Erase process has failed. Click Done to continue" is a general message macOS sends when it's unable to format a drive in Disk Utility. Usually, it also details the erase failure with explanations or error codes, such as
- Couldn't open device. : (-69877)
- Couldn't unmount disk. : (-69888)
- Unable to write to the last block of the device. : (-69760)
- Couldn't modify partition map. Operation failed.
- Wiping volume data to prevent future accidental probing failed. : (-69825)
- An internal error has occurred. : (-69488)
- File system formatter failed.
- Mediakit reports not enough space on device for requested operation.
- Invalid name. Operation failed.
- Erase process has failed. Can't remove disk image on Mac.
- The chosen size is not valid for the chosen file system (-69850).
- The calling process lacks proper privileges.
In this article, I'll explain the causes of the error "Erase process had failed" on M1/M2/M3/T2/Intel Mac and guide you to resolve it.
'Erase process has failed' on Mac, why
Various reasons may cause the erase process to fail on Mac. Here's a list of the most common ones:
- The volume or partition couldn't be mounted because it's in use by another process.
- The drive you want to format is corrupted or damaged.
- The drive's partition map is unreadable by macOS or damaged.
- There's a temporary glitch on your Mac.
- The disk is write-protected.
- The adapter you're using is experiencing issues.
Fortunately, you can resolve the issue with the proven fixes discussed in later paragraphs.
Share this guide to benefit others whose disk erase process has failed on MacBook or desktop Mac.
Erase process has failed on Mac external hard drive/SD card/USB/SSD
If the erase process fails when you're formatting an external hard drive, an SD card, a USB flash drive, or an SSD, try the methods below.
Fix 1: Attempt to erase your drive multiple times
It's not uncommon for me to experience an erase failure in Disk Utility. In fact, I had the exact same experience a few minutes ago when formatting an APFS volume. The first attempt failed, but it worked when I repeated the same process.
That's why I recommend you format your drive more times as well. If Disk Utility still won't let you erase the drive, you can slightly change the erase process and try again. For instance, format with a different file system or partition the drive.
Fix 2: Erase the partition/physical disk
Most people erase the partition of an external drive to format it. This is necessary if the drive has several partitions. However, if your drive has only one partition or you wish to clean up the entire drive, you can work with the physical disk too.
This will allow you to reset the partition map, which may be the culprit, rendering the message "Erase process has failed. Click Done to continue."
Taking my external USB drive as an example, instead of erasing the APFS volume named USB, I can choose to format the physical disk labeled TOSHIBA TransMemory Media to wipe the whole drive.
- In Disk Utility, click View > Show All Devices.
- Select the physical disk and click Erase.
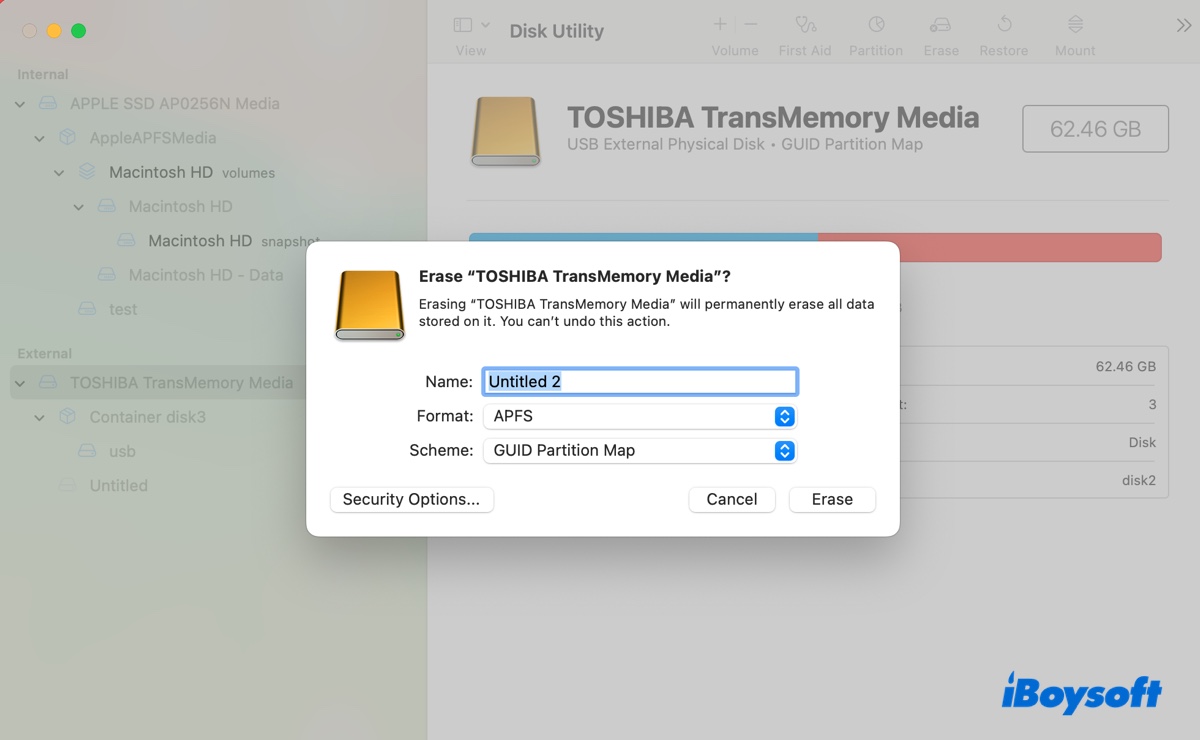
- Give your drive a name.
- Choose a proper file system.
- Keep the scheme "GUID Partition Map."
- Click Erase.
On the contrary, you can format the partition if you've already used the physical disk.
Fix 3: Erase your drive via Terminal
Apart from formatting the drive in Disk Utility, you can also execute a series of command lines in Terminal to erase the disk. The latter provides more advanced options and better flexibility.
The following instructions will forcefully unmount the disk that needs to be formatted, write zeros to its boot sector, and erase or partition it. The "unmounting" and "zero-filling" steps are integrated into the process to avoid errors.
A drive needs to be unmounted before it can be erased. If Disk Utility fails to unmount your drive, the erase won't succeed. That's why it's essential to manually unmount your disk. Besides, by writing zeros to the disk, certain disk-related issues, such as bad sectors or data corruption, can be resolved.
Now, go through these steps to erase your drive in Terminal on Mac:
- Open Terminal.
- Type the following command and hit Enter.diskutil list
- Note down the disk identifier of your external drive or partition, such as disk2 or disk2s1.
- Unmount the disk or partition with the following command after replacing disk_identifier:
For a drive: (e.g., diskutil unmountDisk force disk2)diskutil unmountDisk force disk_identifier For a partition: (e.g., diskutil unmountDisk force disk2s1)diskutil unmountVolume force disk_identifier - Zero out the external drive or volume. (e.g., sudo dd if=/dev/zero of=/dev/disk2 bs=1024 count=1024)sudo dd if=/dev/zero of=/dev/disk_identifier bs=1024 count=1024
- Input your admin password and hit Enter.
- Erase or partition the drive.
Erase a drive: (e.g., diskutil eraseDisk APFS USB disk2)diskutil eraseDisk format name disk_identifierErase a partition: (e.g., diskutil eraseVolume APFS USB disk2s1)diskutil eraseVolume format name disk_identifierPartition a disk: (e.g., diskutil partitionDisk disk2 GPT JHFS+ USB 50g)diskutil partitionDisk disk_identifier GPT format name size
Did the steps work? If so, share them to help others eliminate "Erase process has failed" on M1 Mac and other Mac models.
Fix 4: Delete the partition and re-add it
If you're trying to erase a partition, deleting and re-adding it gives the same result. Here's how to do it:
- In Disk Utility, select the partition you intend to erase and click Partition.
- Select the partition from the left circle and click the ( - ) button.
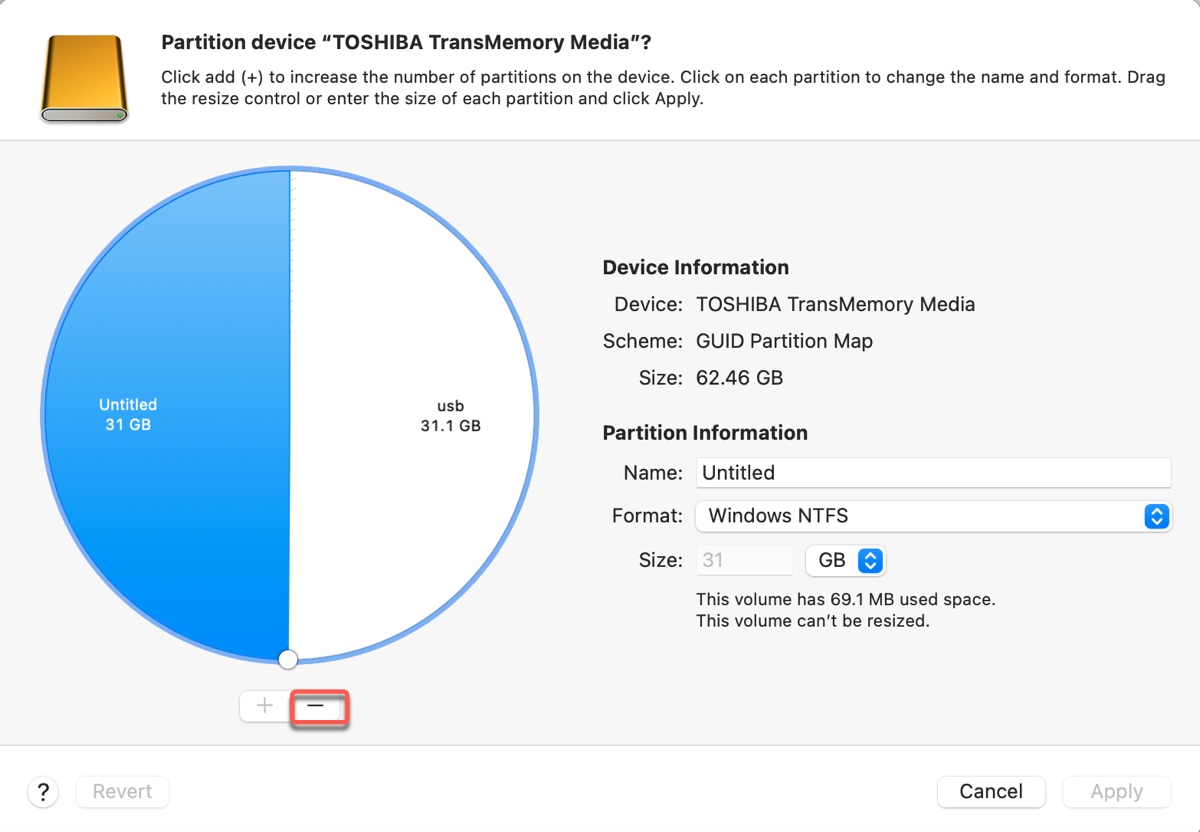
- Click the ( + ) button to add a new partition.
- Name the partition.
- Choose a format.
- Specify the size.
- Click Apply.
Fix 5: Format the external drive on a different computer
Suppose there's another computer, Windows or macOS, available to you; you can format the external drive on it. Chances are that the erase process will finish on this computer, as some users have experienced.
Fix 6: Fix 'Erase process has failed' on SD card
If you can't erase your SD card on Mac, it's helpful to try the following tips:
① Ensure the write protection switch on your SD card is turned off.
Most SD cards have a physical write protection switch used to avoid accidental deletion or modification of the data on the card. When it's turned on, the card is write-protected, preventing any new data from being written to it as well as disk formatting.
② Use a different SD card adapter/reader.
Issues on the SD card adapter may result in formatting failure too. If you're reading the SD card from an adapter, switching to a different one may help.
③ Run SD Memory Card Formatter for Mac
SD Memory Card Formatter is a free tool for formatting SD memory cards, SDHC memory cards, and SDXC memory cards. It's a great alternative when Disk Utility doesn't format your SD card.
Spread the information to benefit others who encounter "Erase process has failed" on their Mac USB/SSD/flash drive/SD card.
Erase process has failed on Mac internal hard drive
Erasing the internal hard drive is vital for factory resetting your Mac or resolving startup disk issues. However, the erase process may fail with errors. If that's also your case, give the following methods a try.
Fix 1: Try again
For some unknown reasons, you might need to repeat the erase process in Disk Utility to make it work. Some may succeed on their second or third attempts; others may need to retry tens of times.
This is INSANITY!!! Somehow, before I finished typing my response, I was able to erase my Mac successfully. I was stubborn and kept trying, and I'm not sure if there's a certain order of operation, but keep at it, and it might work. I tried more than 20 times altogether. I hope this helps someone. -discussions.apple.com
Fix 2: Use Internet Recovery
When the erase process has failed in macOS Recovery Mode, boot into Internet Recovery to utilize the recovery tools from Apple's servers. This will also allow you to reinstall the latest macOS available on your Mac.
- Turn off your Mac.
- Press the power button, and then immediately press and hold Option-Command-R.
- Release the keys when you see the spinning globe.
- In macOS Utilities, click Disk Utility > Continue.
- Tap View > Show All Devices.
- Select the top level of your internal hard drive and click Erase.
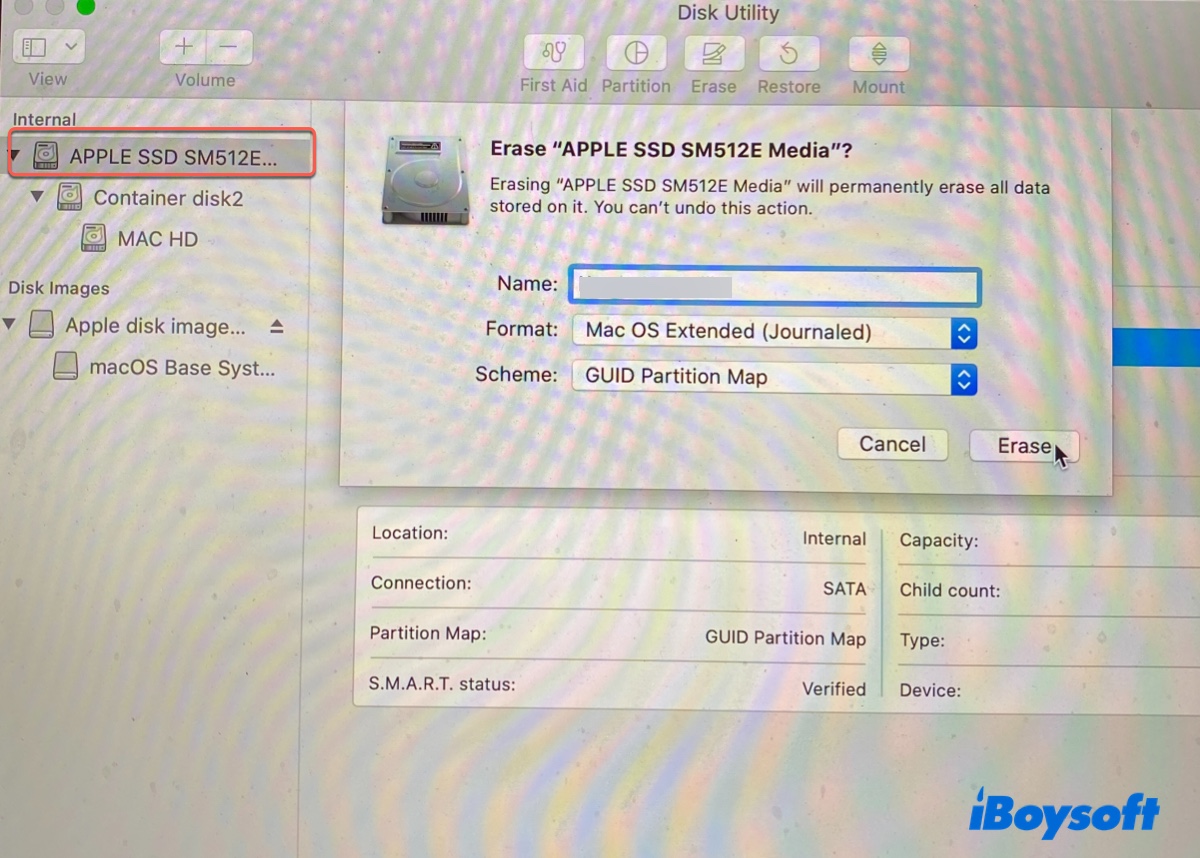
- Name the drive Macintosh HD.
- Choose APFS as the format for macOS High Sierra or later; otherwise, choose Mac OS Extended (Journaled).
- Keep the scheme as "GUID Partition Map."
- Click Erase.
Fix 3: Erase the APFS container on Apple Silicon Mac
In the previous solution, I demonstrated how to erase the physical disk of your internal hard drive on an Intel-based Mac. For an Apple Silicon Mac with the M1, M2, or M3 chip, erasing the APFS container may yield better results.
To do it, locate the container directly beneath the outdented physical disk and click Erase.
Share this post if it helps fix "Erase process has failed" on M1/M2/M3/Intel Macs.
- QHow do you force erase a Mac?
-
A
To force erase a Mac, you can boot into Internet Recovery Mode, select the internal hard drive and click Erase.
- QHow long does it take to erase a Mac?
-
A
The time it takes to erase a Mac depends on the drive size, your processor speed, the amount of data on the drive, the type of storage you have, and your Mac's overall system performance. Generally speaking, erasing a Mac is a few minutes long if everything goes well.
- QWhy wont my Mac let me erase it?
-
A
Your Mac won't let you erase it if it's experiencing issues or the hard drive is seriously corrupted.
- QWill erasing my Mac make it faster?
-
A
Yes, erasing your Mac can potentially make it faster if the slowness was due to a cluttered or fragmented hard drive.