Though it's a main current to pursue an updated operating system, some people still desire to revert to the previous one due to some incomparable features or unique highlights brought by it. And that's why so many users asked, "Can I downgrade macOS Monterey to Big Sur?" online.
Definitely yes! This post is gonna walk you through downgrading macOS Monterey to Big Sur with super-detailed instructions. You don't worry that it confuses you, even if you're a newbie to this mission. Let's get started then!
Preparations should be made before the downgrade:
- A Mac OS Extended (HFS+) formatted USB drive with 20GB or more of space
- A Mac running macOS Monterey
- A backup drive
- A good internet connection
Create a bootable installer for macOS Big Sur
If your machine has upgraded to macOS Monterey via: Apple Menu > About This Mac > Software Update > Upgrade Now, instead of installing macOS Monterey on your unsupported Mac, this means that your machine is officially supported to run macOS Monterey by Apple.
Once you update your Mac, Apple cuts off the way to restore to macOS Big Sur for better performance and collaboration of the updated OS and the hardware. Therefore, making a macOS Big Sur bootable installer is a must here.
You get two options to make a macOS Big Sur installer on your Mac:
- A bootable installer helper
- The terminal
Option 1: Make a macOS Big Sur bootable installer with the helper
iBoysoft DiskGeeker is an all-in-one install disk creator for Mac, which frees you from manual operations, including downloading the macOS Big Sur PKG file, installing the PKG file, moving it to the prepared USB drive, and converting this PKG file to a bootable installer by running commands.
With this helper, you can concentrate on your own business and just let it complete the bootable installer creation. Once the process finishes, you can fetch the bootable USB drive and install macOS Big Sur on your machine directly.
Here is how to make a macOS Big Sur bootable installer with iBoysoft DiskGeeker:
Step 1: Download iBoysoft DiskGeeker and connect the external hard drive to your Mac that you want to use as the bootable source later.
Step 2: Open iBoysoft DiskGeeker.
Step 3: Select the drive you inserted and click "Create boot disk" from the left sidebar.
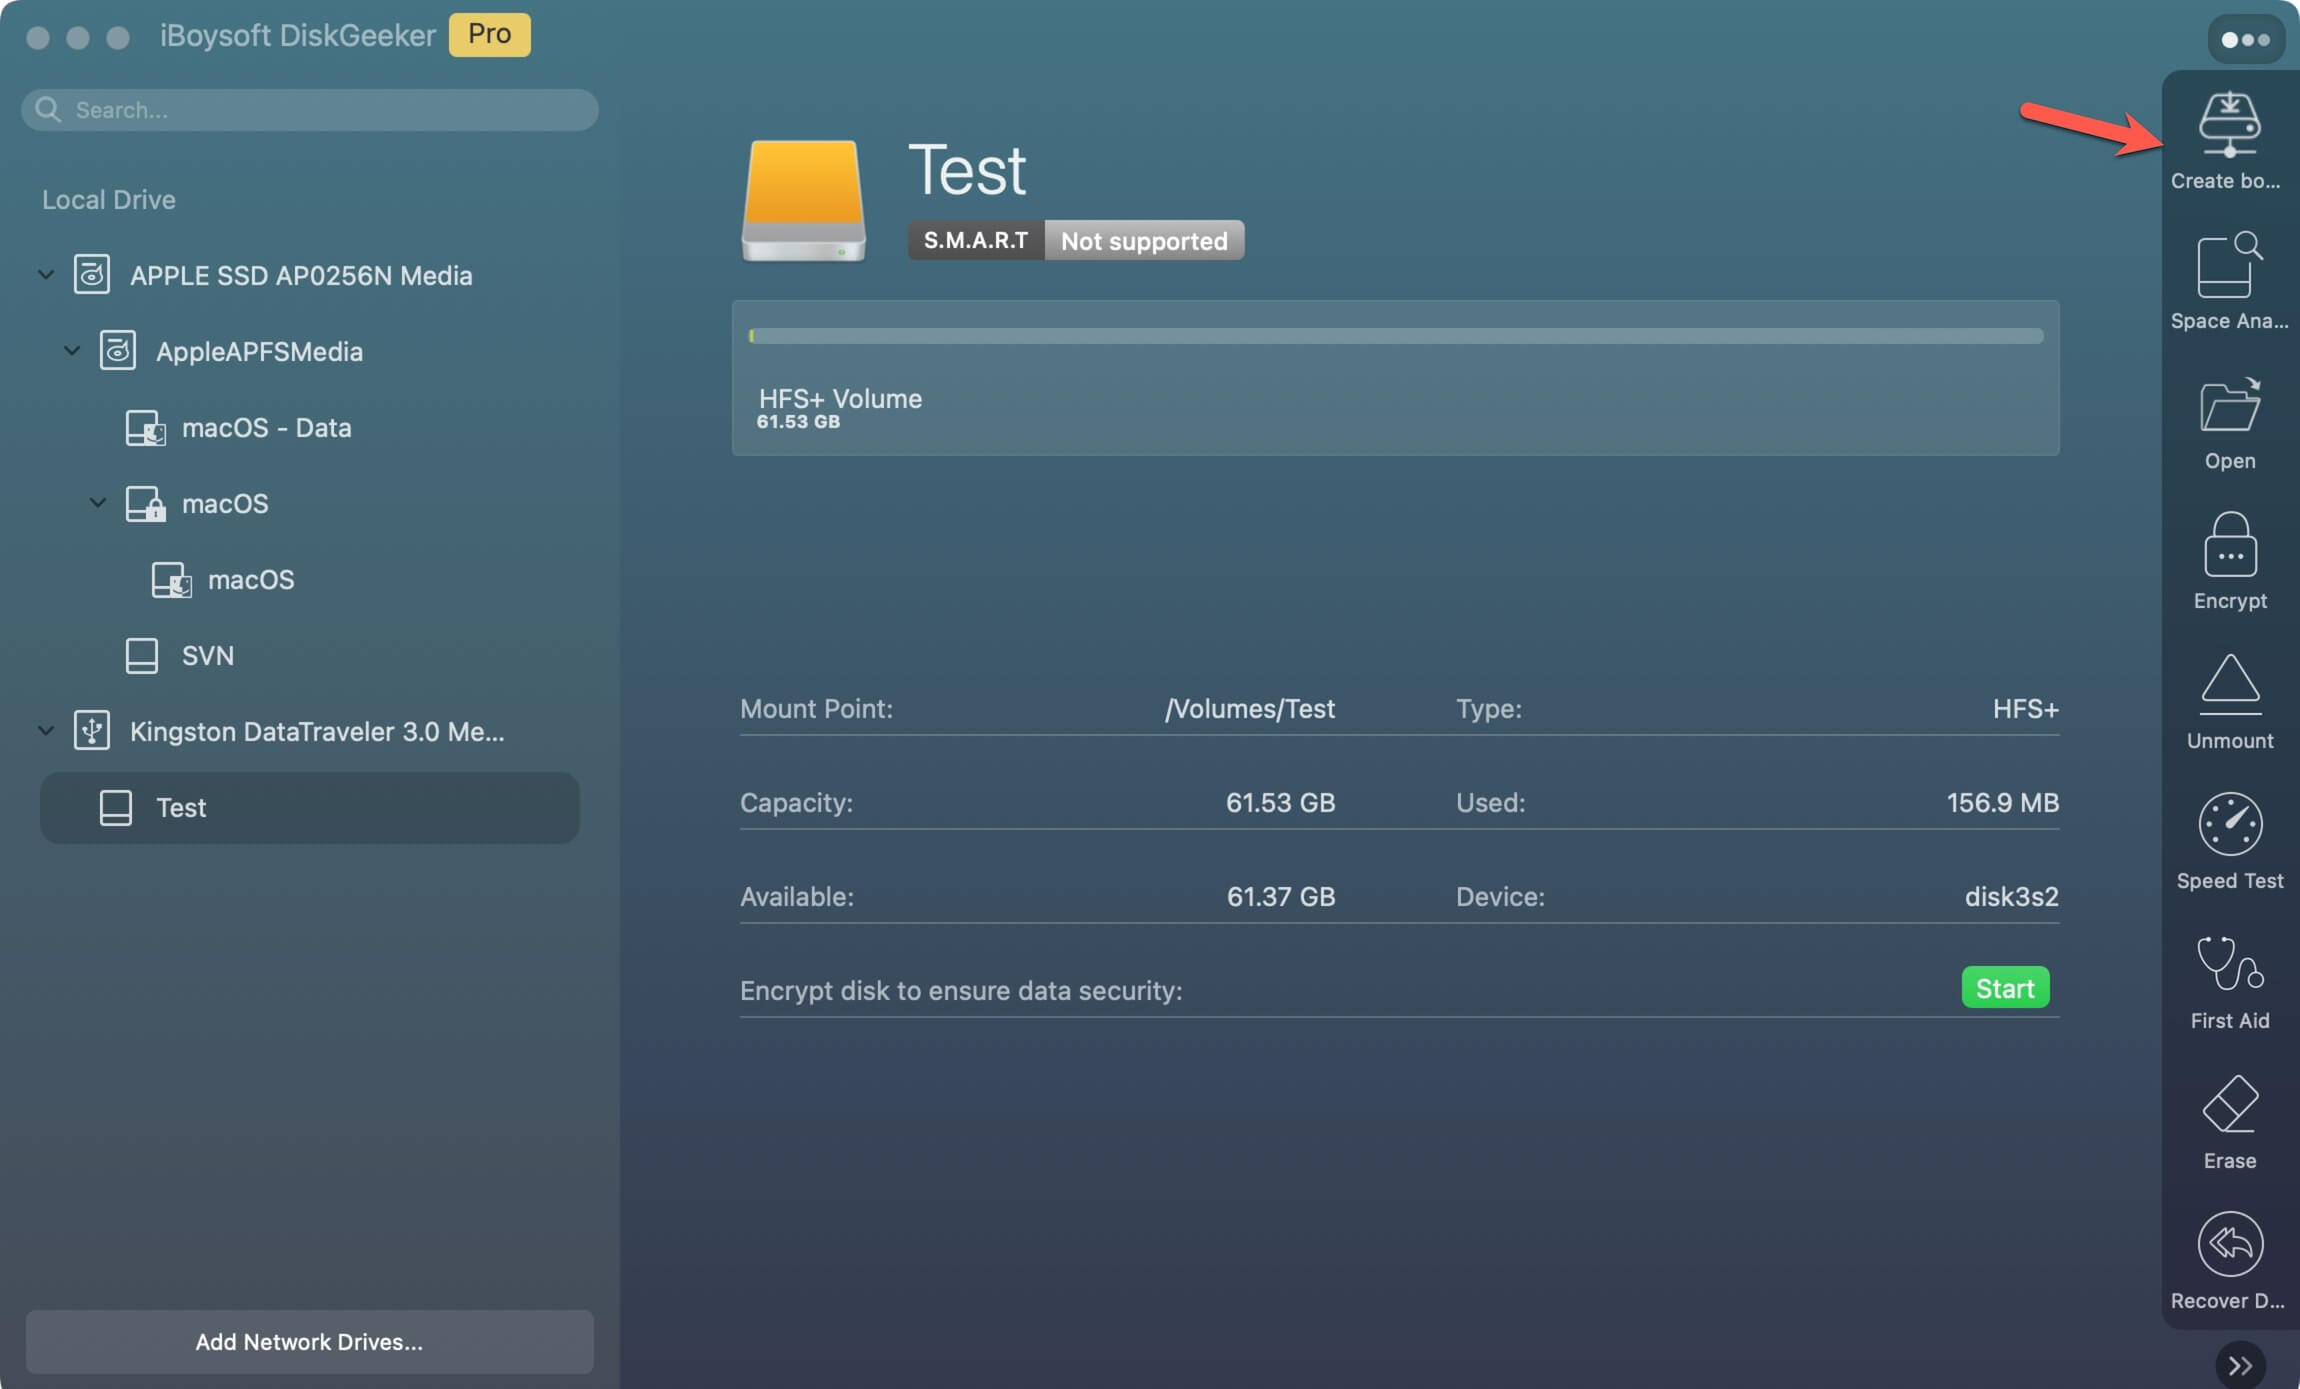
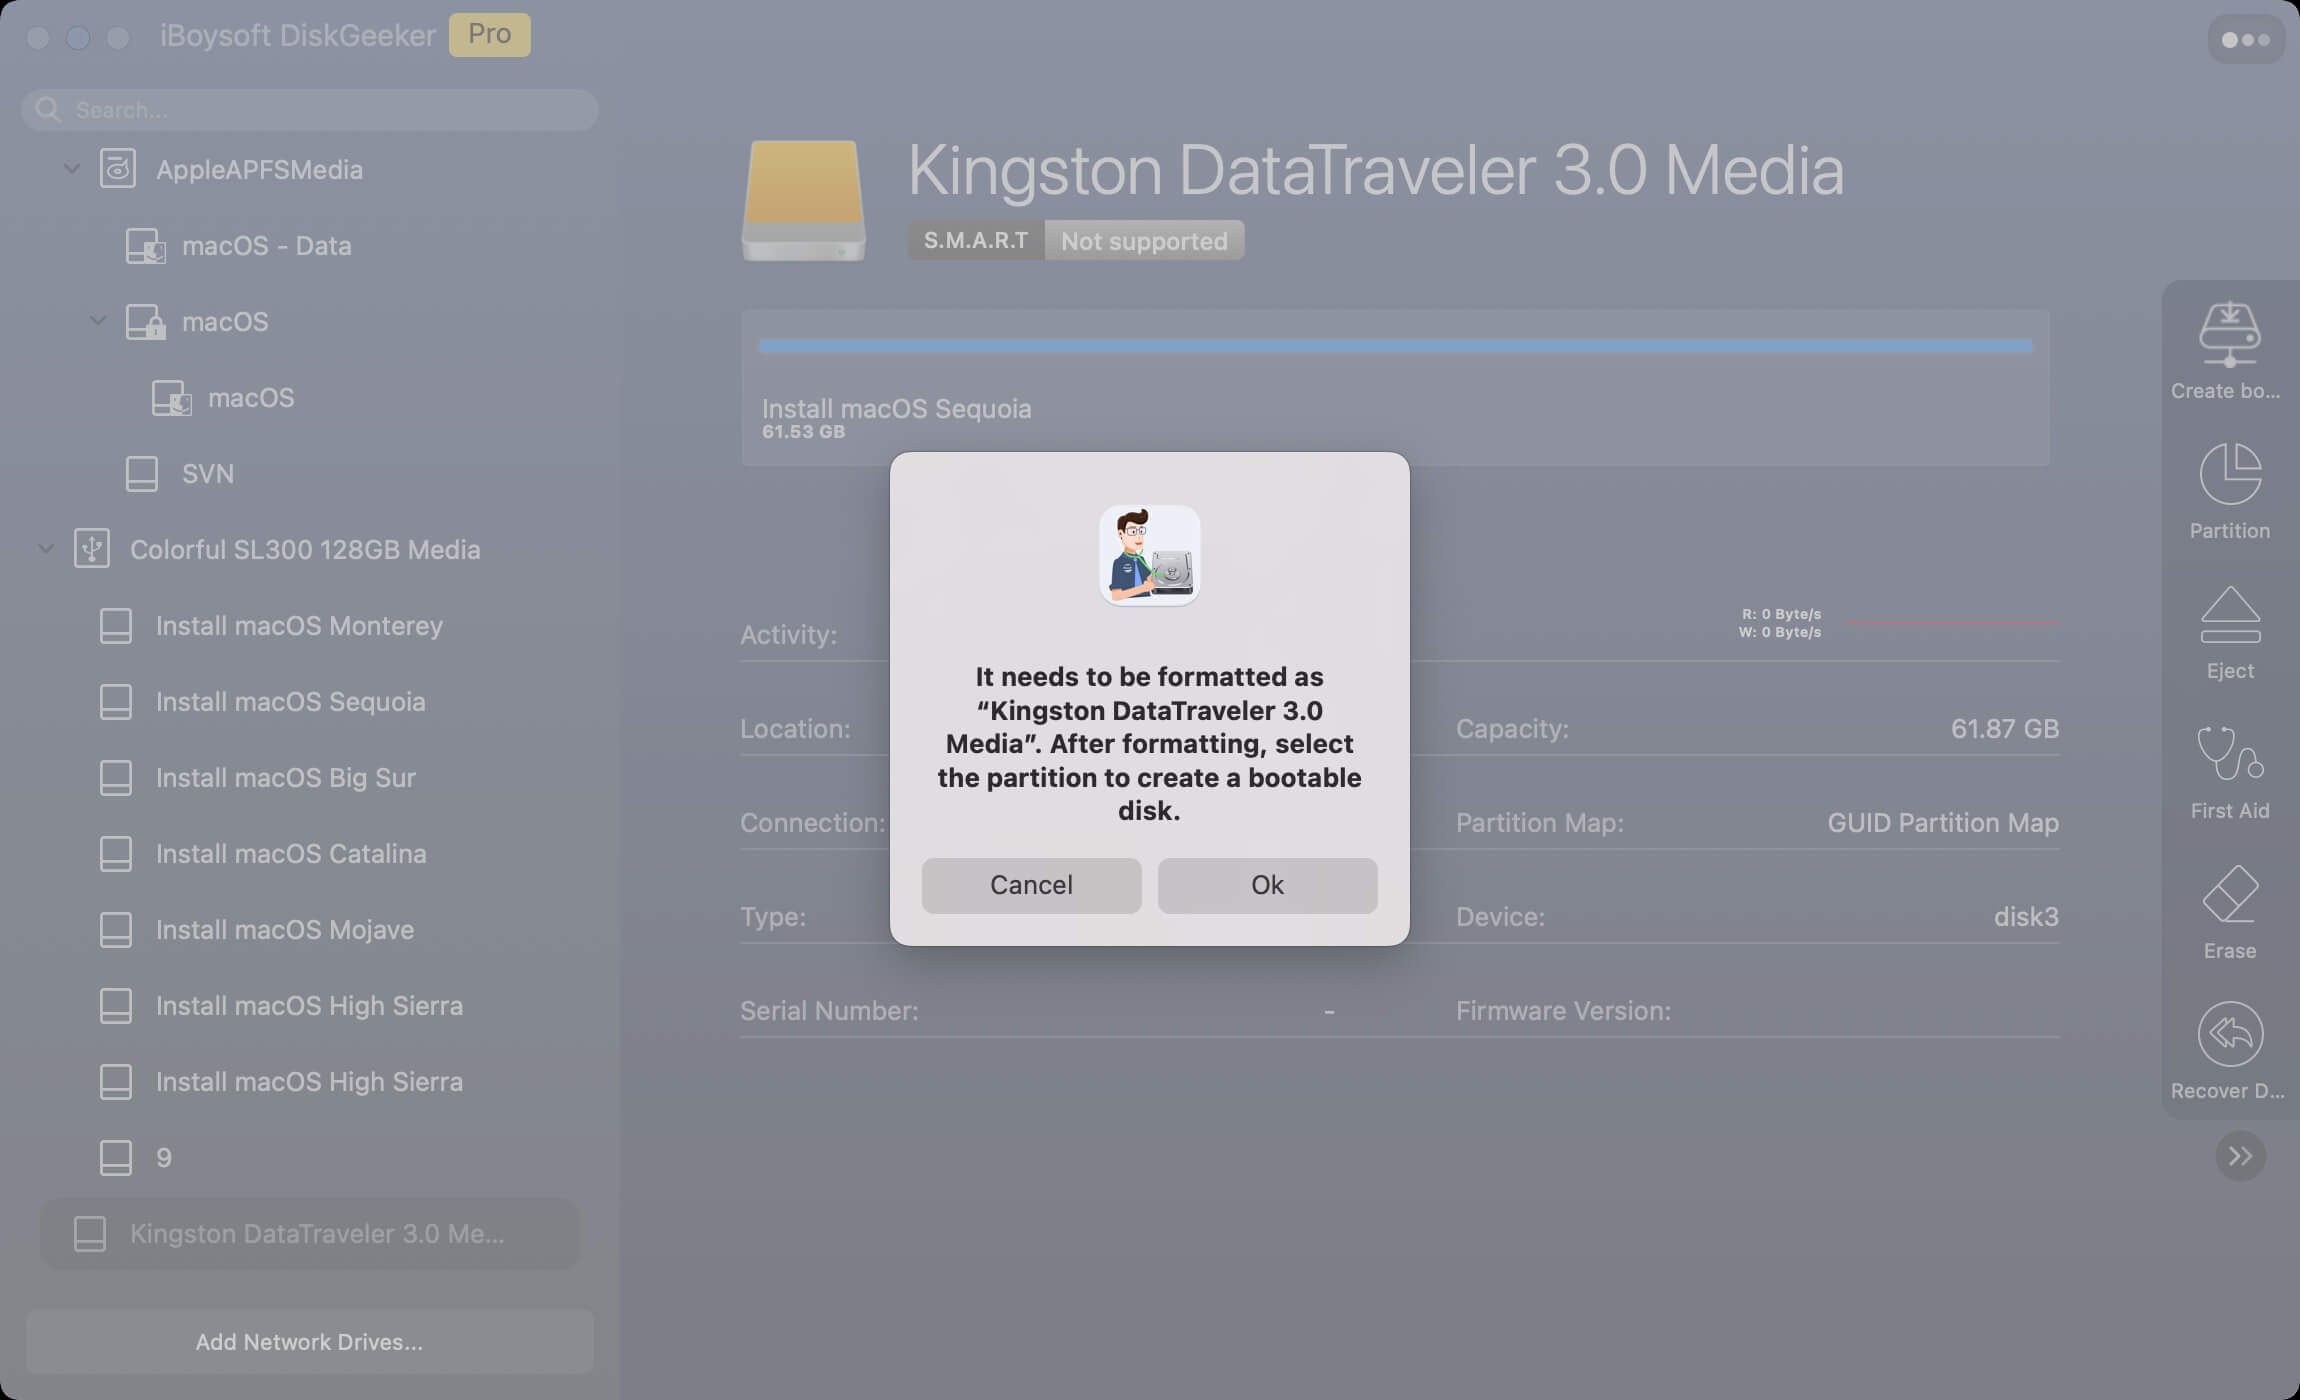
If the external disk doesn't have any volume, when you select the disk and click "Create boot disk", you'll be prompted that the drive hasn't been formatted. Just click "OK" to let the tool format the disk to Mac OS Extended (HFS+). Then, select the volume and click "Create boot disk" to move on.
Step 4: Click "Continue" on the prompt alerting you that the selected volume will be formatted.

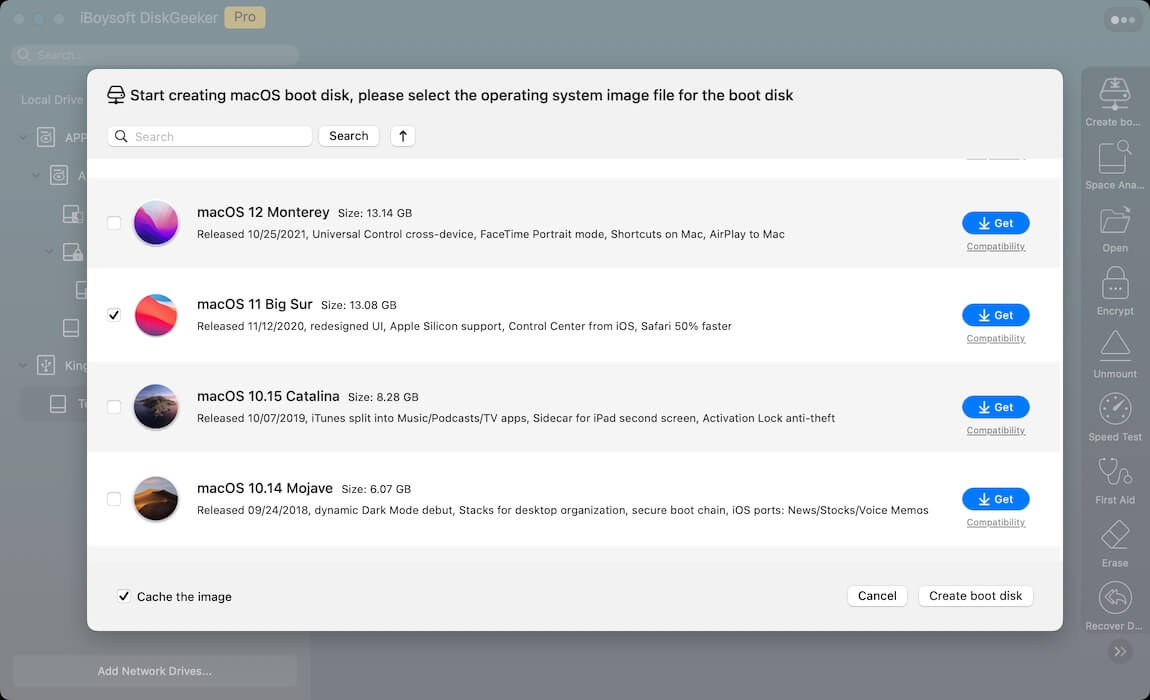
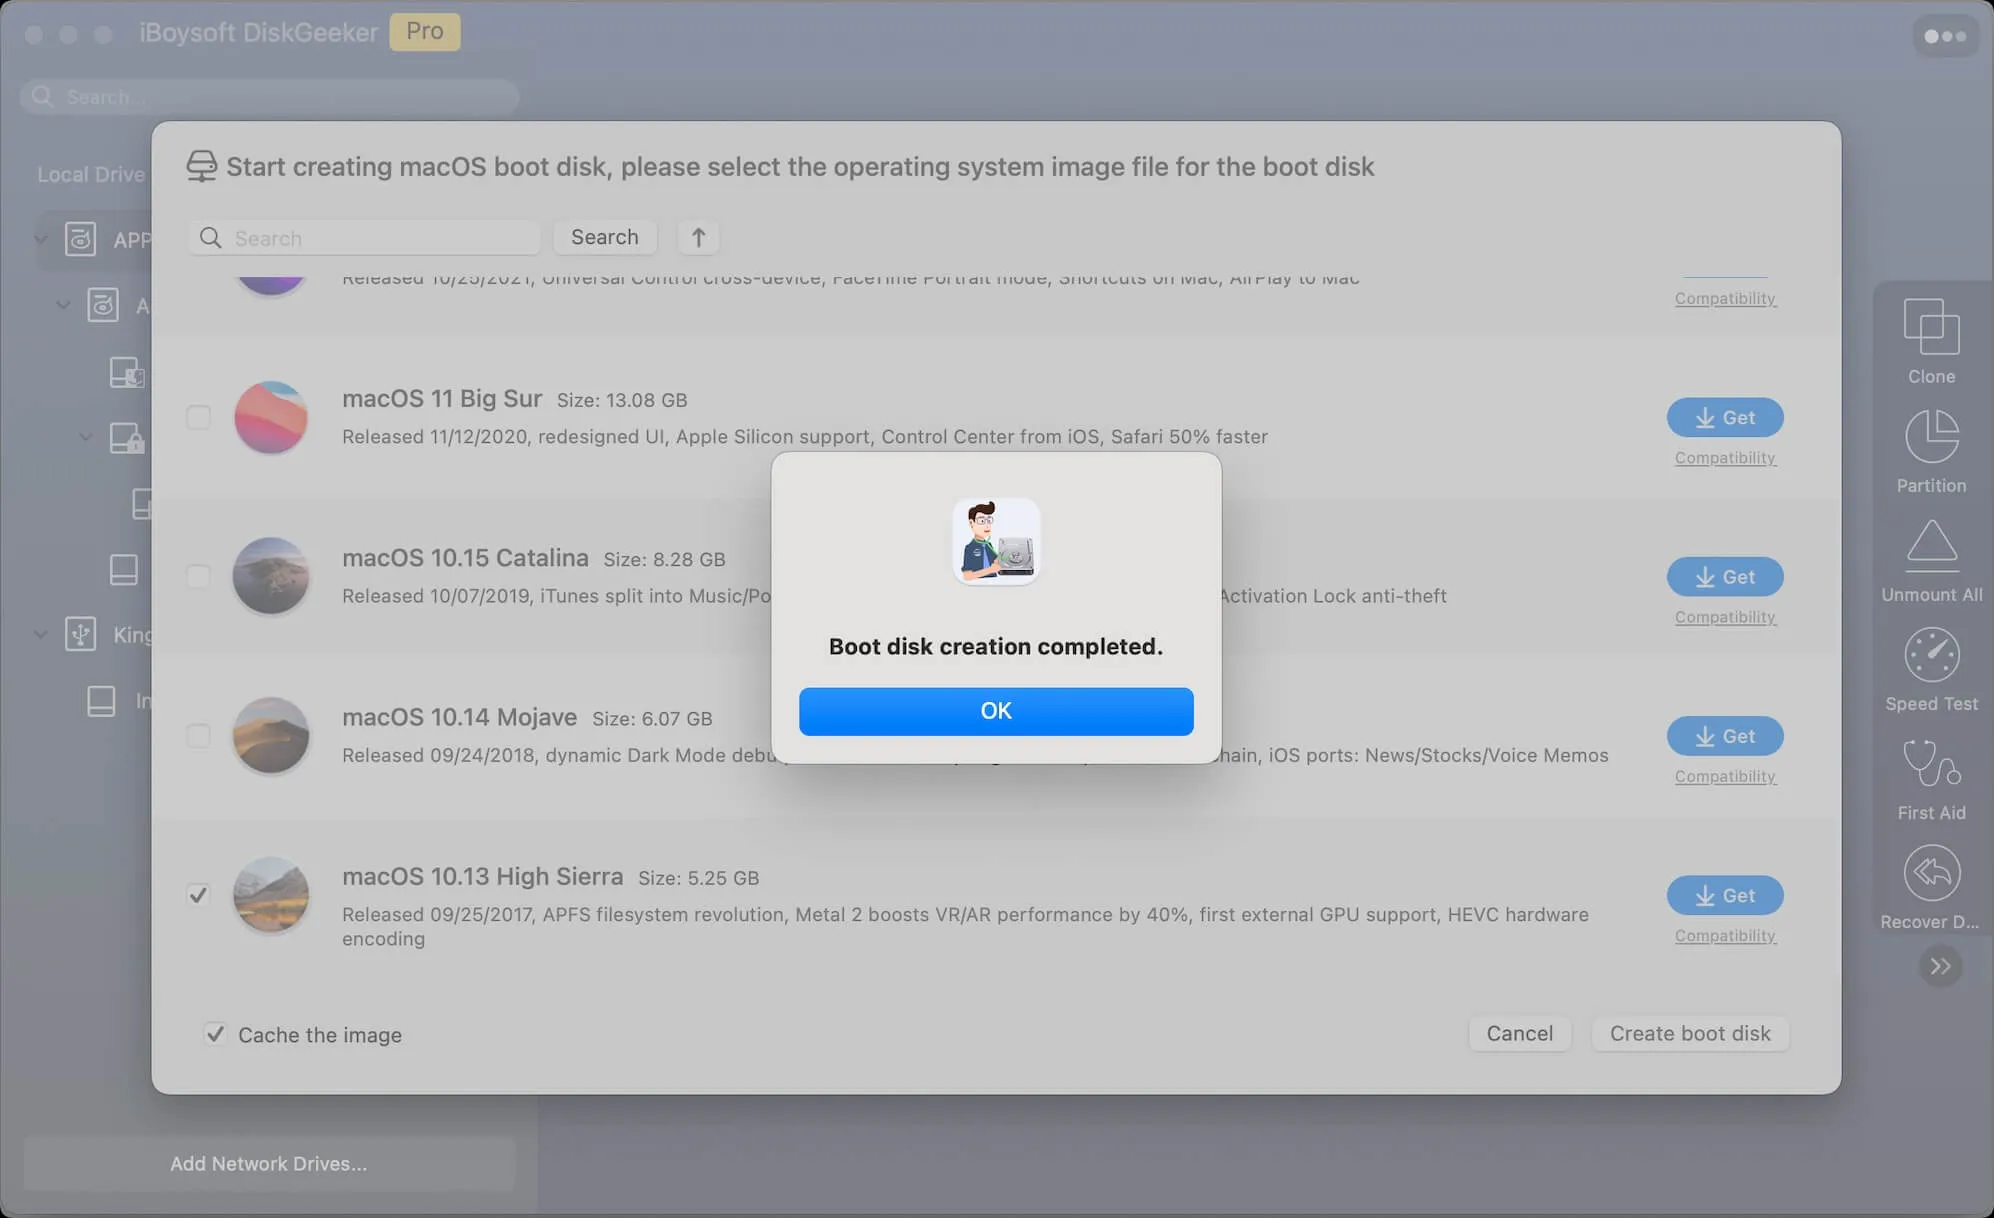
Step 5: Select macOS 11 Big Sur and click "Create boot disk".
Step 6: Click "OK" on the pop-up to let the target partition be erased.
Step 7: Wait for the DMG download process to complete.
Step 8: Once the download ends, a pop-up will inform you that creating a bootable disk will erase the target partition. Click OK to go on.
Step 9: Once the process ends, you have a bootable USB for macOS Big Sur! You can utilize it to revert the OS on your machine.
Option 2: Create the macOS Big Sur bootable installer using Terminal
You can also complete this macOS Big Sur bootable USB creation with the assistance of Terminal. This way, however, is prone to failure since it requires certain knowledge of commands. If you utilize the commands for the first time, remember to follow the instructions strictly, or you will get confused easily.
- Download the macOS Big Sur PKG file here. Or, go to the Mac OS Updates Download center to get a specific update of macOS Big Sur.
- Once the download ends, double-click the PKG file to install it on your machine. Then make sure it is placed in the Applications folder, or the following command may go wrong.
- Launch terminal, copy and paste this command line in the terminal window. Remember to replace "MyVolume" with the USB's name.sudo /Applications/Install\ macOS\ Big Sur.app/Contents/Resources/createinstallmedia –volume /Volumes/MyVolume
- Hit Enter to execute this command. You'll be asked for your user account password; just type it in the window. You cannot see the password; make sure you input it correctly.
- Type Y to make sure your operations, and click OK when you see an alert that Terminal wants to access files on a removable volume.
- Wait for the terminal to notify you that the process ends.
Go share this post to help more people create a macOS Big Sur bootable installer!
Erase the Mac hard drive
Unlike the official update, the downgrade requires erasing the Mac's hard drive, and then the older OS can work on the machine. Before the erasure, please launch Time Machine to back up your Mac fully, or all data and folders will be removed, leaving you no chance to restore.
After the full backup, we can erase the Mac hard drive then. Disk Utility does not permit users to erase the hard drive in normal boot, so we have to boot into macOS Recovery Mode to wipe the drive:
Step 1: Boot into macOS Recovery Mode.
Start your Intel-based Mac in macOS Recovery Mode:
- Completely shut down your Mac and then press the power button or Touch ID button to power on your Mac.
- Hold down the Command + R keys together as soon as your Mac starts or you hear the startup chime.
- Keep holding down the keys for a few seconds until you see an Apple logo, and release the keys to start your Mac in the Recovery partition.
- You successfully boot into macOS Recovery until you see the utilities window with a few recovery and troubleshooting features.
Here's how to boot an M1/M2/M3 Mac in macOS Recovery Mode:
- Completely shut down your Mac.
- Press and hold the Touch ID (the power button) for a few seconds until you see "Loading startup options".
- Click Options next to the Mac's Macintosh HD disk and then click Continue.
- Enter your admin name and password if asked, and you will arrive at the Recovery Mode screen.
Step 2: Launch Disk Utility in macOS Recovery Mode.
- Once you're in the macOS Recovery Mode screen, select Disk Utility from the main options.
- Then click Continue.
- Select the Mac hard drive and click Erase on the top menu bar.
- Type in the info required to erase the hard drive. Then wait for the drive to be formatted.
Downgrade macOS Monterey to Big Sur
Once the drive is erased, the machine you have has a clean drive with macOS Monterey as the default OS. Now we can fetch the macOS Big Sur bootable USB to downgrade the machine.
1. Allow your machine to boot from an external hard drive
The Mac model configured with an Apple T2 Security chip does not permit a startup from an external hard drive, so we need to modify the settings before.
- Go to macOS Recovery Mode with the Command + R keys one more time.
- Select Utilities > Startup Security Utility.
- Check the Allow booting from external media option.

Step 2: Boot your Mac from the USB and install macOS Big Sur
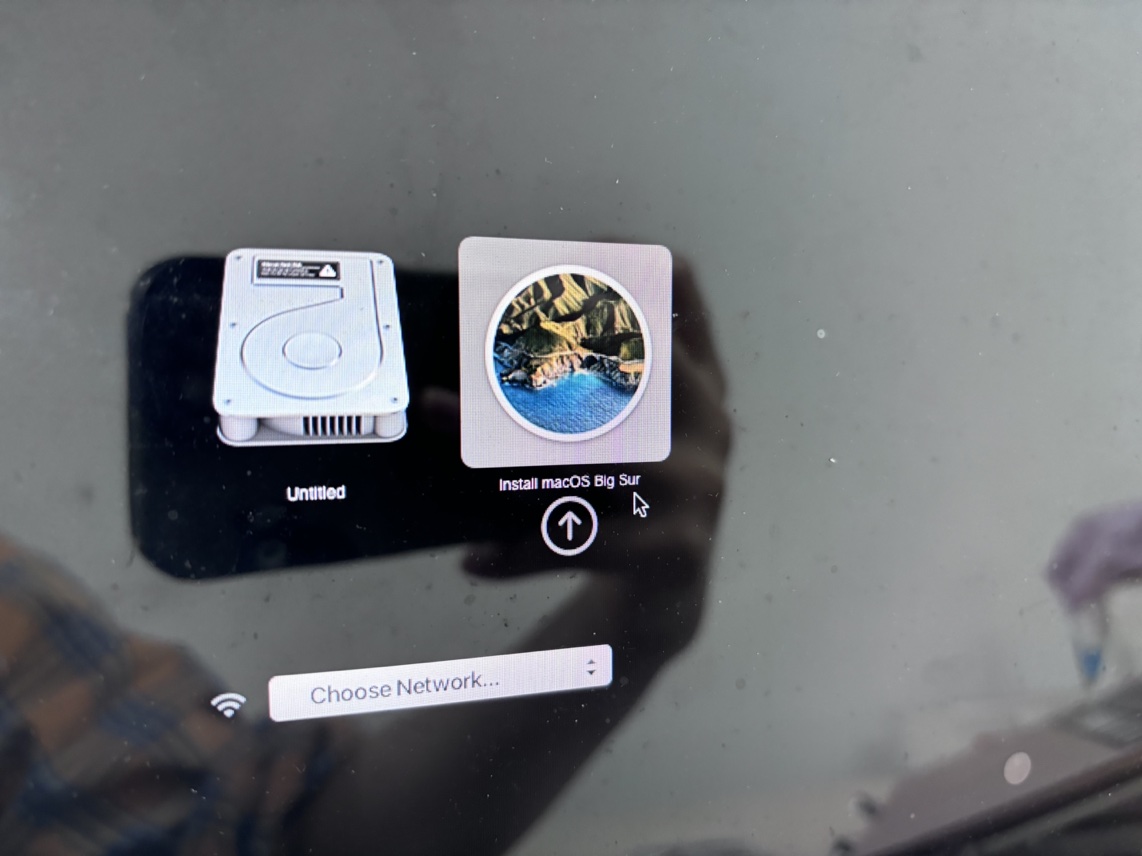
- Make sure the internet goes well. Then restart your Mac and hold the Option key along with the Mac awake.
- You'll be in the Mac boot options screen, choose Install macOS Big Sur.
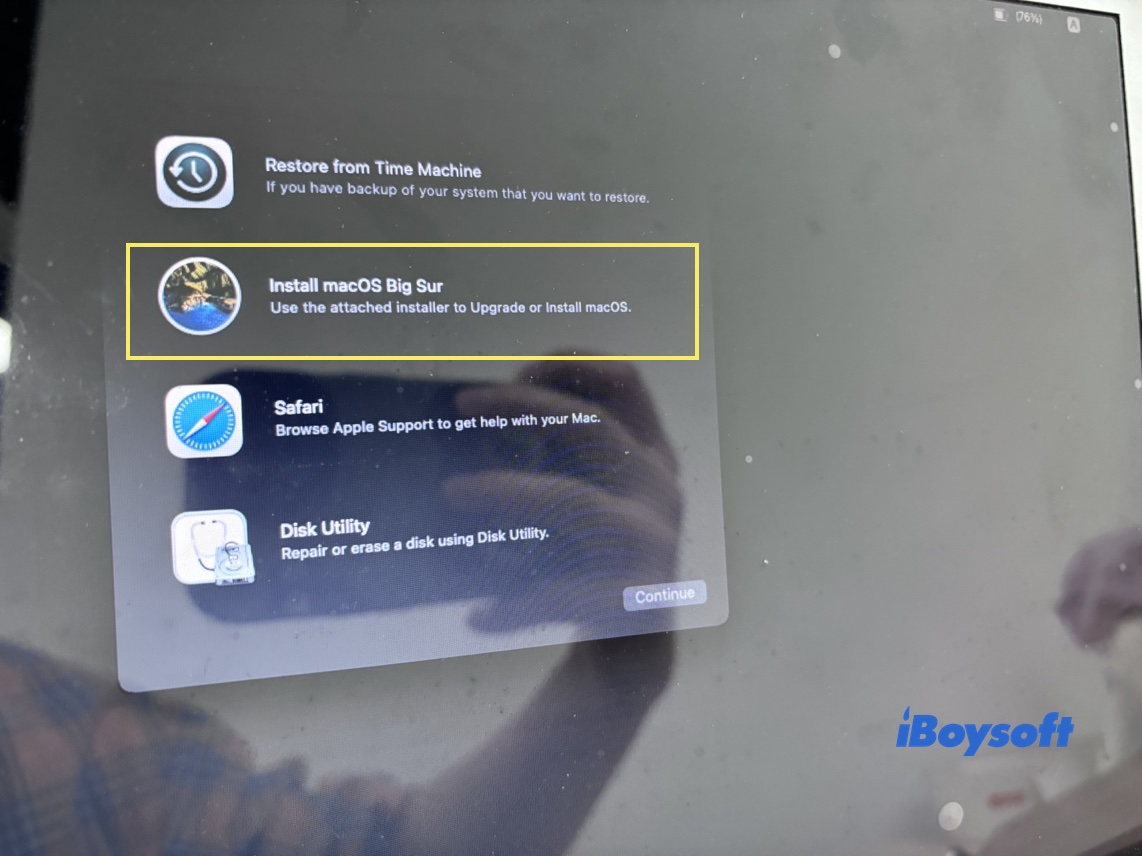
- You will be brought into the macOS Recovery Mode, click Install macOS Big Sur from the main window, and click Continue to proceed.
- Proceed with the following installation process. You may need to choose the language, network, user account, and so on. Once you complete all of them, you're on macOS Big Sur!
Final words
This post is a comprehensive tutorial on exploring how to restore macOS Monterey to Big Sur, which is super suitable for users who have no restoration source of macOS Big Sur. If you have no backup of macOS Big Sur and the system data along with it, then creating a bootable installer for it is the perfect choice for the OS downgrade.