Install Disk Creator for Mac is a utility used to turn a USB drive or other media into a macOS installer, so that users can fetch this drive with the desired operating system to boot any target Mac workstation.
However, this free and open-source utility stopped updates in 2021, indicating that it offers no macOS database released after 2021, which includes macOS Big Sur, macOS Monterey, macOS Ventura, macOS Sonoma, macOS Sequoia, and macOS 16 – the new OS that comes in June 2025.
Take it easy, however, this post offers a perfect alternative to Install Disk Creator for Mac, allowing you to make a bootable USB for any desired macOS with several steps. Let's get started then!
iBoysoft DiskGeeker - Allows you to create a bootable USB for any macOS
iBoysoft DiskGeeker is the incomparable and fascinating install disk creator for Mac with its beginner-friendly interface and advanced functions in turning a drive into a bootable media directly.
It simplifies the creation process into simple steps, freeing you from downloading the macOS installer from the source website, installing it on your Mac, and turning the installer into a bootable database on the USB drive with the execution of command lines.
Specifically, the execution of command lines is prone to failure unless you're an advanced user of the terminal. Or, any misoperation may put your machine at risk.
While using iBoysoft DiskGeeker, all operations are to insert the USB drive, then let it complete the process automatically. You can totally concentrate on other business until it notifies you that the bootable USB is created successfully. It is safer, more stable, and simpler!
iBoysoft DiskGeeker supports most of the Mac operating systems: macOS High Sierra, macOS Mojave, macOS Catalina, macOS Big Sur, macOS Monterey, macOS Ventura, macOS Sonoma, and macOS Sequoia.
Here is how to make a bootable USB with the assistance of iBoysoft DiskGeeker:
Step 1: Download iBoysoft DiskGeeker and connect the external hard drive to your Mac that you want to use as the bootable source later.
Step 2: Open iBoysoft DiskGeeker.
Step 3: Select the drive you inserted and click "Create boot disk" from the left sidebar.
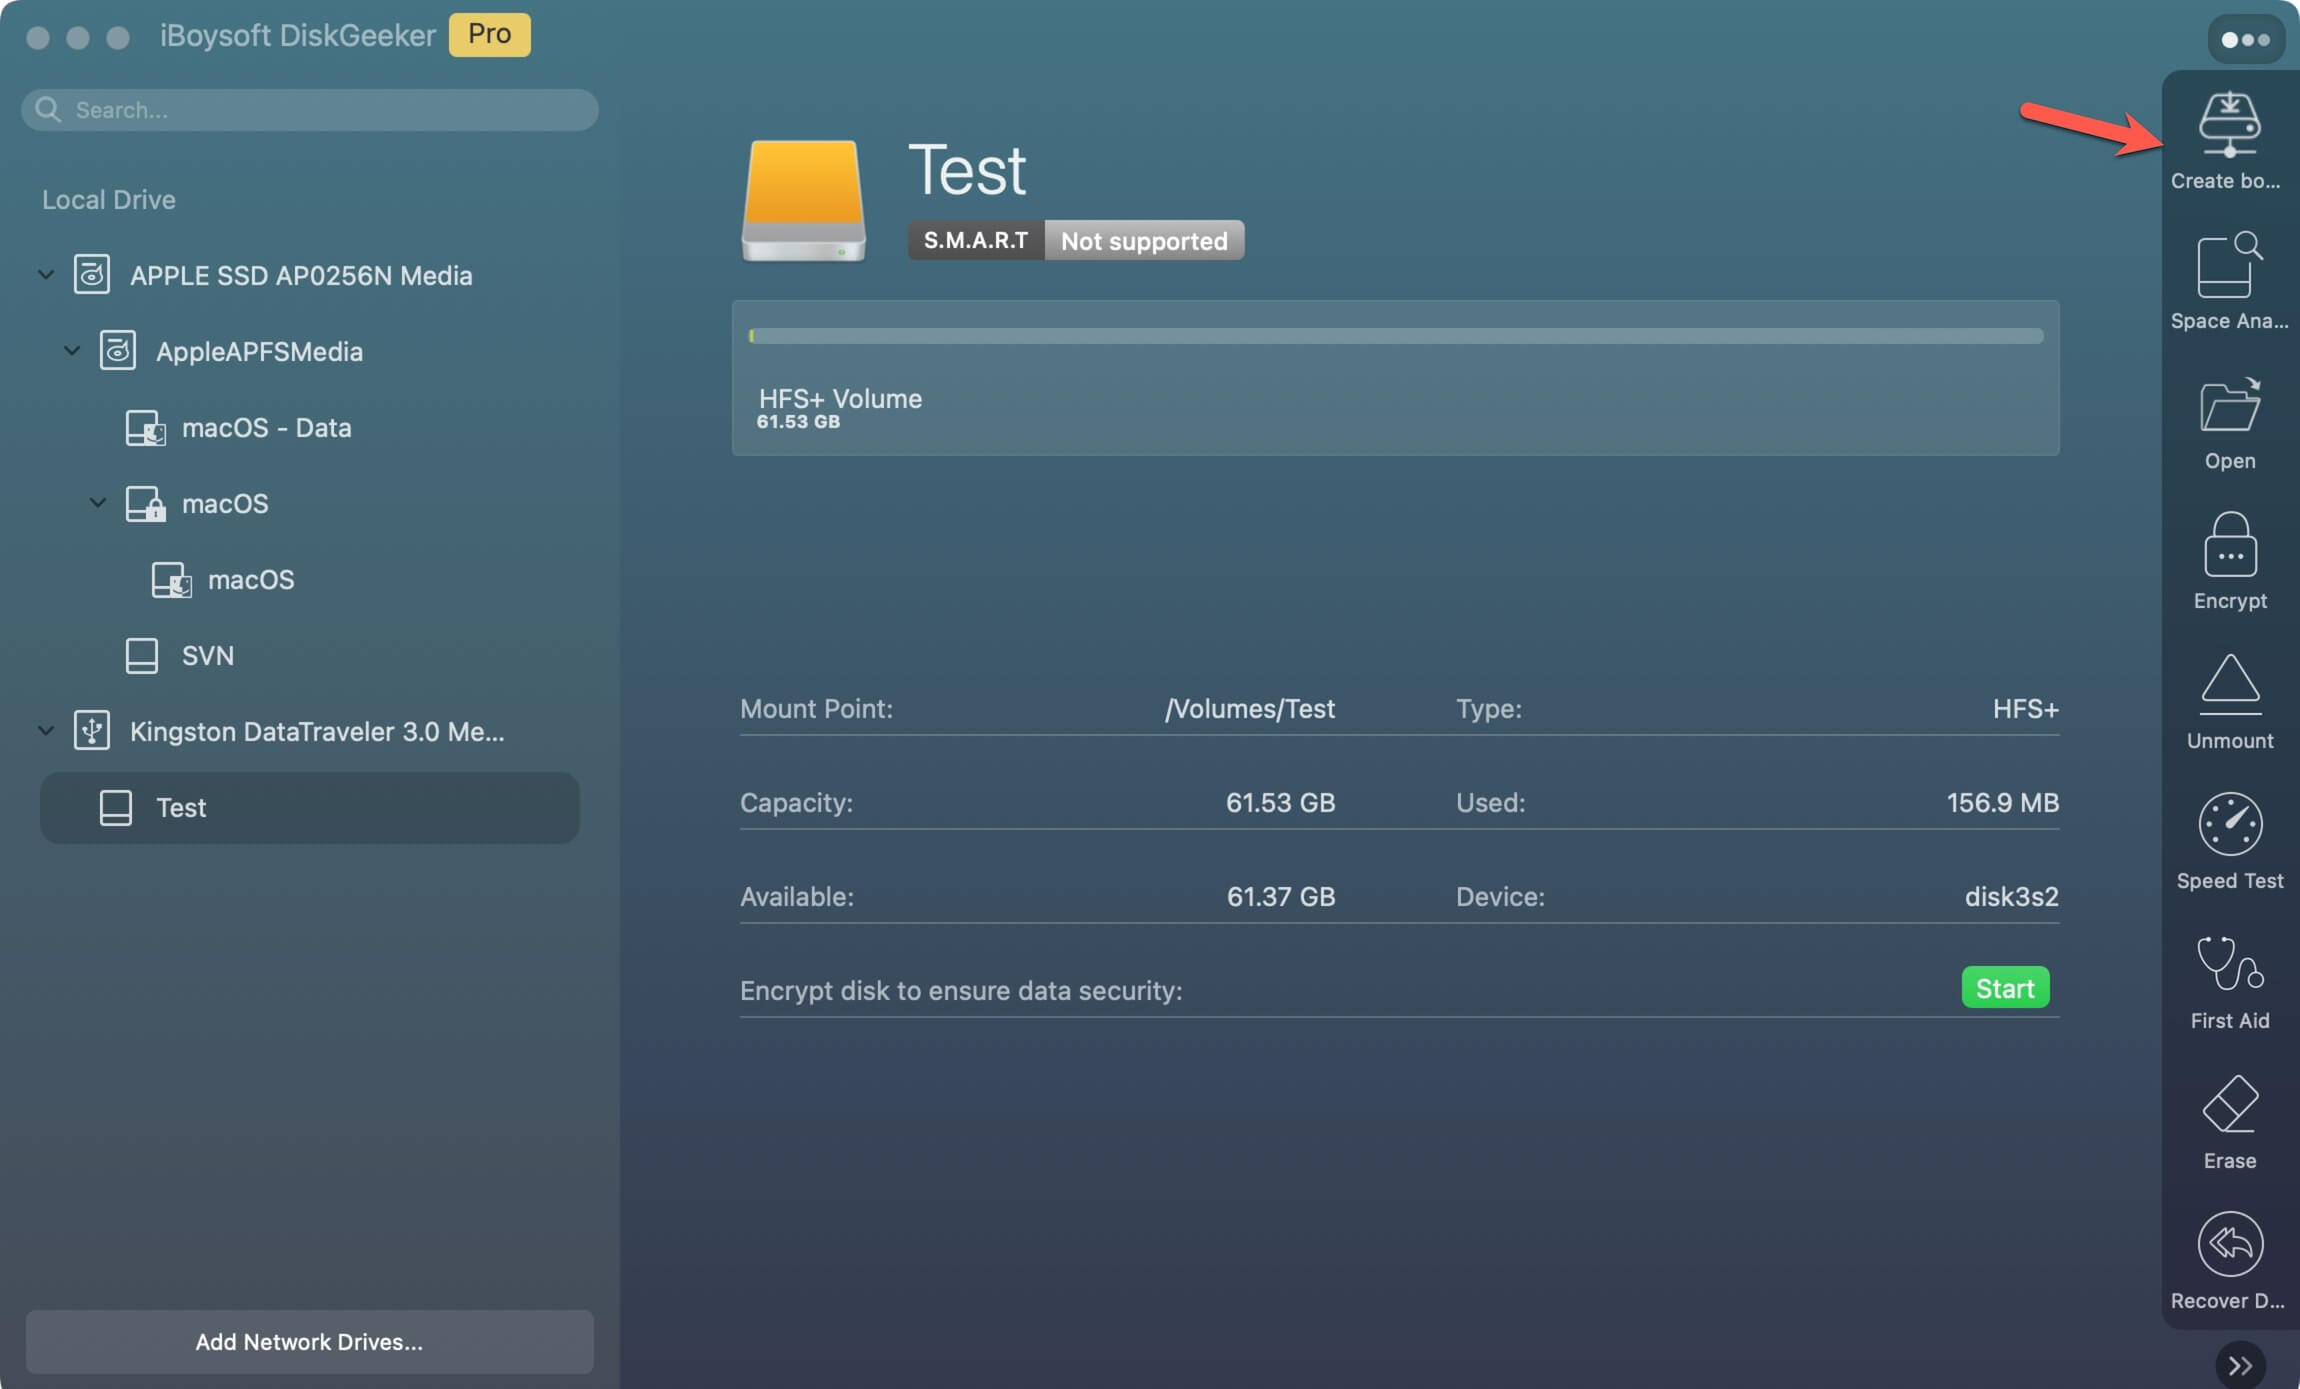
If the external disk doesn't have any volume, when you select the disk and click "Create boot disk", you'll be prompted that the drive hasn't been formatted. Just click "OK" to let the tool format the disk to Mac OS Extended (HFS+). Then, select the volume and click "Create boot disk" to move on.
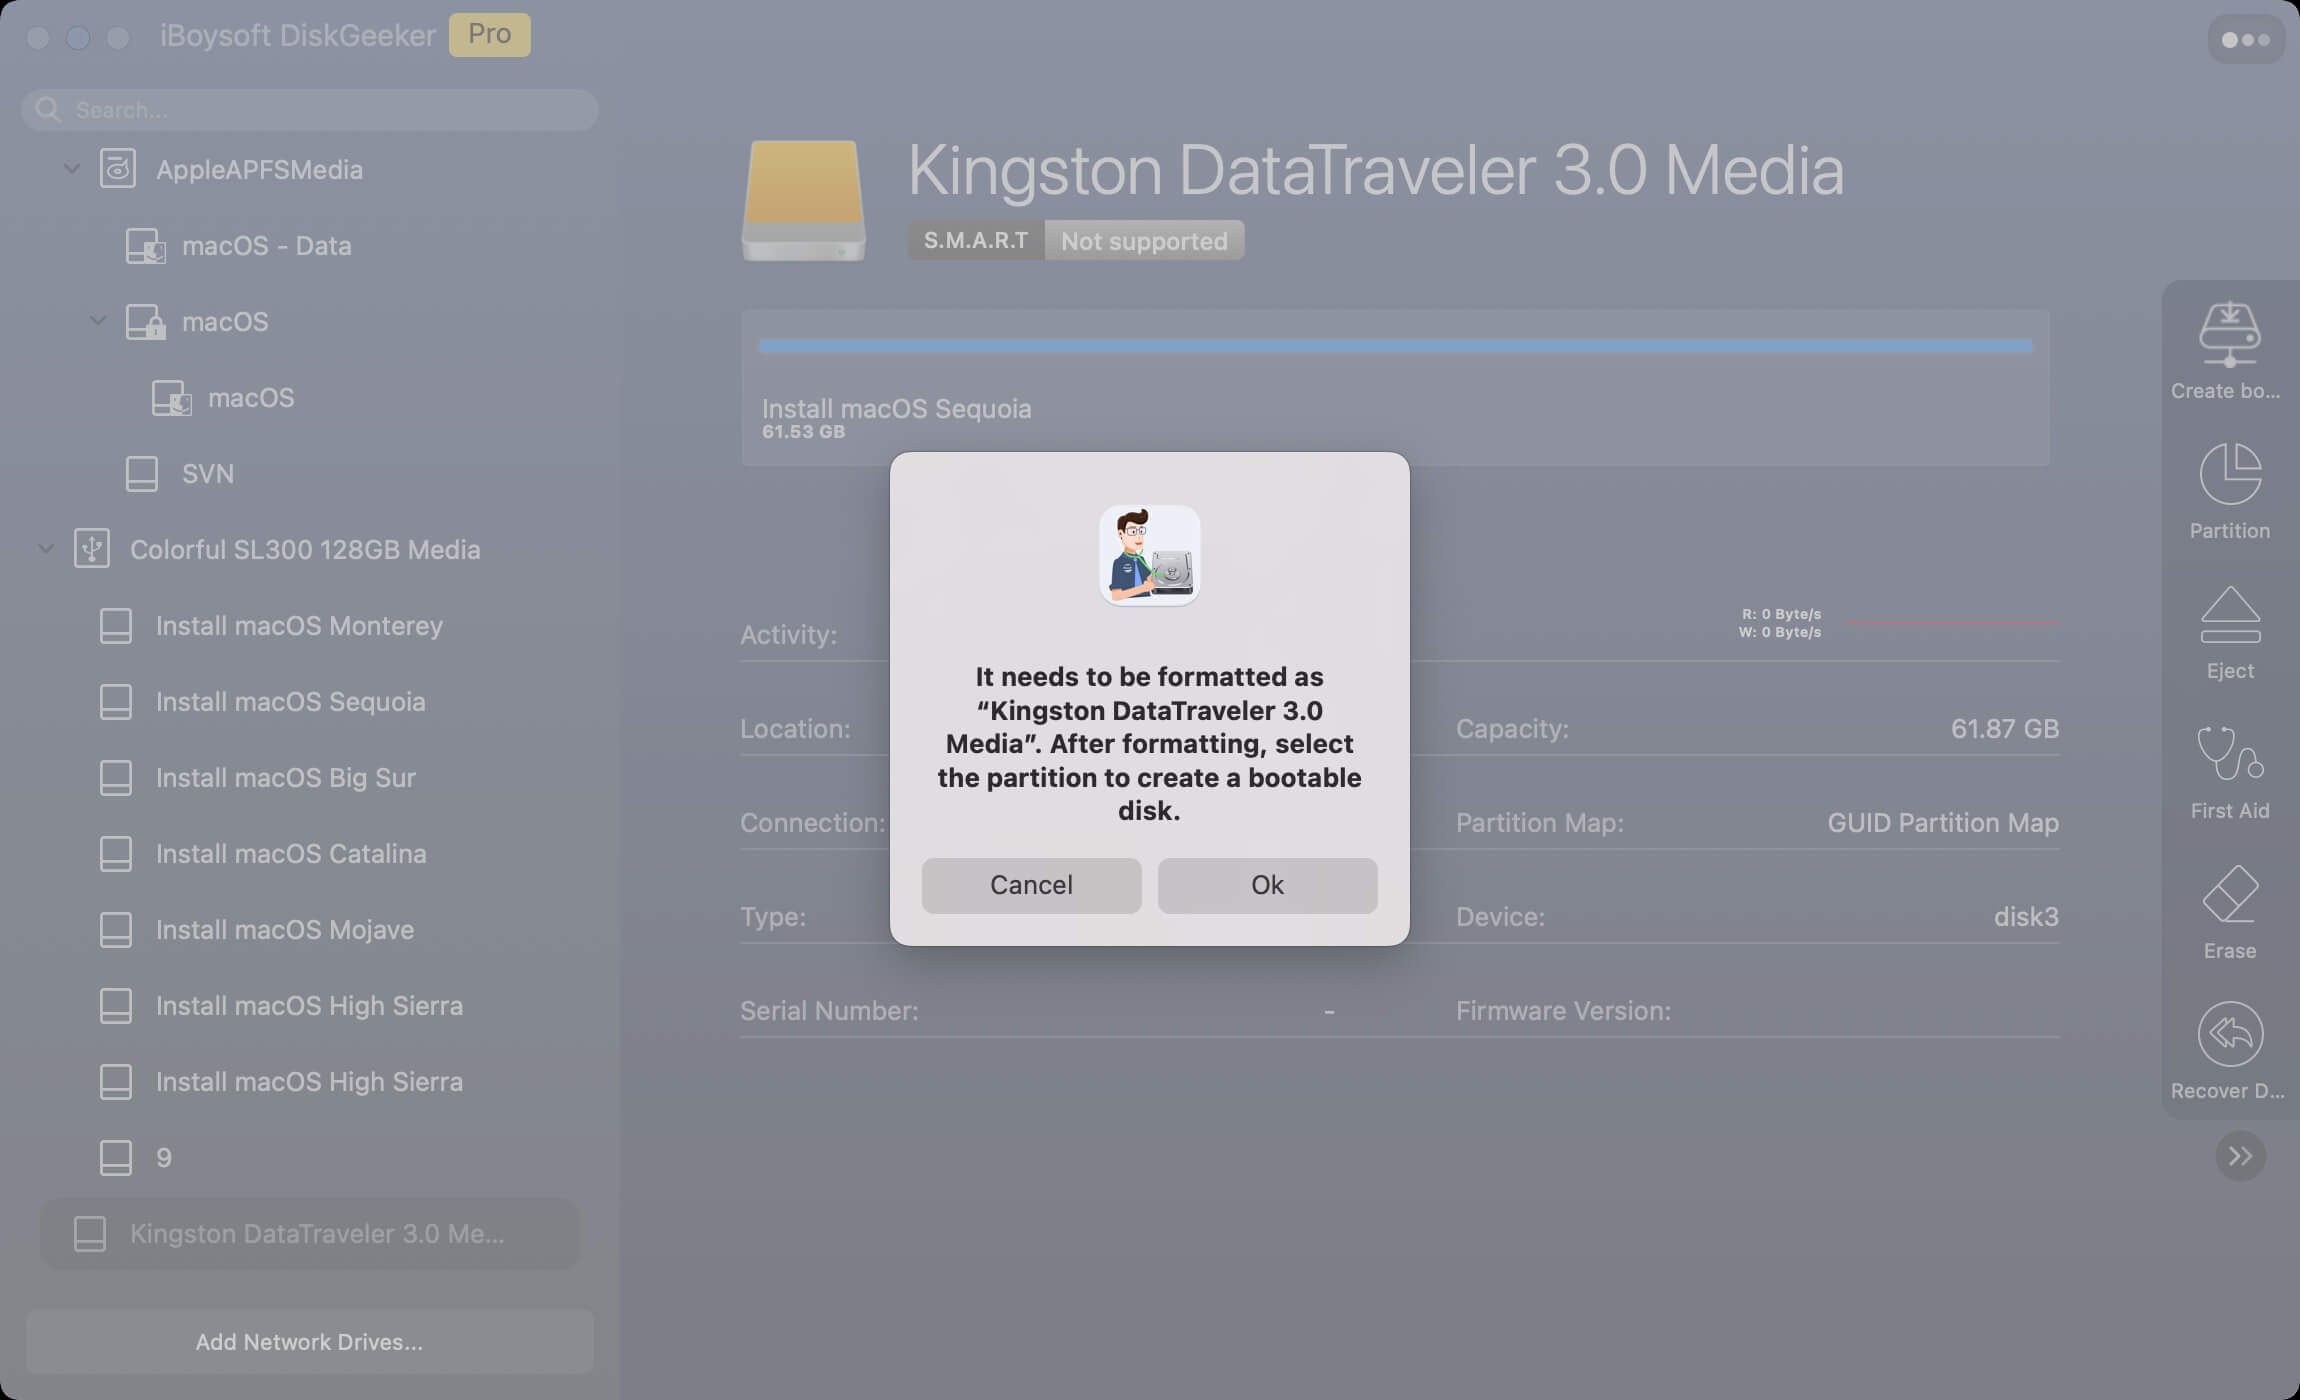
Step 4: Click "Continue" on the prompt alerting you that the selected volume will be formatted.

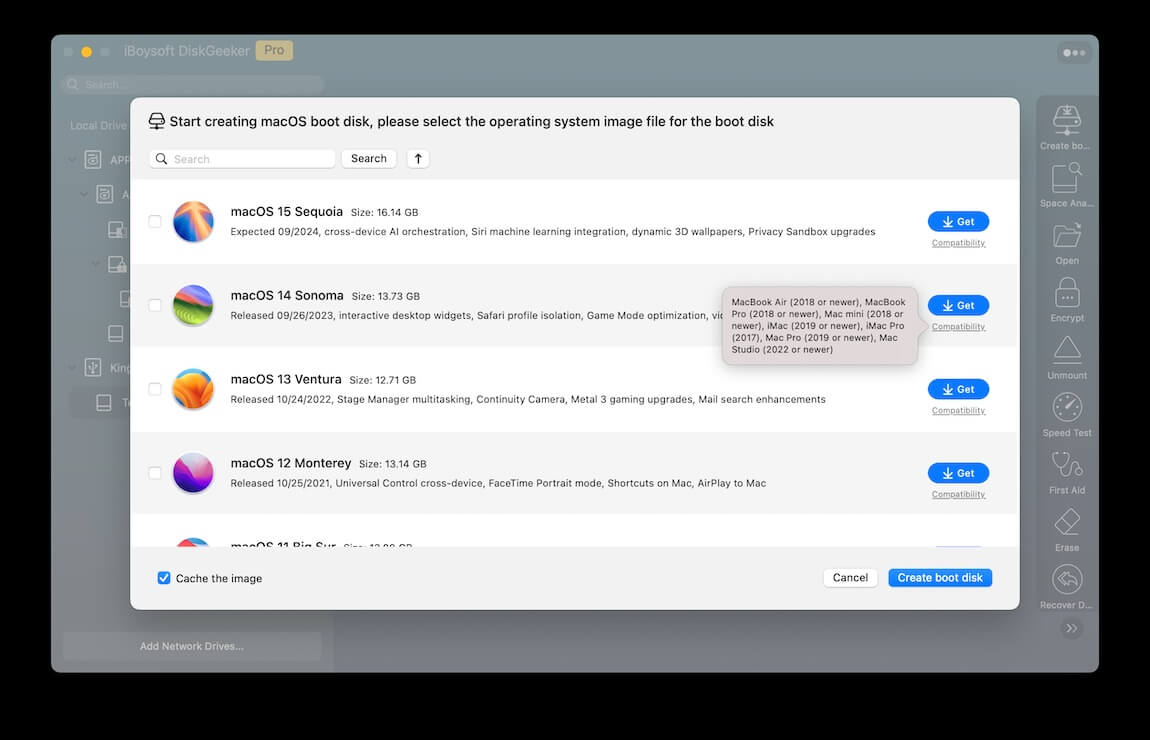
Step 5: Select the macOS version you want and click "Create boot disk".
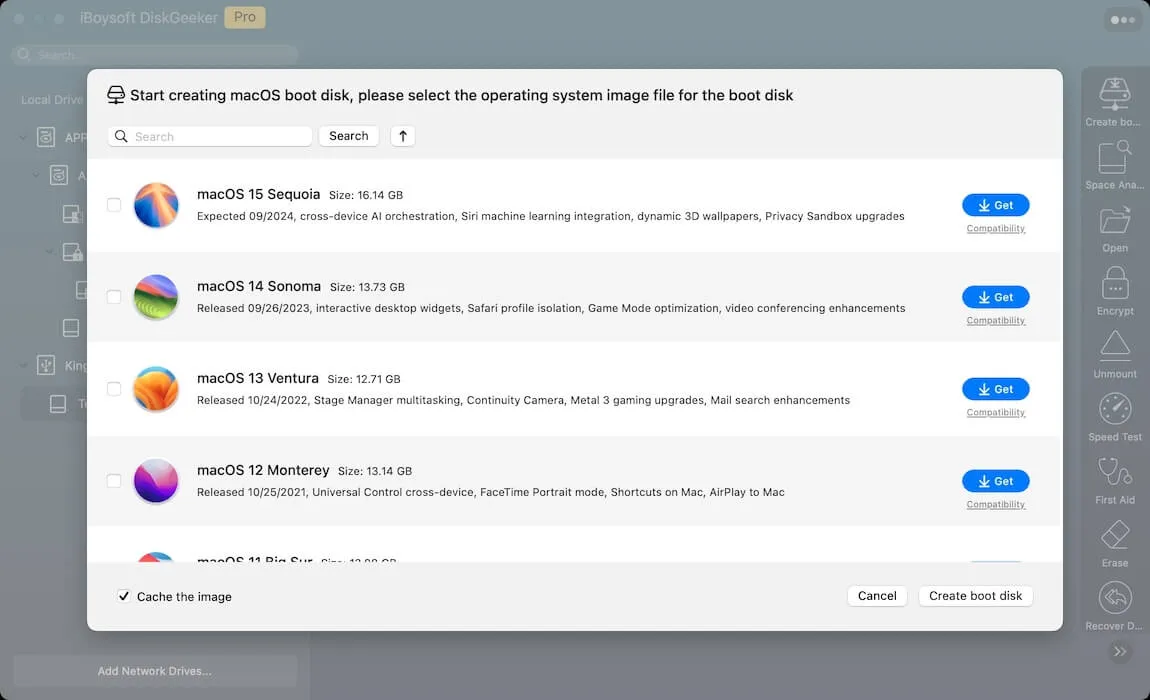
You can click "Compatibility" next to the desired macOS version to see which Mac models it supports.
If your Mac is unluckily dropped by Apple to run the OS officially, don't worry, you can install the desired macOS on unsupported machines with the following tutorials:
- Install macOS Sequoia on unsupported Macs
- Install macOS Sonoma on unsupported Macs
- Install macOS Ventura on unsupported Macs
- Install macOS Monterey on unsupported Macs
- Install macOS Big Sur on unsupported Macs
- Install macOS Catalina on unsupported Macs
- Install macOS Mojave on unsupported Macs
- Install macOS High Sierra on unsupported Macs
Step 6: Click "OK" on the pop-up to let the target partition be erased.
Step 7: Wait for the DMG download process to complete.
Step 8: Once the download ends, a pop-up will inform you that creating a bootable disk will erase the target partition. Click OK to go on.
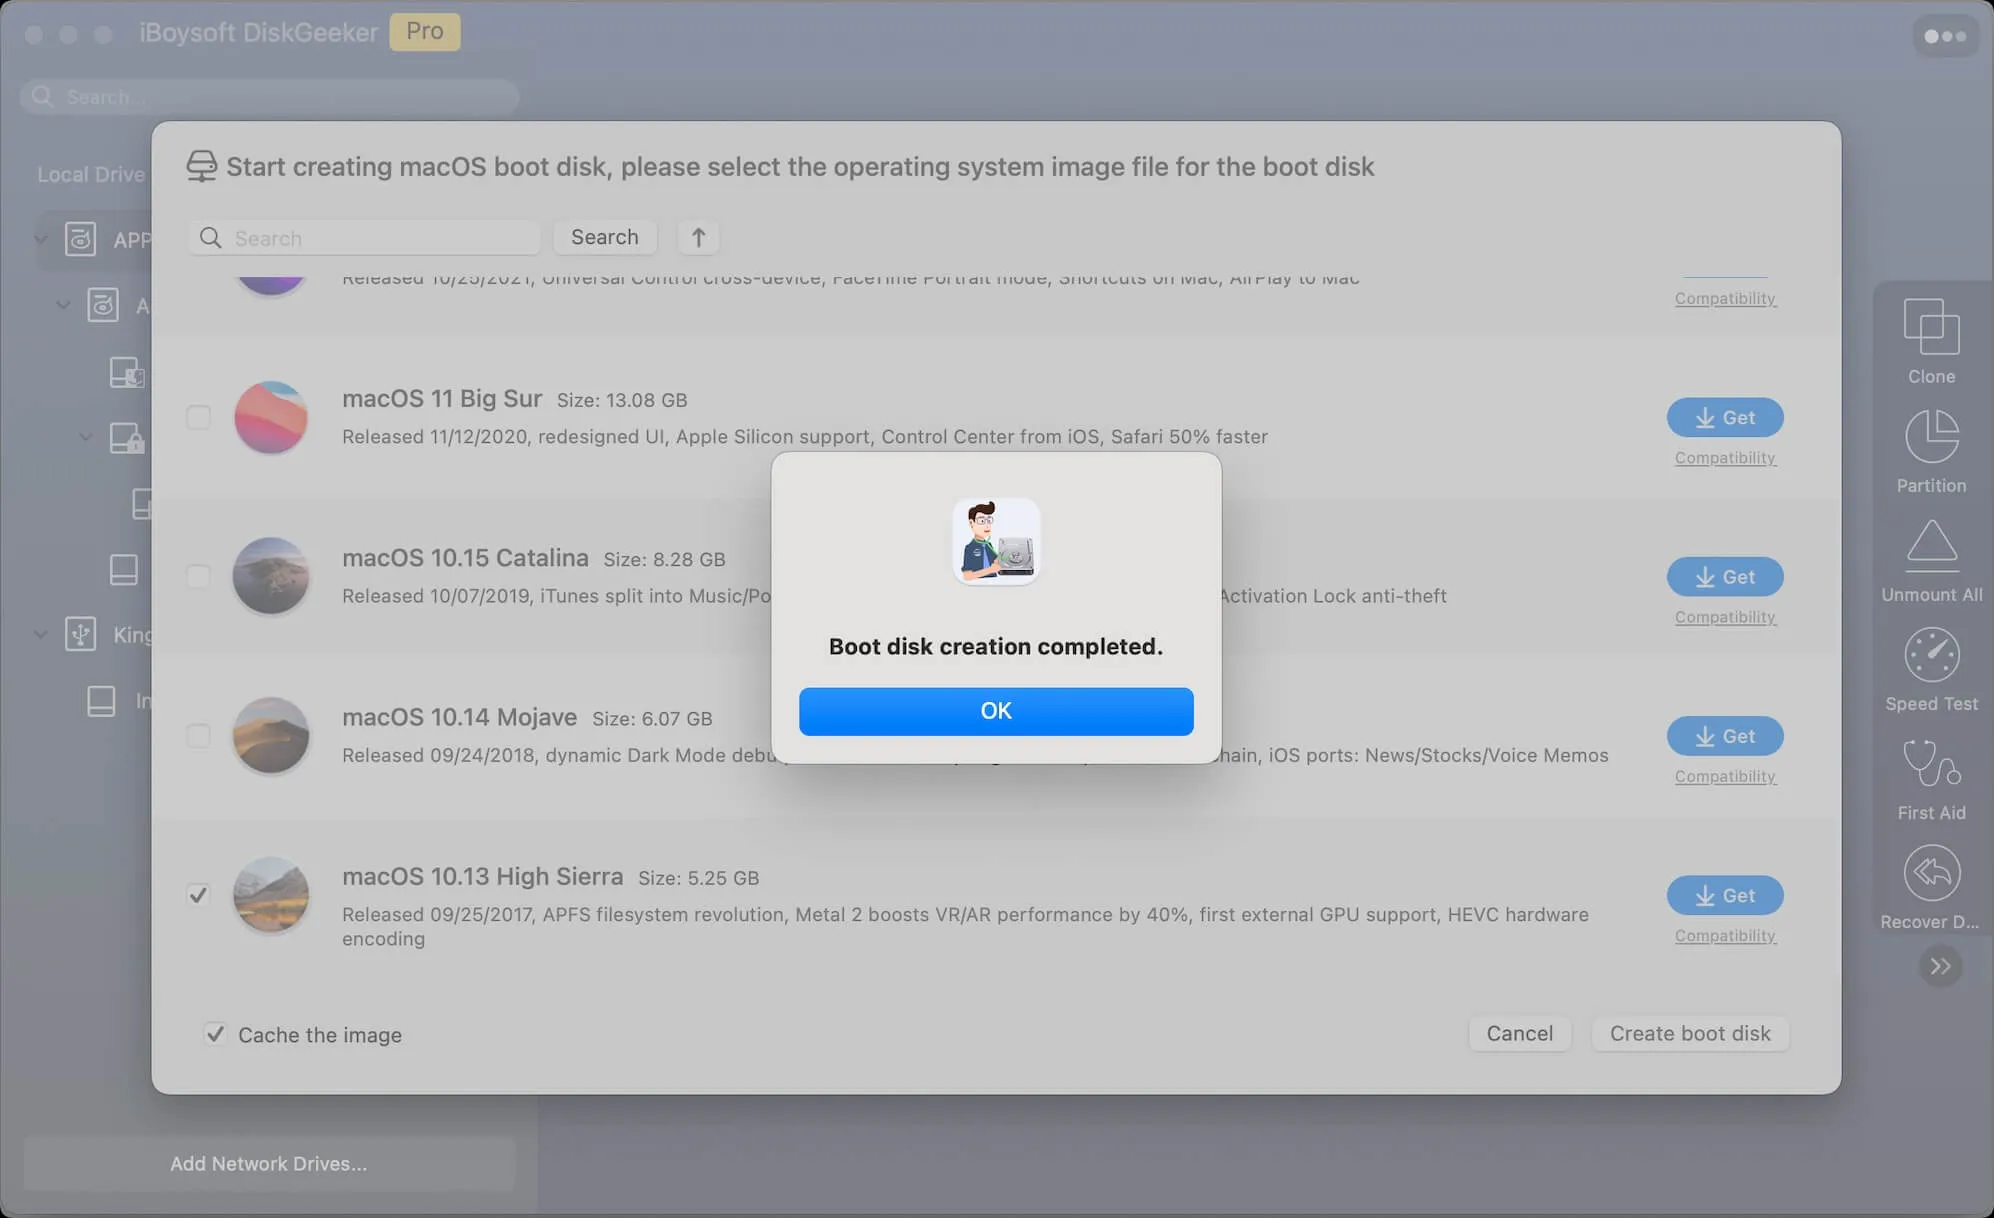
Step 9: Once the process ends, you have a bootable USB then!
Go tell more people how to make a bootable USB on a Mac without running commands!
How to use Install Disk Creator for Mac?
If you insist on using Install Disk Creator for Mac, try this section:
- Download Install Disk Creator for Mac here, and unzip the file by double-clicking the zip file you've downloaded.
- Launch this utility, and you'll be asked to open the internet for this app.

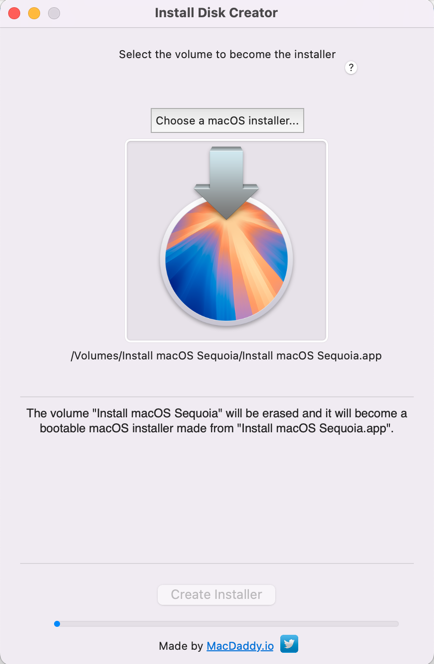
- Then you'll be asked to choose the volume and choose the macOS installer you've downloaded (yes, you have to download the macOS installer previously). For us, here we select macOS Sequoia for testing.
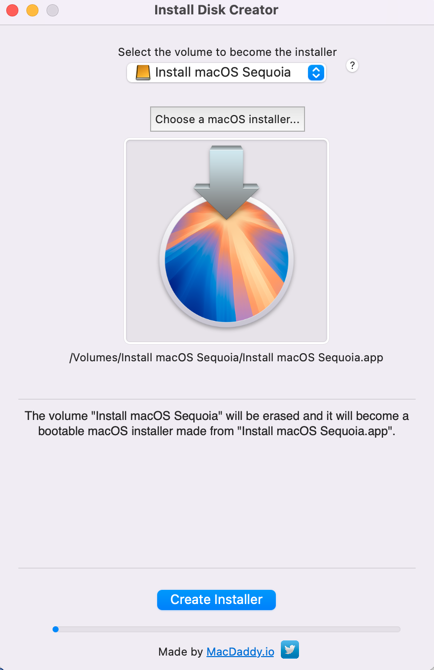
- Click Create Installer on the main window.
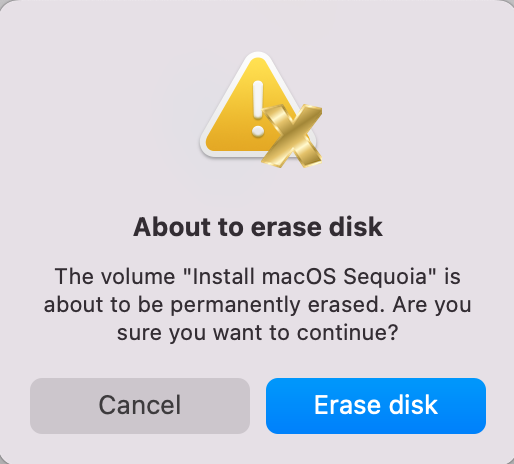
- It will confirm whether you want to erase the chosen disk with a new prompt. Click Erase disk to proceed.
- Type in the user account password when asked and click OK when it wants to access files on a removable volume.
- Then wait for it to complete the whole process.
If you find this utility brags too much about its function of making a bootable USB, scroll up to try iBoysoft DiskGeeker directly!
Why do you need a bootable USB drive?
A bootable USB is a second boot option for you to start your Mac workstation, especially when you're in the following situations:
① macOS Recovery Mode does not work well in reinstalling macOS. When you cannot enter macOS Recovery Mode or fail to reinstall macOS on it, a bootable USB drive is a nice approach, allowing you to reinstall the operating system.
② You do not want to erase the drive to reinstall macOS. A normal macOS update via Software Update won't erase the Mac's hard drive, yet if you want a clean and fresh OS, the drive erasure is a must, unless you boot your machine via a bootable USB, which grants you a brand clean OS with keeping all data on the hard drive still.
③ You want to boot the desired macOS on multiple Macs. A bootable USB can be used to start multiple machines as it's portable and handy.
④ Diagnose and troubleshoot issues on the problematic Mac. When your Mac goes wrong and refuses to boot normally, the bootable media is an alternative approach to activate it. On top of that, you can launch the disk repair process with this bootable drive.
⑤ Rescue data from an unbootable Mac. When your Mac won't turn on, you can fetch the bootable USB to force activate your Mac and then rescue precious data and files on the hard drive.