To speed up users' update frequency on Mac devices, Apple annually removes certain Mac models from the supported device list running the current major macOS. Also, this move ensures more advanced performance and higher security of the devices.
However, considering the budget, lots of users prefer to install macOS on an unsupported Mac compared to owning a supported device. This urges users to look around for the installation tutorial. Today we are going to explain how to install macOS Big Sur on an unsupported Mac using OpenCore Legacy Patcher. If you're interested in it, click in and begin reading now!
How to install macOS Big Sur on an unsupported Mac:
Step 1: Back up your Mac computer
Before diving into the installation, it's necessary to back up the hard drive in case any unexpected issue happens, reducing data loss to occur. Time Machine is the default backup utility on Mac allowing you to fully back up the hard drive. Here is how to perform:
- Run Time Machine by Apple menu > System Preferences (System Settings on macOS Ventura and later macOS versions) > Time Machine.
- Click Select Backup Disk… from the Time Machine menu window.
- Click Use Disk to confirm your choice, then the backup process begins itself.
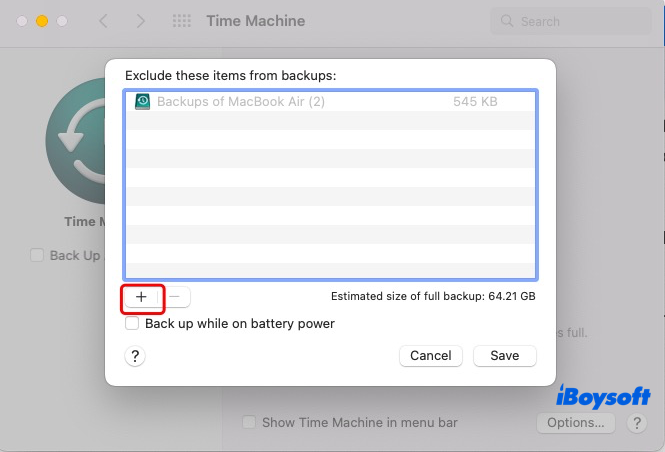
- You can the Option to exclude some folders or files from the backup list if you needn't back up it.
- This process may take some time based on the data size of your machine.
Additionally, iBoysoft DiskGeeker is a perfect alternative to complete the backup mission, which clones the whole hard drive as the final backup database at a fast and stable speed. If you dislike Time Machine, you can give this utility a shot which will never disappoint you!
Share this post with others if you complete the backup mission easily with the help of iBoysoft DiskGeeker!
Step 2: Prepare the macOS Big Sur installer
In this section, we walk you through making the macOS Big Sur installer, where an external hard drive with a size of 16GB is needed. Make sure you have dealt with the files stored in it properly since the OS installer creation wipes the drive completely.
1. Format the hard drive to Mac OS Extended with GUID Partition Mac for Intel-based chip Macs, while a drive with APFS format and GUID Partition Map is more suggested for the Apple Silicon Macs.
Note: You may receive an error saying "APFS disks may not be used as bootable install media" with the wrong format and scheme, so be sure you format the hard drive to the correct parameter!
2. Download the macOS Big Sur installer by clicking this link: Download macOS Big Sur installer and Do Not start the installation as the install package suggests.
The macOS Big Sur installer opens automatically after the download finishes. You can quit the installation process by clicking the Install macOS Big Sur option on the menu bar > Quick Install macOS > Quit. The installer will be kept in the Application folder in Finder on your Mac.
3. Connect the external hard drive with the proper format and scheme to your Mac.
4. Go to Launchpad > Other > Terminal.
5. Copy the command below into the Terminal window. Replace MyVolume with the name of the external drive.
sudo /Applications/Install\ macOS\ Big\ Sur.app/Contents/Resources/createinstallmedia --volume /Volumes/MyVolume
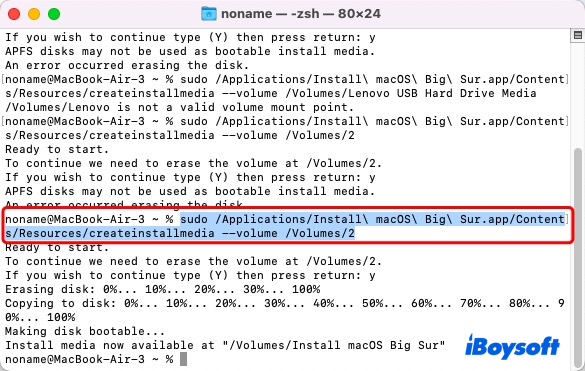
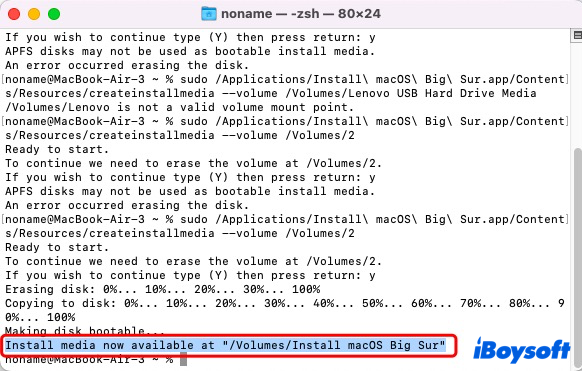
6. Press Return, enter your admin password, and wait for the macOS Big Sur to be installed on the external storage.
Leave your comments and share this post with more people on your social platform!
Step 3: Install OpenCore Legacy Patcher on your Mac
OpenCore Legacy Patcher is a great creation that mends the gap between macOS Big Sur and unsupported Mac. With the assistance of OCLP, you can install macOS Big Sur on unsupported devices seamlessly!
1. Download OpenCore Legacy Patcher and install it on your Mac.
2. Open it to detect your Mac model when downloading and installing ends. You can either select the Mac model manually for an accurate result by selecting Settings > Target Model.
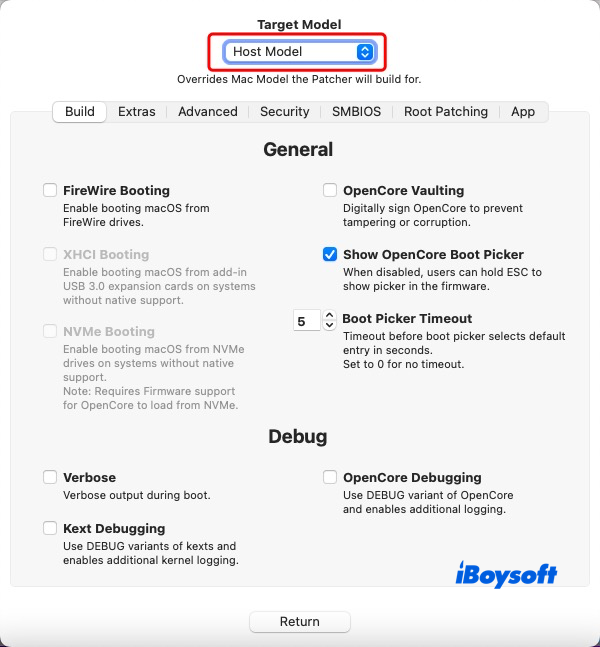
3. Click Return to the main window and click on Build and Install OpenCore.
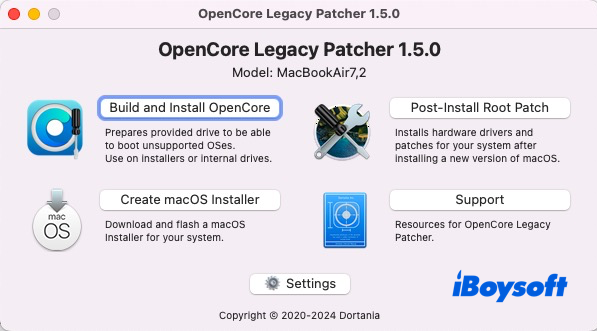
4. Once OpenCore Legacy Patcher is built, it will notify you to view the build log or install OCLP to the target disk for booting. Click Install to disk to allow its installation.
5. When asked for disk access, click OK to permit it.
7. Select the drive used as the bootable installer you made in the Step 3 section. In our case, it is disk2 - USB Hard Drive - 1.0 TB. If the desired drive doesn't show up in the list, click Search for disks again.
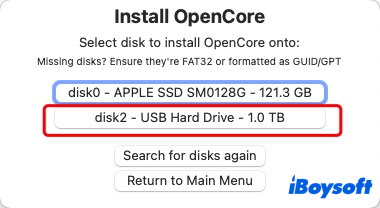
8. Click the given volume it shows up to proceed. Our is disk2s1 - EFI - 209.7 MB.
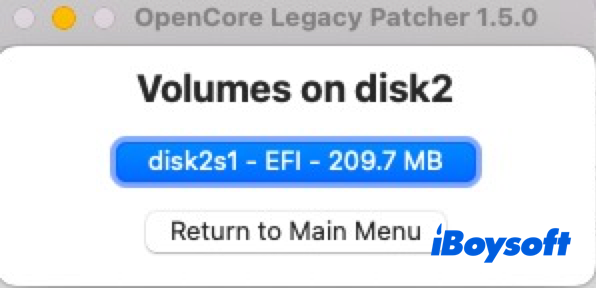
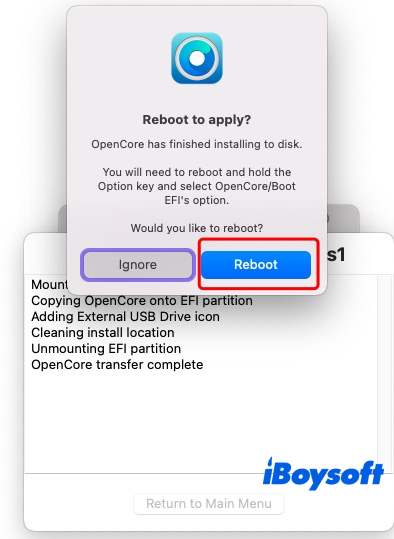
9. Several seconds later, you'll be asked to reboot. If you ensure everything goes well, click Reboot.
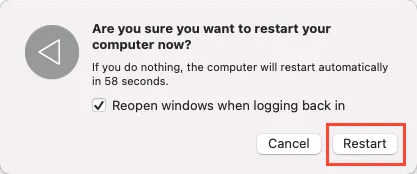
10. You'll be asked whether you confirm to restart, click Restart to go on.
Share this post with more people if you find it helpful!
Step 4: Install macOS Big Sur on an unsupported Mac
Now that we have come to the boot screen, we can set to install macOS Big Sur on the unsupported devices.
1. Once in the restart process, click the Alt/Option key until entering the boot screen, which shows some disks in the screen allowing you to choose.
2. Select Install macOS Big Sur on the boot screen, which was the installer you made in Step 3.
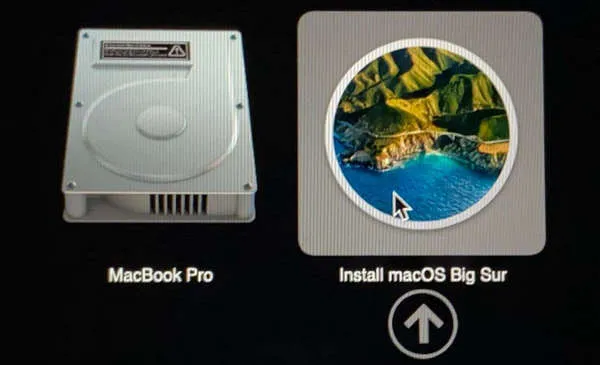
3. Follow the onscreen wizard to complete the whole installation and modify some user settings like language, network, user account, etc.
4. When the setup finishes, you're in macOS Sequoia on your unsupported Mac!
A video tutorial on installing macOS Big Sur on unsupported Macs
Here is a video guideline explaining how to install macOS 11 Big Sur on unsupported Macs. If you're not a fan of text description, watch the video below:
Final words
This guide makes installing macOS Big Sur on unsupported Macs a simple task with the detailed and step-wise guidance, you can proceed with it easily even if you have never done this thing before.
