
Even if your Mac model is not officially supported to run macOS Catalina by Apple, there is still a way for you to install this macOS version on unsupported Macs.
This post walks you through installing macOS Catalina on unsupported Macs with a step-by-step tutorial, while the unsupported Macs include the MacBook Pro before 2015, MacBook Air before mid-2012, MacBook Pro before mid-2012, Mac mini before late 2012, iMac Pro before 2017, and Mac Pro before 2013.
You can carry on this mission with ease, even if you're a newbie to macOS or macOS installation. Just read on!
Tips: Download macOS Catalina first before installing: Download macOS on unsupported Macs
Back up your Mac completely
This step is quite easy but significant since the backup can rescue you from any accident that happens during the installation. With a full backup at hand, you can always restore to the current macOS and all your files accumulated on the hard drive.
Time Machine is a perfect utility that backs up your machine regularly if you activate it previously. In this case, you just need to save the backup drive well and skip to the Step 2 section.
Yet if you have no habit of backing up, please complete the backup manually before the installation begins. Here's how to do that:
- Launch Time Machine on your Mac via Apple Menu > System Settings > General > Time Machine or Apple Menu > System Preferences > Time Machine.
- Click Select Backup Disk to choose the backup destination.
- Select the external disk as the destination drive and click Use Disk to confirm.
- Wait for the backup to end and save it well when it ends.
Create a macOS Catalina bootable installer
With the backup being completed, now we can dive right into the key part of installing macOS Catalina on unsupported machines, that is, creating a macOS Catalina bootable installer.
Compared to executing loads of complicated command lines for the installer, which often makes the macOS Catalina USB installer not bootable. We prefer to simplify this process into a few clicks -- using iBoysoft DiskGeeker. This utility is extremely friendly to computer newbies who find running commands a challenge.
It gives users a shortcut to create a bootable installer of macOS Sequoia, macOS Sonoma, macOS Ventura, macOS Monterey, macOS Big Sur, macOS Catalina, macOS High Sierra, and macOS Mojave.
Let's see how to make a macOS Catalina installer with a few clicks:
1. Download and install iBoysoft DiskGeeker on your Mac.
2. Connect an empty external hard drive that you want to use as the bootable installer to your Mac.
3. Open iBoysoft DiskGeeker and select a volume on the external drive, and click "Create boot disk."
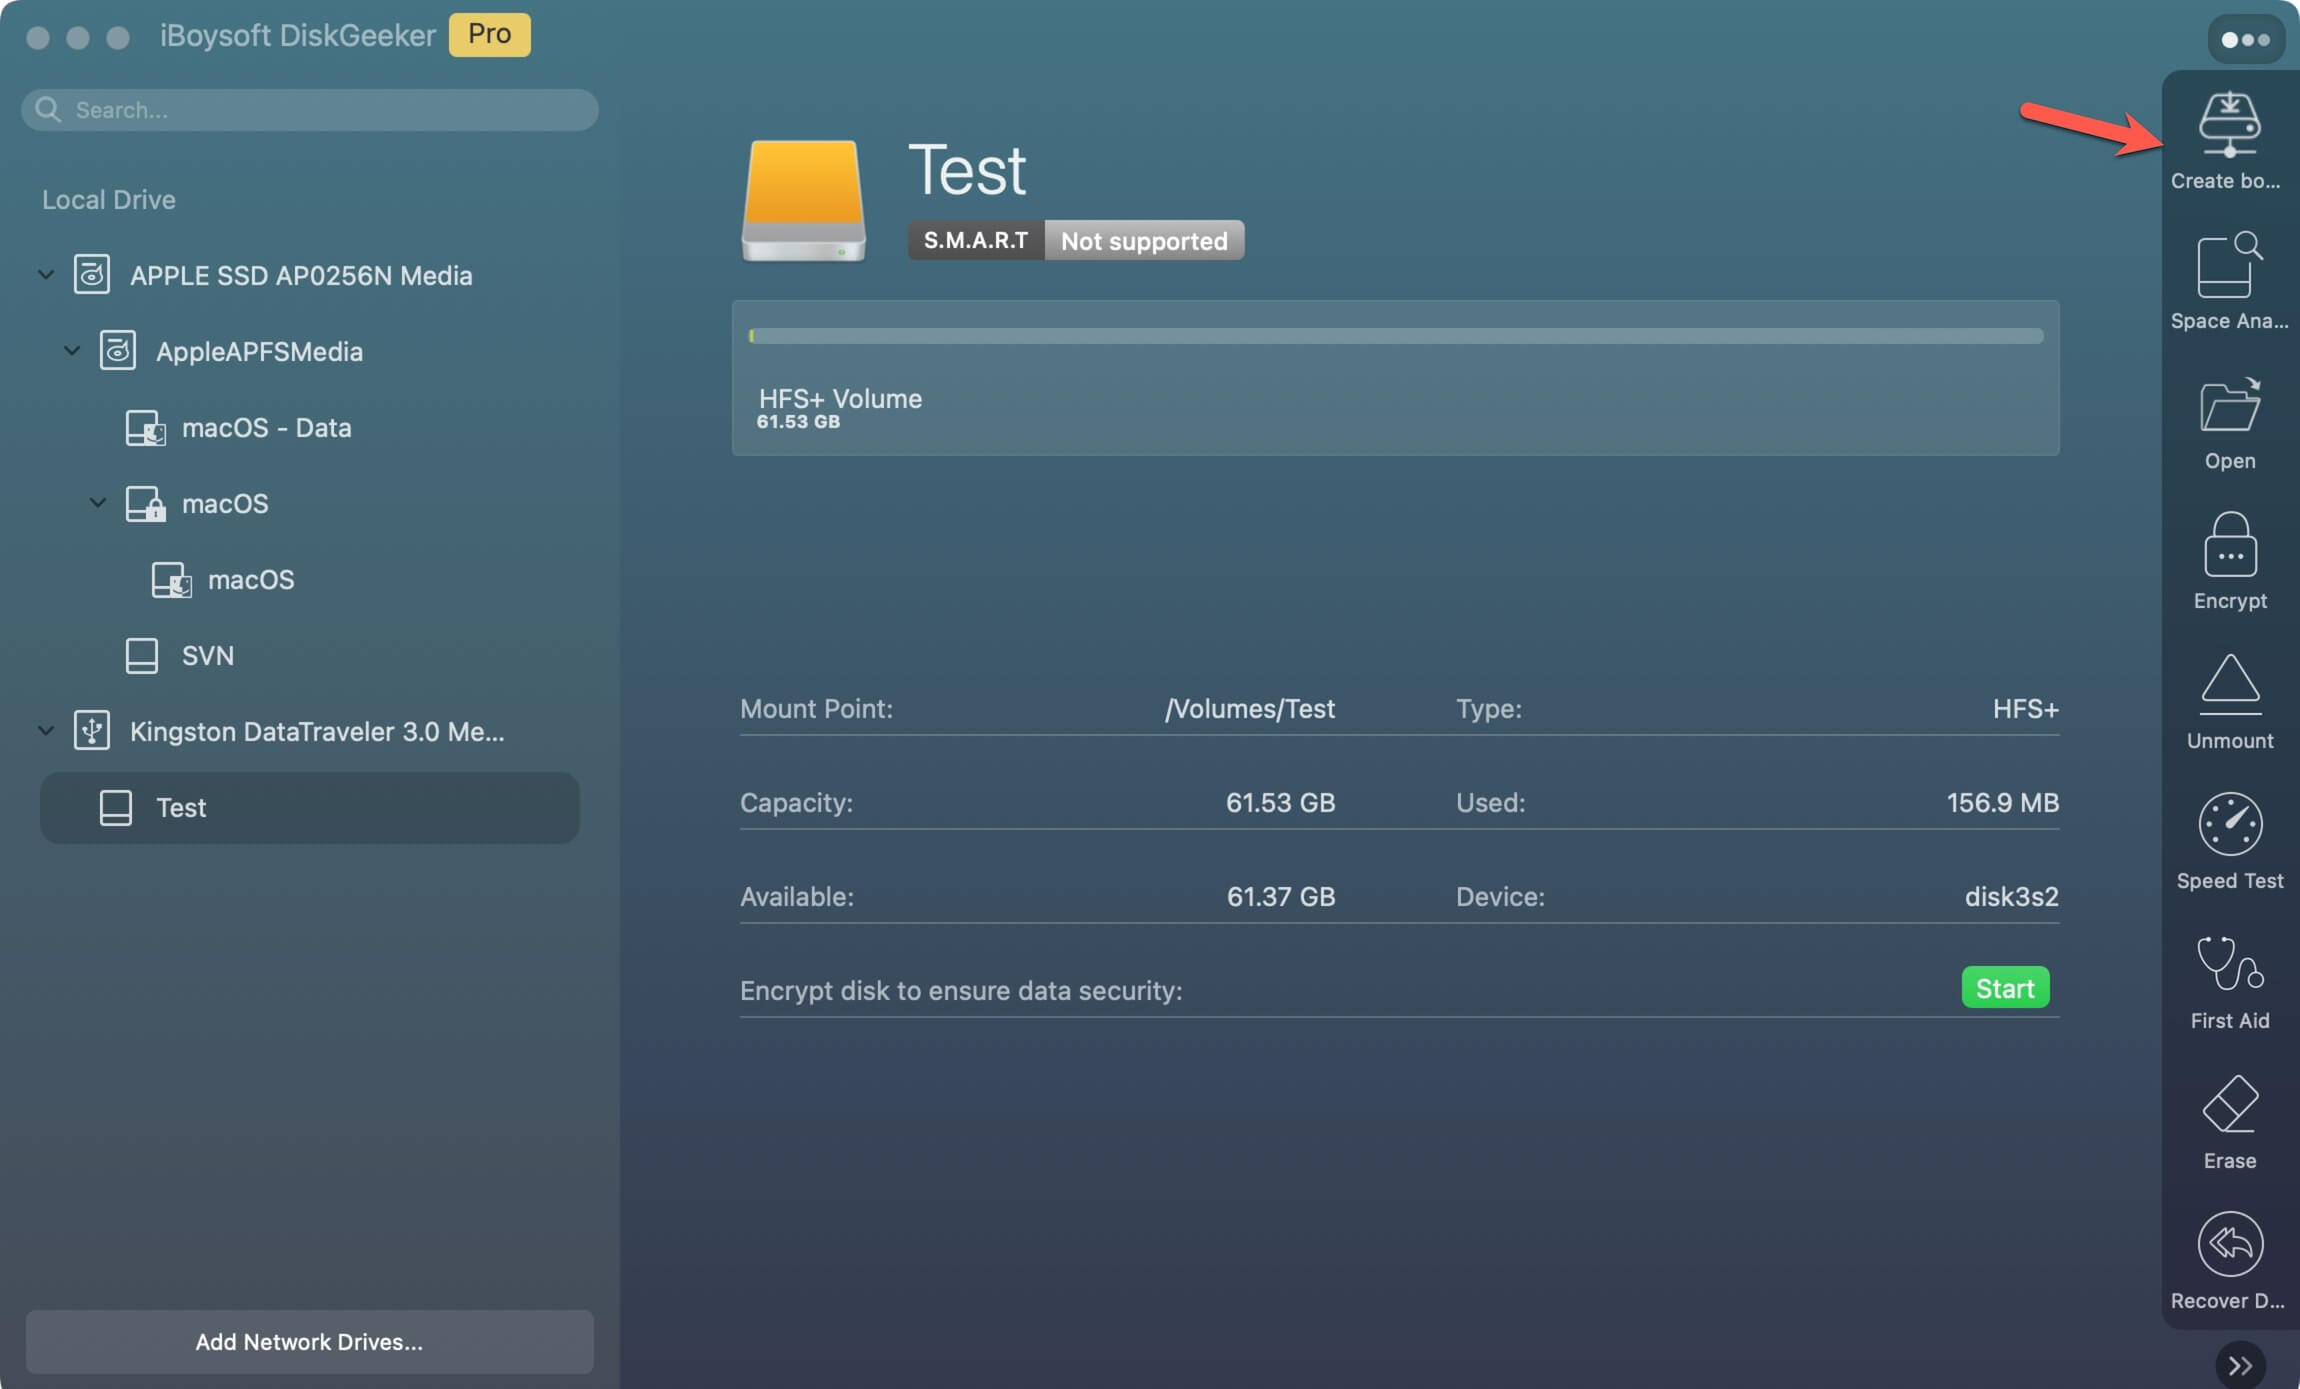
4. You'll be asked to format the hard drive if it has no volume available. Click "Continue" on the prompt to confirm the format process.

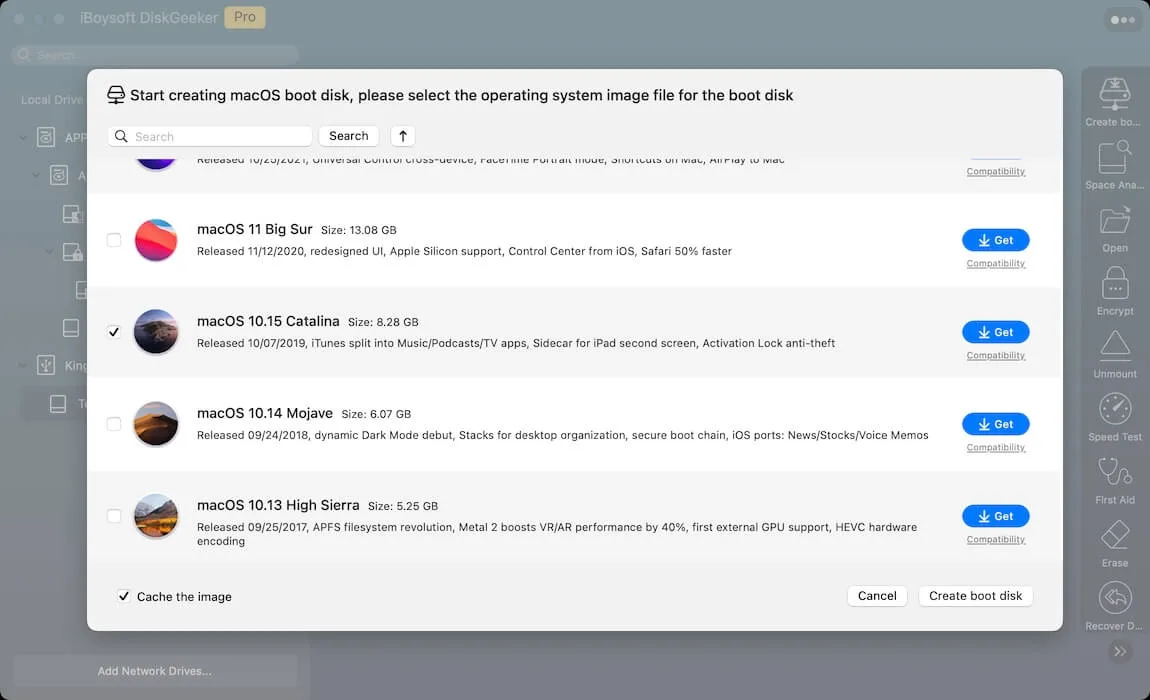
5. Toggle on "macOS 10.15 Catalina" and click "Create boot disk."
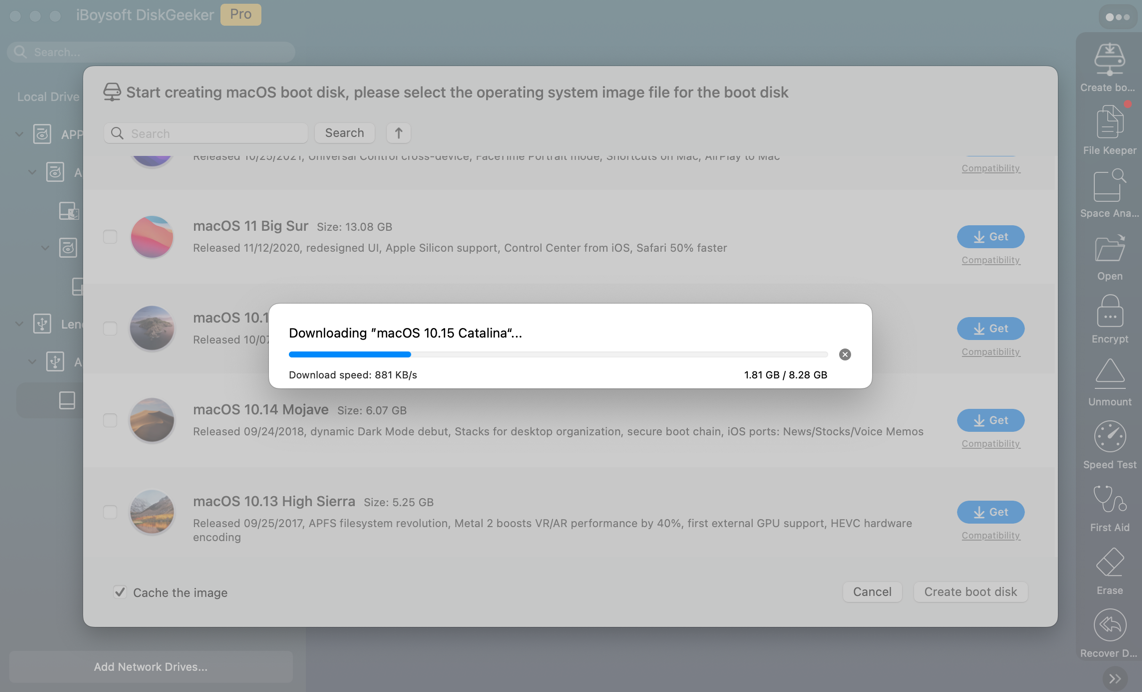
Step 5: A progress bar jumps out to show you the download info. You can click "Unlock Fast Download" and enter the license key to speed up the download.
Step 6: When the download ends, click "OK" when it says "Creating the boot disk will erase the target partition."
Step 7: Wait for a moment to let the tool finish creating the macOS bootable installer. Once done, you get the macOS Catalina installer successfully.
See? This utility frees you from executing long strings of complicated commands and saves you great time and effort!
Share this article to help more people create the macOS Catalina installer easily!
Install the patcher on your Mac
Acknowledgedly, when a Mac is dropped to run macOS Catalina, its hardware is incompatible with this desired operating system any longer. Hence, a patcher is indispensable here to perform the unsupported OS installation. On top of that, it provides an enhanced layer and environment for the features and highlights of macOS Catalina to operate normally, which would not have worked actually.
OpenCore Legacy Patcher is the top-ranked assistant to ensure macOS Catalina lands on any unsupported machines without a hitch. Let's work together to install this patcher:
1. Click here to download the pkg file of OpenCore Legacy Patcher, and do not forget to download its support files, or the unsupported OS installation may encounter obstacles.
If there is any version available, skip it or click Download and Install if you'd like.
2. When the patcher download ends, double-click it to launch. It will detect your Mac model automatically. You can also go to Apple Menu > About This Mac > Mac Model to check the model info by yourself.
3. Click the Settings icon and uncheck Verbose if you don't mean to debug the macOS Catalina installation.
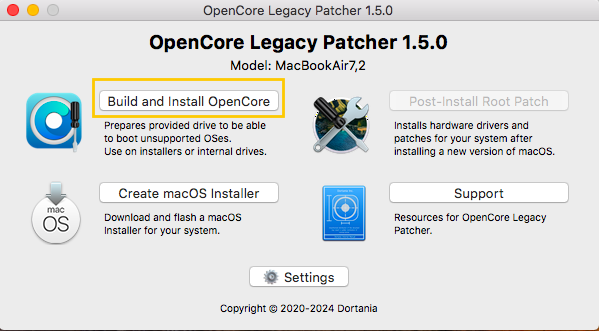
4. Click Return on the bottom to the main window, and click on Built and Install OpenCore.
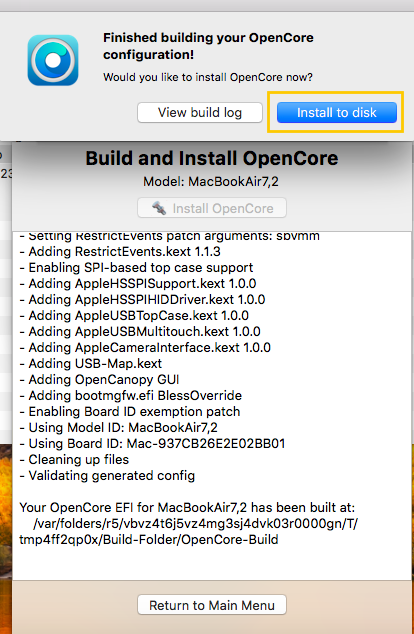
5. When the OpenCore Legacy Patcher is built, it will invite you to view the build log and install OpenCore to the target disk for booting. You can do so if you like. Or, click on Install to disk to go further.
Note: The error "no such file or directory: /library/privilegedhelpertools/com.dortania.opencore-legacy-patcher.privileged-helper" refers there is a missing support file, which triggers the installation failing. So, make sure you have downloaded the pkg file and the support files.
6. Click OK to allow the disk access.
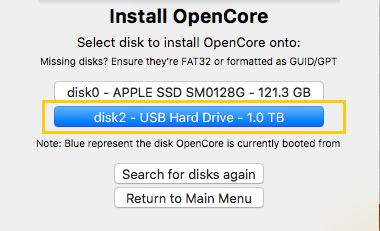
7. Choose the bootable installer you have made. If it is not listed, click Search for disks again.
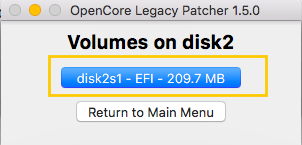
8. Select the volume OCLP lists to place the OpenCore Legacy Patcher. In our case, it's disk2s1 - EFI, which may change in your situation.
Install macOS Catalina on unsupported Macs
Finally, we have come to the last stage - installing macOS Catalina on the canceled machines. With a bootable installer and the compatibility patcher at hand, everything is ready but the final step.
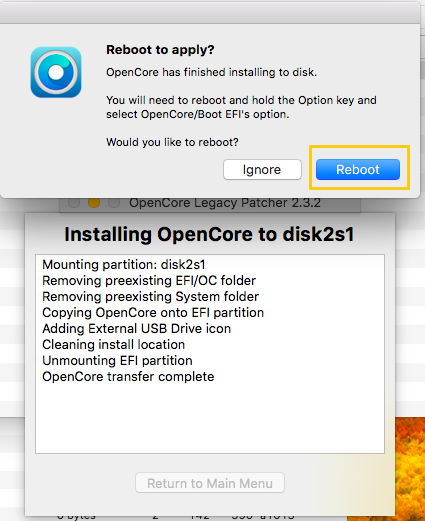
1. After you select the volume to place the OpenCore Legacy Patcher, it will prompt a window for you to reboot. If you ensure everything is done, click Reboot.
2. Then, you will see the confirmation pop-up to restart your Mac; just click on Restart to proceed.
3. When your Mac enters the boot screen after the restart, hold down the Option/Alt key on your keyboard to select the EFI Boot entry with the OpenCore icon.

If your Intel-based Mac does not boot from the bootable USB using the Option (Alt) key, restart it and simultaneously press Command - Option - R - P until the progress bar or Apple logo displays on the screen. This procedure can delete the cache -- the culprit that triggers such a boot failure. Then, use the Option (Alt) key to restart your Mac again.
4. Since you have loaded OpenCore, select Install macOS on the boot screen.
5. Follow the onscreen wizard to complete the installation and some user settings like language, network, user account, and so on.
6. When the setup finishes, you're in macOS Catalina on your unsupported Mac!
macOS Post Install
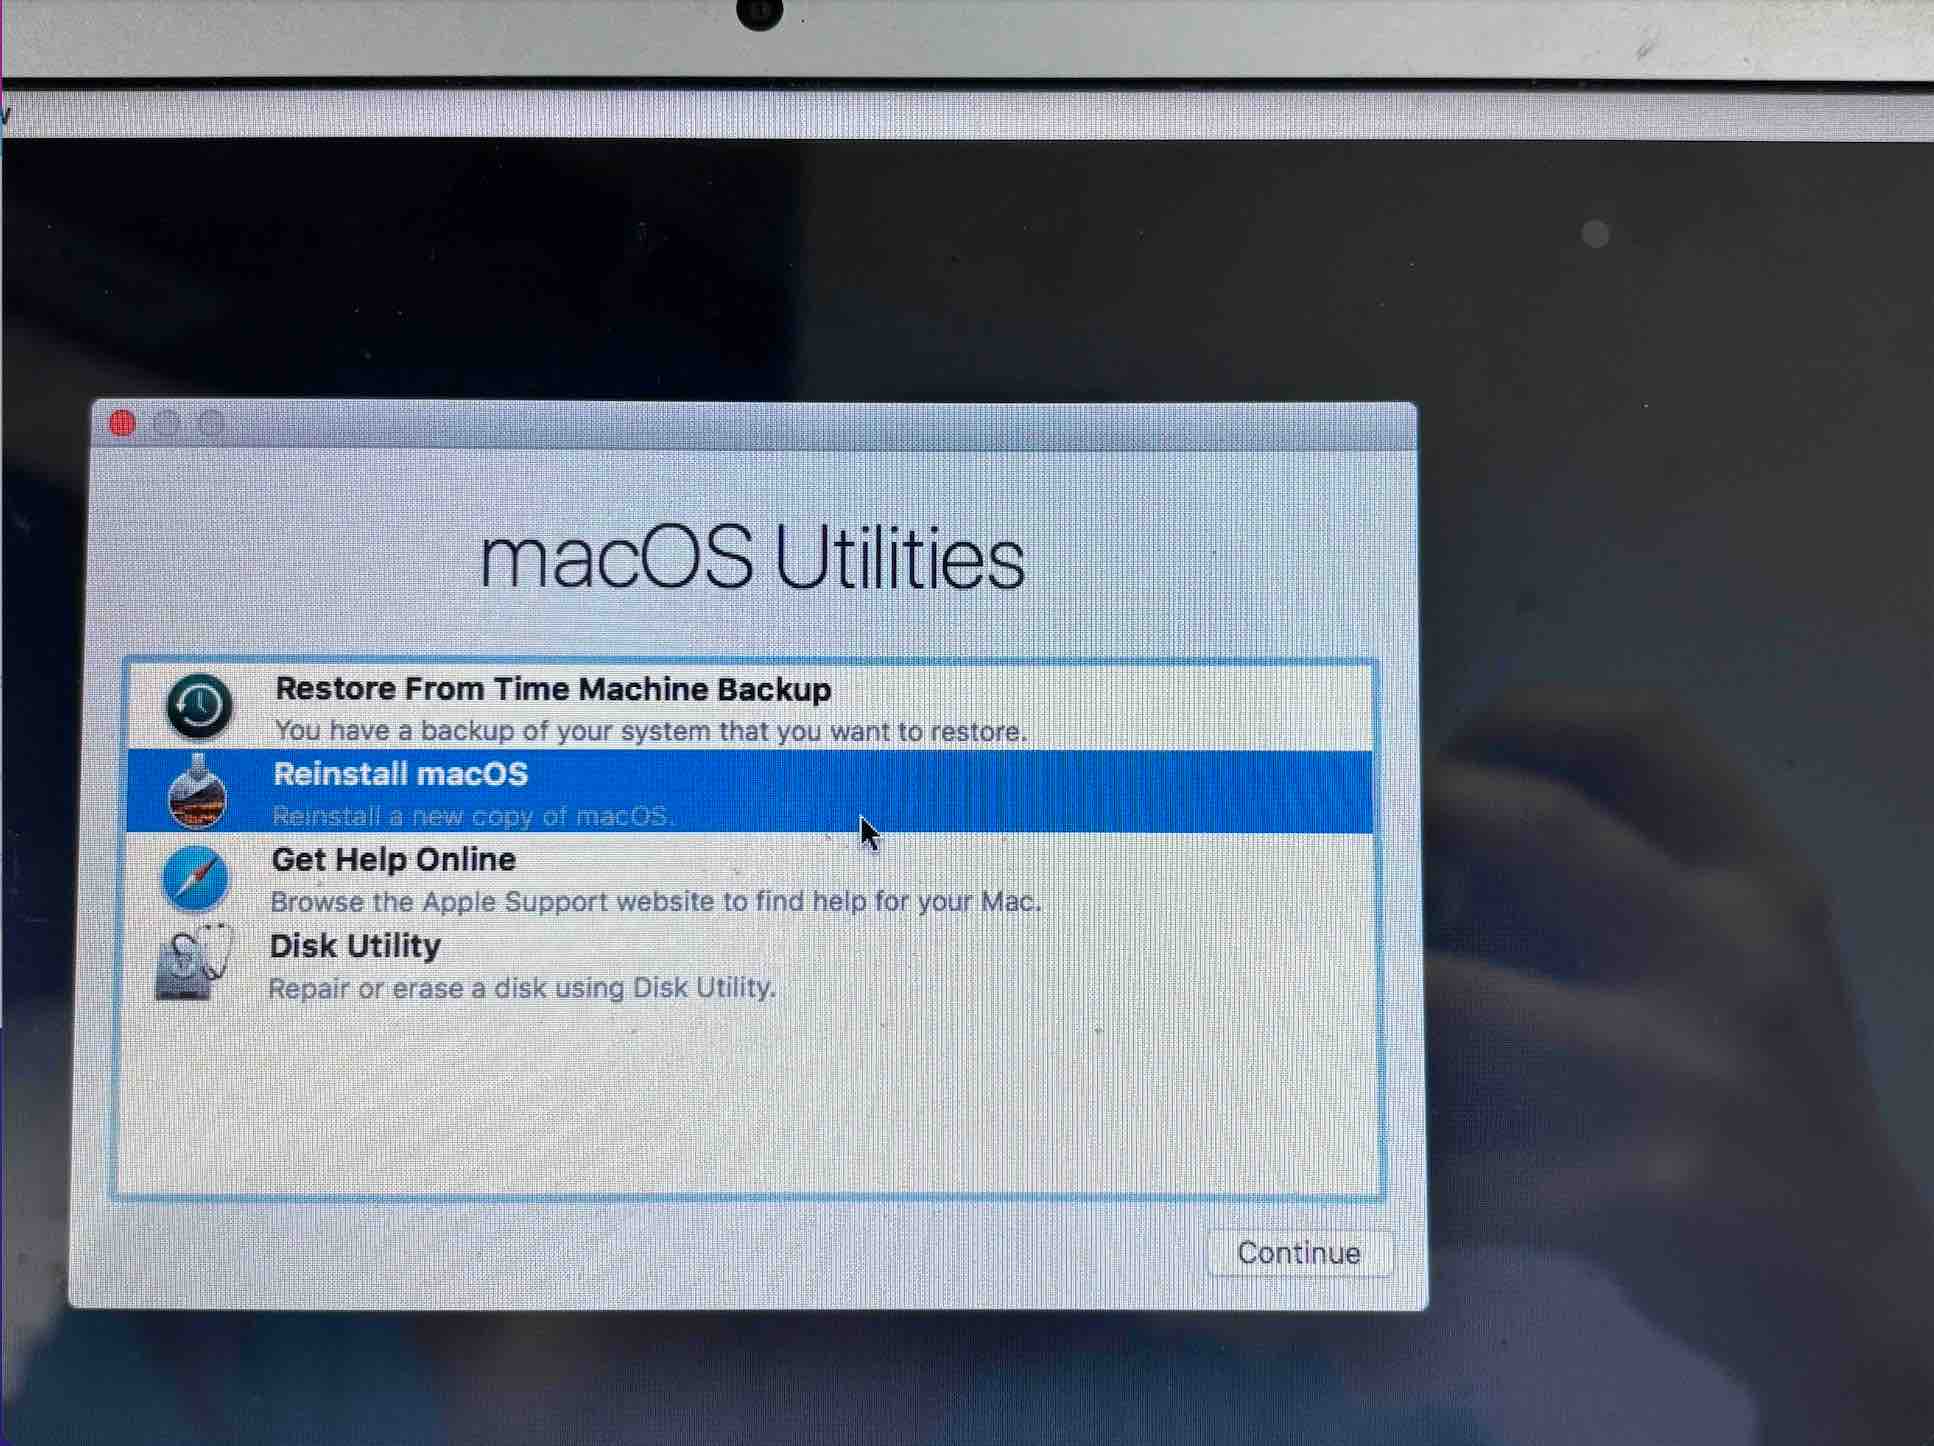
You can see a macOS Post Install option listing in the macOS Utilities window when you select Reinstall macOS in the Step 4 section, which deals with the conflicts and incompatibility issues that might happen on your Mac after the installation. It aims to make the OS on unsupported machines operate smoothly and improve the users' experience.
- You can boot into the macOS Utilities window again and select macOS Post Install, then click Continue.
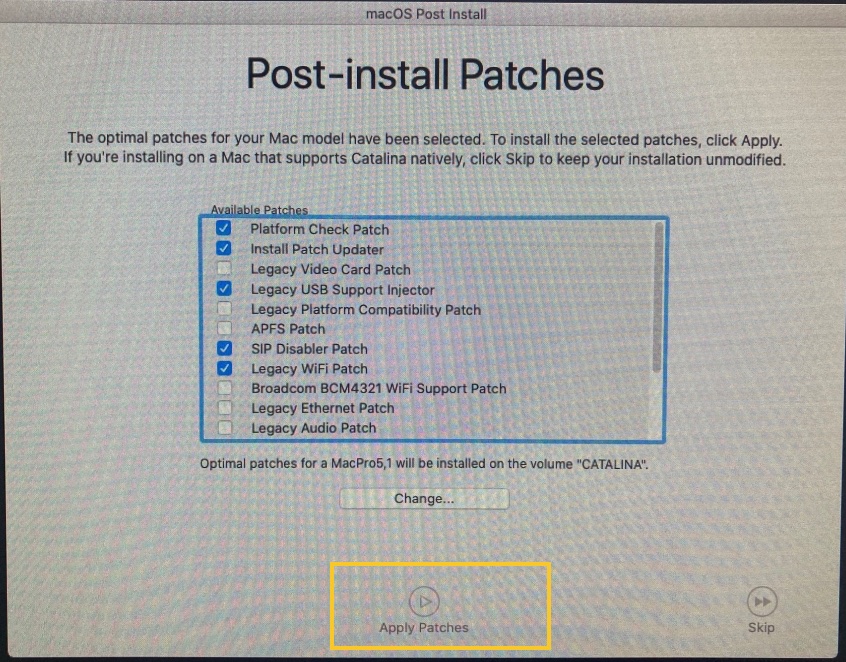
- Keep all the patch settings default and click Apply Patches at the bottom. Your machine will reboot automatically.
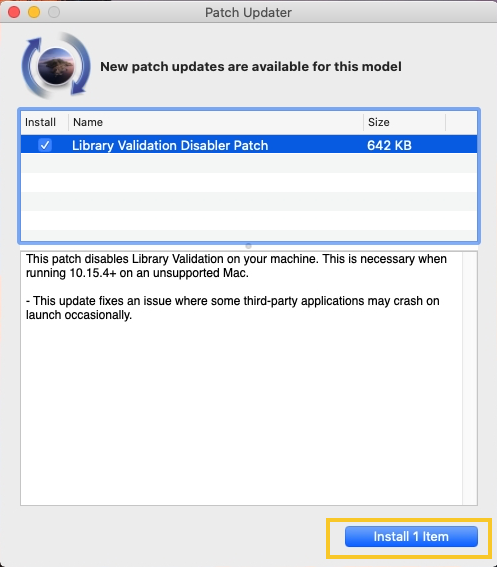
- Click Install 1 Item when a Patch Updater window pops out.
If there is no macOS Post Install option on the macOS Utilities windows, you can start Mac and then launch OpenCore Legacy Patcher, click Post-Install Root Patch to complete this process.
Final words
Due to the gap between the OS and hardware or firmware of the unsupported Macs, users may not get every essence and highlights of macOS Catalina. That's fairly normal, anyway; installing macOS Catalina with the help of patches on outdated machines takes no cost at all.
This post walks users through installing macOS 10.15 Catalina within 5 steps, yet each section contains various details and procedures, which are quite suitable for users who desire this unsupported installation. If you are interested in it, take action right now!