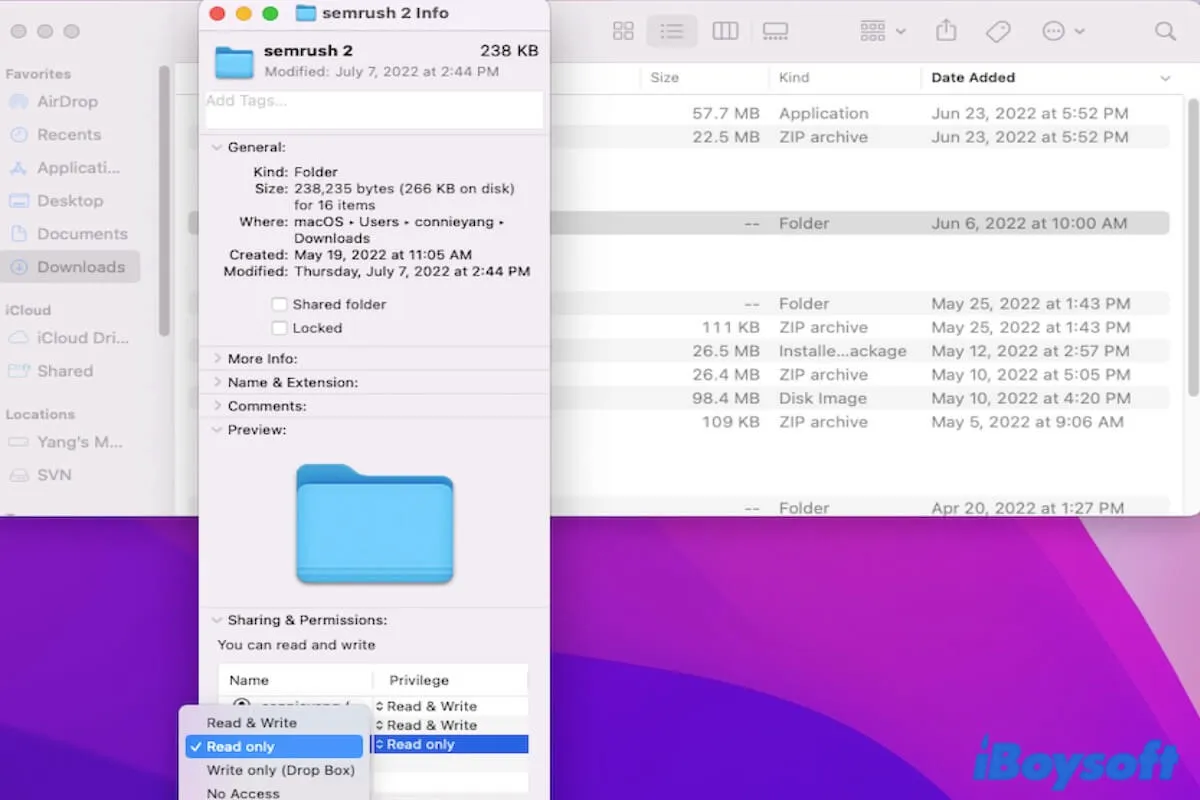
macOS allows you to manage and set permissions for files, folders, and disks on your Mac. You can decide what access to give to the pointed user or group for the specific file on your computer.
If your Mac machine has multiple users or you've set connections with other users via File Sharing or so, it is necessary to manage permissions for certain files and folders on your Mac for private protection.
In this tutorial, you can get complete learning of how to change permissions on Mac when a file or folder can't be opened on macOS due to permission issues. And if you can't change permissions on Mac, you can also find the reasons and possible ways in this article.
How to check file permissions on Mac?
macOS supplies a set of permissions for each file and folder. The administrator can define the individual user or a group has which type of privilege for the specified files, folders, or external hard drives.
If you want to check the file permission on Mac, you can:
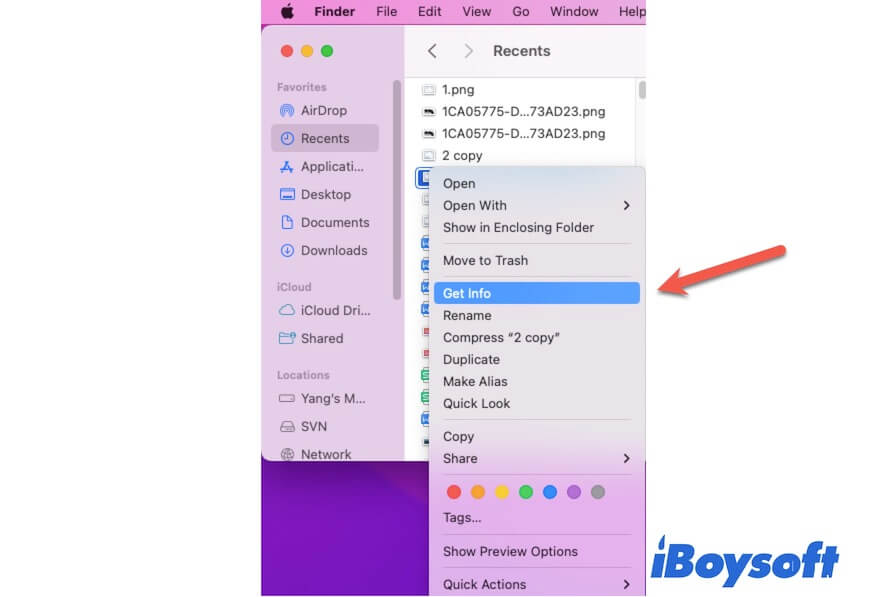
- Right-click the file in Finder and then select Get Info from the menu. Or, you can select the file in Finder and navigate to the top Finder menu, then click File > Get Info.
- Under the Sharing & Permissions section on the info window, you can see the privilege of each user or group for this file.
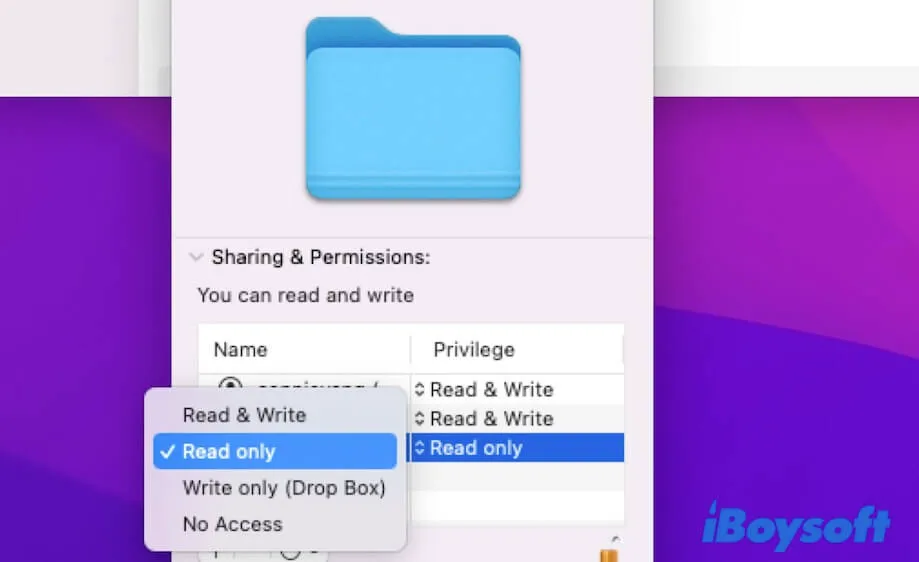
Expanding the privilege of each group (except the admin), you can find four types of available permissions.
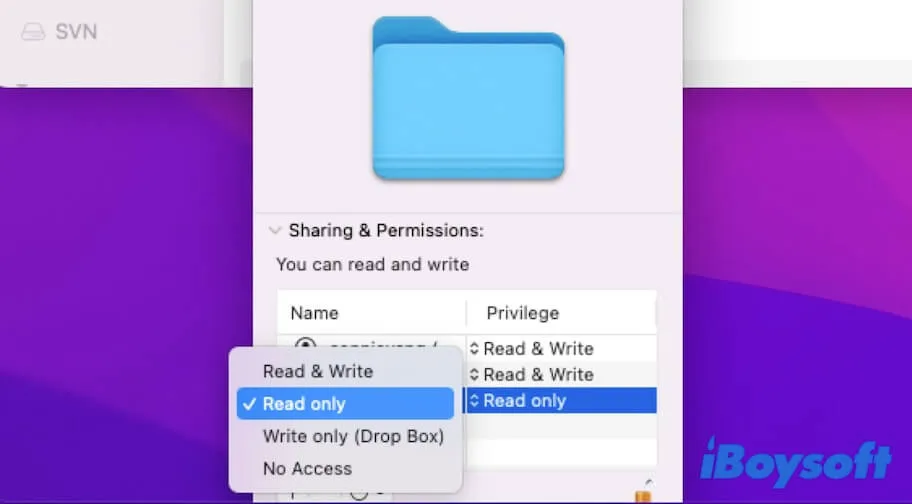
- Read-only: only allows the user to view the file while can't do any changes.
- Write-only: turns a folder into a drop box, enabling the user to put items in without opening it. Only the owner who set the drop box can access it.
- Read & write: permits the user to open, view, and edit the file or folder.
- No access: stops all access to the file or folder.
You can share the way to check permissions on Mac with more friends.
How to change permissions for files, folders, or hard drives on Mac?
If you are going to change read and write permissions for a file, folder, or hard drive on your Mac, you can follow the detailed methods below.
Change/grant permissions for users & groups
- Right-click the target file or folder and choose Get Info.
- Click the lock icon at the bottom of the window and enter the admin password.
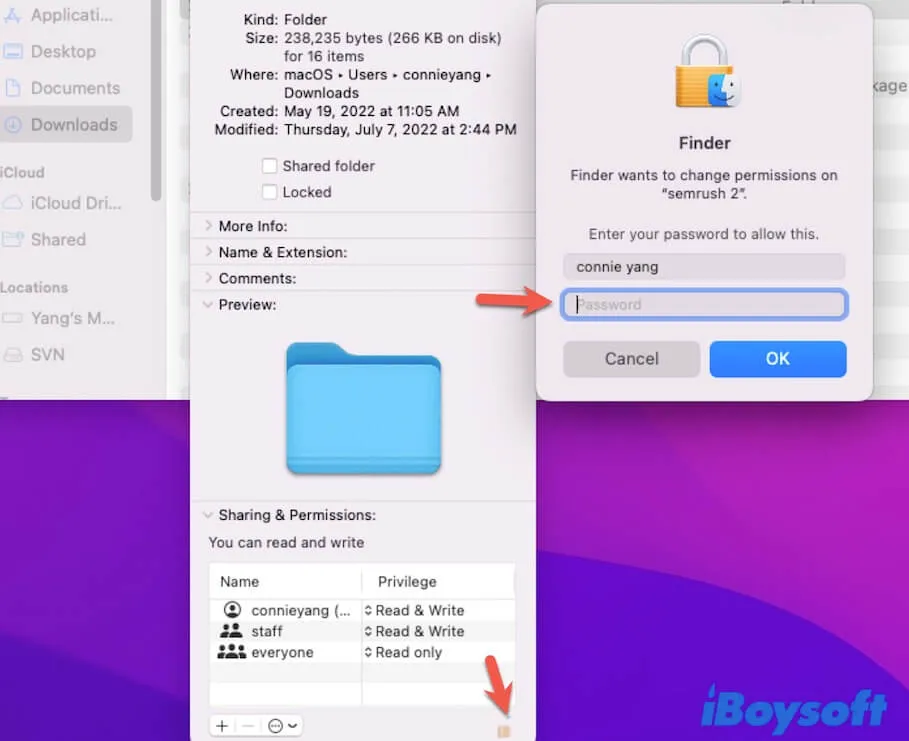
- Under the Sharing & Permissions section, select the user name under the Name tag and expand its privilege.
- Choose the privilege you want to reset to from the drop-down menu.
Give permissions to all files in a folder or disk
- Select the folder or hard drive and then move to the top Finder menu bar.
- Choose File > Get Info.
- Click the bottom lock icon and type your admin password to unlock it to make changes.
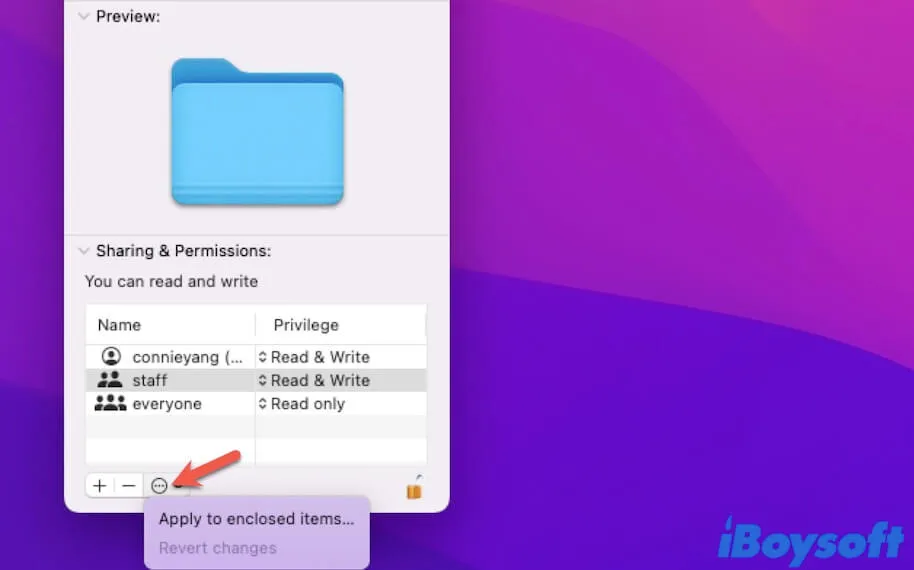
- Click the Action pop-up menu (the circle with three dots at the bottom) and then select Apply to enclosed items.
Change the owner of the file/folder/disk
- Select the file, folder, or the hard drive, then select File on the top menu bar > Get Info.
- Unlock the bottom lock via entering your admin password.
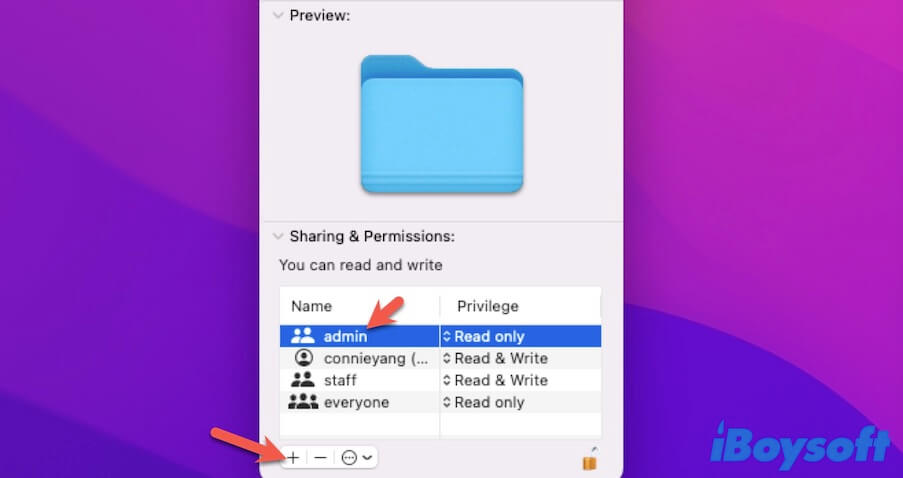
- Under the Sharing & Permissions section, choose the new owner from the list of names. If the new owner's name isn't here, click the + icon to add it.
- Click the Action pop-up menu and then select Make "..." the owner.
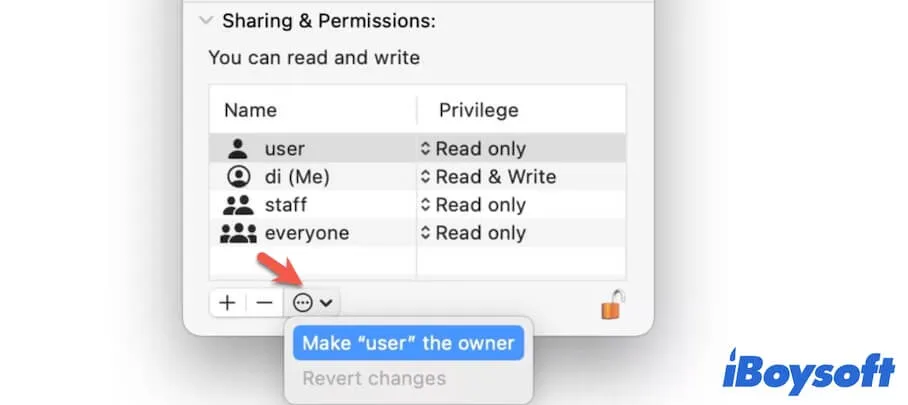
Note: If you want to undo the changed permissions for users and groups, you can click the Action pop-up menu and then select Revert changes.
Add or remove a user or group in the file permission group
- Right-click on the target file and then select Get Info.
- Unlock the lock at the bottom to make changes.
- To add a new user or group, click the + icon and then choose a new user or group and then click Select.
- To remove a user or group, select the user or group from the Name list and click the - button at the bottom.
If you think the above ways to change permissions on Mac are useful and worth recommending, share them with more people.
How to change permissions on Mac with Terminal?
Apart from using Finder to change permissions on Mac, Terminal gives you a larger control over file permissions. To manage and adjust permissions with Mac Terminal, you need to use the ls command line to view the permissions while using the chmod command line to modify the permissions.
Check file permissions on Mac with Terminal
In the first step, you need to run ls in Terminal to view the permissions of the files and folders on your Mac.
- Open Terminal from Launchpad or you can press the Command-Space shortcuts to launch Terminal and enter Terminal to open it.
- Type ls -l in the Terminal window. Then, you'll see a list like this:
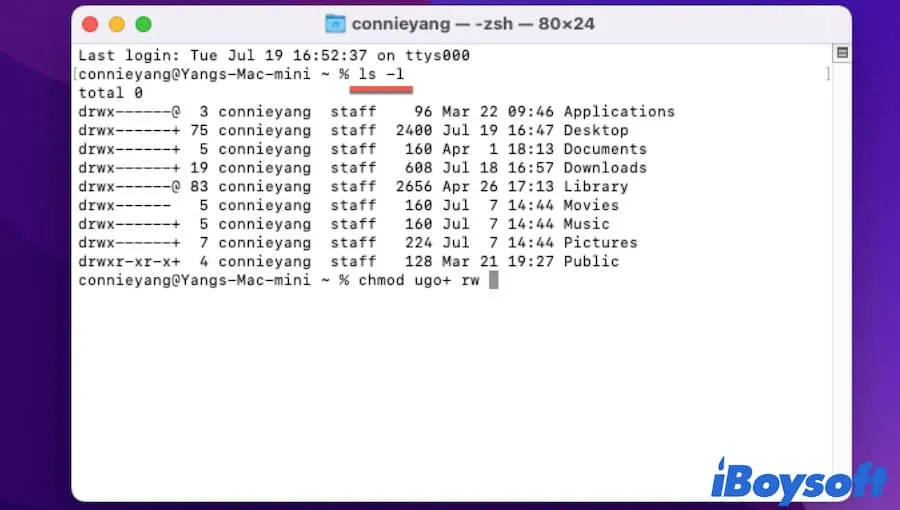
Now, let's comprehend the permissions of files and folders from the listed information in the Terminal window.
If the first letter shows d, it means this item is a folder while - indicates that it's a file. And the next three characters mean the owner's permissions for this file or folder - r (read access), w (write access), x (execute access), and - (no permission).
Here we take the Applications folder as an example. The permission for the owner of the Applications folder is rwx (read, write and execute), and the next set of --- shows the group and other users have no access to the owner connieyang's Application folder.
For the last Public folder (drwxr-xr-x), it means the owner has the read, write and execute access for this folder, the assigned group has the execute and write access, and the other users only have the execute but no read-write access.
Change permissions on Mac with Terminal
After learning how to view the file and folder permissions, you can get down to change the permissions on Mac with Terminal.
For instance, if you need to give the owner, the group, and everyone else the read, write, and execute privilege for the Document1.docx file on your desktop, run the following command line:chmod ugo=rwx Desktop/Document1.docx
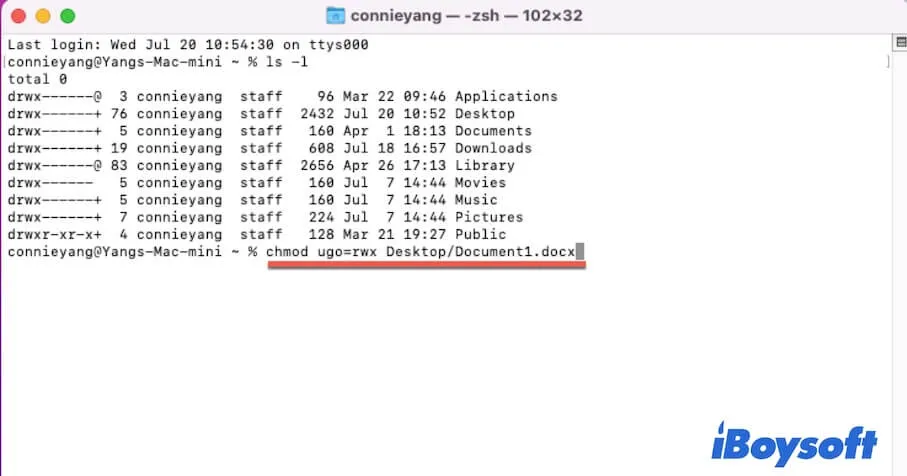
Here, u stands for the user (owner), g means the group, and o indicates the others (everyone). And "=" refers to an exact setting. You can replace Desktop with the folder where your target file locates and replace Document1.docx with your desired file name.
If you want to prevent the appointed group and others from accessing your private file, you can run this command:chmod u=rwx, g=---, o=--- Desktop/Document2.docx
Here, you need to change Desktop to the folder where your file is stored and replace Document2.docx with the name of your private file.
Also, you can define different file permissions for the user, group, or others, such as --x (execute only), -w-(write only), r--(read-only), rw-(read and write access), etc.
Share the way to change permissions on Mac using Terminal with others!
How to change app permissions on Mac?
Sometimes, when you install or prepare to run an app on your Mac, a notification appears to ask for certain permissions to enable the app to work properly such as "(app name) would like to access files on a removable volume on Mac". Some Mac users report the error "the application Finder does not have the permission to open'(null)'" on macOS Sequoia.
Different types of programs usually have different permission requirements, ranging from accessing different locations on your Mac hard drive to various utilities. For example, the data recovery software and Mac cleaner software require full disk access to scan everything on your Mac hard drive.
But whatever the permission that a program requires, you can change it in System Preferences on Mac. Here's how to change app permissions on Mac:
- Open the Apple menu > System Preferences > Security & Privacy > Privacy.
- Under the Security & Privacy window, click the padlock icon at the left bottom and enter your admin password to unlock for changes.
- Select the services that the app requires for running from the left sidebar. Then, on the right pane, check the box beside your target app. If it is not here, click the + button to add the software.
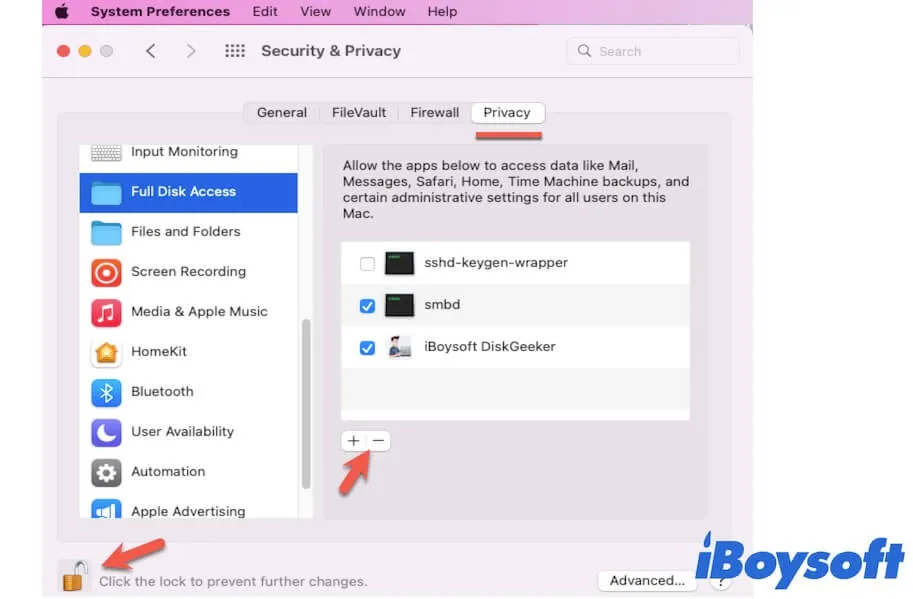
Also, you can uncheck the app under the specific service to disable its permission to access this service.
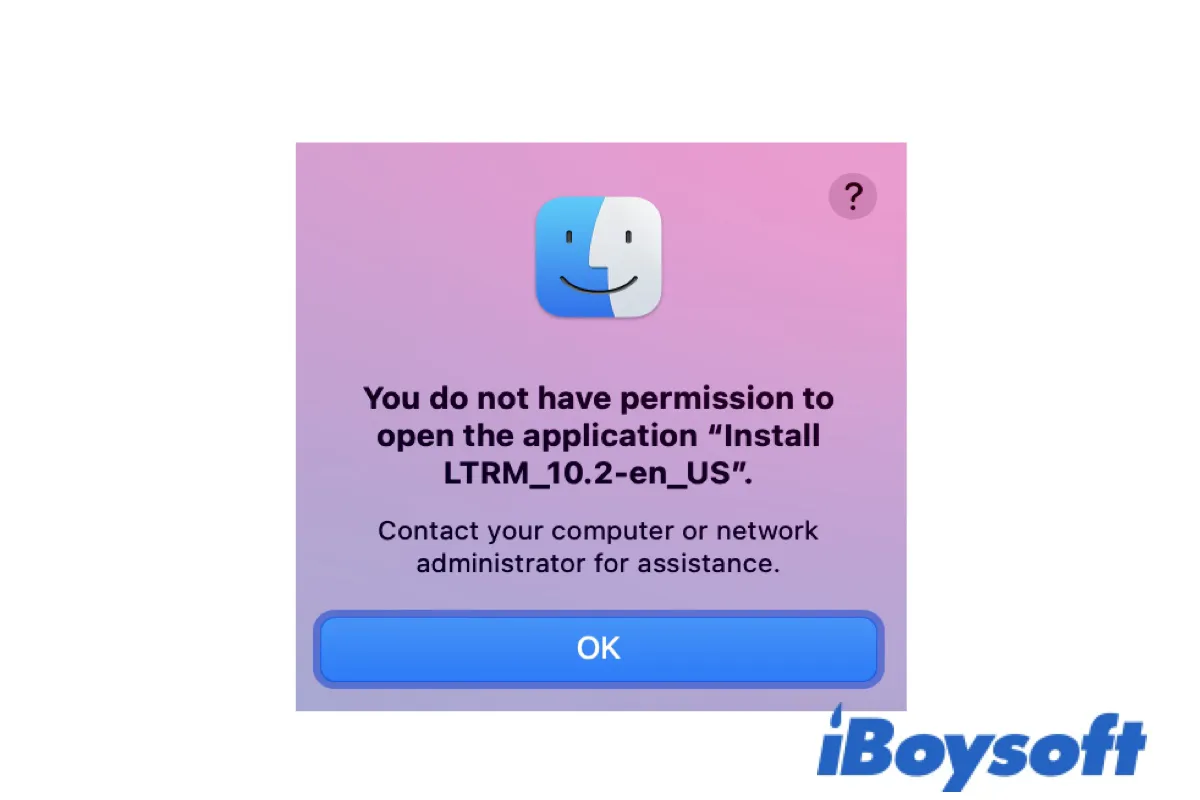
[Fixed] 'You do not have permission to open the application(file).'
This post helps you eliminate the error "You do not have permission to open the application. Contact your computer or network administrator for assistance." when opening apps on Mac. Read more >>
How to change permissions on external hard drives on Mac?
Modifying the permissions on external hard drives is similar to changing the permissions on files and folders on Mac. You can right-click the external hard drive in Finder or on the desktop and select Get Info. Then, unlock the bottom padlock. Finally, under the Sharing & Permissions section, reset the permissions of the external hard drive for the user, group, or everyone.
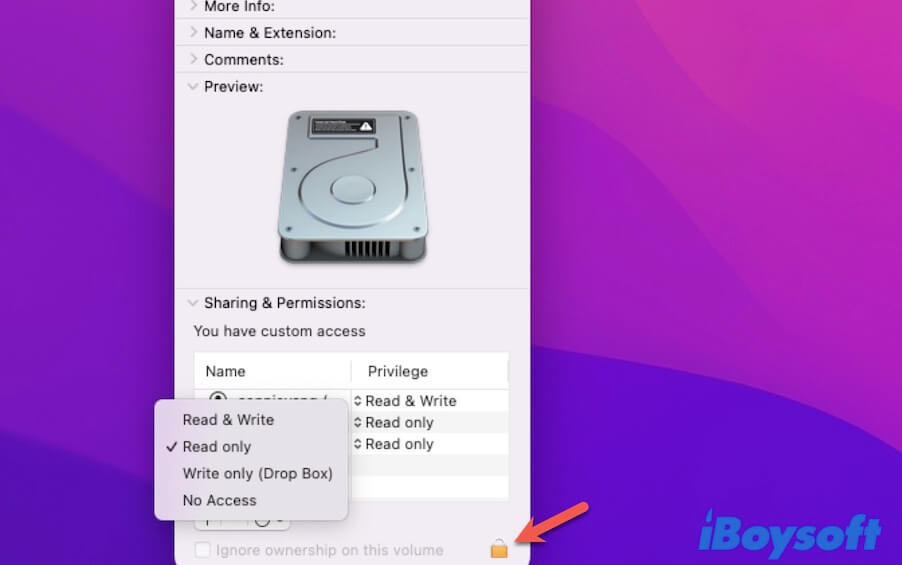
But sometimes, you may find that you have full read-write access to the external drive but can only read it or even fail to open it. That may be because the external hard drive is corrupted on Mac, formated with the unsupported file system, has opened the write-protected switch, is improperly connected, or has hardware damage.
Under this situation, if you want to change permissions on the external hard drive on Mac, you have to fix the issues on the drive first.
Can't change permissions on Mac, what to do?
On the hard drive, file, or folder Info window, you click the bottom lock to try to unlock it to make changes. But unexpectedly, you receive an error message saying "The operation can't be completed because you don't have the necessary permission.".
You may be confused about why you can't change permissions on the external hard drive on your Mac, or of the file or folder. Usually, only the owner of the file can modify the permissions for it. In that case, you can log into the Mac with the admin account. Only the administrator has the right to modify all the users' permissions on Mac.
And if you run the chmod command in Terminal to try to change permissions on Mac but are denied, check if you use the admin account and run the command line properly.
FAQ about change permissions Mac
- QWhy can't I change permissions on my Mac?
-
A
That may be because you don't use the administrator account to change permission settings of the file or folder.
- QHow do I fix permissions on my Mac?
-
A
If you can't access an external hard drive with full read-write access privilege, the hard drive permission is probably corrupted. You can run First Aid in Disk Utility to check and repair the corrupted external hard drive. Then, it will be accessible again. If you can't open or write to a file or folder on Mac, you can fix the permissions by right-clicking the item and selecting Get Info to modify the permissions under the Sharing & Permissions section.
