
There are many NTFS for Mac tools out there, but today, we will learn in detail about a free NTFS for Mac - NTFS-3G. If you hate using Terminal to install Homebrew, macFUSE, and NTFS-3G, a user-friendly alternative - iBoysoft NTFS for Mac is worth consideration: one-click installer, no complex command lines, and Finder integration. Check the practical recommendation and quick comparison table below if you're tight on time:
| Choose NTFS-3G if | ✅ You are a tech-savvy user ✅ You already installed or used Homebrew/macFUSE ✅ You want free software ✅ You only occasionally move files from Mac to NTFS drives |
| Choose iBoysoft NTFS for Mac if | ✅ You are a beginner or normal user ✅ You don't want Terminal commands ✅ You want Finder integration ✅ You frequently use NTFS drives between Windows and Mac ✅ You want an easier, faster NTFS read/write experience on Mac |
Quick Comparison Table between NTFS-3G and iBoysoft NTFS for Mac
| Items | NTFS-3G | iBoysoft NTFS for Mac |
| Cost | Free | Paid (Trial + license/subscription plans) |
| Installation | Complex Terminal commands | Simple one-click installer |
| Extra apps needed | Yes. Homebrew+macFUSE+NTFS-3G | No. Stand-alone software |
| macOS Integration | Limited | Finder-integrated |
| Speed | Usually slower | Usually faster |
| BitLocker support | No | No |
| macOS compatibility | macOS Sierra 10.12 - macOS Tahoe 26 | macOS High Sierra 10.13 - macOS Golden Gate 27 |
| Mac models support | Both Intel and Apple Silicon (M1-M5) Macs | Both Intel and Apple Silicon (M1-M5) Macs |
| Stability | Unstable. Error occurs during installation | Generally good |
What is NTFS-3G?
NTFS-3G is a free, open-source driver designed to grant full read and write access to Windows-formatted NTFS drives on macOS. Compatibility requires using a FUSE compatibility layer - macFUSE.
Meanwhile, NTFS-3G is also a must-have when you're planning to use Mounty for NTFS to enable NTFS drive write access on macOS Ventura - macOS Tahoe.
To enable NTFS write access on macOS 27, use NTFS for macOS Golden Gate.
How to Install and Configure NTFS-3G to Enable NTFS Read/Write Support?
Before installing NTFS-3G on macOS, you need to know the supported macOS versions and architectures first (compatibility list source from Google AI overview and my actual test).
| Mac Models | Both Intel and Apple Silicon (M1, M2, M3, M4, M5) Macs |
| macOS versions | macOS Tahoe 26 macOS Sequoia 15 macOS Sonoma 14 macOS Ventura 13 macOS Monterey 12 Legacy macOS: Fully supported out of the box (Big Sur, Catalina, Mojave, High Sierra, Sierra) |
Once your Mac meets NTFS-3G requirements, you can proceed to installing NTFS-3G on your Mac. Here I'd like to share my experience on both newer and older Macs - Apple Silicon M1 Mac with macOS Tahoe 26 and Intel Mac with macO Monterey 12 to test its compatibility and installation complexity for your reference.
Summary: NTFS-3G compatibility has been verified in my test, and it works on both Intel-based Macs and Apple Silicon Macs. It is also compatible with a wide range of macOS versions, including the latest macOS Tahoe 26 and older versions such as macOS Monterey 12.
However, the installation process is technically demanding and requires a high level of command-line expertise. During setup, I had to run numerous Terminal commands and encountered various errors that required troubleshooting.
Therefore, NTFS-3G is not the most practical choice for common users. Compared with this approach, a professional iBoysoft NTFS for Mac is generally a more user-friendly and suitable solution (no Terminal commands).
How to Install and Use NTFS-3G on Apple Silicon M1 Mac with macOS Tahoe?
The actual test environment: an Apple Silicon M1 MacBook Air 2020; macOS Tahoe 26.5.1
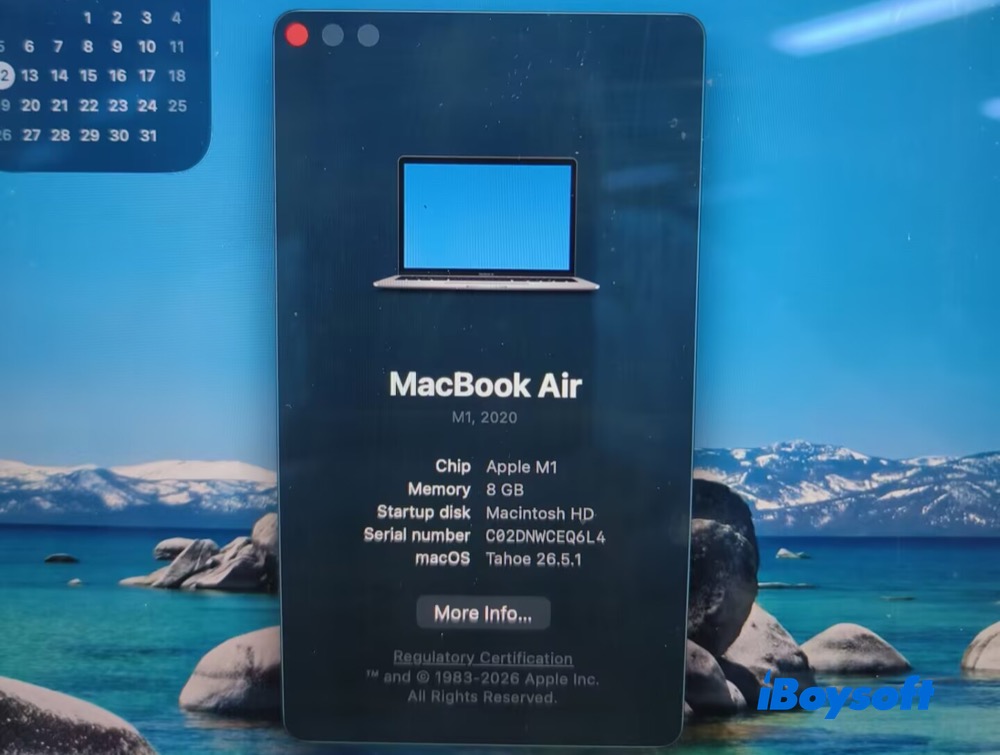
1. Go to Finder > Applications > search and open Terminal
2. I don't already have Homebrew. Thus I install Homebrew by running the command:
- /bin/bash -c "$(curl -fsSL https://raw.githubusercontent.com/Homebrew/install/HEAD/install.sh)"
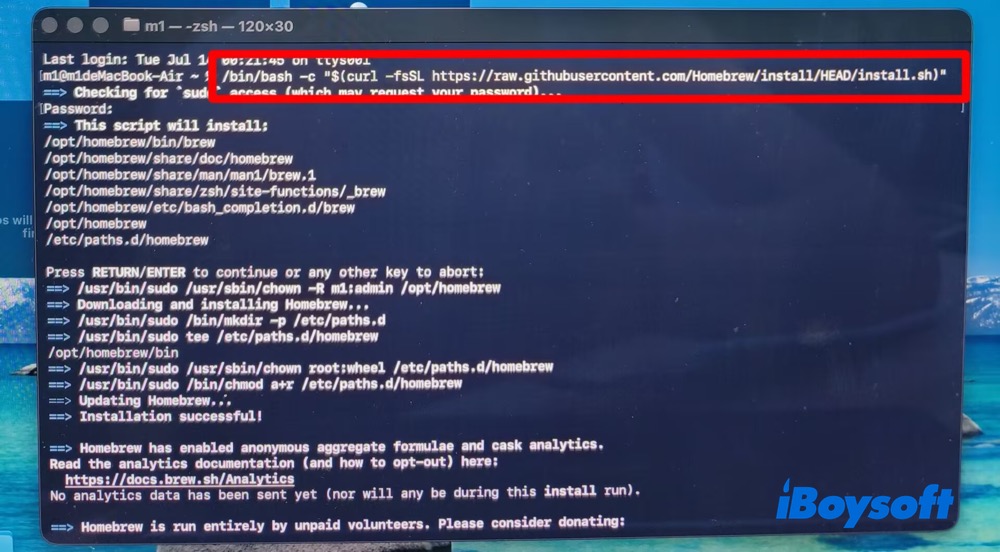
Enter your password and wait for the installation to complete. Make sure you have a stable network connection. Or it will send you an error report.
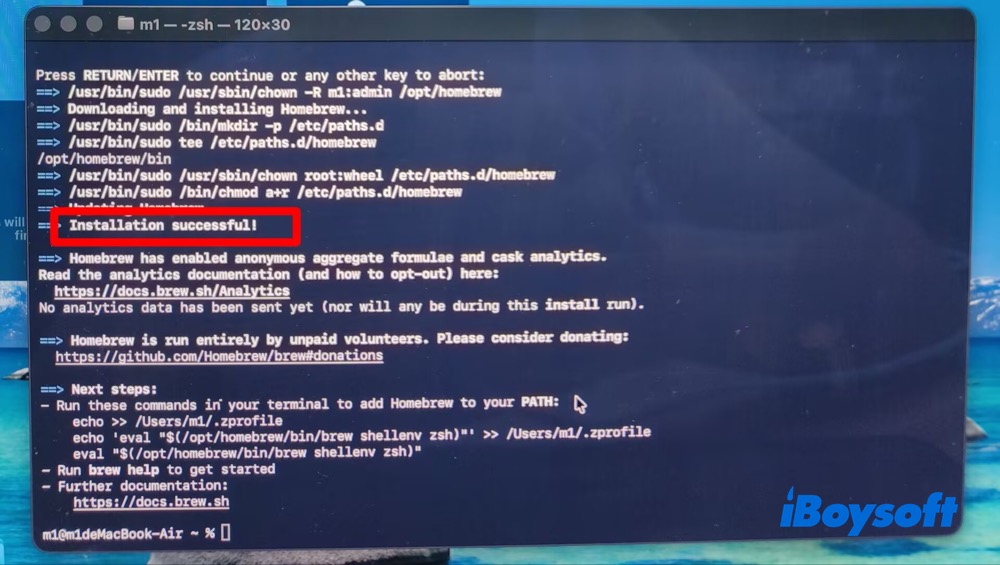
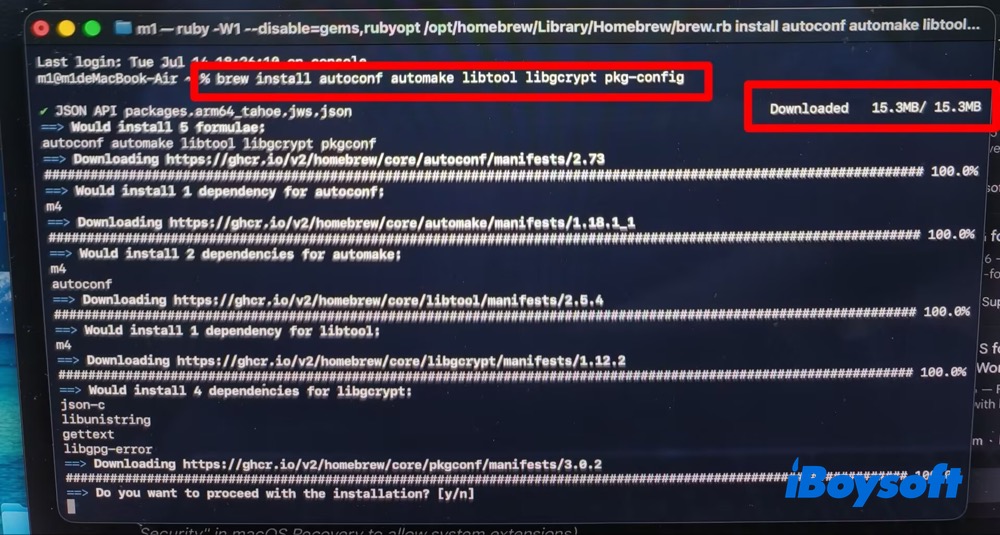
3. Install the required compilation tools and libraries using Homebrew:
brew install autoconf automake libtool libgcrypt pkg-config
The libtool download is comparatively slow. Please patiently wait a second.
4. I'm not sure if I've installed or upgraded macFUSE. So I still run the following command line.
brew install --cask macfuse
The fact is that the latest version of macFUSE already exists on my Apple Silicon Mac. If you don't, use the above command line to install it or go to the official macFUSE GitHub repository.
Note: on an Apple Silicon Mac, you may need to lower your security settings to "Reduced Security" in macOS Recovery mode to allow system extensions.
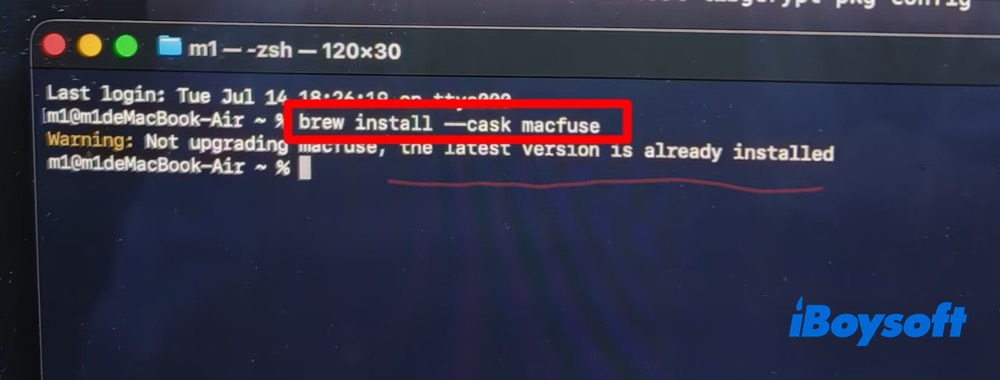
5. Install NTFS-3G via Homebrew:
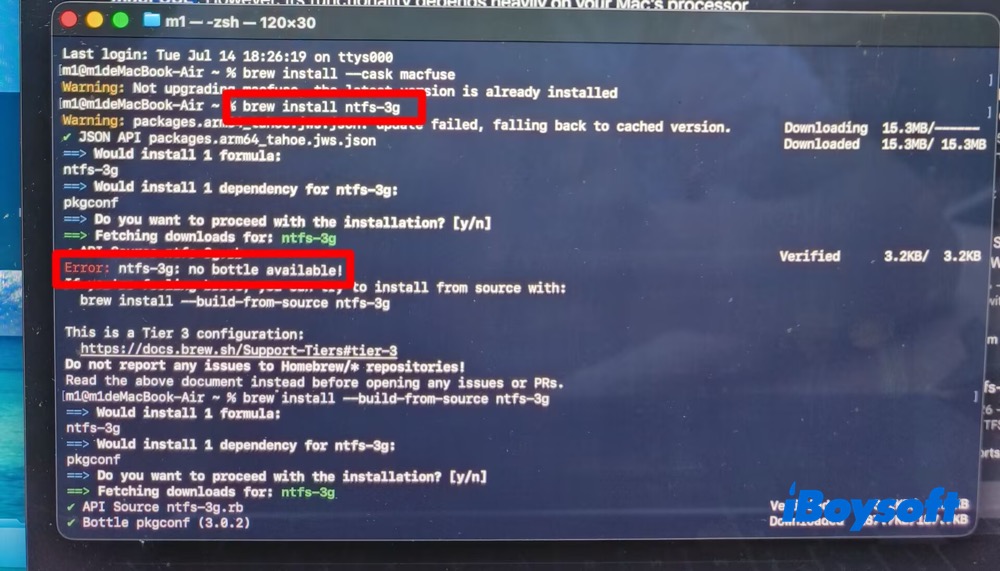
brew install ntfs-3g
But I'm not the lucky one. I got an error report: Error: ntfs-3g: no bottle available! It suggests trying another source:
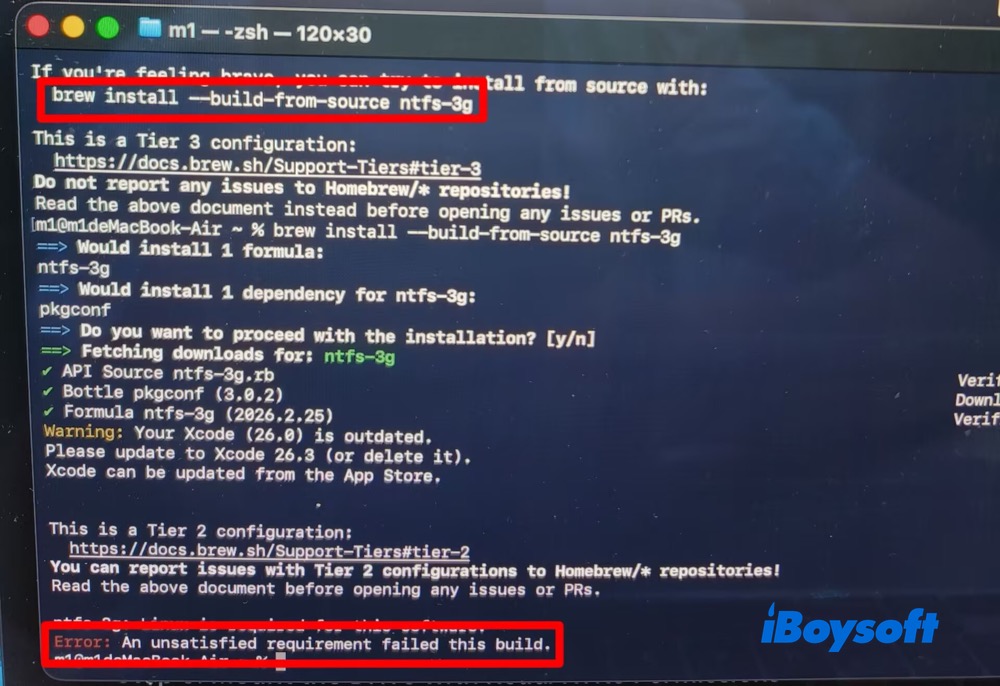
brew install --build-from-source ntfs-3g
Again, another error shows up: ntfs-3g: Linux is required for this software. Error: An unsatisfied requirement failed this build.
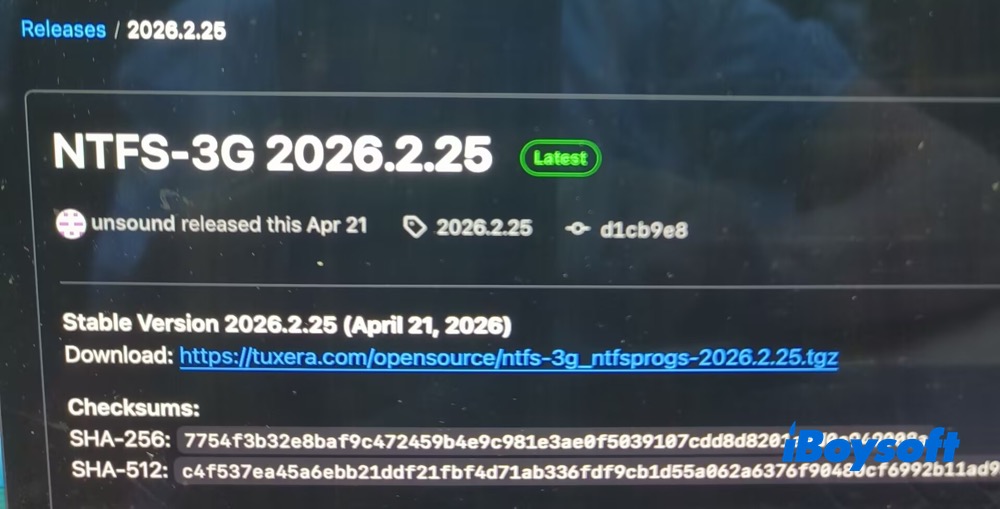
Well, the Homebrew Terminal doesn't allow me to successfully install NTFS-3G. Fine, I turn to Tuxera NTFS-3G GitHub repository to compile the latest version of NTFS-3G 2026.2.25.
6. Plug my NTFS drive into my Intel MacBook Air and find my NTFS drive by running the following command:
diskutil list
I locate my external drive in the list and find the Identifier for the NTFS partition.
7. Enter the following command to make sure my NTFS drive isn't already mounted by the native system.
sudo umount /dev/diskXsY
Then a temporary folder needs to be created as the mount point.
sudo mkdir /Volumes/NTFS_Drive
Run the command below to mount my NTFS drive using NTFS-3G:
sudo /opt/local/bin/ntfs-3g -o local -o allow_other /dev/diskXsY /Volumes/NTFS_Drive
Remember to replace "diskXsY" with your actual drive identifier.
Note: NTFS-3G requires manual Terminal commands to mount NTFS drives. Or, you can install Mounty for NTFS app to mount your NTFS drives in read-write mode if you're sick of Terminal commands.
Now, my NTFS drive is accessible and writable through the newly created /Volumes/NTFS_Drive directory. I can open, read, copy files to/from it, edit and delete files.
How to Install and Use NTFS-3G on an Intel Mac with macOS Monterey?
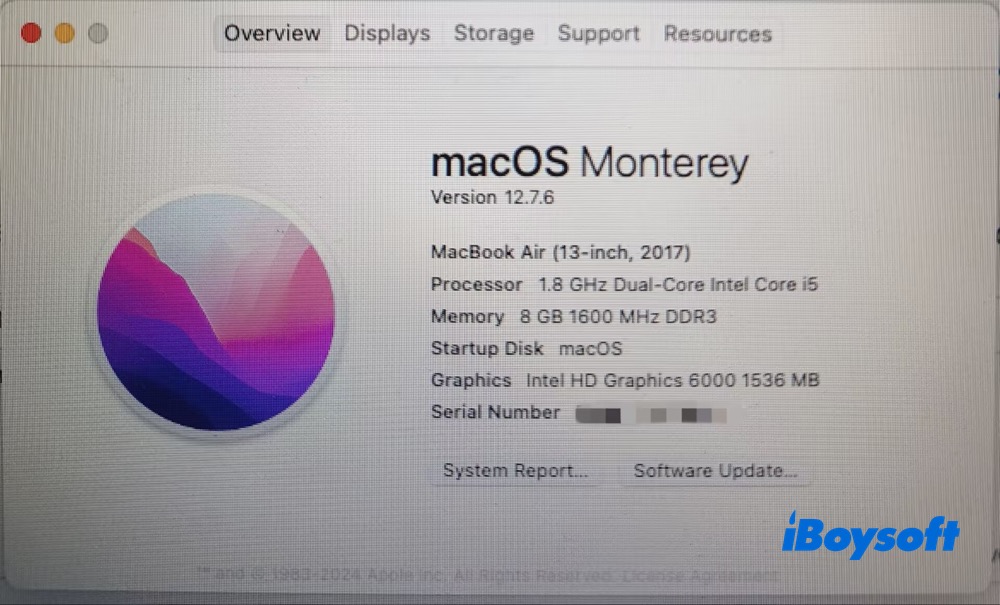
The actual test environment: an Intel-based MacBook Air 13-inch 2017; macOS Monterey 12.7.6
1. Go to Launchpad and type "Terminal" > open Terminal.
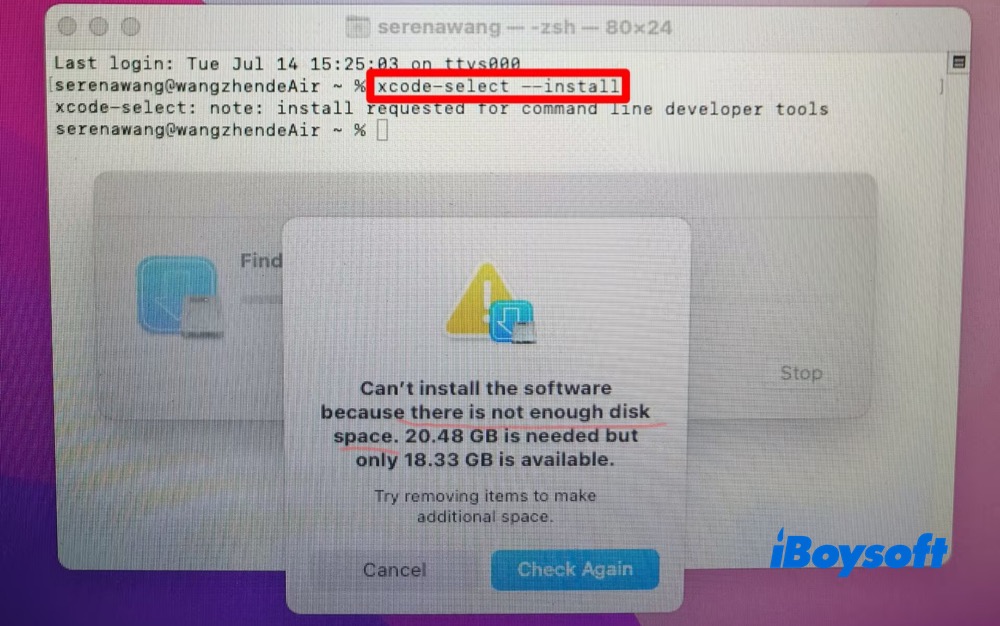
2. Install Command Line Tools. Enter the following command to have Xcode command-line tools installed.
xcode-select --install
A notice pops up: there is not enough space left for the software installation. I have to check my Mac disk space and free up space on the Macintoch HD. Then, re-install this Xcode software.
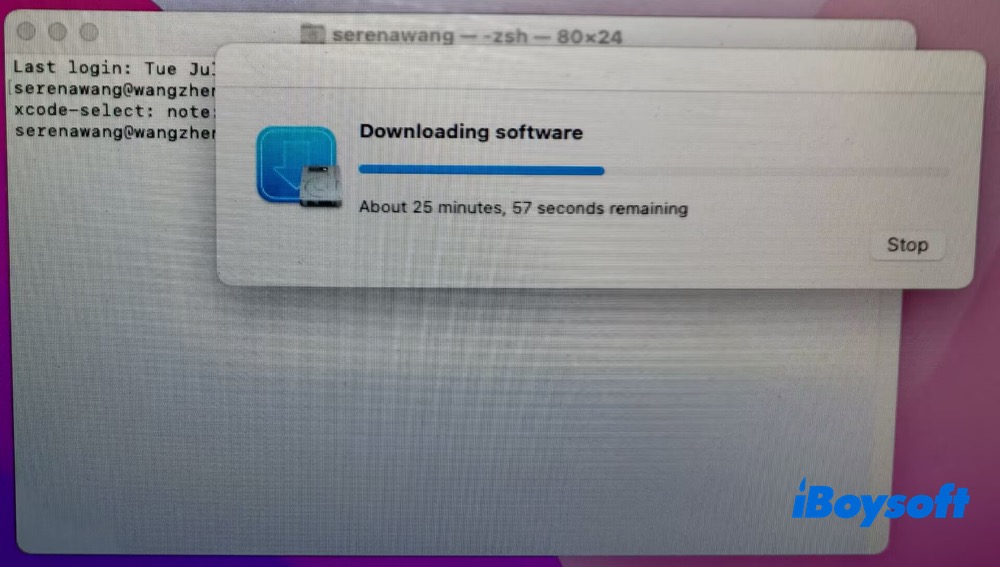
Just a few minutes, the Xcode is successfully downloaded and installed.
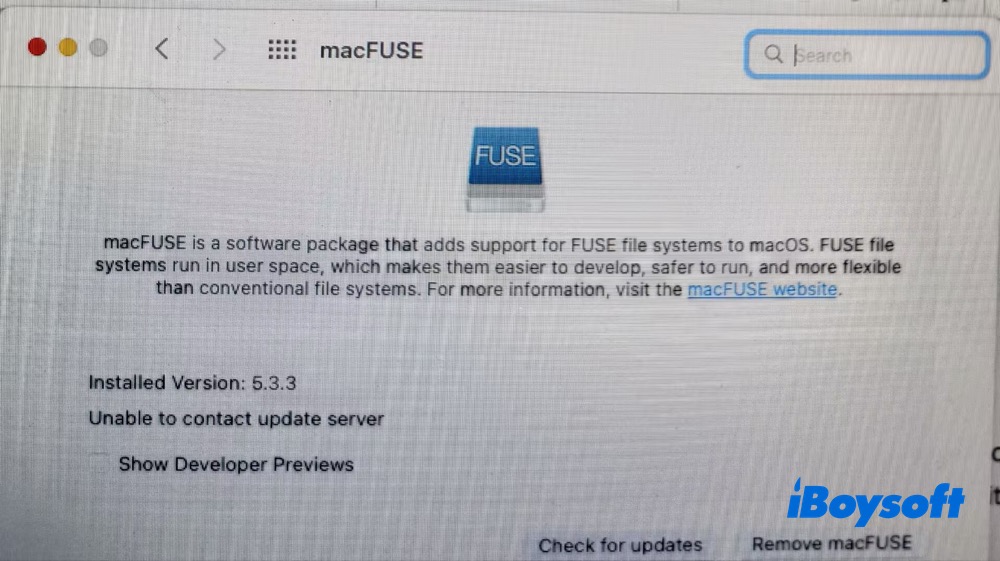
3. Check macFUSE updates. I've installed macFUSE before. Thus, I just need to update macFUSE to the latest version 5.3.3. You can turn to the macFUSE GitHub release or macFUSE official webpage to download it. Or use Terminal commands to install macFUSE after you have installed Homebrew.
Read more about MacFuse for NTFS
4. Install NTFS-3G via package manager. Generally, Homebrew is the primary option to install NTFS-3G. However, Homebrew supports macOS Sonoma 14 or newer. My Mac is running macOS 12 Monterey. I have no choice but to select MacPorts to install NTFS-3G via the command below:
sudo port install ntfs-3g
Enter my computer password.
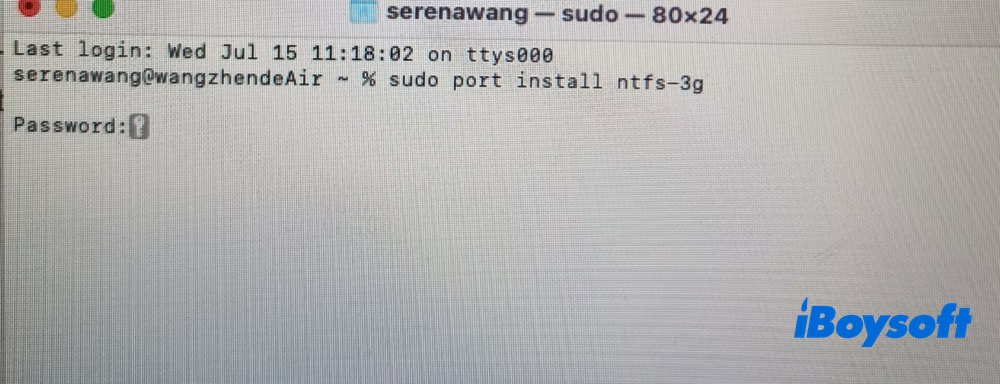
5. Mount my NTFS drive with read and write permissions. The detailed steps are the same as those in an Apple Silicon Mac (step 6 - step 7). I don't repeat them here. Go back to the M1 Apple Silicon Mac part if needed.
Other free options: Hasleo NTFS for Mac
If you find this article informative and helpful, why not leave your comment below and share it with more people on your frequently used social platform?
A Better Alternative to NTFS-3G on Mac (No Terminal)
From the above test, you can see the NTFS-3G installation complexity. Beyond that, users complained on reddit.com that macOS updates could break it. Because macOS continuously evolves its security policies and filesystem APIs, third-party FUSE drivers may require updates to maintain compatibility. Slow write speed is another gripe. NTFS-3G uses FUSE (Filesystem in Userspace), which introduces additional processing overhead during data operations.
Comparatively, iBoysoft NTFS for Mac is a better option. One-click installation lets you easily install it on Intel or Apple Silicon M1-M5 Macs (macOS Golden Gate 27 to macOS High Sierra 10.13) without Terminal commands. Meanwhile, it auto-mounts your NTFS drives in read-write mode and helps you rename, edit, delete and write files to NTFS drives in Finder at almost native Mac drive speed.
Check the read and write speed of NTFS disks on a Mac with iBoysoft NTFS for Mac.
How to Write to NTFS Drives on Mac with iBoysoft NTFS for Mac?
Step 1. I downloaded iBoysoft NTFS for Mac (version 8.0) on my M1 MacBook Air 2020 running macOS Tahoe 26.5.1, it seamlessly works on macOS 26. BTW, it supports macOS 27 Golden Gate now in its version 9.0.
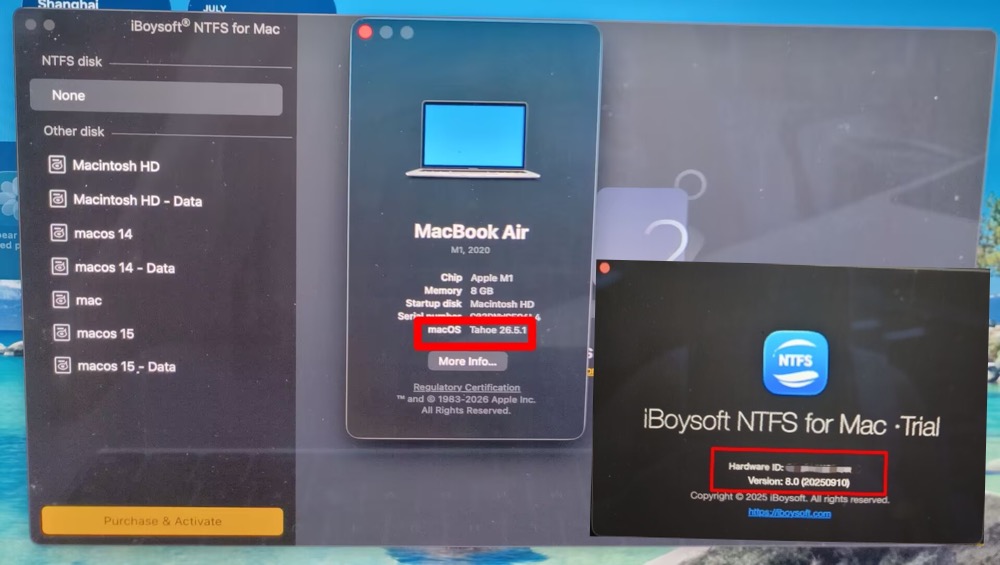
How about its compatibility with older macOS? I turn to my older Intel MacBook Air (2017) macOS Monterey 12.7.6. There is no problem installing and activating it. Regardless of Intel/Apple Silicon Mac running an older OS or newer OS, this Windows NTFS for Mac utility can deliver excellent compatibility.
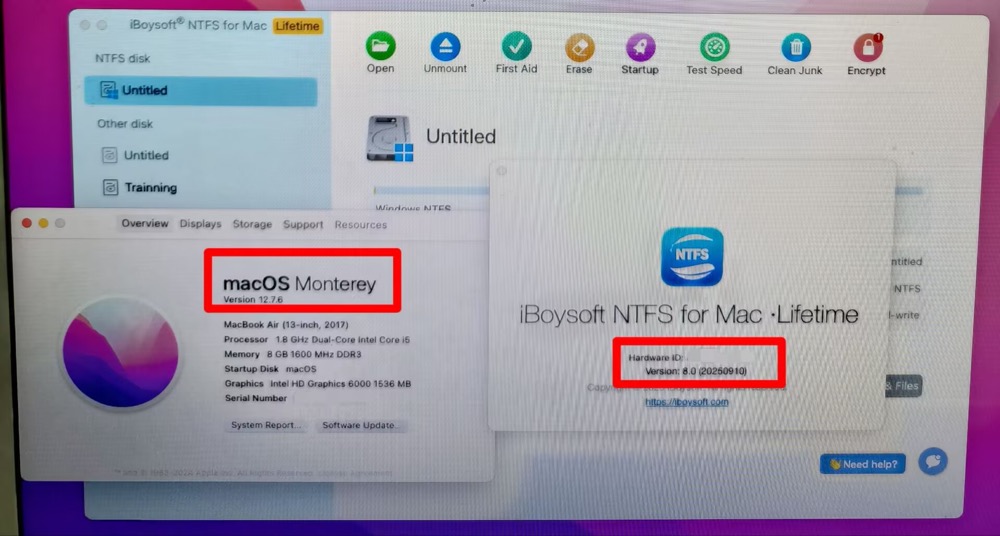
Step 2. I connect my NTFS drive to my MacBook Air. It auto-mounts my NTFS drive instantly. I click the Enable Writable green button to manually enable my NTFS drive's “write" capability.
Then, my NTFS drive auto-opens in Finder. This is really convenient.
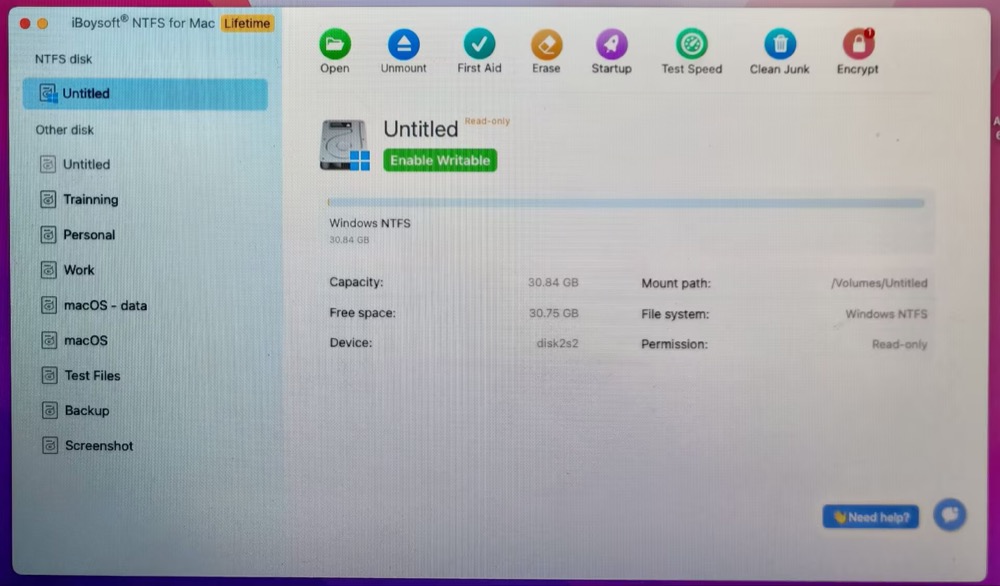
I didn't choose Advanced Mode the first time I launched this NTFS for Mac. That's why I need to manually enable writable capability. You're suggested to select Advanced Mode if you want the auto-mount feature.
Step 3: After getting a notification saying the drive has been mounted in read-write mode successfully, I start to rename, edit, delete, and copy files to/from my NTFS drive.
If this software solves your problem, share it with more people!
How to Write to an NTFS Drive without NTFS-3G
If you have no interest in NTFS-3G or other NTFS for Mac utilities, the following section might suit your requirements, which explores how to write to an NTFS hard drive on macOS Ventura or newer with tricky workarounds.
Note: Think twice before you carry out the provided tricks since you may suffer from data loss or Mac damage due to mistaken operation. Once you decide to use the solution we present, please follow the steps carefully to minimize the chance of an accident.
Method 1. Reformat NTFS to exFAT
Formatting the hard drive to a file system compatible with both Mac and Windows is a nice option. Here we recommend exFAT; unlike NTFS, it works perfectly to read, write, transfer, and share files on both Windows and macOS.
Back up the targeted hard drive in full or the formatting will wipe everything stored on it. If, unfortunately, data loss happens to you, relax; you can recover files from the formatted hard drive via iBoysoft Data Recovery for Mac.
Let's see how to launch Disk Utility to format the hard drive to exFAT directly:
- Open Disk Utility > select the NTFS hard drive in the left sidebar
- Click Erase > select exFAT as its file system
- Follow the wizard to complete the formatting process
Method 2. Install an NTFS for Mac driver via Terminal
You can also launch Terminal to install an NTFS for Mac driver to write to NTFS hard drives. This method is suitable for tech-savvy users with certain command skills, or it may result in Mac damage due to maloperation.
- Plug an NTFS drive into your Mac.
- Go to Applications > Utilities > Terminal.
- Type the following command line in your Terminal app, and enter your admin account password when prompted.sudo nano /etc/fstab
- Type the command line below, please replace the DISKNAME with your drive name, and then press Enter.LABEL=DISKNAME none ntfs rw,auto,nobrowse
- Press the Ctrl + O keys to write the information to the file, then press Enter to save.
- Press the Ctrl + C keys and the Ctrl + X keys to exit the editor window.
- Eject the NTFS drive and then connect it to the Mac again.
- Go to the Finder menu, type /volumes, and press Enter, then you can drag and drop the NTFS drive to the sidebar where you can access it easier.
Final thoughts
Based on my test experience, the NTFS-3G compatibility fits the bill. Yet, the installation is indeed complex and troublesome. Plus, it's not as tightly integrated with the kernel as native drivers. And it usually slower than the professional NTFS for Mac drivers because of FUSE overhead.
To have an easier and more seamless writing experience, I recommend iBoysoft NTFS for Mac here, which requires only 1 simple click to install and auto-mounts NTFS drives in read-and-write mode without Terminal commands. With seamless Finder integration and high-speed file transfers, it delivers a smoother and more efficient NTFS drive writing experience.
We appreciate your comment and sharing very much!
FAQs about NTFS-3G for macOS
- Q1. Why writing to NTFS drives is very slow using NTFS-3G on Mac?
-
A
That's because NTFS-3G uses FUSE (filesystem in user space), data has extra processing overhead. It goes very slow especially when you copy a large file or many small files to your NTFS drive.
- Q2. NTFS-3G worked on Ventura, then stopped mounting after Sonoma. Why would this happen?
-
A
Because macOS changes security policies and filesystem APIs. Third-party FUSE drivers may require updates.