
Written by
Eudora Liu
Summary: As we all know how to create a Windows 10 bootable USB on Windows, do you know how to create it on Mac? This post introduces you to three ways to create Windows 10 bootable USB on Mac.
Is your Windows 10 crashed and not working when you try to turn it on? Or else have you ever seen any error code like Error Code 0xc0000225 on your screen when you boot your PC? If so, you may need to create a bootable Windows 10 USB to rescue this solution by running a diagnosis or installing a new Windows system.
It's easy to create a bootable Windows 10 USB on Windows, but if only a Mac system is available, how do you create Windows 10 bootable USB on Mac?
Don't worry. This post introduces three ways to create a bootable Windows 10 USB on Mac, so keep reading and learn how to operate it.
Three ways to create Windows 10 bootable USB on Mac
A bootable USB drive is a USB drive that allows you to use the file system stored in a flash drive to boot the computer rather than using hardware.
About how to create a bootable Windows 10 USB on Mac, there are three ways introduced to you and you can use them as a reference. No matter which way you want to use it, you need to prepare a USB drive with at least 16GB first.
Use Disk Utility to create a bootable USB on Mac
Disk Utility, a built-in disk manager on Mac, can repair, restore, partition, and erase internal disks and external storage devices. Before you use Disk Utility to create a bootable USB on Mac, you need to prepare a Mac running older macOS and a Windows ISO file with the latest version.
- Plug the USB drive into your Mac.
- Press Command + Space to open Spotlight and type in Disk Utility to open. (Or you can turn to Finder > Choose Go > Utilities, and double-click to open it.)
- Right-click the USB drive on the left and format it using MS-DOS (FAT).
- Drag and drop the download Windows ISO file to your USB to start the writing process.
After the process is finished, you can use the USB drive to install the operating system on your unbootable Windows 10 or fix the current problem with the Windows operating system.
But this way is only helpful with old macOS users, so if your Mac runs on a newer edition, you need to take other ways to create a bootable Windows 10 USB on Mac.
Use BootCamp Assistant on Mac
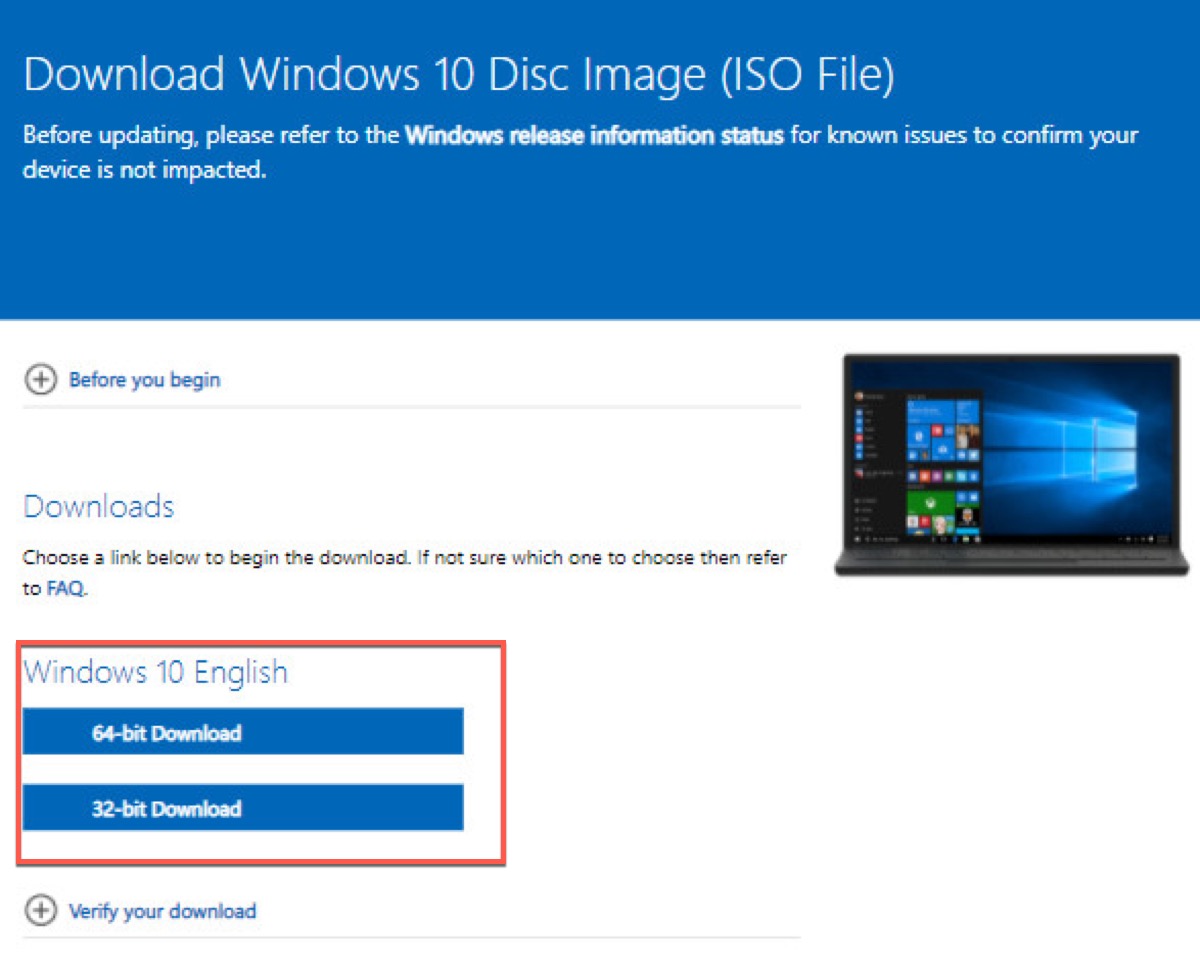
BootCamp Assistant, a multi-boot program, can help users to install the Windows operating system on a Macintosh system computer. So you can use it to create a bootable Windows 10 USB on Mac. And you need to download Windows ISO files first. (Fix if you encounter a Windows ISO download error on your Mac)
- Finder > Applications > Utilities > BootCamp Assistant.
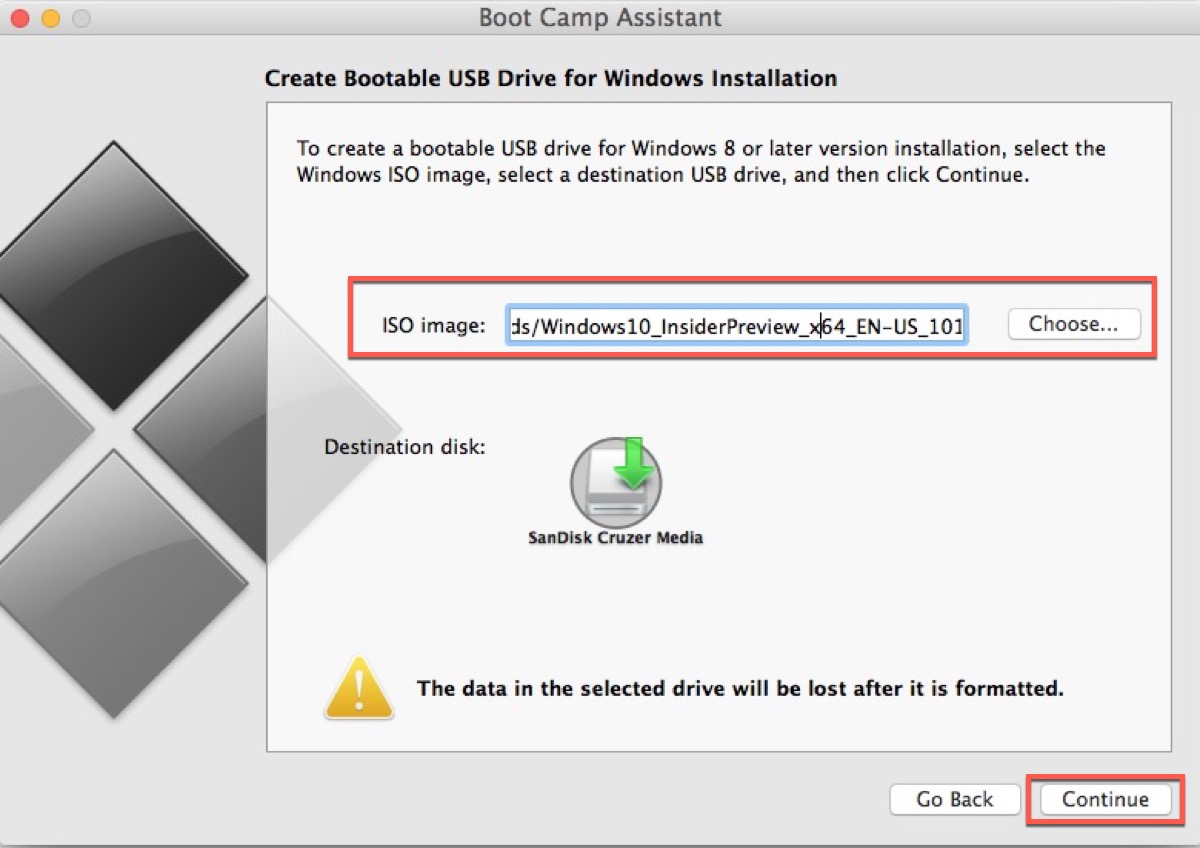
- Check the create a Windows 10 or later version install disk and click Continue.
- Click Choose and import the Windows 10 ISO file from Mac's internal storage, and click Continue.
- Check if it is renamed WININSTALL after BootCamp Assistant creates a bootable Windows 10 USB.
- Eject the USB drive on Mac.
What you need to pay attention to is that this way is only suitable for those whose Mac with Intel chip. Because of the difference in the ARM chip's architecture, it doesn't allow traditional Windows installations and Apple Inc. did away with BootCamp for good. Therefore, you can't use BootCamp Assistant on Macs with M1 or later chips.
Share this with more people to learn about how to create Windows 10 bootable USB on Mac.
Create a bootable USB from Terminal
Terminal is a command line interface for the Mac operating system. And you can create a bootable Windows 10 USB on Mac by using the command.
- Insert the prepared USB into your Mac.
- Press Command + Space to open Spotlight and type in Terminal to open. (Or you can turn to Finder > Applications > Terminal, and double-click to open it.)
- Type in the following command, press enter to get the list of connected devices, and find your USB name.
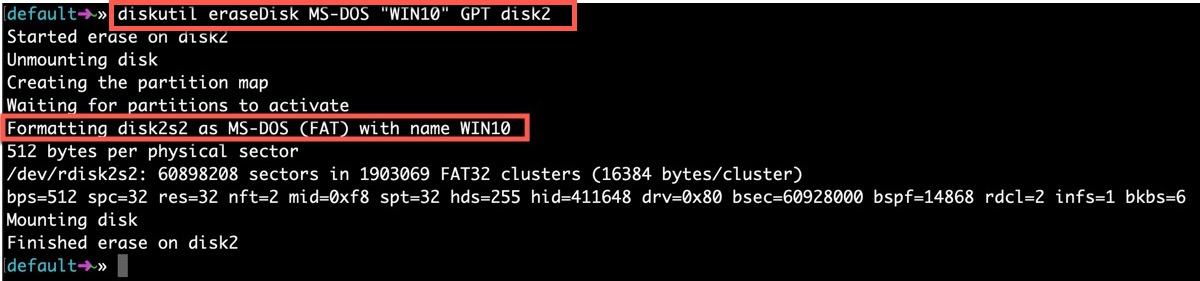
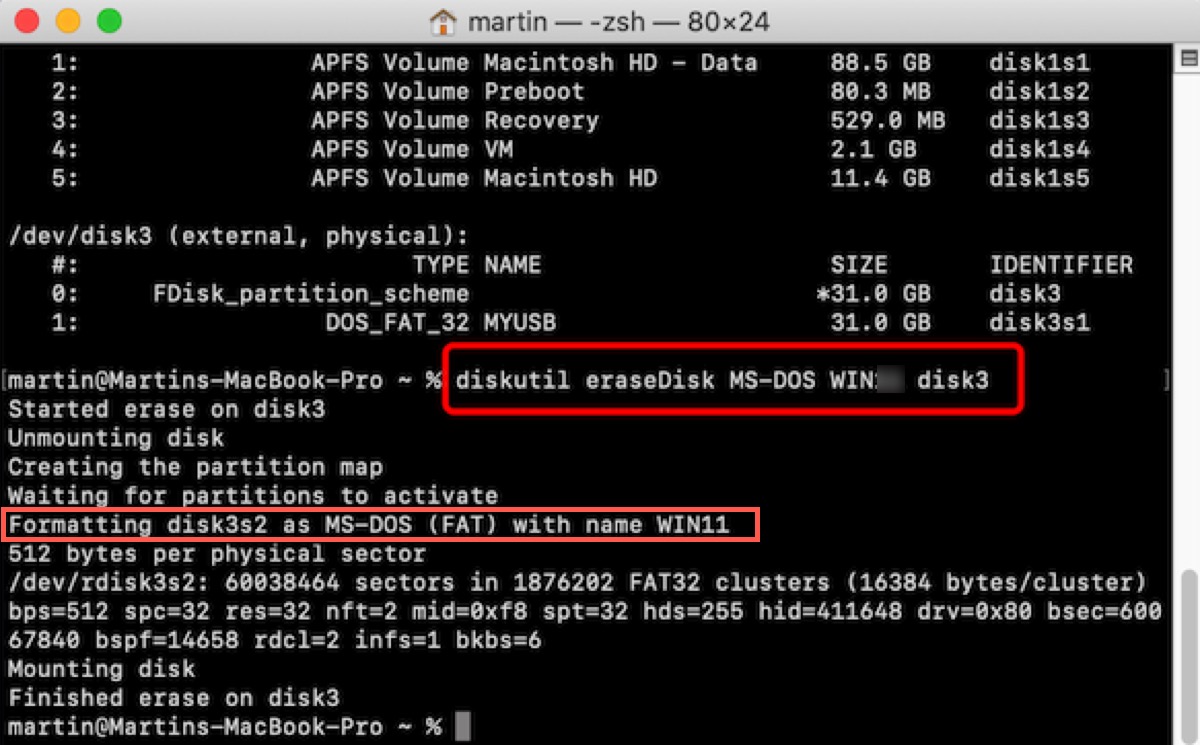
diskutil list - Type in the following command and enter your USB name.
diskutil eraseDisk MS-DOS "WINDOWS10" GPT drive name - Download the ISO file from Microsoft's official website.
- Type in the following command to mount the file and replace WINDOWS10IMAGE with the download ISO file name.
hdiutil mount ~/Downloads/WINDOWS10IMAGE.iso - Type in the following command to make sure to replace MOUNTED with the mounted file name.
cp -rp /Volumes/MOUNTED-ISO/* /Volumes/WINDOWS10/ - Type in the following command and then close Terminal.
hdiutil unmount/Volumes/MOUNTED-ISO
After that, you can eject your USB on your Mac and use it on your crashed Windows computer or install the operating system on it.
It's the most difficult and useful way to create a bootable Windows 10 USB on Mac. And this way won't limit the macOS version or your chip, so if the above two ways are not working, you can take this way to fix your problem.
Read more: [Explained] Fail to Use Boot Camp on M1 Mac?
If these ways help you to fix your problem, you can share it with your friends who have the same problem as you.