
Unlike an external storage device, a Mac's internal hard drive is sturdier, and it doesn't run into problems as often as flash drives. But it can't last forever. Sometimes, the Mac hard drive tends to get corrupted, broken, or dead. And then your Mac can't start up. Let's see a real-life example first.
Hi, my 4-year-old MacBook Pro has died. The people at the Apple Store have confirmed that it's a dead logic board. I have some important files on the computer that were not backed up. How can I retrieve these files? Preferably, I'd like to be able to access these files on a PC, but if need be, I can borrow my friend's iMac to do the transfer. Thanks! -discussion.apple.com
Normally, when your MacBook Air or MacBook Pro can boot up, you can transfer files from Mac to Mac with Migration Assistant or an external disk. But when your Mac is broken or dead, how to transfer files from a broken Mac to a new Mac? In this article, we will talk about 4 feasible ways to get files off a dead MacBook Air/Pro, just keep reading.
Way 1: Use the recent Time Machine backup
It is always advisable to keep a backup of your data on a Mac. If you have used Time Machine to back up all the files on your broken MacBook to an external drive, then it's very simple to transfer data from a broken Mac to the new Mac.
- Connect your Time Machine backup drive to the new Mac. Launch Mac Finder, and access the drive under the Locations section in the left sidebar.
- Double-click the Backups.backupdb and then click the folder with the name of your dead Mac. All of your backups are listed in separate folders named after the dates they were created, in the format YYYY-MM-DD.
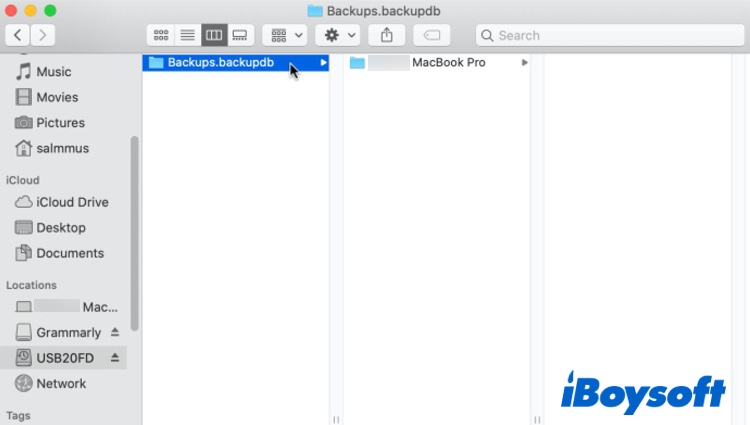
- Locate the folder labeled with the latest date and time. Then copy the files and folders from the latest backup to your new Mac's internal storage.
If, unfortunately, you didn't have any backups of your broken MacBook Air or MacBook Pro, don't worry, go ahead to try the solutions below to get files off a dead MacBook Air or Pro.
Way 2: Use Target Disk Mode
Apple provides a very useful boot mode called Target Disk Mode on an Intel-based Mac. This mode can be used to share your (dead/broken) Mac's internal hard drive with another Mac to transfer files. If your broken Mac computer is fitted with an Intel chip, then use the below steps to solve how to transfer data from dead Mac to new Mac:
- Connected your broken Mac and the new Mac using USB, USB-C, or Thunderbolt cable.
- Now make sure that the broken Mac is completely shut down. Press the power button on the dead Mac, then immediately hold the T key and wait to boot into Target Disk Mode.
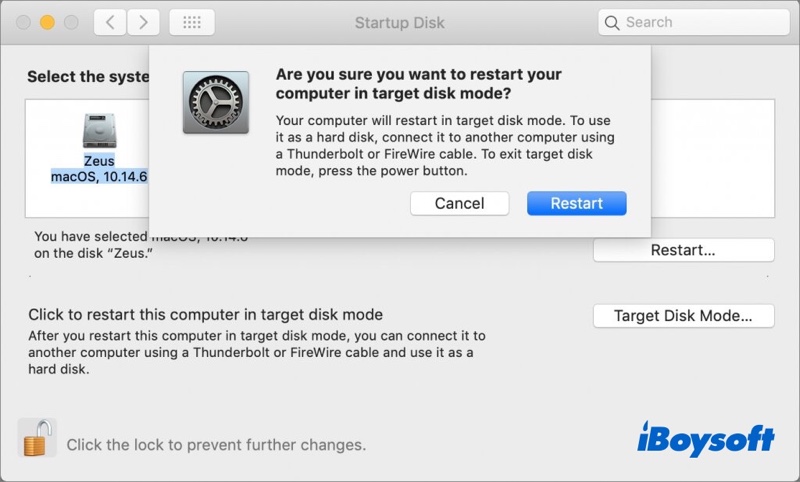
- Now turn your attention to the new Mac. The broken Mac's drive icon should appear on the desktop or in the Finder sidebar under Locations.
- Double click on the drive to access it. If the drive is encrypted with FileVault you should be prompted for the password which macOS can use to decrypt the volume.
- Drag and drop the files/folders from the broken Mac disk to the new Mac's storage.
- Once you finish transferring data, on the new Mac, eject the dead MacBook by dragging its disk icon to Trash.
- Shut down the broken Mac and disconnect the cable between the two Macs.
Way 3: Through Mac Sharing Mode
What if your broken or dead Mac is designed with an M1 chip or later, then how to transfer files from a broken M1 Mac to a new Mac? Actually, the Target Disk Mode in Intel Macs has been replaced with Mac Sharing Mode in Apple Silicon Macs. Mac Sharing Mode is very similar to Target Disk Mode, though it works a little bit differently. Let's see how to transfer data from dead Mac to new Mac using it:
- Connected your broken Apple Silicon Mac to the new Mac with USB, USB-C, or Thunderbolt cable.
- Ensure the broken M1 Mac is completely switched off. On the dead Mac, press and hold the power button until you see Loading startup options on the screen.
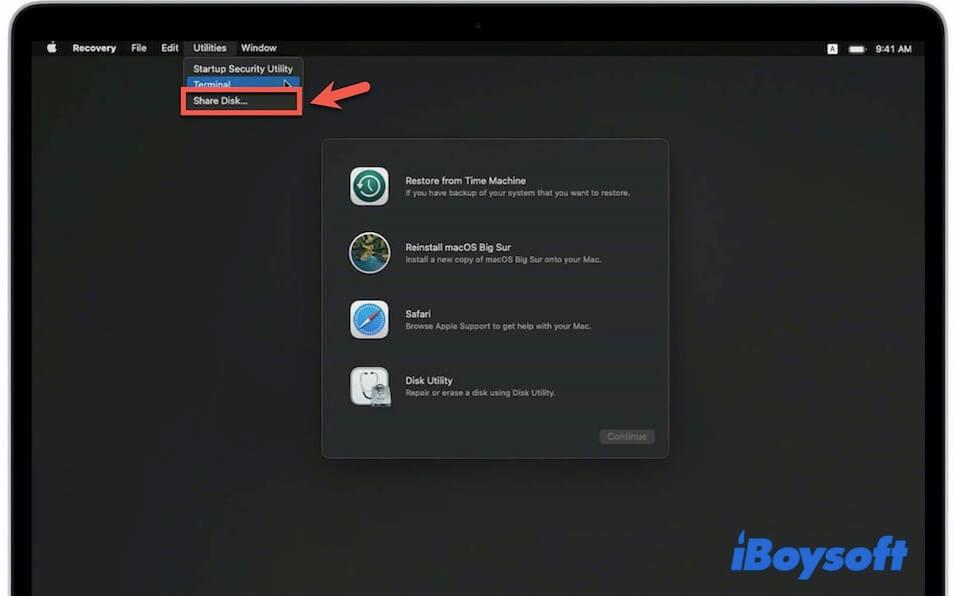
- Click the Options tab and then click Continue. Enter your admin password if prompted.
- Click Utilities and select Share Disk. Choose the disk or volume of your M1 Mac and hit Start Sharing.
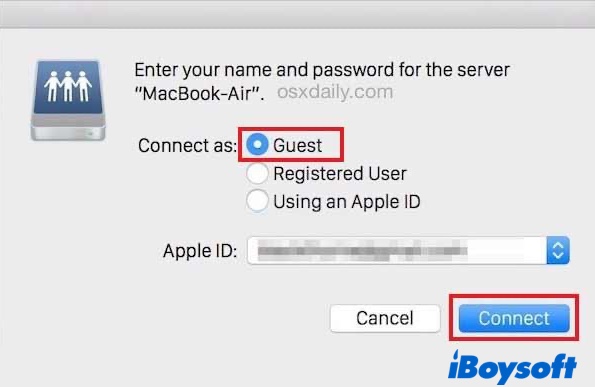
- On your new Mac, launch Mac Finder and select Network in the Locations section.
- If everything goes well, you should see the broken M1 Mac appearing. Double click on it then click Connect As, chose Guest then hit Connect to finalize the process.
- Now you should be able to see your broken Mac files. Select the wanted files and then transfer data from dead Mac to new Mac.
- Eject the broken Mac disk icon in the Finder and shut down your Apple Silicon Mac when you're done. Finally, don't forget to disconnect the cable on your Mac.
Way 4: Use data recovery software
In addition to the above solutions, to get files off the dead Mac hard drive, you can use third-party software to help you. iBoysoft Data Recovery for Mac is a handy Mac hard drive file recovery software that has helped lots of users transfer files like documents, pictures, audio, videos, and emails from a broken Mac to a new Mac.
With this data recovery tool, there is no need to physically take out the broken Mac internal HD and access files in it. Instead, you are allowed to run the software through the iBoysoft Server or create a bootable USB and then get files off the dead MacBook. Well, using which method will depend on your situation.
Case 1: If you only have the dead Mac computer
If you have only one unbootable Mac or MacBook at your hand, the best solution you can try is to run Recovery Mode for recovering files. Before starting the data transfer process, you need to prepare a healthy external storage device with enough free space to store the recovered data.
1. Boot your Mac into macOS Recovery mode. Even though your Mac can't boot up normally now, there's a recovery partition on your Mac machine to allow you to run some basic macOS utilities.
- For Intel Macs before 2018: Turn on your Mac and immediately press down Command + Option + R keyboard keys together (not regular Command + R). Hold them until you see a spinning globe on your screen.
- For Intel Macs after 2018 with T2 Security Chip: Turn on your Mac and immediately press down Command + Option + Shift + R keyboard keys together. Hold them until you see a spinning globe on your screen.
- For Apple Silicon Macs: Turn on your M1 Mac and immediately press the Touch ID button. Hold it until you see the Loading startup options. Click Options to enter macOS Recovery Mode.
2. Choose a network for your Mac. You need to make your Mac connected to the Internet all the time.
3. Click Utilities in the top menu and select Terminal from the drop-down menu.
4. Type in the command line below and then press Enter. [For Fusion drive, enter sh <(curl http://boot.iboysoft.com/fdboot.sh)]
sh <(curl http://boot.iboysoft.com/boot.sh)
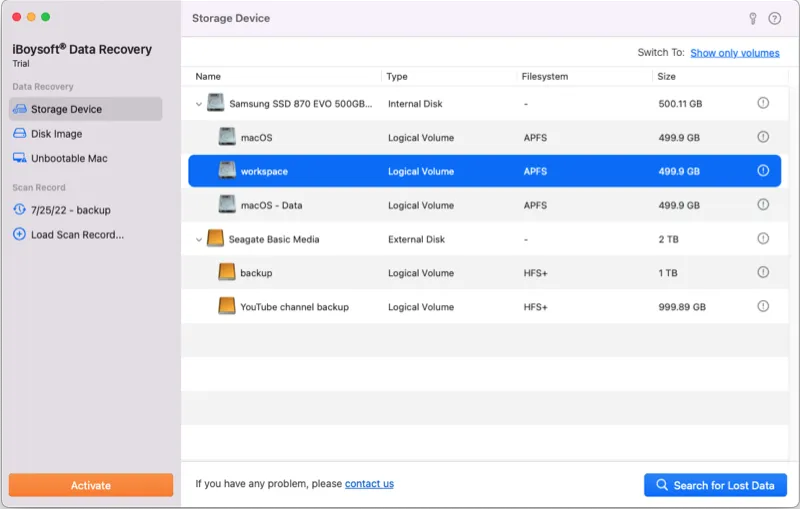
5. When iBoysoft Data Recovery for Mac is launched, select the Mac hard drive in the list and click on Search for Lost Data to scan for files on this drive. (For Fusion drive, select Fusion Drive > Search for Lost Data)
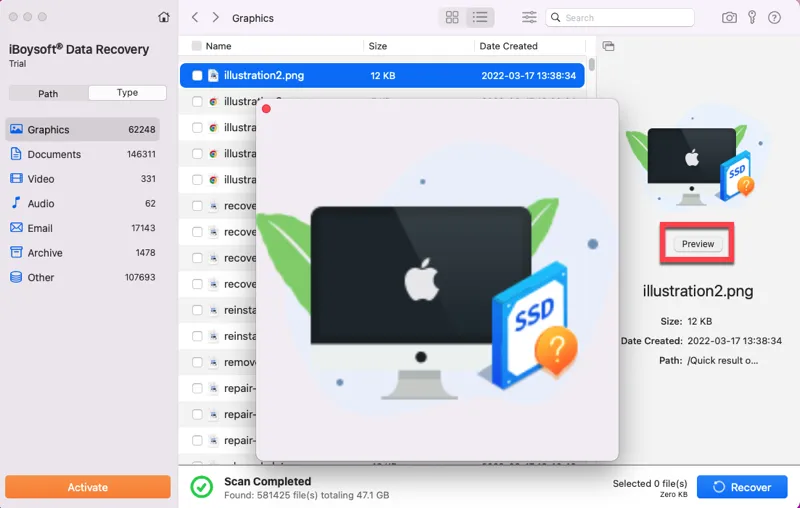
6. Select and preview the files you want to get back then click on Recover to recover them. Save the recovered files to the external drive you prepared.
Case 2: If you have a broken Mac and a new Mac
If you have another new Mac and an empty USB drive, you can try the below steps to recover data from dead Mac hard drive. This solution is a little complicated, make sure you can follow every step patiently and carefully.
Step 1: Plug the USB drive into the healthy Mac computer.
Step 2: Download the two files below and save them to the root directory of the USB drive. These two files will install iBoysoft Data Recovery for Mac on the drive.
- http://boot.iboysoft.com/boot.sh
- http://boot.iboysoft.com/iboysoftdatarecovery.dmg
Step 3: Connect the USB drive to the dead or broken Mac.
Step 4: Boot the Mac into Recovery Mode following the steps mentioned above. This time, use Command + Option + Shift + R keys on all Intel Macs.
Step 5: Open Terminal from the drop-down menu of Utilities at the Apple menu bar.
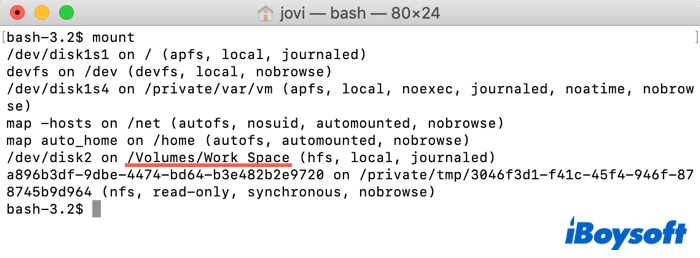
Step 6: Run the command below to list all mounted disks/partitions.
mount
In the picture below, the USB drive that contains the downloaded files is named Work Space and its path is /Volumes/Work Space.
Step 7: Run the following command.
cd '/Volumes/Work Space'
Step 8: Run this command to launch iBoysoft Data Recovery.
chmod 777 ./boot.sh && ./boot.sh
Step 9: Recover lost data from the broken Mac after the software is launched.
How to fix a broken Mac computer?
After transferring files from a broken Mac to a new Mac, you can troubleshoot the "MacBook won't turn on" problem by doing the following to make it usable again.
- Start Mac in Safe Mode
- Reset PRAM/NVRAM
- Repair startup disk
- Reset the SMC
- Restore Mac
- Reinstall macOS
Have you got all the ways to transfer files from broken Mac to new Mac? Please share our post to help others.
- QHow to get files off Mac with broken screen?
-
A
To transfer data from the MacBook with a broken screen, use Target Disk Mode. Target Disk Mode allows your Mac with a broken screen to mount like an external hard drive on another Mac. Here's how to do it:
1. Power down your damaged Mac.
2. Connect your damaged Mac with the new healthy Mac using the appropriate USB or USB-C cable.
3. Start up your damaged Mac while holding down the T key.
If all is well, your Mac with a broken display will appear as a mounted drive on the new Mac and you can access it in Finder.
- QHow long does it take for Mac to Mac Transfer?
-
A
It depends on how much data you're transferring and the method of transfer. Transferring 20-30 GB over a Thunderbolt 3 cable will take a few minutes. Transferring 100-200 GB over Wi-Fi will take a few hours.