At times, some unexpected events happen and damage the directory structure of the external hard drive. This makes data or the drive inaccessible. Fortunately, Disk Utility can help you keep your external hard drive healthy. But there are situations in which it may not be available.
In this case, you can also use some command lines to verify and repair an external hard drive. This passage will show you a detailed guide to repairing an external hard drive with Mac Terminal.
How to repair external hard drive with Mac Terminal?
Note: This guide is intended for advanced users who are comfortable with the Terminal and command line. If you know less thing about the terminal line, please be sure to input the command line provided by this post carefully, or any wrong command line may overwrite your data and damage the external hard drive even your Mac machine.
First of all: Back up important data
The wrong statement goes this way if you repair an external hard drive with Terminal, all data stored on the drive remains intact. But the truth is when running Terminal to repair an external hard drive, it will write new data on the drive and overwrite the original one. So if you have valuable data on the external hard drive, you should retrieve data from the corrupted external hard drive first.
iBoysoft Mac Data Recovery is a data recovery tool that can retrieve or recover deleted files even emptied from Mac Trash and recover lost data from unmountable hard drives, corrupted drives, or formatted drives as well as other storage like USB flash drives, SD cards, memory cards, pen drives, etc. Moreover, iBoysoft Data Recovery for Mac supports more than 500 file formats, including pictures, audio, videos, emails, documents, presentations, numbers, etc.
Step-by-step guidance to retrieve lost data from a corrupted external hard drive:
- Download and install iBoysoft Data Recovery for Mac on Mac.
- Launch iBoysoft Data Recovery for Mac.
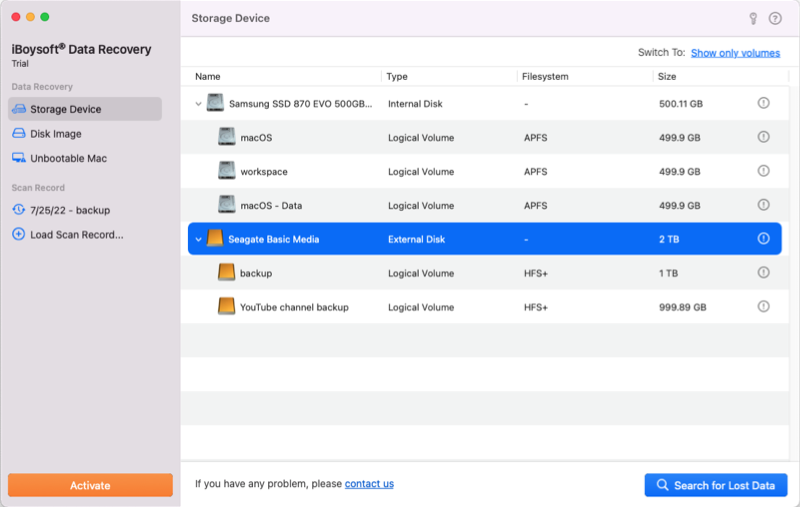
- Select the corrupted external hard drive and click "Search for Lost Data" to search the inaccessible files.

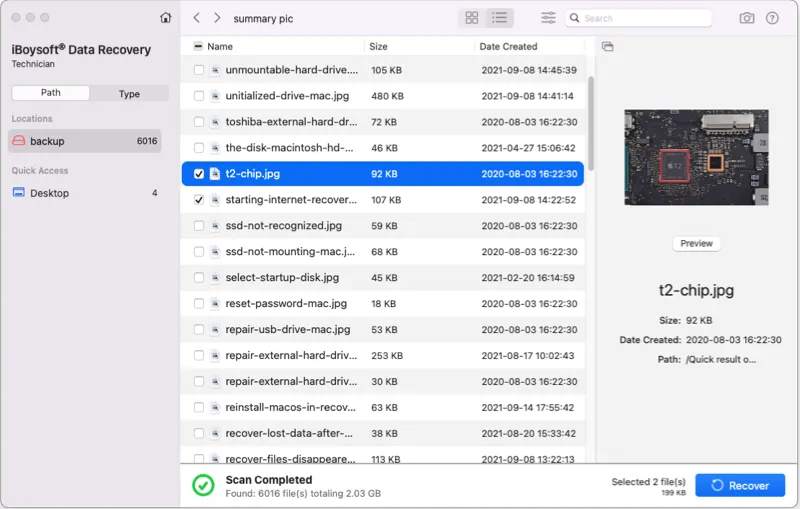
- Preview the files in the search results and choose what you want to recover, click "Recover" to get those lost files back.

With all the files and data at hand, now we can concentrate on fixing the external hard drive with a string of command lines.
Method 1: Verify and repair the external hard drive from the command line
Please be sure you have input the command line correctly or your system may go wrong due to mistake command lines.
- Open Terminal (Applications > Utilities > Terminal.app)
- Type or paste in this command then type ls and press Return. This action lists all of the hard drives on your Mac, including the attached ones. Target the one for certification or repair and notice its drive letter.cd /Volumesls
- Type in the following command line, then press Enter. (Please make sure to substitute the [drive identifier] portion for the actual name of the external hard drive) diskutil verifyVolume [drive identifier]After verifying the external hard drive, you don't need to repair the external hard drive if there is no error message popping up. But if you get the error message saying "The volume was found corrupt and needs to be repaired", you have to use the following command lines to repair the drive.
- Input the following command and press Return. (For example, if the name of your external hard drive is "ExternalBackups", you should type in diskutil repairvolume /Volumes/ExternalBackups/)diskutil repairvolume /Volumes/[drive identifier]/
Method 2: Repair the external hard drive with fsck
If the first method fails to repair the external hard drive, don't be upset, you can try the fsck command. This command line is a bit more complex, but it works for situations when Disk Utility can't repair disk.
- Open Terminal (Applications > Utilities > Terminal.app).
- Type in this command line: (This will produce a list of all the currently connected drives, both mounted and unmounted).diskutil list
- Locate the one you want to repair and find its drive identifier.
- Restart your Mac and hold down the Command + S keys to boot into Mac Single User Mode before the Apple logo appears.
- Some white text will scroll by quickly. When it stops, type in the command below, then press Enter./sbin/fsck –fy
- Type in the following command, change hfs to the drives' file system, and replace [drive identifier] with the actual drive name). fsck will check the file system and attempt to repair any damage that it finds on an external hard drive./sbin/fsck_hfs -fy /dev/[drive identifier]
- When fsck is finished checking and repairing, type reboot into the command prompt and press Enter. Then your Mac will reboot, returning you to the usual login screen.reboot
If your hard drive still has problems, it may have serious file system corruption. You can try iBoysoft Data Recovery for Mac to recover important back and then reformat the drive in Disk Utility.
If you still can't use the external hard drive, the drive may be physically damaged. You can only send it to a local repair company or replace it with a new one.
Be kindly share this post with more people if you find it helpful!
Last words
See? It's quite easy to repair bad sectors on an external hard drive with the Mac Terminal, even for a rookie to the command lines. Yet it's crucial to fetch data from the drive before repairing it since it rebuilds a new file system or structure, mixing the index to your files and making them inaccessible.
On top of that, please always back up everything important in case an accident happens like this. The 3-2-1 backup strategy is recommended that three copies are made of the data to be protected, the copies are stored on two different types of storage media and one copy of the data is sent off-site.
