Nearly everyone has accidentally deleted a file from a Mac or PC before. Whether it's a family photo or a working document, a permanently deleted file can't be found or open like you usually do. But what if you want the deleted photos back?
To recover the permanently deleted images and undelete them from your PC, Mac, Android Phones, and iPhone check the following lists and try plenty of ways to get deleted files back. It is highly recommended you to use the free Mac photo recovery software to get the lost images back.
Guide to recovering deleted photos on Windows PC without software
For Windows users, there are normally 3 ways to get deleted photos back from a Windows computer.
Solution 1: Restore deleted photos from Recycle Bin
Recovering deleted photos won't be a problem if, fortunately, the files are removed into Recycle Bin. Whether you press the Delete key or right-click to choose Delete the file or folder, your photos will be dumped to the Recycle Bin on the Desktop.
To restore them:
1. Open the Recycle Bin by double-clicking its desktop icon.
2. Right-click the deleted photo or file you want and select the Restore option.

However, it may not be possible to recover deleted data from the Recycle Bin in some situations.
Why you can't find the deleted photos in Recycle Bin?
- The deleted photos were then emptied from Recycle Bin.
- The deleted photos will bypass the Recycle Bin and be permanently deleted if you throw them away by using the powerful Shift + Delete key shortcut.
- Regarding external storage devices, the deleted photos from sd cards or external hard drives will NOT be placed in the host computer's Recycle Bin.
- The deleted photos will be emptied from Recycle Bin automatically after 30 days if the Delete files that have been in the Recycle Bin for over 30 days option is turned on under Settings.
- Photos and files that are lost due to unexpected power failure, virus attack, or malfunction of software when editing or transferring them may be permanently lost.
Video guides you to recover deleted pictures emptied from Recycle Bin:
Solution 2: Recover permanently deleted photos from Windows backups
If you can't find any deleted photos in Recycle Bin, this solution may help you out.
There are 3 ways to recover the deleted or lost photos if you can't even see them in the Recycle Bin.
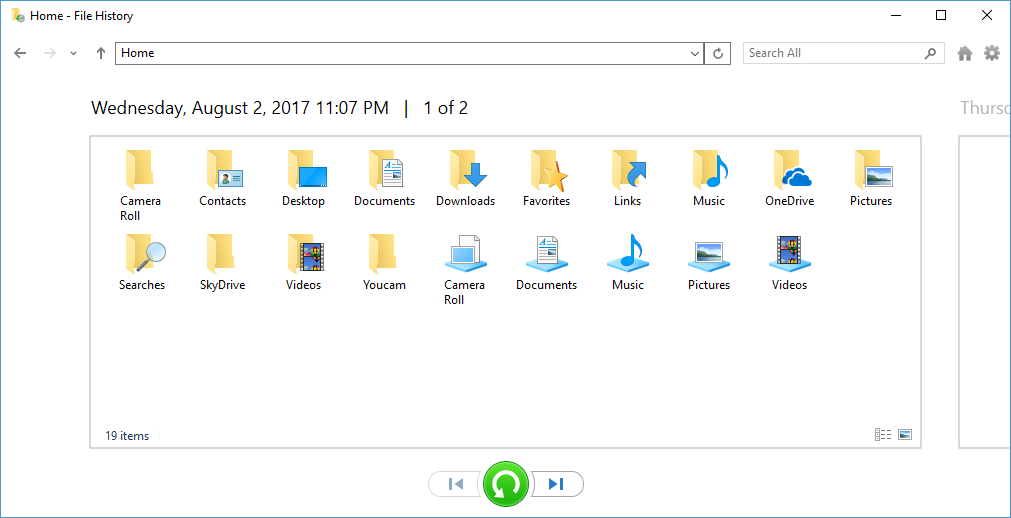
1. Recover deleted photos through File History
File History is a tool available in Windows 8.1 and later, which works with a number of devices to back up your data. If you backed up photos using File History, check your recent backups and restore permanently deleted photos in Windows.
To perform this operation, connect the backup storage media to your Windows computer and follow these steps:
- In the search box on the taskbar, enter "Restore files", and then select Restore your files with File History.
- Look for the file you need, then use the arrows to see all of its versions.
- When you find the version you want, select Restore to save it to its original location. To save it in a different place, press and hold (or right-click) Restore, select Restore to, and then choose a new location.
2. Recover deleted photos from Previous Versions
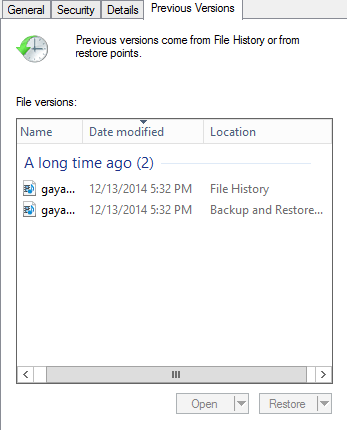
Alternatively, you can recover permanently deleted photos using the Restore previous versions feature in Windows. The feature is also known as shadow copies: versions of files and folders that may exist within restore points. If you have such backups, you can recover deleted pictures with the following steps.
- Open the File Explorer and find the file containing deleted photos.
- Right-click on the folder and select Restore previous versions in the context menu.
- Now you can view the list of available versions. Choose the version you would like to restore and click Restore.
3. Recover deleted photos through Backup and Restore (Windows 7)
- Click the Start button, and select Control Panel in Windows System (you can type "Control Panel" in the search section in order to find it quickly).
- Select Backup and Restore.
- If you are asked to set up a backup, it is very likely you don't have backups in Windows. If you did back up your deleted pictures, then hit Restore my files and follow the instructions on the wizard.
If the solutions to recover deleted photos without software can't find your photos back, then you can try photo recovery software such as iBoysoft Data Recovery.
Guide to recovering deleted photos on a Mac computer without software
There is no "Delete" option on a Mac when you try to delete files, regardless of a Mac hard drive, a USB flash drive, an SD card, or an external hard drive. Photos will be deleted by the "Move to Trash" option. Then you can manually empty the Trash to get rid of them forever.
There are two ways to get deleted photos back for free on Mac mini, MacBook Pro, MacBook Air, or other Apple models.
Solution 1: Recover deleted photos from your Mac's Trash Bin
If you haven't emptied Mac Trash in a while, you can recover deleted photos from Trash on Mac. In this situation, the recovery process is straightforward:
- Open the Trash on the dock.
- View a list of files that you have deleted recently.
- Right-click the photo you want to restore and choose Put Back to its original location.
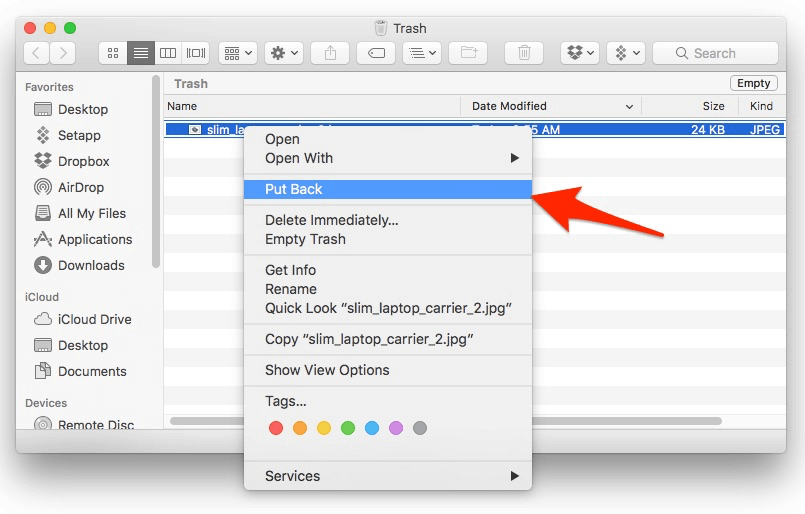
Of course, you can only restore deleted items if the items are still in the Trash.
Why you can't find deleted photos in Trash?
- The deleted images have already been emptied from Trash.
- The photos have been removed from Trash after you choose Delete immediately.
- You've press Option + Command + Delete key shortcuts to delete the photos or videos immediately..
- The deleted photos have been in the Trash for over 30 days while the option "Remove items from the trash after 30 days" was enabled via Finder > Preferences... > Advanced.
If you can't restore photos from the Mac Trash but have made Time Machine backups, you should move to the next solution.

Missing Photos After macOS Ventura Update, How to Recover?
This article provides you with some feasible solutions to recover missing photos after macOS Ventura update, and tells you why photos would disappear from your Mac after an update. Read more >>
Solution 2: Restore deleted photos from Time Machine backups
The macOS Time Machine is a great built-in backup feature of your Mac to automatically back up all of your files, including apps, music, photos, emails, documents, and system files. If the Time Machine disk has been set up, you can restore your photos from Time Machine backups after deletion.
Here is how to restore deleted photos with Time Machine:
- Connect the backup drive to the Mac computer.
- Open the folder that once contained your deleted or lost files.
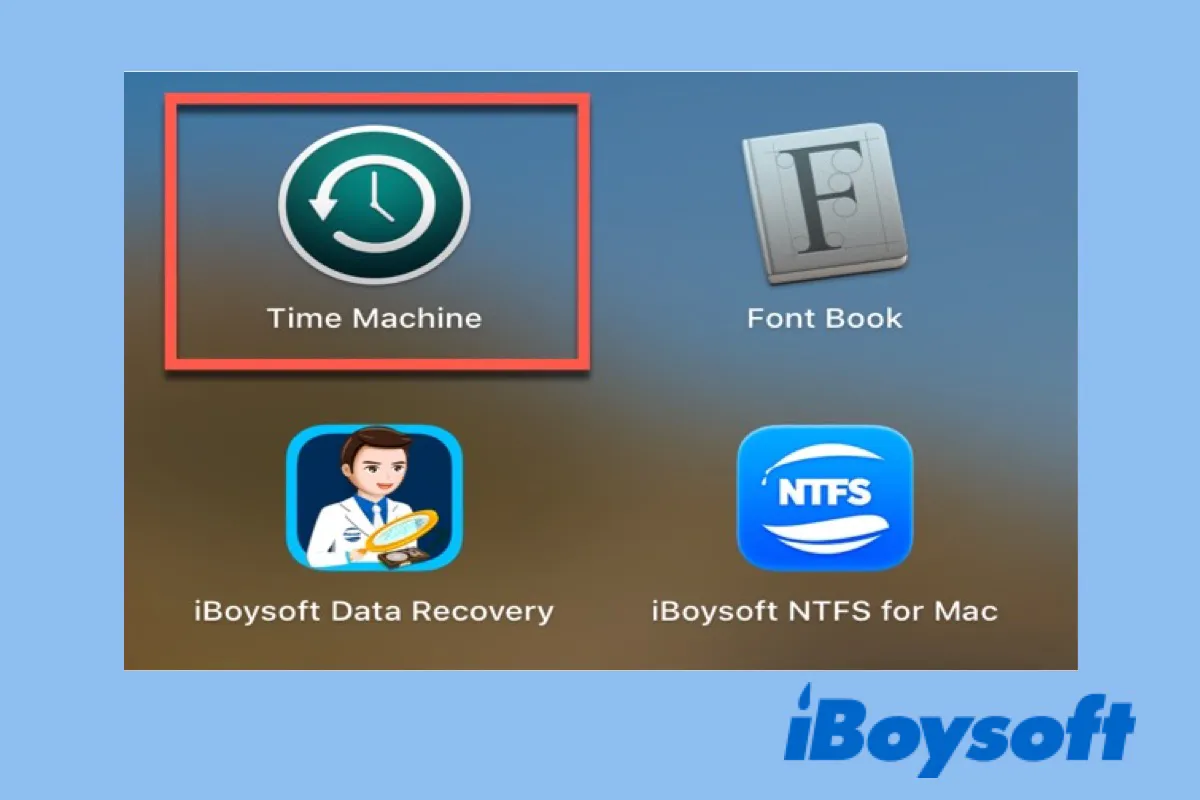
- Click the Time Machine icon in the top left menu bar and select Enter Time Machine.
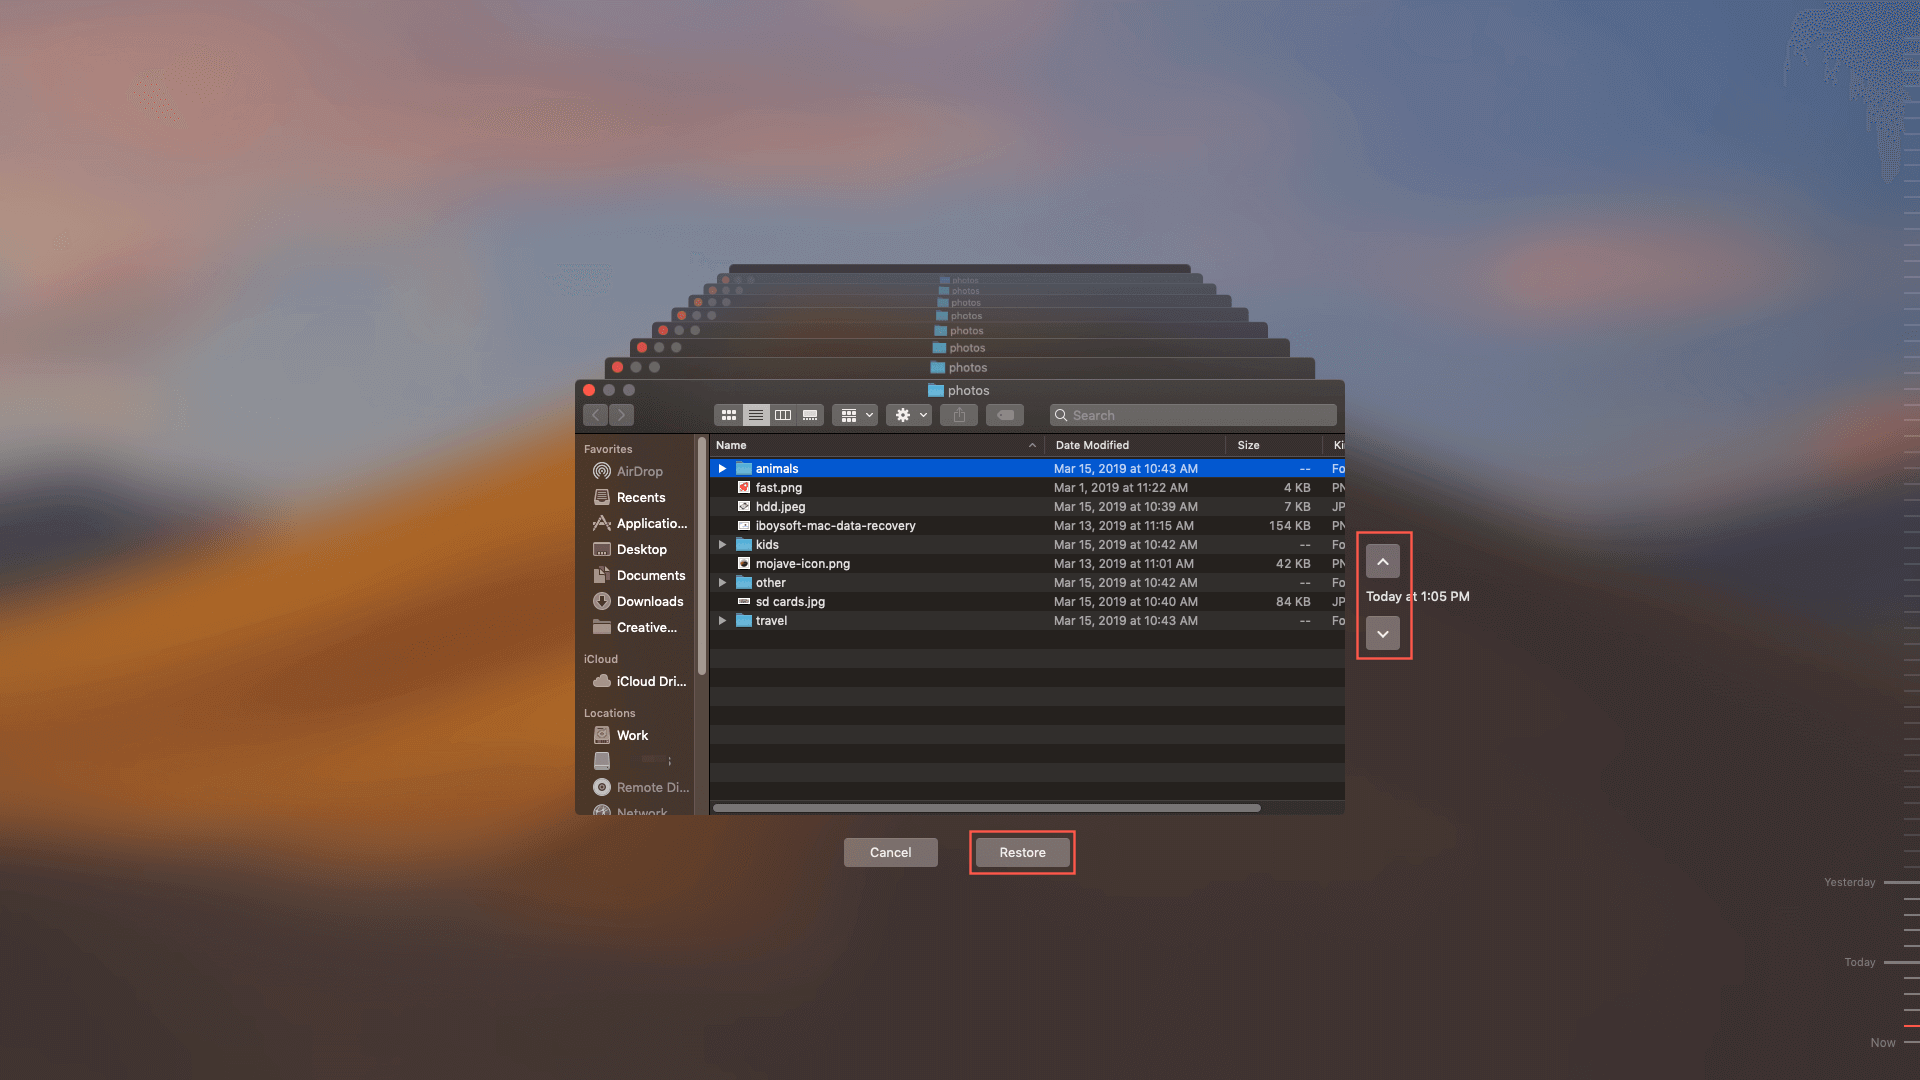
- Browse the items in the backup folder by using on-screen up/down arrows or using the timeline at the edge of the screen. If you want to find files of older versions, using the timeline to navigate the files is faster. You will be able to see a lot of snapshots of this whole folder and how the folder changes over time..
- Select an item and press the Space bar or double-click it to preview it.
- Select the file you want to restore, and then click Restore.
A Time Machine Guide to Back up and Restore your Mac
This post will walk you through the steps to set up Mac Time Machine, create Time Machine backups, and restore Mac from Time Machine. Read more >>
If you didn't set up Time Machine, you'll need to recover deleted photos from your Mac with iBoysoft Data Recovery for Mac.
How to recover deleted photos with photo recovery software?
If you tried the solutions above in vain, free photo recovery software is always by your side to help you.
iBoysoft Data Recovery is a free deleted photo recovery program that can help you recover deleted photos, pictures, or images successfully and effectively. It supports various image file formats, including JPG, PNG, BMP, EPS, TIF, TIFF, PCD, RAW, JIF, JP2, GIF, FPX, etc. With iBoysoft Data Recovery, photo recovery isn't a big deal and you can retrieve your valuable family photos, work photography pictures, and other images.
It also can recover videos, music, audio, documents, and emails either from a computer's internal hard drive. And it also supports external hard drive data recovery, memory card recovery, USB flash drive data recovery, etc.
Steps to recover deleted photos with iBoysoft Data Recovery
1. Download and install the right version of iBoysoft Data Recovery for your Windows PC or Mac.
2. Launch iBoysoft Data Recovery and choose the drive from which you deleted your photos.
3. After clicking the Next button, iBoysoft Data Recovery will start searching for all deleted or lost photos.
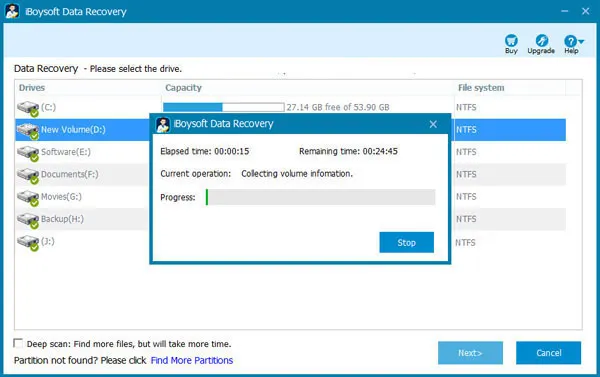
4. You are allowed to preview the scanning results, choose the photos you want to get back, and then click the "Recover" button.

After that, have a check to ensure you have recovered all lost pictures. If you don't see the desired images you want to recover, click on Back and check Deep scan to restart the scanning process for more files.
How to recover deleted photos on Android phones?
If you're using an Android phone, you can use the below methods to get deleted pictures back. The one you choose will be based on if you use cloud storage or need to recover from the device itself. Here's how to do:
Solution 1: Retrieve deleted photos from Gallery/Albums
When you delete a photo from your Android phone's gallery, it is stored in the trash folder for 30 days. So, assuming that you recently trashed the image, it should be there. Do the following to restore deleted pictures within 30 days:
1. Open your Gallery/Albums on your phone.
2. Find the Trash folder or Recently Deleted folder.

3. Your deleted photos should appear in this folder. If you find the images you want, you can tap on the Restore icon or select the recover option to get them back.
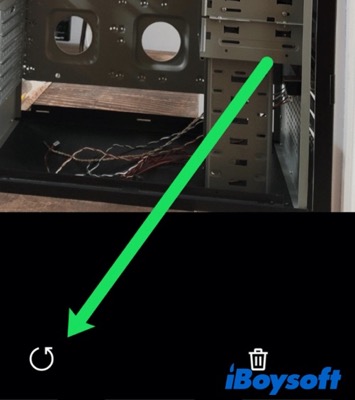
If your desired photos are not in this folder, you may have deleted them over 30 days ago. Don't worry, the below solutions should be helpful.
Solution 2: Recover photos from the Cloud storage
If you regularly store your phone photos in the cloud, such as a Google Photos account, Microsoft One Drive, or Dropbox then it's simple to get your deleted phone pictures back.
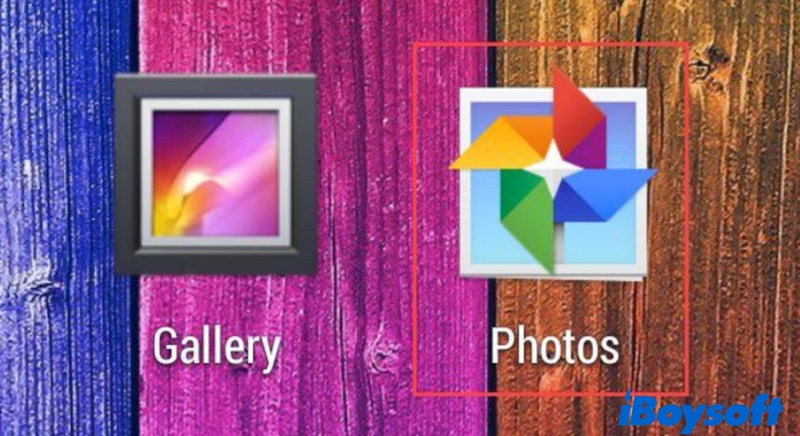
Google Photos
Google Photos can safely back up all images that you keep on your Android smartphone to the cloud and restore them when needed. You can restore photos directly from the Google Photos app with these steps.
1. Open the Google Photos app on your Android phone.
2. Find the deleted photos you want to retrieve.
3. Tap More (three dots) and select Save to a device.

Microsoft OneDrive
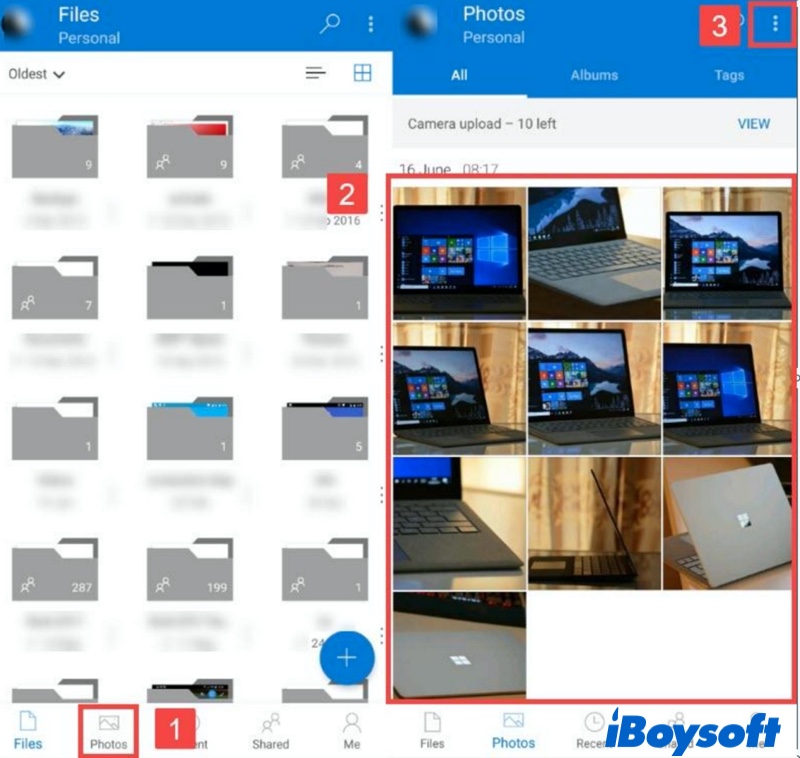
Microsoft's cloud storage service, OneDrive, also offers an automatic photo backup feature. All images uploaded to OneDrive can be recovered to your smartphone by the following steps:
1. Open the OneDrive app on your Android device.

2. Select Photos from the bottom menu.
3. Choose the photos you want to restore.
4. Tap More (three dots) and select Save.
Dropbox
If you're a Dropbox user and had activated the automatic photo backup feature before you lost or accidentally deleted your photos, you can now easily recover them with just a few taps.
1. Open the Dropbox app on your phone.

2. Navigate to the Camera Uploads folder. If you remember moving the images to a different folder, navigate to it instead.
3. Select the pictures you want to restore from all the photos.
4. Tap More (three dots) and select Save to Device.

Solution 3: Restore deleted pictures with the recovery app
What if you haven't backed up your precious photo? Is there another feasible way? Luckily, if your Android phone has a removable microSD card, then you can perform SD card data recovery with a photo recovery app to get your pictures back.
If not, you can still use a professional photo recovery app for Android to get files back, like DiskDigger. Simply download it and follow the instructions to retrieve deleted photos step by step.
How to retrieve deleted photos on iPhone?
To recover recently deleted photos from an iPhone, you can use a few different methods. With some luck, you can get your photos back as long as they have not been overwritten by new data.
Solution 1: Recover deleted images from iPhone Photos
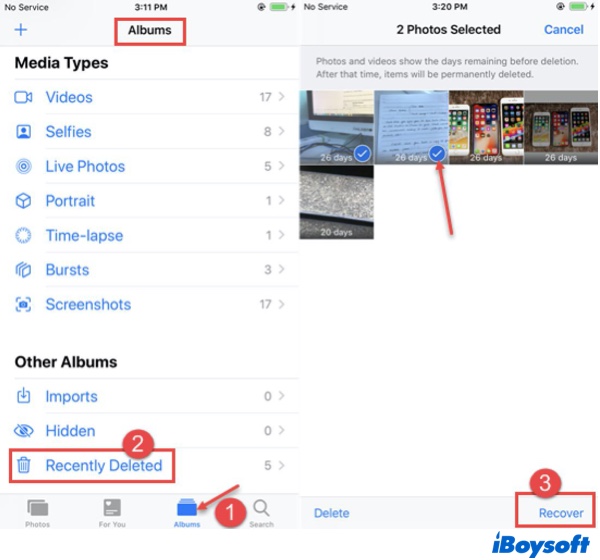
Within 30 days of accidental deletion, your photos will not be erased from your iPhone's internal storage. These recently deleted photos can be found in the Recently Deleted folder. Follow these steps to get your wanted images back.
1. Open the Photos app on your iPhone and select Albums.
2. Scroll to the bottom of the screen, and choose the Recently Deleted folder.
3. Select the pictures you want to restore and tap on Recover to get the photos back.
Solution 2: Recover lost photos from a backup
If your photos are already gone from the Recently Deleted album, then you may be able to get your photos back by restoring your previous iPhone backup.
iCloud Backup
If you use iCloud to back up your iPhone, follow these steps to retrieve deleted photos:
1. Go to Settings > your name > iCloud, scroll down until you see iCloud Backup, tap on it and select Back Up Now. This is a precaution just in case something goes wrong or you don't like the content of the older backup and are willing to give up the photos, you can return to your current configuration.

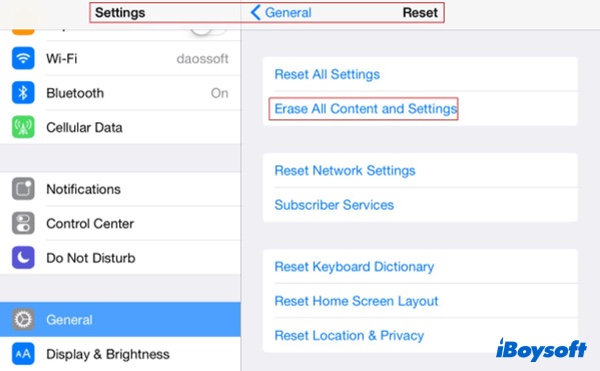
2. Navigate to Settings > General > Reset and then tap Erase All Content and Settings.
3. On the Apps & Data screen, tap Restore from iCloud Backup.

4. Sign in with your Apple ID.
5. Select Choose backup and select the iCloud backup you want to use for the recovery.
6. Follow the prompts to complete the procedure.
Now check the Photos app to see if the precious photos were recovered. If not, you can repeat the process and restore an older backup, or return to your most recent backup.
iTunes Backup
You can also recover deleted images to your iPhone from an iTunes backup using these steps.
1. Connect the iPhone to your computer and open iTunes.
2. Click the iPhone icon when it appears in the iTunes window.
3. Click the Summary option and select Restore Backup.
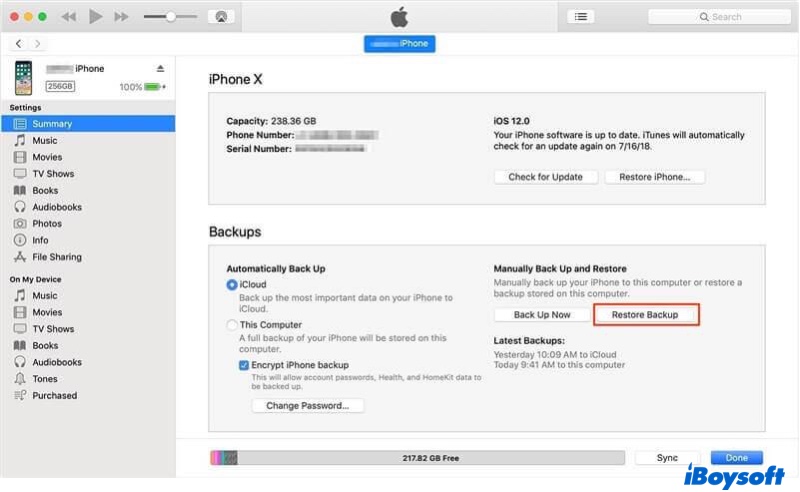
4. Choose the backup that contains the deleted iPhone photos and click Restore.
Solution 3: Recover deleted images with recovery software
If unfortunately, you don't have any iPhone backups, the last resort you can try is to use an iPhone photo recovery app. PhoneRescue for iOS is recommended here.
It provides you with 3 recovery modes to recover your lost or deleted photos in just 3 simple steps: choose one mode, select photo type, then after previewing select to recover. It supports recovering deleted photos to the iPhone directly. Also, you can recover deleted iOS data to your Windows PC or Mac.
More about photo deletion and recovery
Why can deleted photos be recovered?
First of all, it has to be made clear that you didn't "permanently" delete the photos even you have emptied the Recycle Bin.
The original files are still held on their locations on a drive but marked as "deleted", so that you can't access it in a normal way. In most situations, you can restore the accidentally deleted or lost pictures, photos or images.
However, once the deleted data is overwritten after new data is stored to that memory location, you'll lose the deleted files permanently and for real: gone!
In a few words, deleted photos can only be recovered when they have not been superseded by new data written to the disk space they inhabit.
Wielding this basic theory, let's see what happens when you delete a file.
Each file and folder on your hard disk has a pointer that tells the operating system where the file or folder is located. When you delete a file, the operating system only removes the pointer and marks the space containing the file as available for saving new files. Although the file is no longer accessible on your hard drive, the deleted file still exists on the hard drive.
That's to say when you delete a photo, it isn't really formally erased but continues to exist on the drive. The "deletion” is actually labeling the photo to another location (Recycle Bin or Trash) and the computer doesn't need to 'move' the file anywhere. Therefore, you can restore them by moving them out of the Recycle Bin or Trash.
Even after you emptied them from the Recycle Bin or Mac Trash, the deleted/lost files could still exist in their original location on the drive. You can recover such deleted Word files, email files, video files and other files easily assuming that new data accumulation hasn't gotten in the way.
Note: It is impossible to recover deleted photos from a TRIM-enabled SSD. That's because Solid-state drives work differently in order to speed up the read and write performance. When you use a TRIM-enabled SSD (all modern SSDs support the SSD TRIM technology) and deleted a file, the operating system will completely erase all files immediately, precluding all chances for deleted data recovery. All Windows computers have TRIM support, but it is not standard for Mac computers to have TRIM support. You can go to About > System Report to check if the TRIM is enabled on the SSD on your Mac.
How to recover as many deleted photos as possible
Since not all deleted photos can be recovered, how can you maximize your chances of getting back your deleted photos?
Here are some important tips.
- Stop using the data storage device from which you have deleted the photos as soon as possible after discovering them missing. Stop using the data storage device from which you have deleted the photos as soon as possible after discovering them missing.
- Stop using your computer immediately. If deleted photos were saved on the system partition (such as the 'C:' partition for PC and Macintosh HD for Mac), try to perform no further operation and quit all apps and cease software activity. This way you can prevent the operating system from writing new data that can write over your deleted photos.
- Use read-only deleted photo recovery software. Many data recovery programs on the market will write new data to your source drive when they are scanning or recovering deleted files from that same drive. This could possibly result in data overwriting on the source and make some of your lost files unrecoverable. If you want to use a data recovery program, make sure the software is read-only and doesn't write any data to your source drive, such as iBoysoft Data Recovery.
How to avoid photo/image/picture loss?
Accidental deletion can be prevented in several ways. It only takes a little bit of extra effort when you edit, transfer, or clean up your important files.
- Make backups of the user files on your hard drive and update it regularly.
- Back up and sync your photos and files in cloud storage and on a local drive.
- Change file permissions for different users and different files to avoid accidental deletion.
- Set up important files as read-only for other users who might accidentally delete your data.
Moreover, a professional deleted data recovery program such as iBoysoft Data Recovery can save the day in the event of data loss.
Conclusion
With the evolution of digital cameras and smartphones, people's love of taking pictures with their Canon cameras and Android phones has grown exponentially. Moreover, people download, transfer and edit photos on computers and removable drives millions of times a day across the globe. Accidentally deleting or losing photos does statistically happen very often, unfortunately.
Pictures and videos are stored on digital camera SD memory cards and removable micro SD cards in some Android phones. With iBoysoft Data Recovery, recovering deleted photos directly from digital cameras isn't a problem.
But instead of recovering deleted photos after you lose them, a better way is to back up your important photos regularly.
FAQs about recovering deleted photos
- QHow to recover permanently deleted images on Windows 10?
-
A
Even thought permanently deleted images can't be easily recovered from the Recycle Bin, they can still be undeleted with the help of a photo recovery software application. iBoysoft Data Recovery for Windows is a good option.
- QCan I restore deleted pictures from my Android phone?
-
A
Yes, in many cases, it's possible to restore deleted pictures from an Android phone. Here's what you can do:
Restore them from a cloud backup.
Remove the SD card and scan it with photo recovery software on Windows or macOS.
Use a photo recovery app for Android phone.
- QWhere do deleted photos go on iPhone?
-
A
They initially go to the Recently Deleted album and stay there for 30 days. During that time, you can easily recover those photos right on your iPhone, no need to look for backups or connect your iPhone to Mac. After 30 days, you'll need a professional recovery tool for iPhone to bring those photos back.
