Accidentally erased a hard drive with Disk Utility on Mac? Don't worry, you'll still have the opportunity to recover it. This post will help you solve how to recover an erased hard drive on Mac even recover an erased startup disk. If you're interested, just keep reading!
How to recover an erased hard drive on Mac:
| Specific Issues | Method 1 | Method 2 |
| How to recover an erased hard drive on Mac | 1. Free download and install iBoysoft Data Recovery for Mac on your computer. 2. Launch the software and select the storage device from the sidebar. 3. Click Search for Lots Data to scan all erased files. 4. Right-click the scanned files for preview. 5. Click Recover to restore the files stored on the erased hard drive. | |
| How to recover an erased Startup disk on Mac | 1. Boot your Mac into macOS Recovery Mode with different steps based on your Mac model. 2. Make sure the internet works nicely and open Terminal in the macOS Utilities window. 3. Enter the command line to run iBoysoft Data Recovery Software for Mac: sh <(curl http://boot.iboysoft.com/boot.sh). 4. Once the download completes, launch it, and select your drive in the software sidebar. 5. Click Search for Lost Data and preview your files.6. Click Recover to bring your lost files back. | 1. Connect the drive containing your Mac's recent backup version to your Mac. 2. Go to Apple Menu and click Restart. 3. Boot your Mac into macOS Recovery Mode. 4. Click Restore From Time Machine Backup in macOS Utilities window. |
What happens after erasing a hard drive on Mac
'Will Disk Utility erase files?' or ' What happens if I erase my hard drive on Mac?', you must have seen those questions on Mac forums frequently. Disk Utility works as an all-in-one disk management tool on macOS and offers an 'Erase' option for Mac users.
Generally speaking, the operation 'Erase' means permanently wiping out all the data and the erased data seems to be not recoverable. However, the 'Erase' button has a different meaning on MacBook and Mac, which functions similarly to 'Format'.
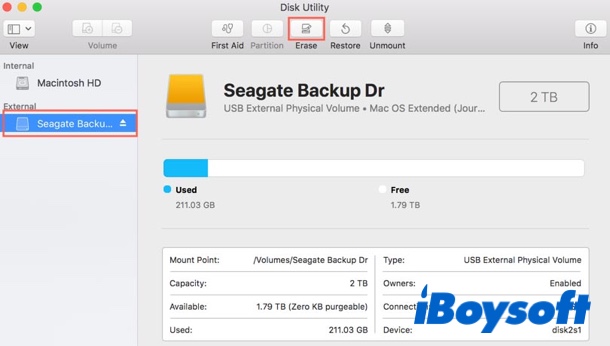
In another word, the erased/formatted files could be recovered with file recovery software for Mac on the condition that the erased hard drive is not overwritten yet by new content. Just reading the next part, let's see how to perform erased data recovery on Mac.
Many Mac users including your family members or friends may have accidentally erased a hard drive on their Mac and hope to recover files, share this tutorial to help them!
How to recover erased hard drive on Mac
To recover an erased drive on Mac and get your important files back, using data recovery software is the most convenient way. There are a few data recovery apps in the market, here we use iBoysoft Data Recovery. This app allows you to recover erased, formatted, or deleted data from external storage media on Mac.
It can recover erased files in macOS 13 Ventura, macOS 12 Monterey, macOS 11 Big Sur, macOS 10.15 Catalina, macOS 10.14 Mojave, macOS 10.13 High Sierra, macOS 10.12 Sierra , and earlier Mac OS X 10.11, and it works fine on M2, M1, M1 Pro, and M1 Max Mac.
Best Mac Erased File Recovery Software - iBoysoft Data Recovery for Mac
- Recover erased photos, documents, audio files, videos, emails, etc.
- Recover deleted files from HDD, SSD, flash drives, SD cards, etc.
- Support APFS, HFS+, exFAT & FAT32 formatted drives.
- macOS Monterey & Apple Silicon Macs supported.
Read-only & risk-free
Now, do the following to recover the erased hard disk on Mac:
- Free download iBoysoft Data Recovery for Mac and install it on your Mac internal hard drive. Don't install it on the erased disk because it may increase the risk to overwrite the disk you're trying to recover.
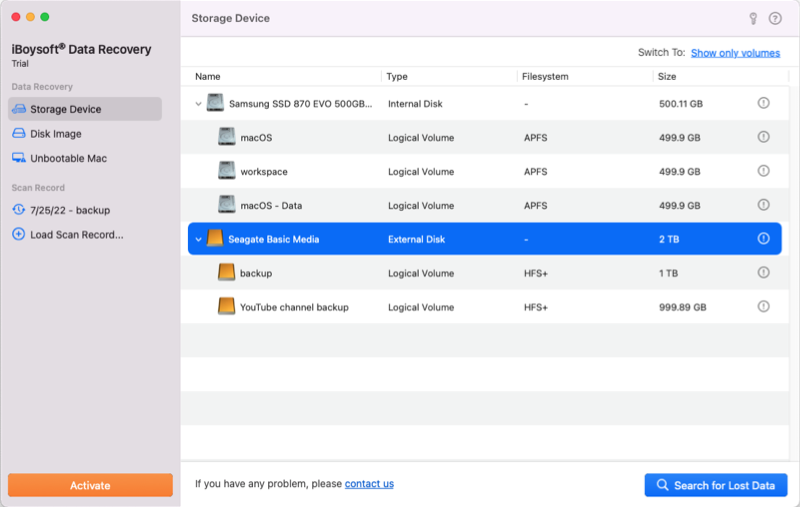
- Launch iBoysoft Data Recovery for Mac, and click on Storage Device from the sidebar. From the storage device list, choose the erased hard drive.
- Click Search for Lost Data to scan all erased files.
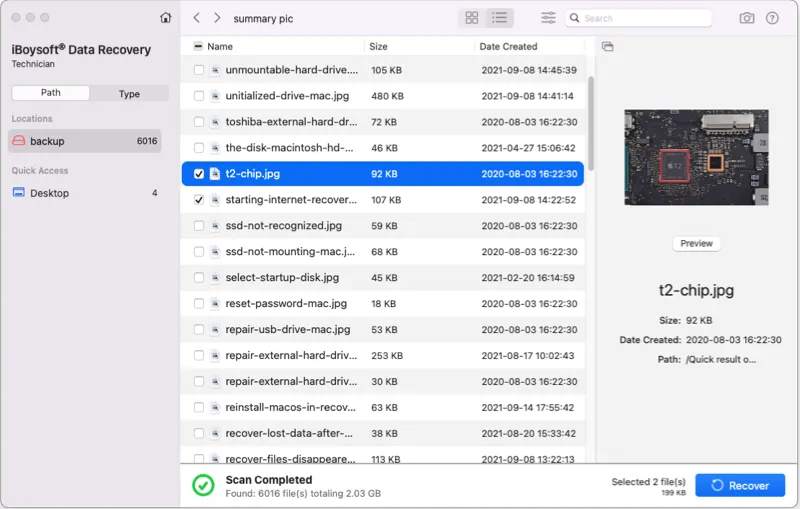
- You can filter files by different categories and then preview the scanning results. Choose the files you want to recover, or select all the files and click the 'Recover' button to recover those files from the erased hard drive on your Mac. Remember to store the recovered files on another healthy disk.
Have your precious data been recovered? If so, don't hesitate to share this tutorial on your social media.
What to do if you erased your Mac startup disk accidentally
In addition to erasing the external hard drive on Mac accidentally, many Mac users also complained that they accidentally deleted Mac startup disks and found the MacBook won't turn on. Don't panic if you encounter this issue also. Even though it's a bigger mess to deal with, you still have a chance to recover your erased data. Here we offer 2 methods for you.
Method 1: Use iBoysoft Data Recovery software in Recovery Mode
iBoysoft Data Recovery for Mac can be also easily used in macOS Recovery Mode. This is the best choice when you want to quickly recover your hard disk in an emergency without creating a bootable drive.
Step 1: Boot your Mac into macOS Recovery Mode.
- For Intel-based Macs before 2018: turn on your Mac and immediately press down the Command + Option + R keys at the same time, then hold them until you see a spinning globe on your screen.
- For Intel-based Macs after 2018 with T2 Security Chip: turn on your Mac and immediately press down the Command + Option + Shift + R keys together, then hold them until you see a spinning globe on your screen.
- For Apple Silicon Macs: turn on your Apple Silicon Mac and immediately press the Touch ID button. Hold it until you see Loading startup options, then click Options to enter macOS Recovery Mode.
Step 2: Choose a stable network for your Mac and make sure your Mac is connected to the Internet all the time. Open Terminal from the Utilities drop-down menu.
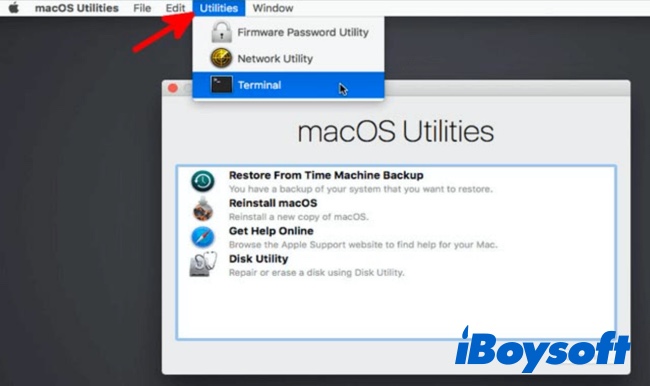
Step 3: Enter the following command in Terminal and press Return to launch iBoysoft Data Recovery. The admin password is needed.
sh <(curl http://boot.iboysoft.com/boot.sh)
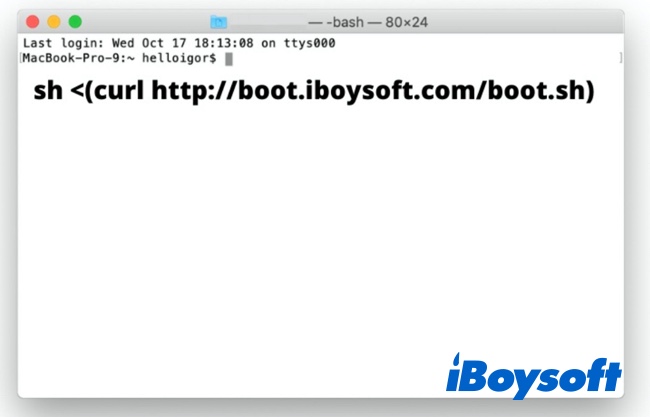
iBoysoft Data Recovery now should be downloading. Once it's done, simply start it, and follow the steps we mentioned in the previous section to recover your files.
Method 2: Restore backup with Time Machine
If you ever backed up your Mac with Time Machine, then you can easily recover your whole startup disk or hard drive with this tool.
- Connect the drive that contains your Mac's recent backup version to your Mac.
- Go to the Apple menu and click Restart.
- Boot your Mac into Recovery Mode. Different Mac models require different ways to boot into macOS Recovery Mode. You can use the booting methods mentioned in Method 1.
- Click Restore From Time Machine Backup when the macOS Utilities window appears.
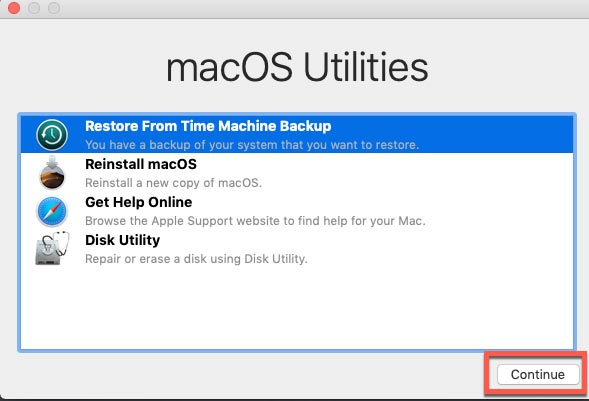
- Choose the disk containing your backup and click Continue, then your Mac will start recovering the selected backup and finally restart.
Share this tutorial on your social media if you think it's useful.
FAQs about how to recover erased hard drive on Mac
- QCan an erased hard drive be recovered on Mac?
-
A
As long as your external hard drive has not been overwritten with new contents, it's possible to recover files from the erased hard drive on Mac.
- QDoes erasing Mac hard drive erase everything?
-
A
Erasing Mac will delete all the files on it and restore your Mac to factory settings.
- QDoes erasing hard drive remove virus on Mac?
-
A
To protect your Mac against viruses, you can restore your Mac to factory settings. In this way, all virus should be removed.
- QWhat happens if I erase Mac SSD?
-
A
If your Mac SSD TRIM is enabled, erasing Mac SSD will permanently delete all the files and can't be recoverable. If SSD TRIM is not turning on, you'll still have chance to get your files back.
