
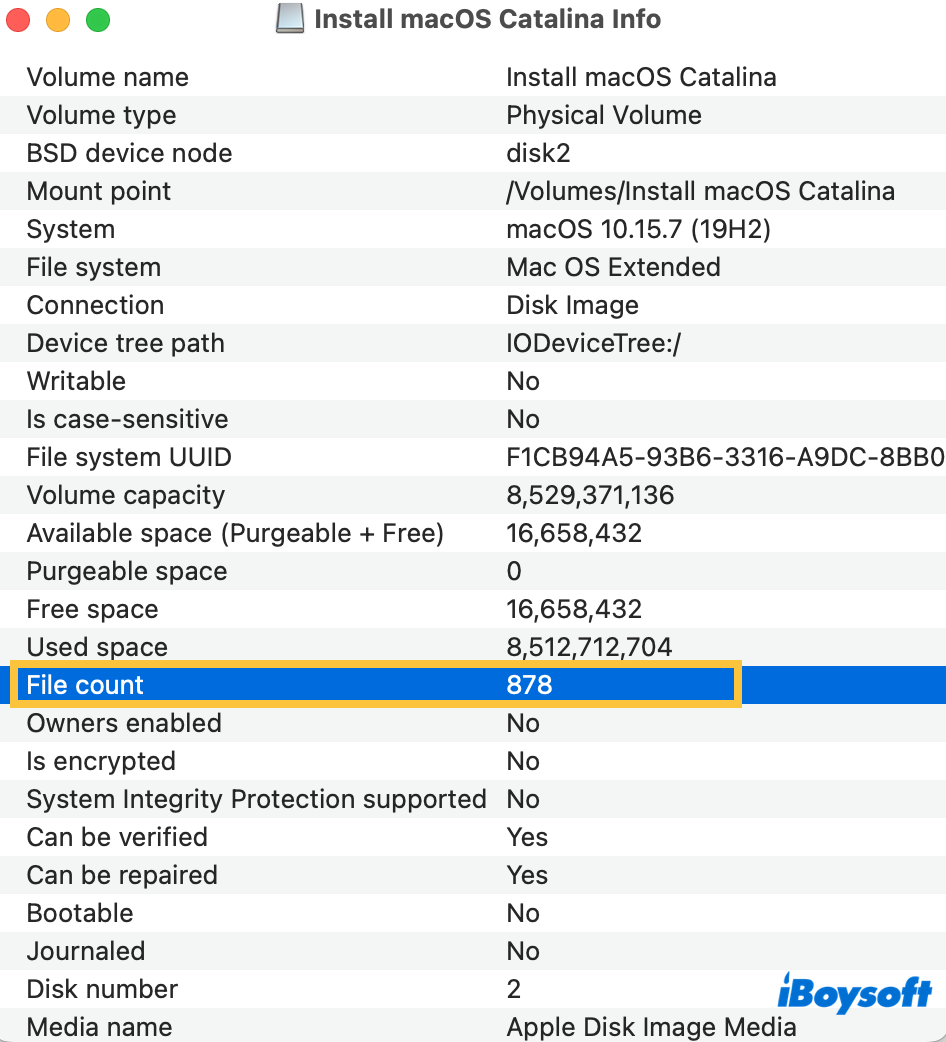
I am trying to reclaim the use of an old disc drive that I used in the past. The finder says that there are zero files on the drive, but Disk Utility says there are 24,000 files, using over 600 GB. How can I discover what's on this drive, as I don't want to just format it and lose whatever is there? It's a USB external connection to a 4 TB backup drive.
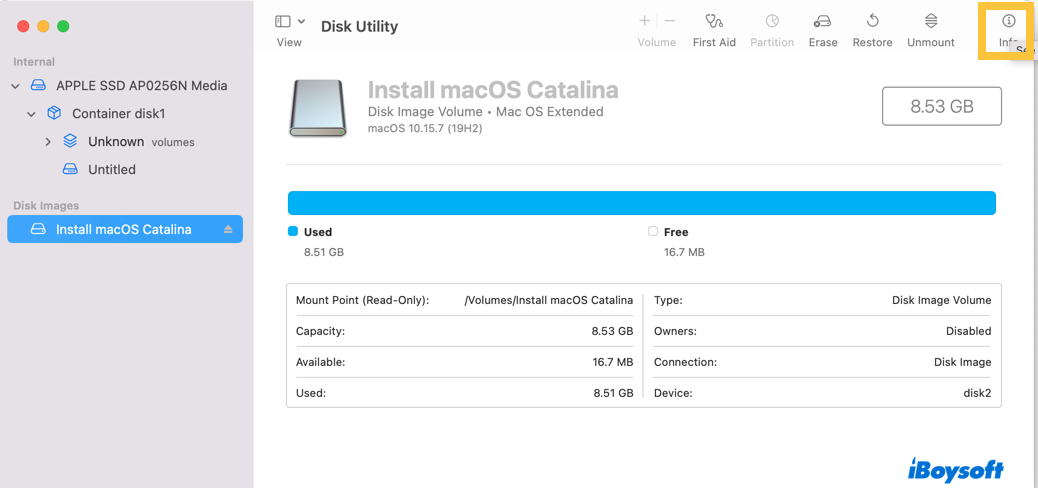
Just like the example above, it's frustrating when running into the issue of Finder not showing files stored on the connected hard drive, especially when you place something valuable on it. Yet things don't go that awfully since Disk Utility shows the files still by Disk Utility > hard drive > Info. This means you still get a chance to have all of your data.
This post walks you through rescuing the hard drive files disappearing from Finder and troubleshooting the issue of Finder saying 0 files on Mac! Let's get started then!
Priority - Rescue lost files with iBoysoft Data Recovery Software
Now that we can see Disk Utility shows a certain number of files via the Info tab, it means we still have access to the files.
Compared to locating the files with a native utility like terminal, we highly recommend a safer and more stable approach to grab them, that is, running iBoysoft Data Recovery Software.
Built with incomparable disk scanning skills and data recovery algorithms, it scans the whole hard drive for any file traces bit by bit and sector by sector. No matter whether the files are deleted, replaced, or overwritten with new data, this utility always finds the original files and recovers them with ease!
This software can recover loads of file formats, including PDFs, Word, Excel, Numbers, videos, photos, audio, HEIC, Notes, Freeform boards, etc., from formatted, inaccessible, broken, and even failing hard drive on macOS Sequoia, Sonoma, Ventura, Monterey, Big Sur, Catalina, Mojave, High Sierra, Sierra, and Mac OS X El Capitan.
Here we'll show you how to get the inaccessible files not showing in Finder from the USB hard drive:
Step 1: Free download and install iBoysoft Data Recovery Software on your Mac. Do not place it on the USB drive that Finder can not present files, or this utility overwrites all data on the drive, leaving 0 chance for data recovery.
Step 2: Connect the USB hard drive to your Mac and wait for it to be mounted, then launch iBoysoft Data Recovery Software for further recovery.
Since Disk Utility detects and mounts your USB hard drive successfully, your hard drive certainly is accessible. Or, you have to troubleshoot the issue of the external hard drive not mounting on Mac, or the external hard drive not showing up on Mac first of all.
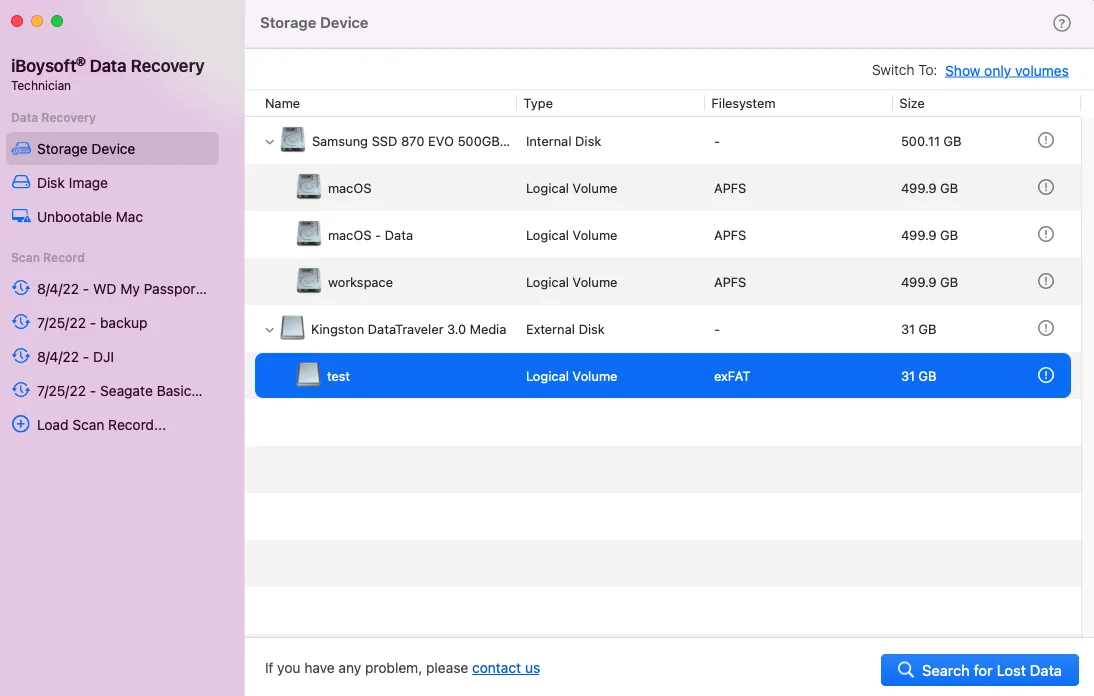
Step 3: Select the USB hard drive you connected and select it from the device list mounted by the data recovery software. Click Search for Lost Data to begin disk scanning.
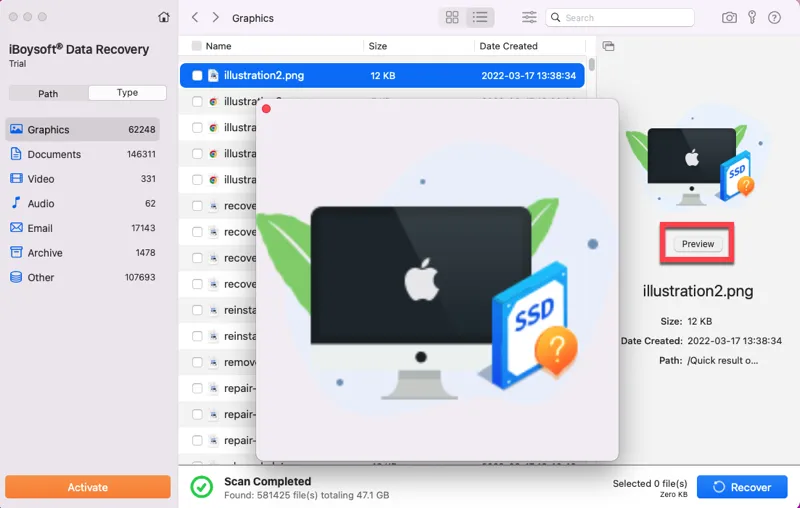
Step 4: Once the recovery software finishes the disk scanning, it presents all the files it has scanned. You can select a file and click Preview to check it beforehand.
Step 5: When you finish the preview, you can select the files you desire and click Recover to bring all the inaccessible files back.
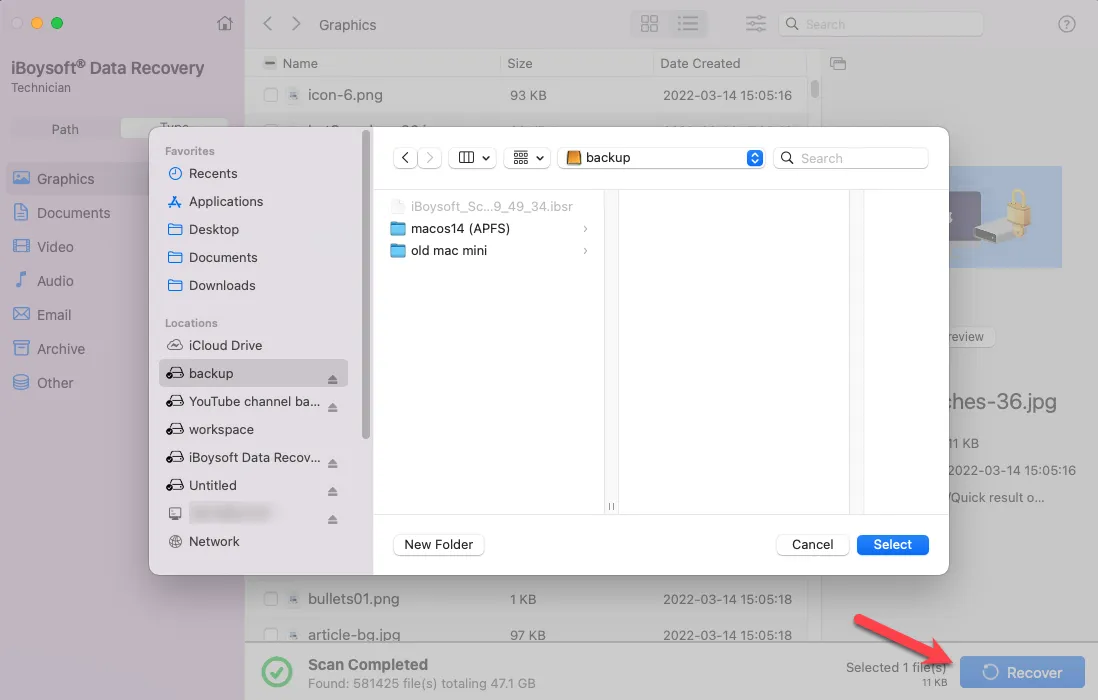
Save the recovered files to a new and safe volume instead of the original USB hard drive, since we have not resolved the issue of Finder saying 0 files yet, and we cannot tell whether the drive is the final culprit.
Share this post to help more people get their data when Finder says no files on the external hard drive on Mac!
How to fix Finder says 0 files on Mac?
Now that we have fetched all files with the assistance of iBoysoft Data Recovery Software, we can rest assured and resolve this issue without worrying about data loss triggered by some professional approaches like drive formatting or so. Let's dig deep:
Approach 1: Retry to connect the drive with an alternative dock/station
Sometimes, it's the connection adapter or hub that triggers an external hard drive not working well on a Mac. If you have connected the USB hard drive to your Mac with a Mac docking station, adapter, or reader, try to exclude it and connect the drive to the machine directly. Things may go in a good way.
Or, if you connect the hard drive to your Mac directly, try to use a connector between them. Then, wait and see if Finder shows the files as usual.
Approach 2: Check the file system of the USB drive
The file systems compatible with macOS include APFS, HFS+, HFS, and ExFAT, while only APFS is widely used on Mac. Based on Apple's design, HFS+ is no longer used for the macOS boot drive and hasn't been an option for Time Machine any longer, let alone speaking of the early released HFS.
ExFAT, however, is a file system proprietary to Microsoft Windows, so, by nature, certain limitations are a must due to the incompatibility between the two operating systems.
You can check the file system of the USB hard drive and then format the drive to APFS if it is not:
- Open Finder, then launch Disk Utility from the Applications > Utilities folder.
- Click View > Show All Devices.
- Select the physical disk of your external hard drive. (Usually named with the manufacturer's name).
- Click Erase.
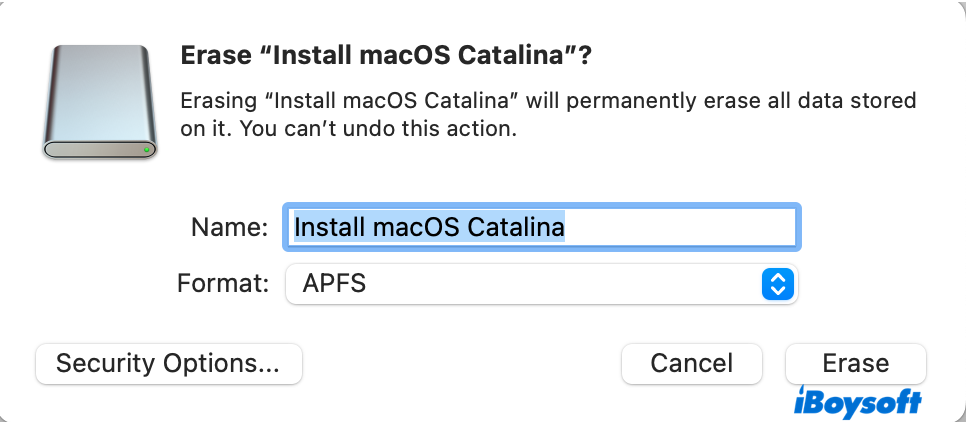
- Give the disk a name.
- Choose APFS as the file system.
- Set the scheme to GUID Partition Map.
- Click Erase.
Then you have a USB hard drive fully compatible with your Mac, and you can use it as the best drive for Time Machine backup or other tasks.
Approach 3: Check the drive health
Once the drive health reads bad, it triggers sorts of strange problems, and Finder saying 0 files on the drive is not an exception. Apple has configured Mac with a native drive health checker -- Disk Utility. It is a straightforward mission to check the hard drive health with it:
- Open Finder > Applications > Utilities > Disk Utility. Or, you can access it this way: Launchpad > Others > Disk Utility.
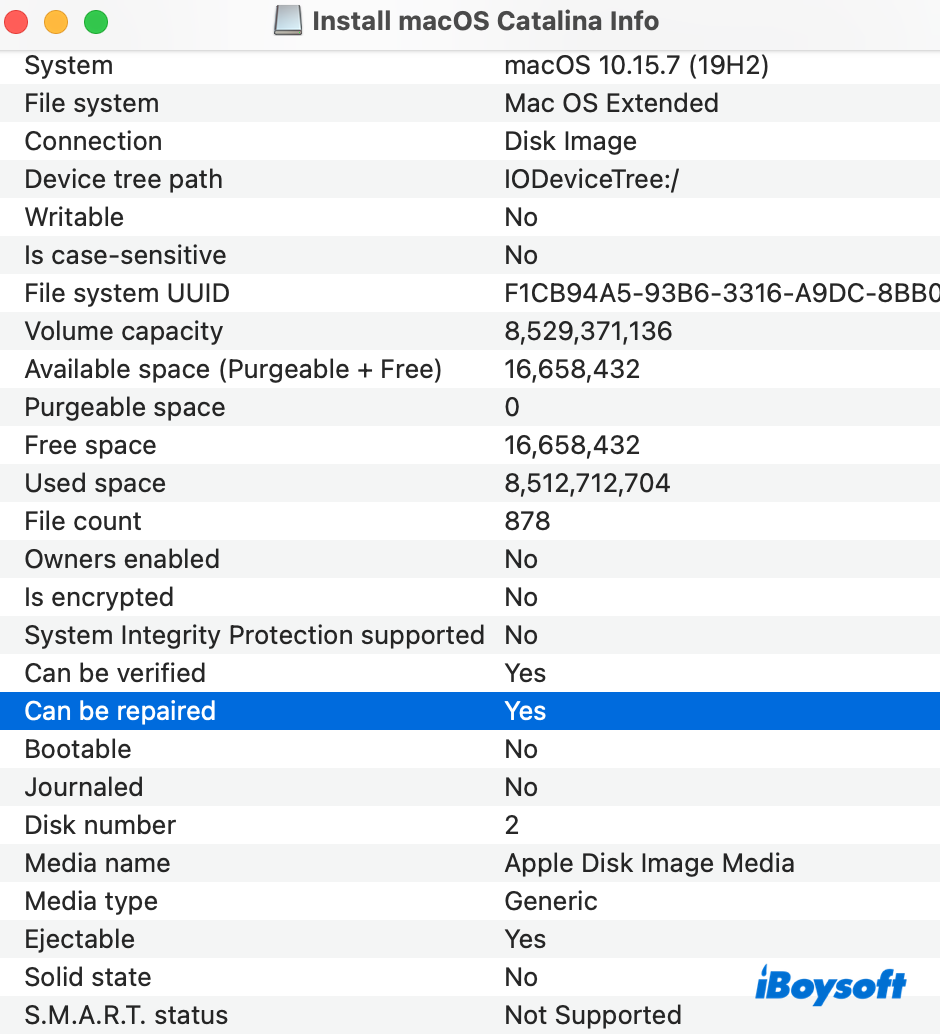
- Select your disk in the left menu, then choose Info in the upper right corner.
- Find any error messages highlighted in red. If there is no red, this disk is healthy.
Alternatively, iBoysoft DiskGeeker is worth a shot, which informs users of potential issues, allows for prompt repairs, and minimizes the risk of data loss.
Approach 4: Run Disk Utility First Aid
You can also run First Aid in Disk Utility to troubleshoot the USB hard drive, which always checks for drive issues and repairs them automatically as expected. Here is how to perform that:
- Open Finder > Applications > the Utilities folder. Then, open Disk Utility.
- Click View at the upper-left corner and select Show All Devices to list all detected disks and volumes.
- Select the target disk or volume on the left sidebar.
- Click First Aid and then select Run on the pop-up window.
- Stop any operations during the check and repair process, then wait until the First Aid finishes running.
Running First Aid to repair the Mac's internal hard drive also makes sense, since it might be Finder's fault for not showing files on the Mac.