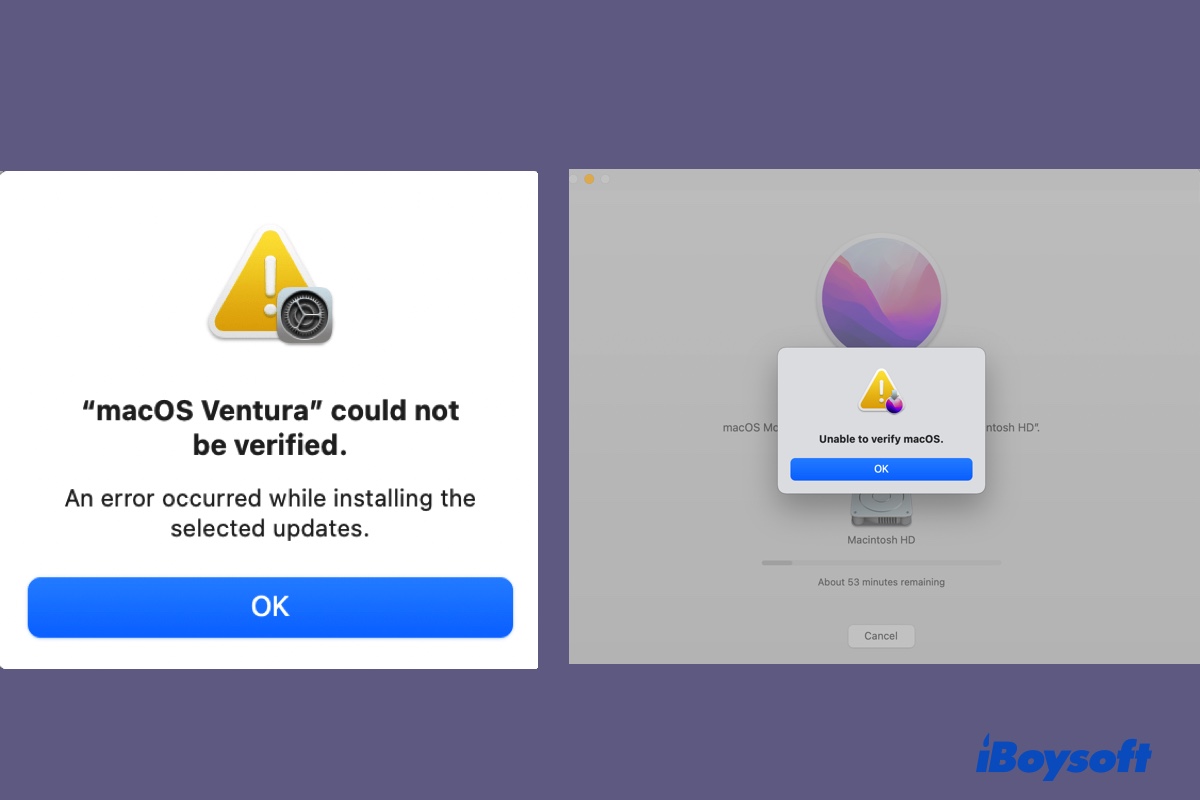
Installing or upgrading macOS may be straightforward, but it's also prone to errors. The verification errors, "Unable to verify macOS." and "macOS (version) could not be verified," are two of the common ones.
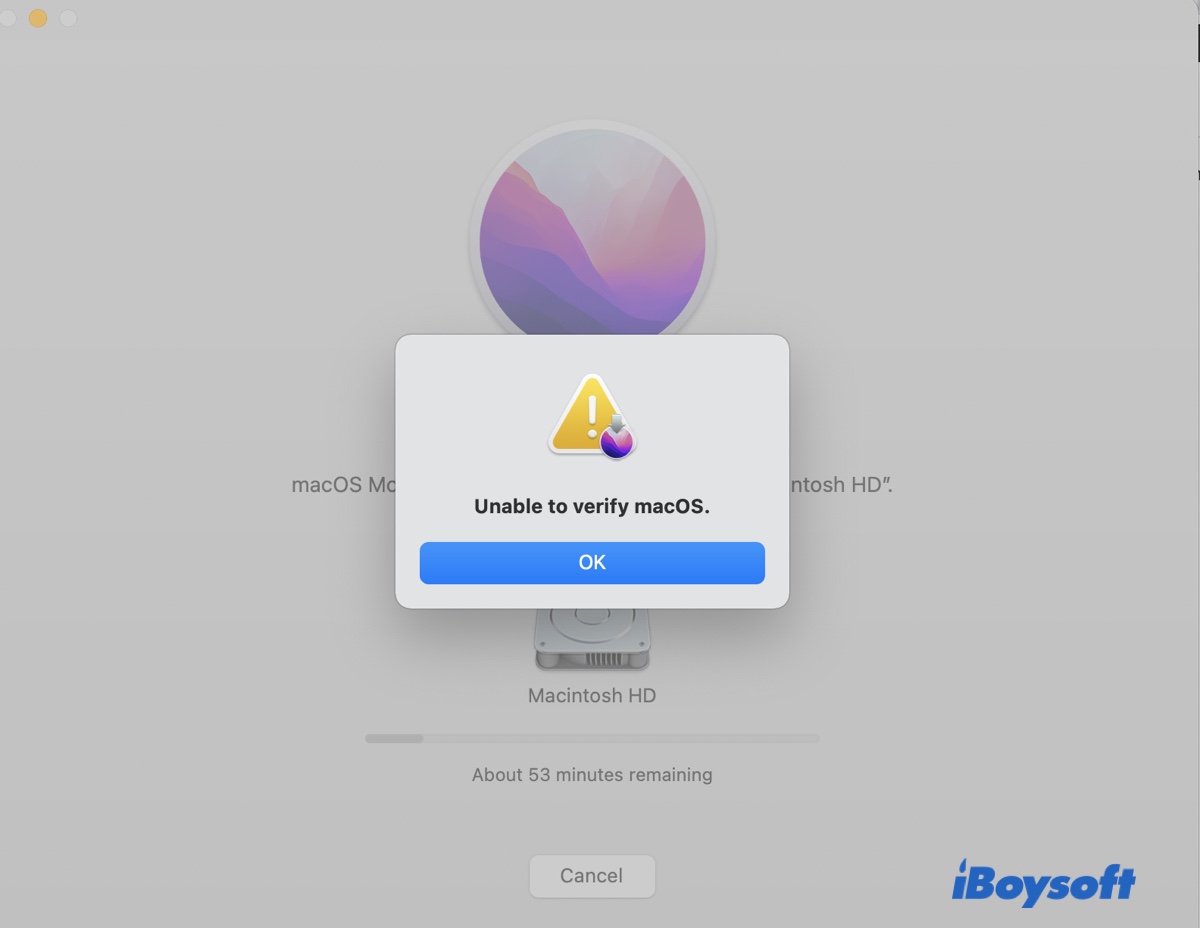
"Unable to verify macOS." occurs when you fail to install the macOS to the selected internal hard drive or external disk. It has been reported to happen when reinstalling, upgrading, or updating to macOS Ventura, Monterey, Big Sur, Catalina, etc.
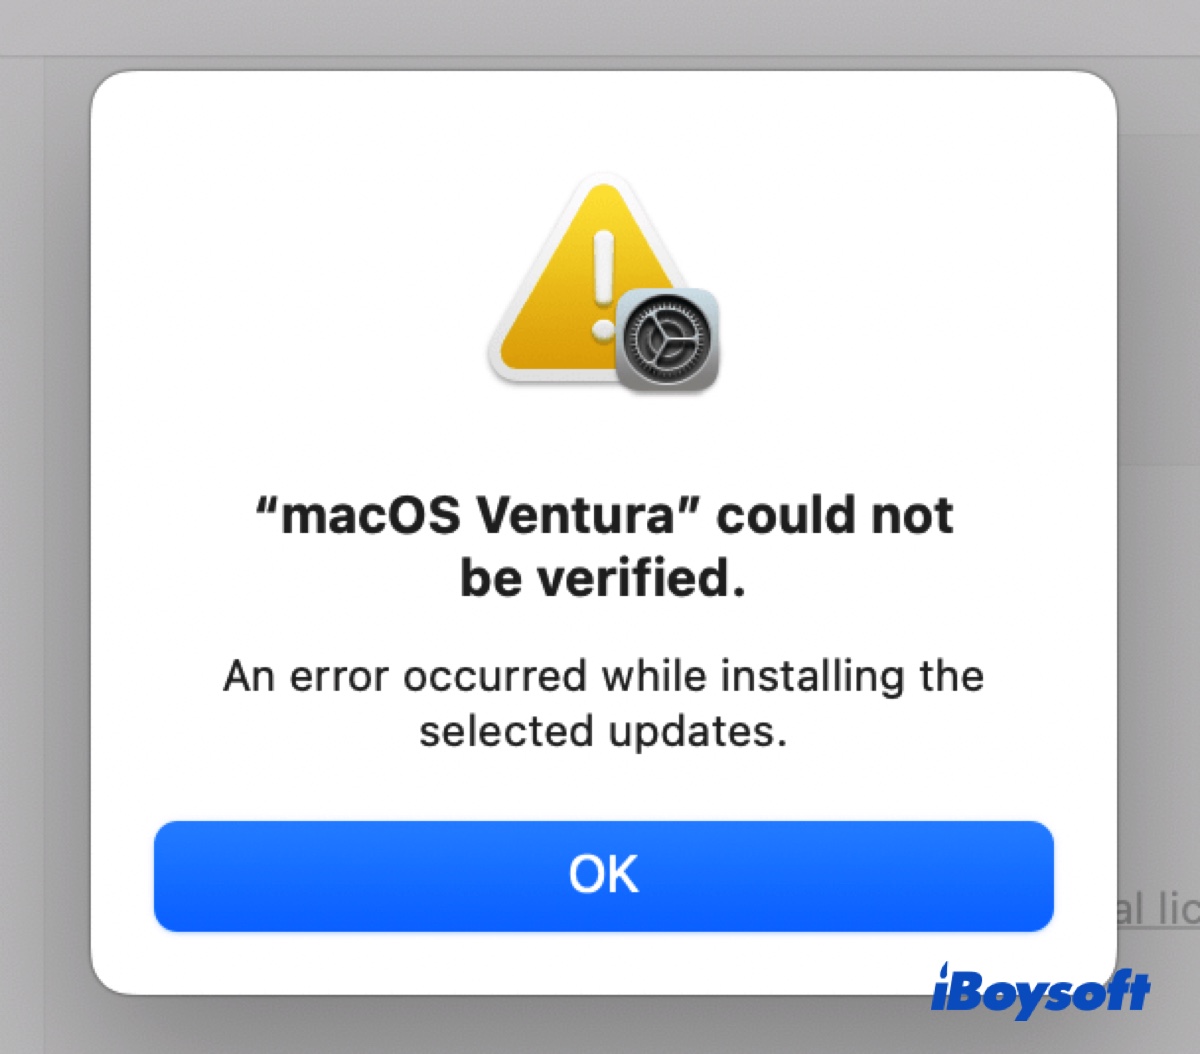
"macOS (version) could not be verified. An error occurred while installing the selected updates. " pops up after downloading the software update. Depending on the macOS version you're upgrading to, you'll likely receive one of the following messages.
- "macOS Ventura" could not be verified.
- "macOS Monterey" could not be verified.
- "macOS Big Sur" could not be verified.
- "macOS Catalina" could not be verified.
Here, we put together the proven fixes to the errors and help you install the desired macOS version. Before heading to the solutions, let's start by understanding why your Mac was unable to verify macOS Ventura or other releases.
Why is your Mac unable to verify macOS?
There're various reasons why you receive the error, "Unable to verify macOS." or, for example, "macOS Ventura could not be verified." when installing or upgrading macOS. Here's a list of the most likely causes:
- Unstable internet connection
- Interferences from third-party apps like VPN
- Temporary system glitches
- Incorrect date and time settings
- Disk errors on the startup disk
- Corrupted macOS installer
Now that you have a sense of the possible culprit, read on to resolve the issue.
Click the button below to share why your Mac is unable to verify the software update with others.
Fix 'macOS Ventura could not be verified' & 'Unable to verify macOS' when updating macOS
Since the two verification errors can appear on any macOS version, you can use the solutions below to resolve the issue. Here are some sample scenarios that the fixes apply to:
- Encountering "Unable to verify macOS" when installing Ventura, Monterey, Big Sur, Catalina, or earlier.
- Seeing "macOS Ventura" could not be verified."
- Experiencing "macOS Monterey" could not be verified."
- Getting "macOS Big Sur" could not be verified."
- Receiving "macOS Catalina" could not be verified."
The list of fixes to try if a macOS update could not be verified:
- Fix 1: Check the system status page
- Fix 2: Check the internet connection
- Fix 3: Retry downloading and installing macOS
- Fix 4: Check your Date & Time settings
- Fix 5: Enable Content Caching on All Content
- Fix 6: Install macOS from App Store
- Fix 7: Boot into Safe Mode
- Fix 8: Repair your startup disk
- Fix 9: Check the Firewall Settings
- Fix 10: Install macOS from Internet Recovery
- Fix 11: Allow booting from external drives (installing macOS on external drives
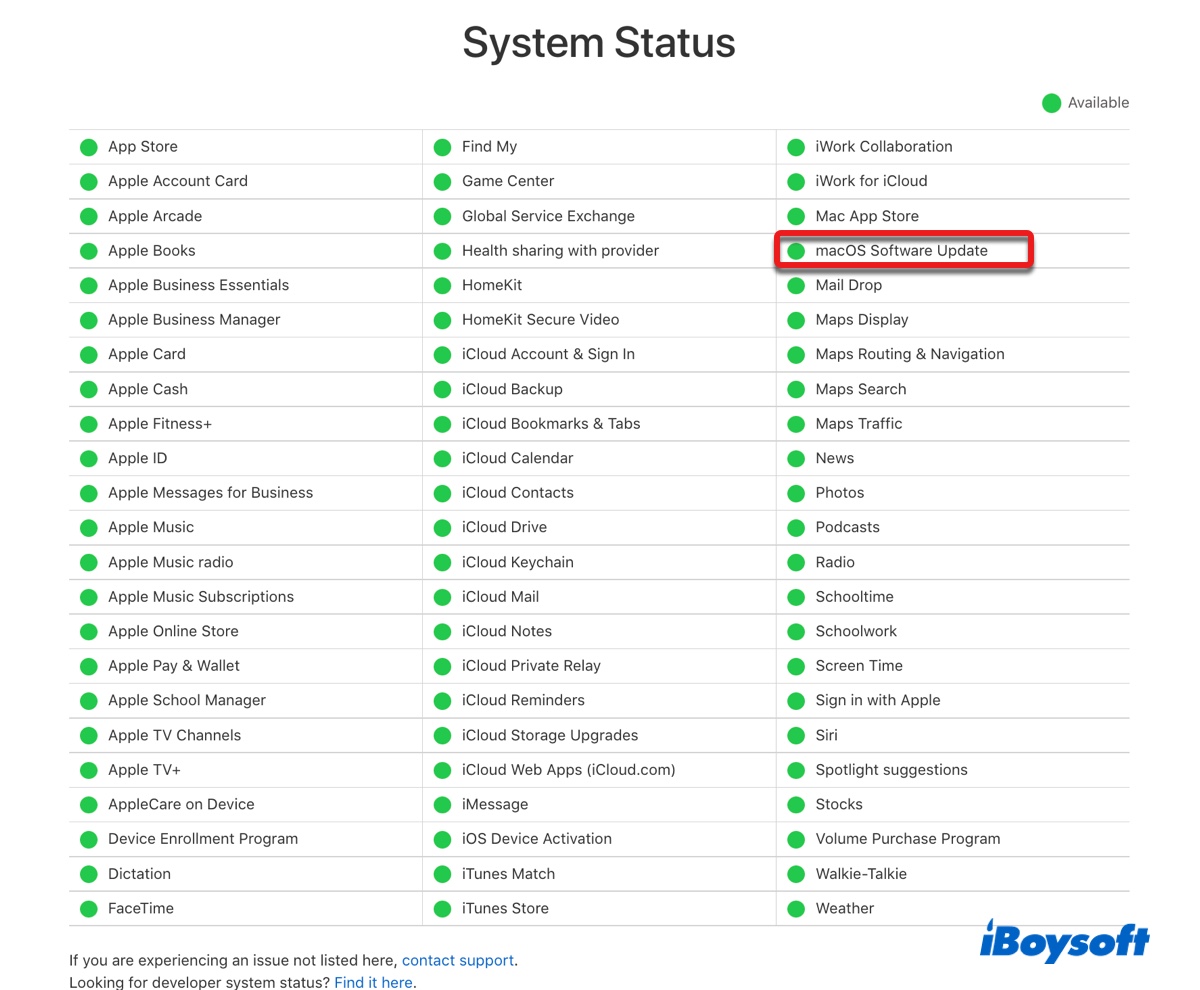
Check the system status page
Your first step should be to check Apple's status page to see if "macOS Software Update" is experiencing an outage. If it is, you don't need to do anything but wait. Otherwise, you can start troubleshooting with the following solutions.
Check the internet connection
A poor or interrupted internet connection can lead to failures at installing a new macOS update with error messages like "macOS Ventura could not be verified" or "Unable to verify macOS." Therefore, you should check the internet connection following the tips below:
- Disable other devices from using the WiFi to ensure maximum bandwidth.
- Try an Ethernet cable.
- Restart your router or modem.
- Sit your Mac close to the router.
- Disconnect and reconnect to the network.
- Disable your VPN agent or security software, such as Netscape. (Must try!)
- Connect to a different WiFi. The current WiFi network may be blocking the update server.
If you're certain you have a strong and stable internet connection and have disabled VPN or other security software, retry the installation. If the issue persists, continue with the next solution.
Retry downloading and installing macOS
It's a good idea to delete the installer (if any) and retry downloading and installing the macOS update after a reboot. However, if you're upgrading to macOS Ventura from the Software Update preference pane, there's likely no installer to delete as it downloads only the needed files that are required to upgrade your current OS to Ventura but not the full installer.
So, if your Mac is unable to verify macOS Ventura, simply reboot your Mac and update macOS from System Preferences again.
If your Mac is unable to verify macOS Monterey, Big Sur, Catalina, or earlier, delete the installer (labeled similar to "Install macOS Monterey") from the Applications folder, empty the Trash, then restart your Mac and install the update again.
Note: Suppose you see an old installer left after a previous update. Delete it as well.
Just so you know, some users repeated the update process 7 times to finally get the job done. So, keep trying.
Check your Date & Time settings
Incorrect Date & Time settings can also render macOS unable to verify a software update. You can take the following steps to check and correct it:
- Open System Preferences > Date & Time.
- Tap the yellow lock at the bottom-left and enter your password to unlock the pane.
- Tick the box next to "Set date and time automatically."
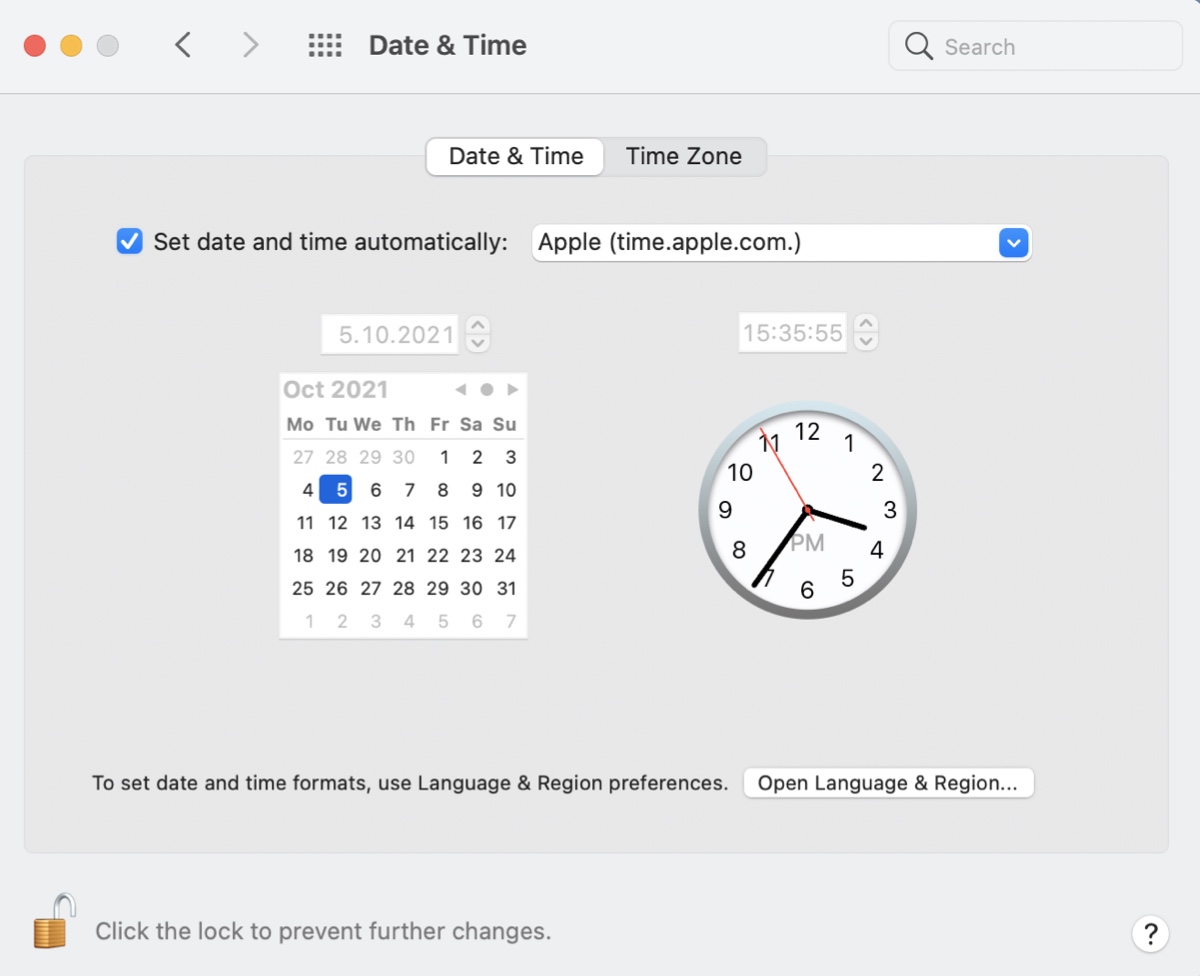
- Click "Time Zone."
- Check the box next to "Set time zone automatically using current location."
- Tap the lock to save the changes.
- Restart your Mac.
- Try installing macOS again.
If the options are already checked, uncheck them, reboot your Mac, then go back to "Date & Time" to re-enable them again.
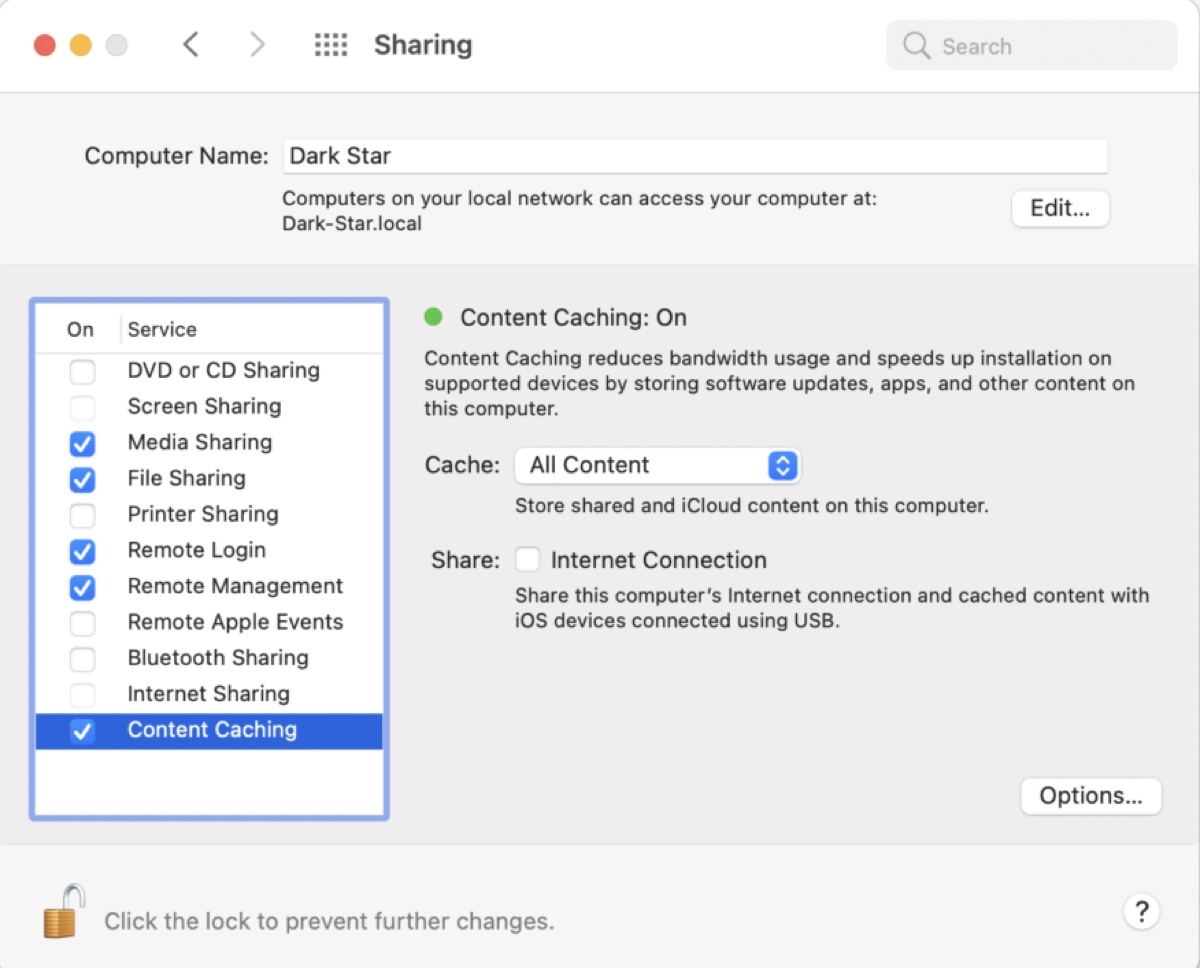
Enable Content Caching on All Content
Content Caching is a Mac feature that caches the downloaded software or data from iCloud on your Mac and makes them available to other Apple devices on the same network. With it configured, you only need to download the software or app update on your Mac once, after which, the updates will be accessible to other devices without downloading from the internet.
While this doesn't sound relevant to the verification error that much, there're cases where users fixed the error, "macOS Monterey could not be verified," by enabling content caching on all content. Hence, it's worth trying, even if you're installing a different release.
- Open System Preferences > Sharing.
- Check the box next to Content Caching to enable it.
- Select "All Content" in the drop-down menu next to Cache.
After that, retry downloading and installing the update. If the first attempt fails with an error like "macOS Ventura could not be verified," try the second time.
Install macOS from App Store
If you haven't tried to update your Mac from App Store, now is the time. You can open App Store and search for the release you want to install, then click Get to download it. This way, you'll have the full installer downloaded to your Applications folder.
If App Store doesn't have the installer, click this link to get it.
When the installer is downloaded, it should automatically run on your Mac, allowing you to install the update on a selected disk.
Boot into Safe Mode
You can also update your Mac in Safe Mode. It is a great way to troubleshoot errors on Mac, as it loads only the required components, verifies your startup disk and attempts to fix directory issues, and cleans system cache files.
Try downloading and installing the update in Safe Mode and see how it goes. Note that the process to restart your Mac into Safe Mode is different on Apple Silicon (M1 & M2) and Intel-based Macs.
Repair your startup disk
It's possible that your startup disk has disk errors, causing the verification to fail with an error like "macOS Monterey could not be verified." To check and repair your startup disk, you need to run Disk Utility First Aid in macOS Recovery.
Here's how to do it:
- Boot into Mac Recovery Mode.
- Click Disk Utility > Continue.
- Select View > Show All Devices.
- Choose the last internal volume from the left sidebar.
- Click "First Aid."
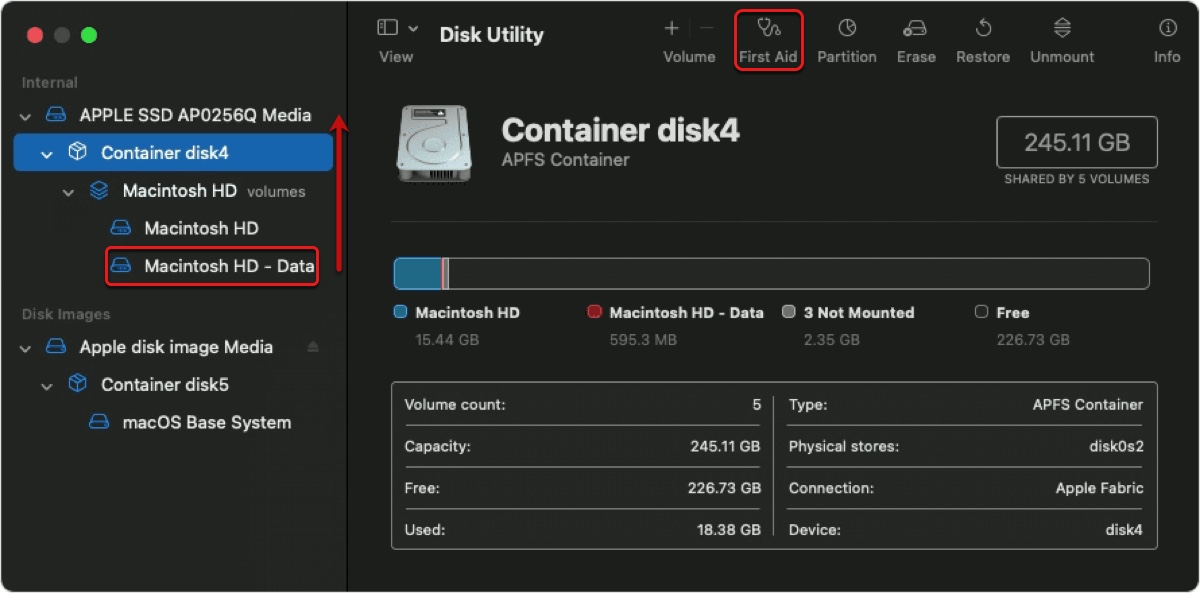
- Once the scan is complete, continue scanning the second last volume until the top disk (e.g. Apple SSD) is checked.
If Disk Utility reports no error, you can restart your Mac and retry updating macOS.
If Disk Utility reports an error, fix the error first.
Check the Firewall Settings
Make sure your Firewall is not set to block incoming connections. Otherwise, you can't run the installer correctly.
- Open System Preferences > Security & Privacy.
- Select Firewall.
- Tap the lock and enter your password.
- Uncheck the box next to "Block all incoming connections."
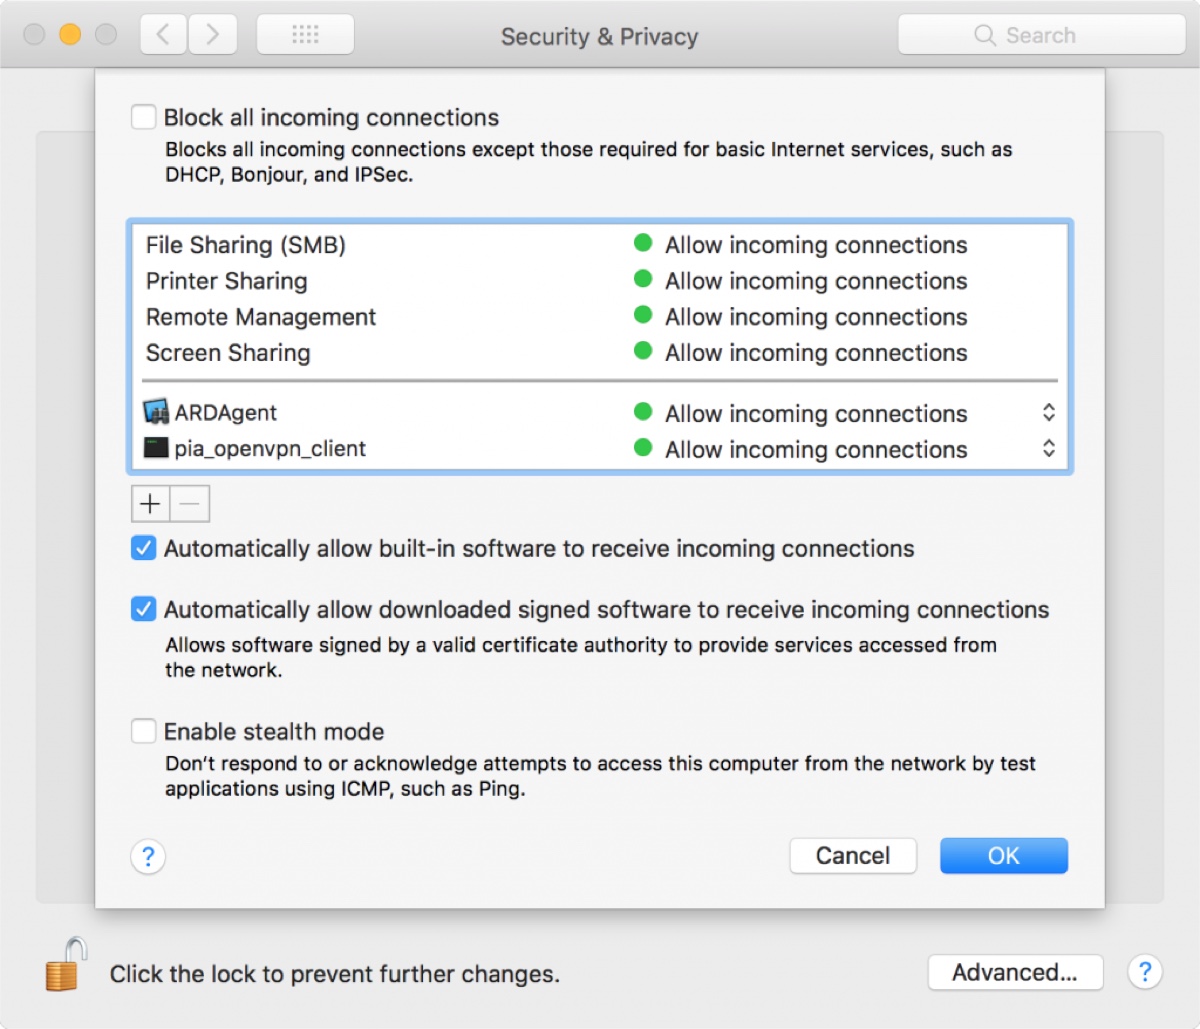
- Enable "Automatically allow built-in software to receive incoming connections."
- Enable "Automatically allow downloaded signed software to receive incoming connections."
Install macOS from Internet Recovery
Alternatively, you can update or upgrade your Mac from Internet Recovery Mode. It enables you to reinstall macOS and upgrade to the newest macOS release available to your Mac. Reinstalling macOS as guided below will keep your files and personal settings intact.
On an Intel-based Mac:
- Restart your Mac.
- Immediately press and hold the Option + Command + R keys when the screen turns black.
- Release the keys when seeing the spinning globe.
- Choose an administrator account and enter the password if required.
- Click Reinstall macOS (version) > Next.
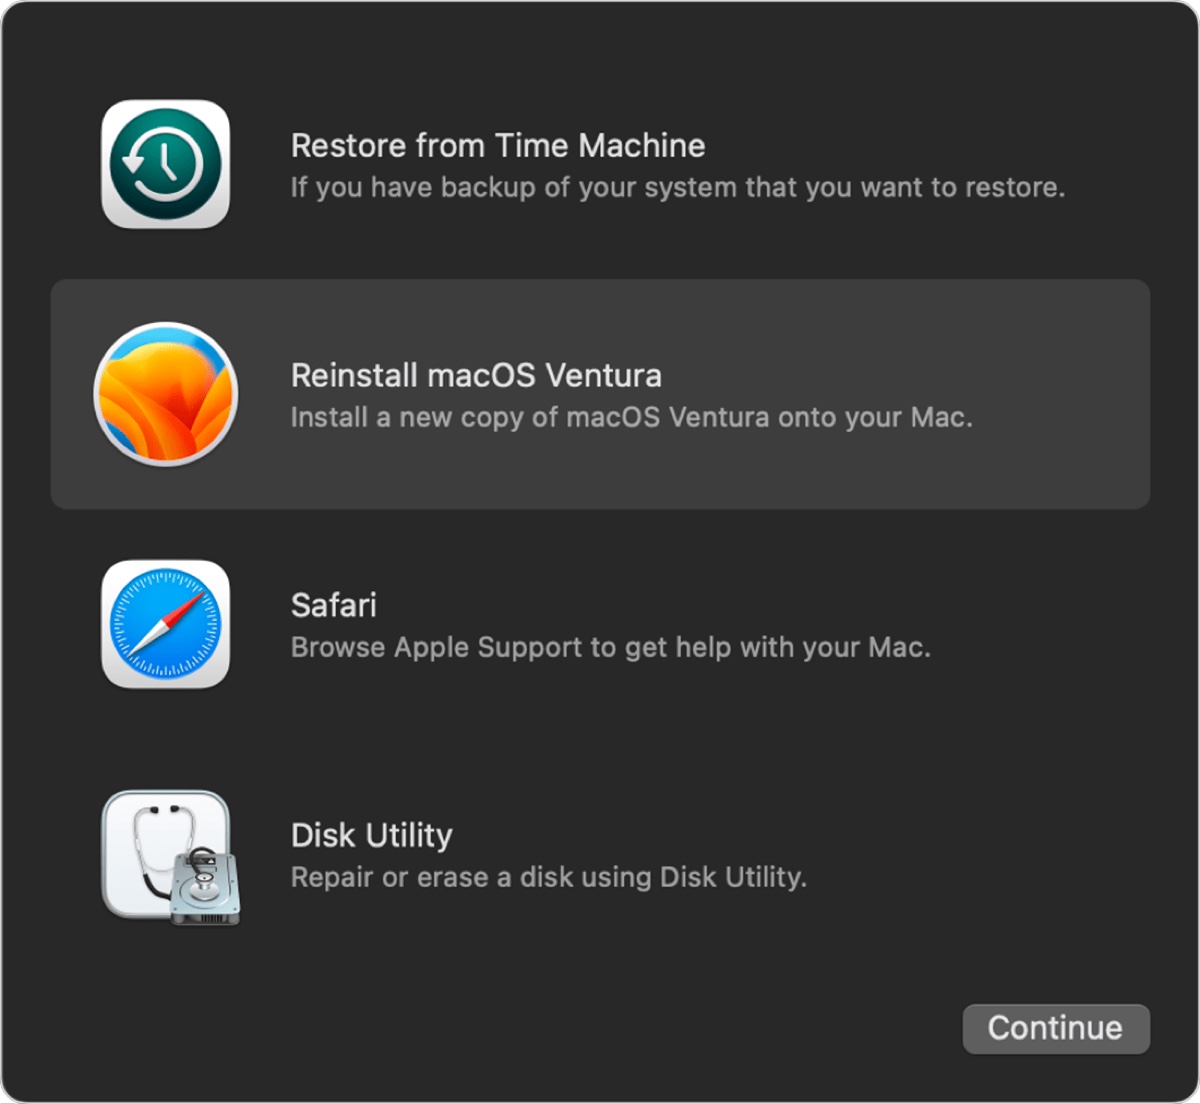
- Follow the instruction to install the update.
Things are slightly different on Apple Silicon Macs. They only allow you to reinstall the macOS currently installed on your Mac and update it to its latest version.
On an Apple Silicon ( M1 & M2) Mac:
- Shut down your Mac.
- Press and hold the power button until "Loading startup options" shows up.
- Click Options > Continue.
- Choose an administrator account and enter the password if needed.
- Tap Reinstall macOS (version) > Next.
- Follow the instruction to install the update.
Updating from macOS Recovery should have bypassed errors similar to "macOS Ventura could not be verified." But if you still receive "Unable to verify macOS" on Recovery Mode, you should consider erasing your Mac.
Erase your Mac
The last resort is to format your startup disk and then reinstall macOS. This will fix all kinds of software issues, including those the verification errors result from if that's your case. But erasing your Mac will delete all data on your Mac, so you need to back up your Mac with Time Machine before getting started.
Here are a few options about how you can update your Mac:
- Format your startup disk, click "Reinstall macOS" to reinstall the operating system, then update or upgrade your Mac from System Preferences.
- Create a bootable USB installer with the macOS you want to upgrade to, boot from the USB, format your startup disk, then click "Install macOS" to get the update.
A Detailed Guide on How to Clean Install macOS Ventura
Here's a guide to erase your Mac and install macOS Ventura with detailed steps. Read more >>
Allow booting from external drives (installing macOS on external drives)
Macs with the T2 chip forbid booting from external drives by default. If you encounter the error reading "Unable to verify macOS." when installing macOS on an external drive, you may need to configure your Mac to allow booting from external media.
- Restart your Mac.
- Immediately press and hold the Command + R keys when the screen turns black.
- Release the keys when seeing the Apple logo.
- Select an admin user account and enter the password if asked.
- Click Utilities > Startup Security Utility.
- Click "Enter macOS password."
- Select an admin user account and type in the password.
- Enable "Allow booting from external or removable media."

Now, you can retry the installation.
Share this post if you find it helpful.
Fix 'Unable to verify macOS' when reinstalling macOS
If the "Unable to verify macOS" error pops up when you're trying to reinstall macOS on Recovery Mode, use the following solutions to resolve it.
Change Date & Time using Terminal
Your Mac's date and time must be correct for the installation to complete. Therefore, you should check whether the date and time are correct with the steps below.
- Restart your Mac into Recovery Mode.
- Click Utilities > Terminal.
- Type in the following command and hit Enter to verify your Mac's date.date
- If the date and time are incorrect, execute the following command to correct them. ntpdate -u time.apple.com
- If you don't have internet access, run the following command to manually reset the date and time. (e.g., October 24 2022 at 18:30)date 1024183022
- Exit the Terminal app and reinstall macOS.
Reinstall macOS in Internet Recovery
If your Mac is Intel-based and the error appears in Local Recovery Mode (Command + R), it's advisable to try the Internet Recovery Mode. As the name implied, you'll need internet access to enter internet recovery. There are two keyboard combinations you can use to boot into Internet Recovery Mode.
- Option + Command + R: Reinstall macOS and upgrade to the latest macOS version compatible with your Mac.
- Shift + Option + Command + R: Reinstall the macOS version that shipped with your Mac or the closest version that's still available.
Follow these steps to reinstall macOS:
- Shut down your Mac.
- Press the power button, then immediately press and hold one of the combinations above.
- Let go of the keys when the spinning globe shows up.
- Click "Reinstall macOS (version)," then click Continue.
- Follow the onscreen instructions.
Install macOS from a bootable installer
If the installation continues to fail in Internet Recovery, you can install the update through a bootable macOS installer. That requires you to first make a bootable installer with the version of macOS you intend to install, then boot from it and click "Install macOS (version)."
Erase your Mac
If the above fixes didn't do the trick, you need to back up your Mac, then erase the drive. After that, you can retry reinstalling macOS from the local or internet recovery mode, or the bootable installer.
Share this post to benefit more Mac users.