The image being high-resolution and high-definition takes up too much space. You must want an image resizer that is able to scale down a big image file and make it more sendable or storable.
This article offers you 6 multiple methods on how to resize an image on Mac computers, whereat Mac native solutions and a third-party utility are included. Let's get started then.
How to resize an image on a Mac via iBoysoft MagicMenu?
A big image file not only runs too much space on your device but also takes more time to transfer. In such a case, making an image size smaller is a must.
iBoysoft MagicMenu is a wonderful utility that allows you to cut down the storage space spent on a big image file by compressing. It consists of three compression levels, including High level, Middle level (default), and Low level. The higher the level you choose, the smaller the archive size and the longer the compression process will be.
Moreover, iBoysoft MagicMenu allows you to complete batch-compression work at once. When you get a slew of images that need to be resized, making use of iBoysoft MagicMenu to compress them is highly recommended.
With a user-friendly interface, the image resizing work via iBoysoft MagicMenu is as easy as an apple pie. Read and follow the given steps below:
Step 1: Free download and install iBoysoft MagicMenu on your Mac computer.
Step 2: Right-click on the selected folder or files and choose Compress.
Step 3: Set a password to protect files and folders on your Mac. (Optional)
Step 4: Choose a compression level from the High level, Middle level (default), and Low level.
Step 5: Click Compress and select a destination to save your compressed files. 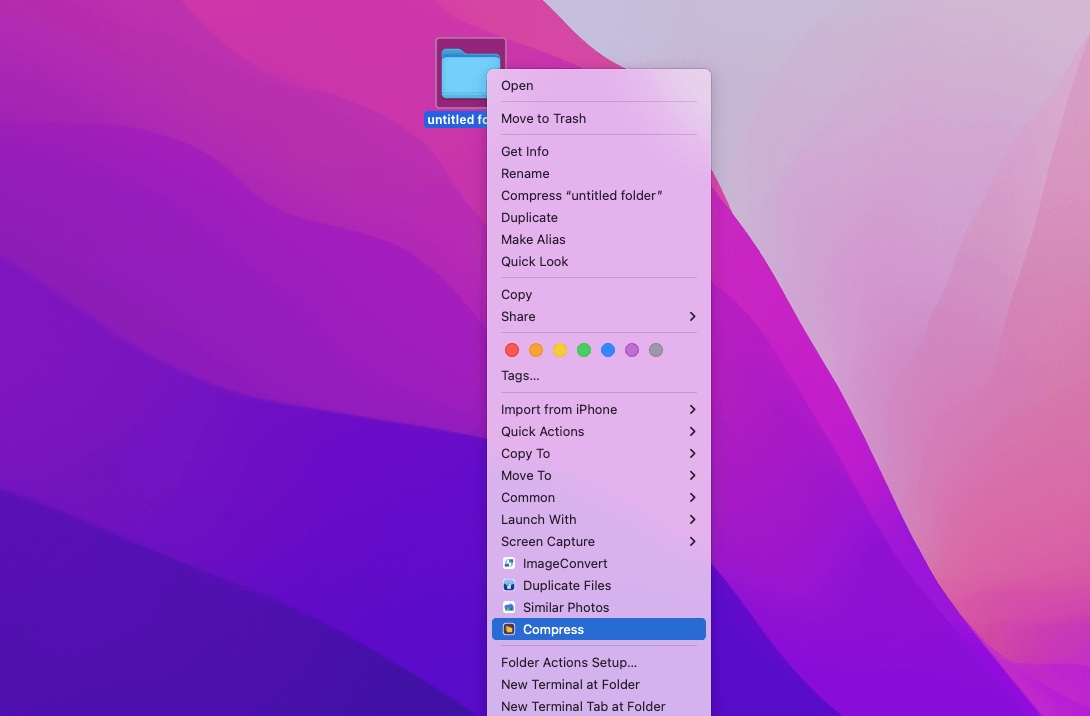
You can click the Add Files button on the compression window to add more images as well to scale down batch images in one go. This versatile offers support for macOS 13 Ventura, 12 Monterey, 11 Big Sur, 10.15 Catalina, macOS 10.14 Mojave, and macOS 10.13 High Sierra. Moreover, Intel-based Macs and M-series chip Macs (later M3 Apple Silicon Macs included) are fully supported.
If you find this software useful, why not share it with more people?
How to resize an image in Preview on Mac?
Preview, a built-in app on macOS, is the default viewer for images and PDFs. If you double-click a PDF, JPG, PNG, or any other image file on a Mac without changing settings, it will automatically open in Preview. Aside from opening images and converting image file format, it is also able to resize an image with several steps on your Mac.
- Just keep reading to get to know how to resize an image in Preview on Mac:
- Open the image file that you want to modify in the Preview app.
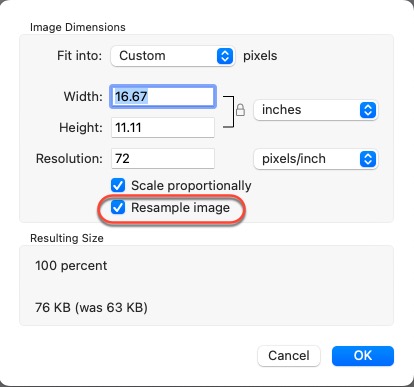
- Select the Tool tab in the context menu and then click Adjust Size.
- Select Resample image. You have to check Resample image if you want to reduce the size of the image files or the file size will not change.
- Enter a smaller value in the Resolution file and the new size will be shown at the bottom.
If you want to resize the file size of multiple images at the same time, just display the images in the same window, select them in that window's sidebar, select Tools, and click Adjust Size to proceed with the resizing process.
How to resize an image in the Photos app on Mac?
The Photos app is an image library that syncs all the photos and videos taken or stored by Apple devices so you can access them at any time and on any device. It is capable of displaying, editing, and managing photos in a fast and easy manner. If you have a mind to resize photos, the Photos app is a nice alternative.
- Launch the Photos app on your Mac device.
- Click the File tab on the upper left corner of your Mac desktop.
- Select Export from the dropdown menu and then click Export 1 Photo.
- Click the downward arrow to expand the context menu bar.
- Determine the photo format, quality, and color profile in the Photo Kind, JPEG Quality, and Colour Profile boxes correspondingly.
- Switch to the Size tab where you can resize the selected photo.
- Expand the arrow to select Custom.

- Expand the Max box and then determine the Width value, Height value, and Dimension value one by one.
- Complete the Info box and File Naming box as you like or just let it default.
- Click the Export button to confirm your actions.
From now on, you have finished the image resizing task successfully. If you have more than one photo that needs to be resized, go to multiple-select them in the Photos app and proceed with the steps mentioned above. Note that the photos you resized will have the same width, height, and dimension values.
Much appreciated if you'd like to move one finger and click the Share button below to help more people!
How to resize an image in Apple Pages on Mac?
The Apple Pages app works as an amazing replacement for a text editor on your macOS computers if you have no Microsoft Office for Mac. Aside from simple texting, it comes with a handy way to resize images in every Pages file and document.
Follow the given steps to resize images in the built-in Apple Pages app:
- Open the Apple Pages and select the document that contains an image that you'd like to resize.
- Click the image that you intend to modify.
- Click the Arrange section in the right panel.
- Switch to the Size tab and determine the Width and Height values as you like.
- Check Constrain proportions if you want to keep the image proportions so that the height will be adjusted to maintain the proportions automatically.
The images' dimensions will follow automatically the Height value that you modified.
How to resize an image in Automator on Mac?
On top of scheduling an email on Mac, the Automator app also works perfectly in resizing an image. Let's create a workflow to make the Automator automate repetitive tasks in batches on your Mac via point-and-click or drag-and-drop so that lots of time and effort are needn't any longer.
- Launch the Automator on your macOS device.
- Click on File and then select New from the dropdown menu.
- Select Quick Actions in the home window.
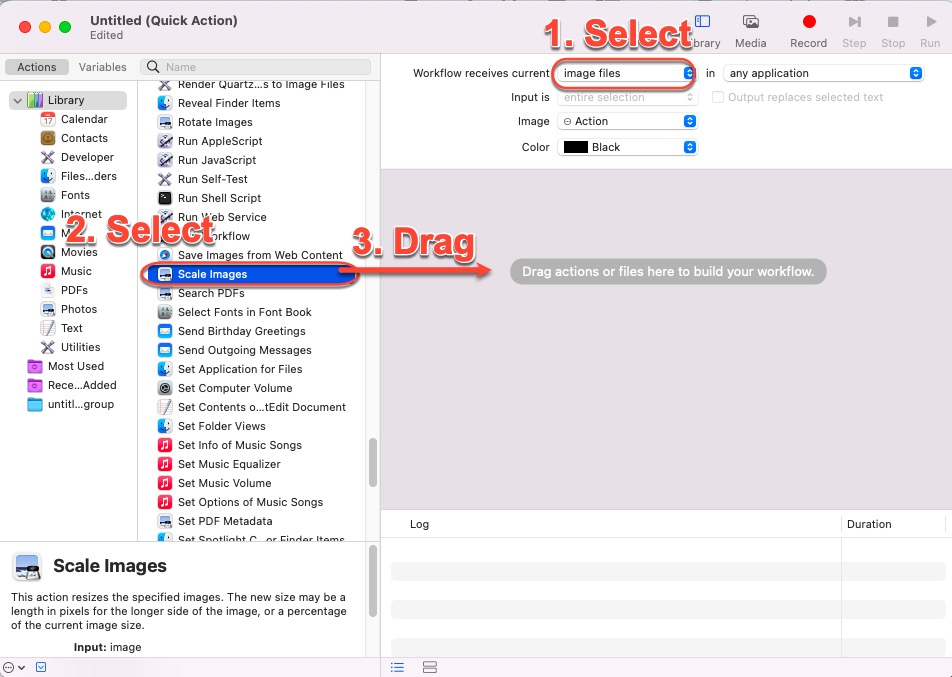
- Select Image files from the Workflow receives current box on the homepage.
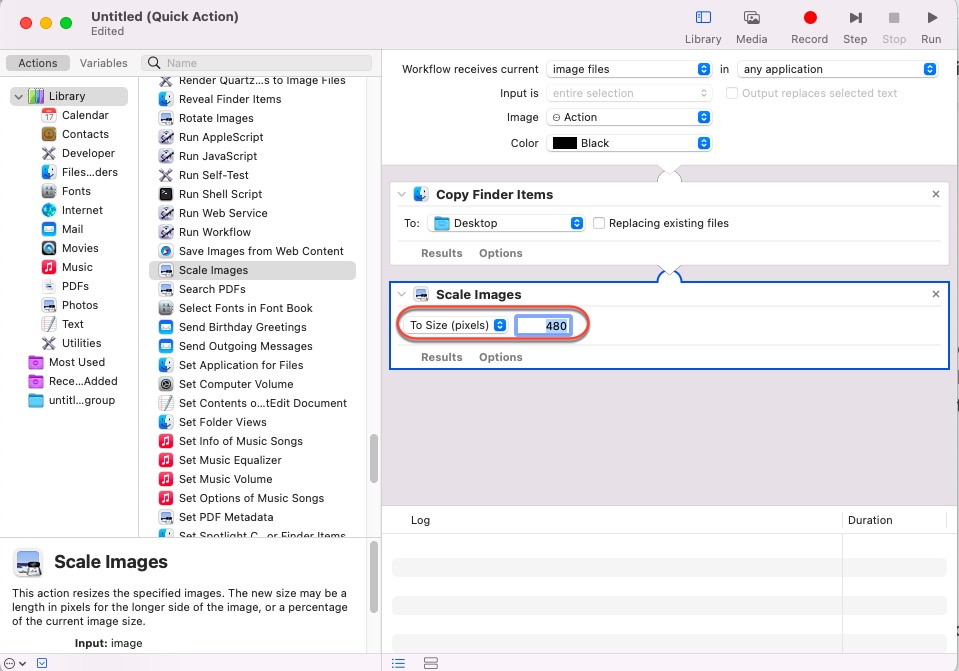
- Select Scale down in the left menubar of the Automator window. Drag the Scale down to the right blank space.
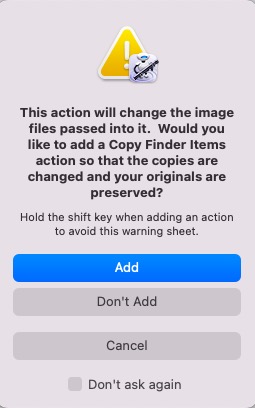
- Note that you'll be prompted a window saying that you like to add an additional task to the workflow so that the original images will be preserved. Otherwise, all your original images will be overwritten by the resized ones.
- Determine the Size value in the Scale Images tab. All the images will be resized to this value afterward as long as you run this workflow.
- Click the File and select Save to keep the workflow well.
- Rename the workflow or let it default and click Save to confirm your actions.
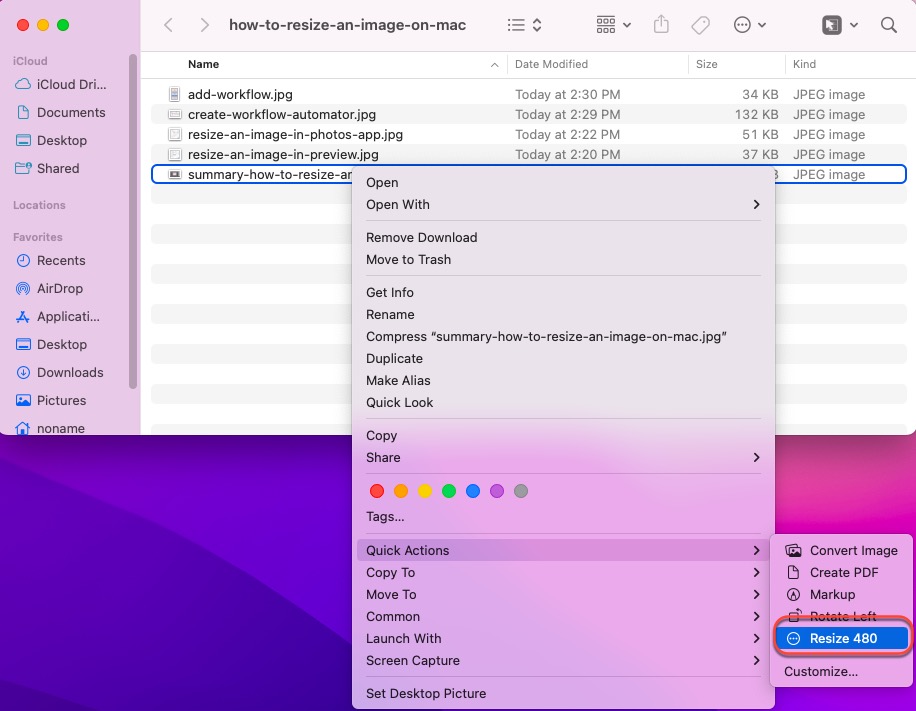
When you want to resize images, right-click it and then select the workflow from the dropdown menu, all the images that you select will be resized automatically.
How to resize an image in the Mail app on Mac?
When attempting to transmit a huge image in the Mail app, you may want to downsize it there since an image that is too large will be blocked by the recipient's server owing to its size. Here are how to do that:
- Open the Mail app and begin to compose your email.
- Add the images that you're trying to send.
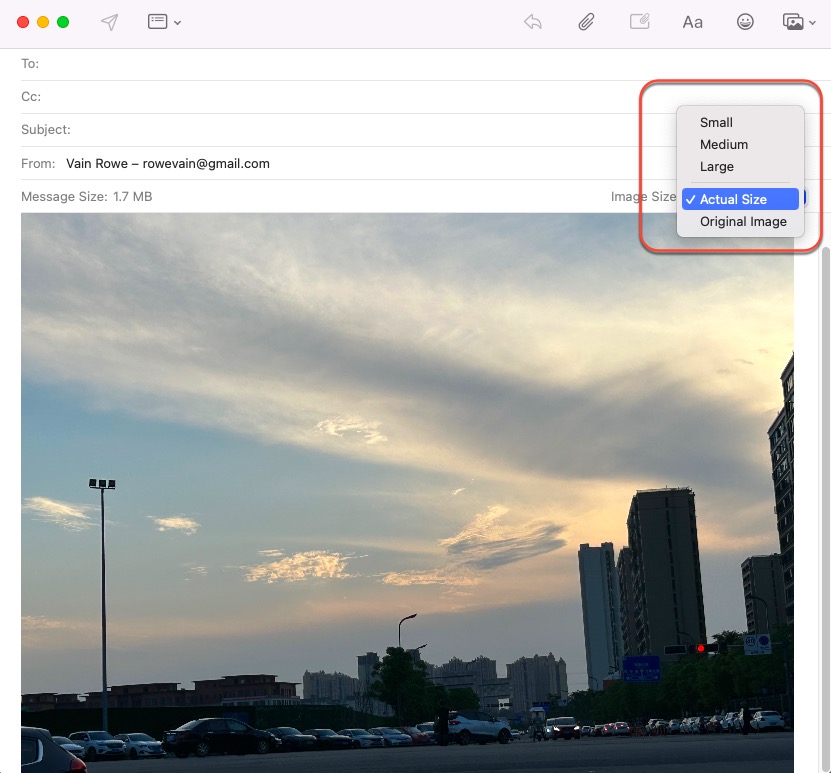
- Click on the drop-down menu next to Image Size on the right side of the message header.
- Choose between Small, Medium, Large, and Actual size. Do not choose the Actual size because it won't change your image size.
- Send your email then.
Conclusion
This post wraps up 6 specific ways how to resize an image on a Mac, both Mac built-in solutions and the third-party software are covered. Just read this article and try one as you like.
Also interested:
FAQ about how to resize an image on a Mac
- QHow do I resize a JPEG on a Mac other than Preview?
-
A
You can resize a JPEG via the Photos app, the Automator app, and the Pages app on your Mac.
- QHow do I change the size of a file in Preview?
-
A
Step 1: Open the image file that you want to modify in the Preview app.
Step 2: Select the Tool tab in the context menu and then click Adjust Size.
Step 3: Select Resample image.
Step 4: Enter a smaller value in the Resolution file and the new size will be shown at the bottom.