Over time, our computers tend to accumulate a lot of unnecessary files, applications, and data that can clutter up storage and slow down performance. Local disk D, often used as a secondary drive on many PCs, is no exception.
Regularly cleaning up disk D is essential to ensure your system runs smoothly and efficiently. In this article, we'll explore the main useful methods on how to free up disk D space on Windows.
The fastest way to clean up disk D
When it comes to cleaning up your drive D, you may consider removing the files or emptying the Recycle Bin, but they cannot clean up disk D completely. If you have too many files on your disk D, total cleanup may be more difficult. How to know all data sizes at a glance and delete them at once?
Here, iBoysoft DiskGeeker for Windows gives you the answer, which offers a comprehensive workaround for managing and optimizing your disk D space. With its intuitive interface, you can easily identify files from large to small in the visual mode, so you can quickly find and delete large files on Windows. The simple drag-and-drop click action can easily and conveniently delete the files.
Let's clean up disk D with iBoysoft DiskGeeker for Windows:
- Free download, install, and launch iBoysoft DiskGeeker for Windows.
- Select Specific folder analysis and wait for the scanning.
- Browse the results and focus on the files of disk D.
- Drag and drop unneeded data into the Trash Bin at the bottom of the window.
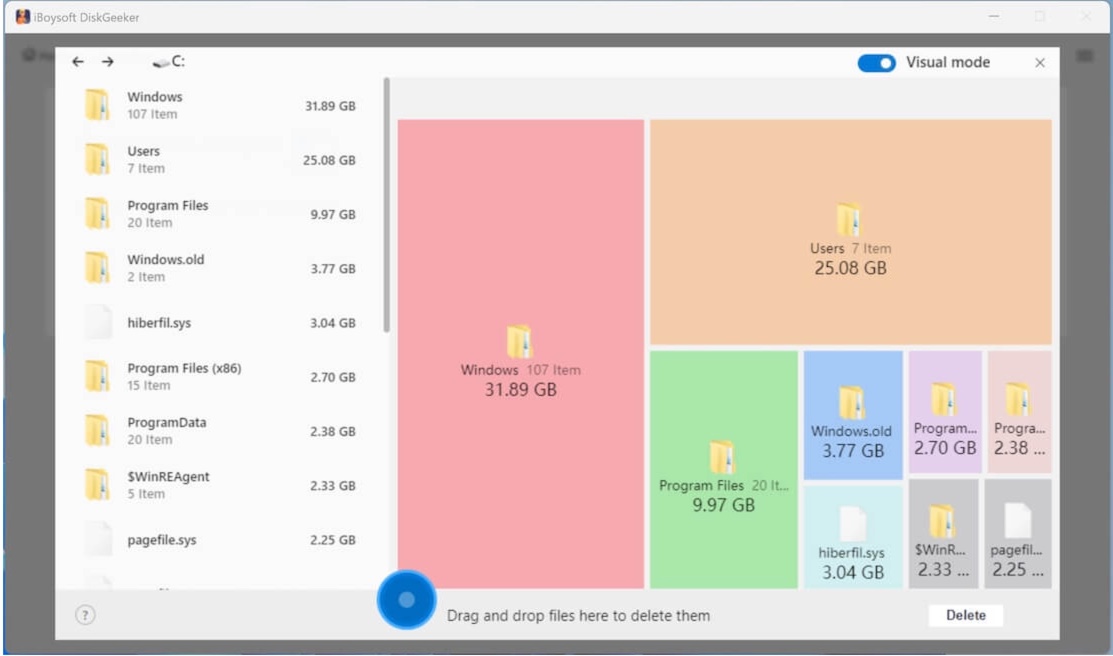
- Click Delete to permanently remove the files.
(Before this step, you can check the files again.)
If you receive the Low Disk Space error on Windows but find there are not a lot of files to delete, you can read this post to fix the Low Disk Space but nothing to delete issue.
What a delicate space cleaner iBoysoft DiskGeeker for Windows is! Why not download it now and share it with more people?
How to clean up disk D manually
If you wanna to try the troublesome solutions here, you're suggested to use them one by one, because none of them can clean local disk D completely.
# Clean up Disk D via Disk Cleanup
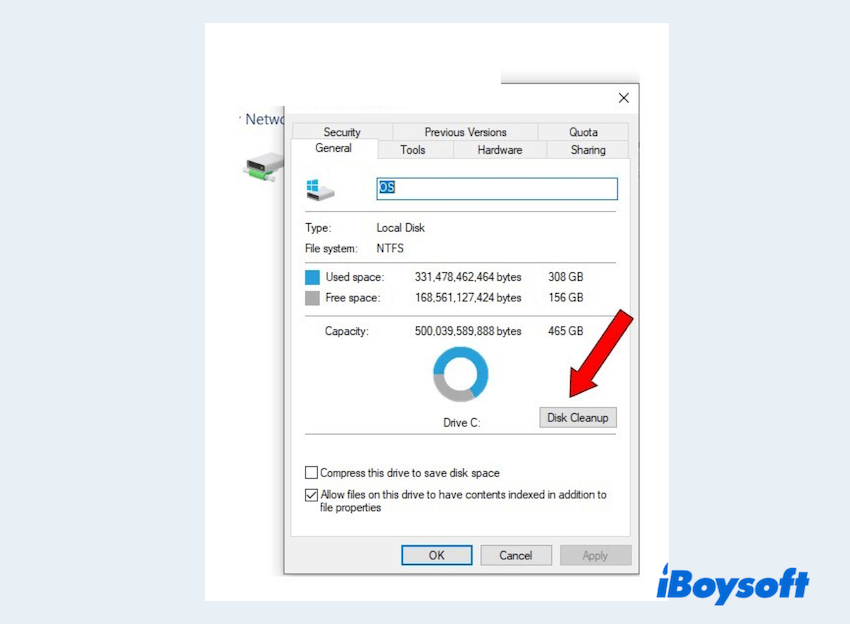
Windows comes with a built-in tool called Disk Cleanup that helps you remove temporary files, system cache, and other unnecessary items. To use it, you can:
- Open File Explorer then right-click on D: drive and select Properties.
- Click on the Disk Cleanup button.
- Select the types of files you want to delete.
- Click OK and then Delete Files to remove them.
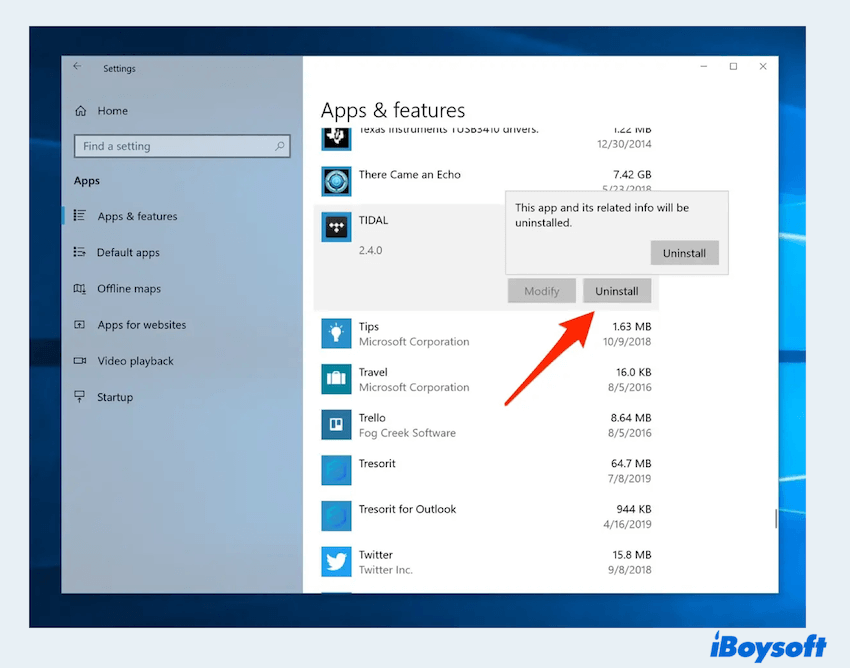
# Clean up Disk D via Unnecessary apps uninstalling
Over time, you might install apps that you rarely use or no longer need. Most users install apps on local disk D, not local disk C, for disk C is related to system operation. But these applications can take up significant space on your disk D. Just follow:
- Start menu > Settings > Apps.
- In the left menu, click Apps & features.
- Review the list of installed programs.
- Click Uninstall if you no longer need them.
# Clean up Disk D via Empty Recycle Bin
The Recycle Bin holds deleted files until you manually empty them. Some users set Disk D as the place to store files in the Recycle Bin. Also, these files still occupy space on your disk D, so make it a habit to regularly empty the Recycle Bin.
Right-click on the Recycle Bin icon on your desktop and select "Empty Recycle Bin" to permanently delete these files.
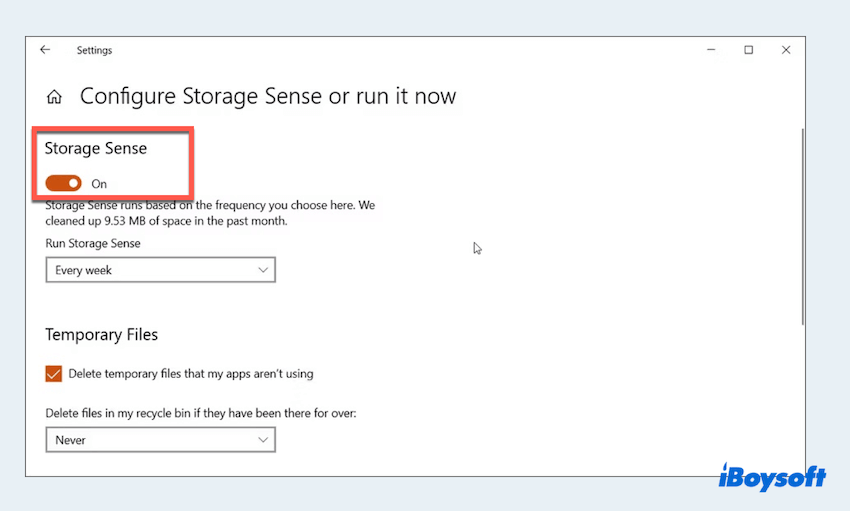
# Clean up Disk D via Storage Sense (Only Windows 10/11)
Windows 10 and 11 feature Storage Sense, an automated tool that helps manage your disk space. It automatically deletes temporary files, unused system files, and items in your Recycle Bin. To enable Storage Sense to clean up D drive almost full:
- Start menu > Settings > System > Storage.
- Toggle on the Storage Sense feature. You can also customize it to suit your needs.
- Click on Configure Storage Sense or run it now to manually start the cleanup process.
Now maybe you know how to clean up your local disk D, share our post. Or you can move to the next fix.
# Clean up Disk D via moving files to another drive or Cloud Storage
If you have large files such as videos, photos, or backups on Disk D, consider moving them to an external drive or Cloud Storage.
Services like OneDrive, Google Drive, or Dropbox offer substantial storage space and can help you free up local disk D without losing access to your files.
# Clean up Disk D via compressing files and folders
If you need to keep certain files on Disk D but want to save space, consider compressing them. Windows allows you to compress files and folders directly.
- Right-click on the large items, and select Properties.
- Click Advanced and check Compress contents to save disk space.
- Click OK to apply the compression.

# Clean up Disk D via disabling Hibernation(if applicable)
On some systems, Hibernation can take up a substantial amount of disk D space. If you don't use the hibernation feature, you can disable it to clean up local disk D space in Command Prompt:
- Open Command Prompt as an administrator.
- Type powercfg -h off and press Enter.
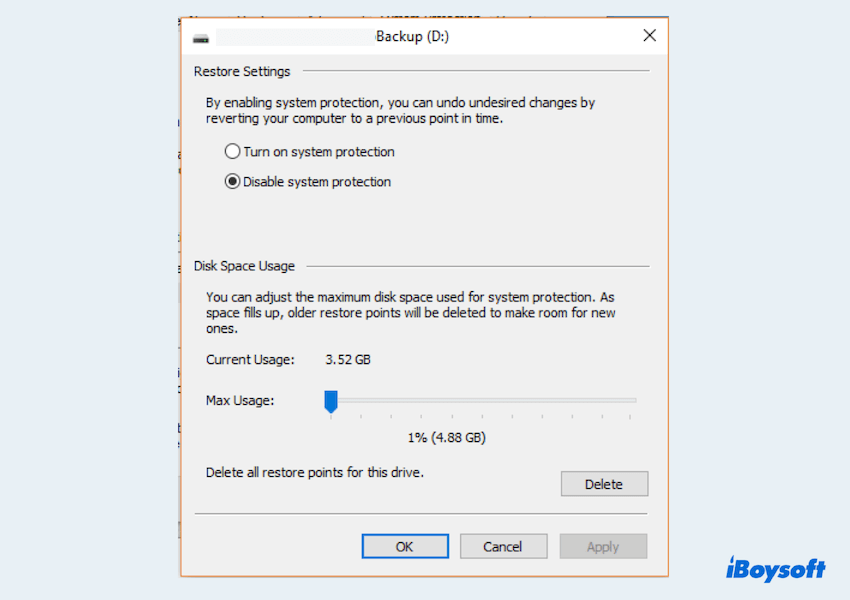
# Clean up Disk D via clearing system restore points
System Restore points are useful for recovering your system after an issue, but they can consume a lot of disk space like Disk D. To free up space on Disk D, you can delete all but the most recent restore point:
- Right-click on This PC > Properties > System Protection > Configure under the D: drive.
- Click Delete to remove all restore points, or adjust the maximum disk space used for restore points.
# Clean up Disk D via Defragment of the disk (HDD only)
For users with traditional Hard Disk Drives (HDD), defragmenting the disk can help optimize space and improve the performance of local Disk D full. Defragmentation reorganizes fragmented files so they occupy contiguous space, making your disk more efficient.
- Search for "Defragment and Optimize Drives" in the Start menu.
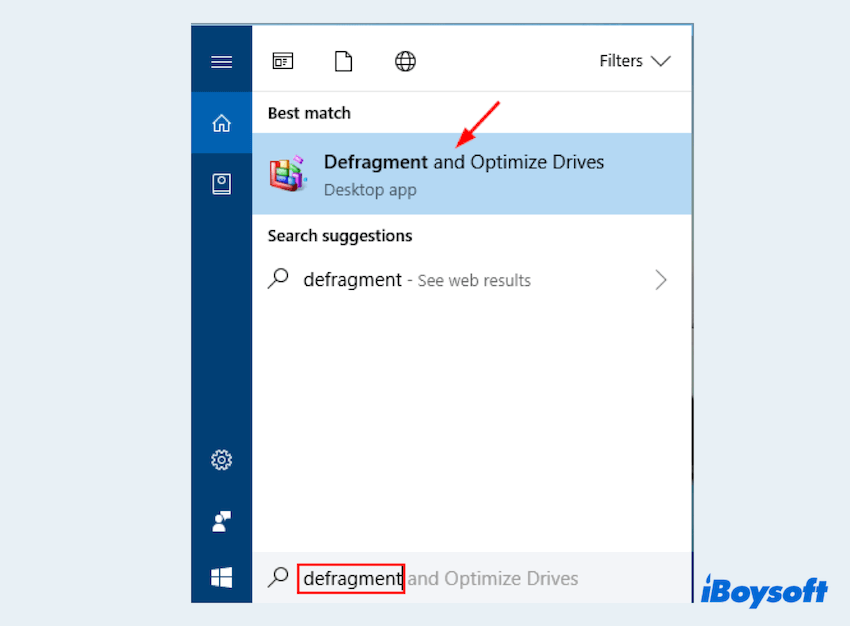
- Select Disk D, and click "Optimize."
Now you must have cleaned up local disk D and solved the issue local disk D is almost full, please share these ways to help more people.
Final words
Regular cleanup of Disk D is crucial to keeping your PC running smoothly. For saving time and effort, iBoysoft DiskGeeker for Windows can provide you with the quickest cleaning process and the complete removal of full disk D.
By implementing these strategies we talked, you'll ensure that Disk D remains an efficient and effective part of your computer's storage system.