Apple has a series of laptop or desktop products configured with high-end processors good at photos and videos advanced processing, such as MacBook Pros and Mac Pros. This makes many accumulating video clips and photo files (PNG, JPG, JPEG, HEIC, and TIFF ) need to be backed up for data safety and security.
As usual, you'd better choose external storage as the backup destination because any computer has a lifetime, which may cause data loss. But how to back up Mac photos to an external hard drive safely and quickly is a question.
No worries, this post comes to instruct you on how to back up photos on a Mac to an external hard drive with all workable solutions.
How to back up Mac photos to an external hard drive with iBoysoft MagicMenu?
Indeed the case that we photo and video personnel have a mother load of material to take good care of, and know how important these unfinished and finished files are. So we ought to make sure the photos are good and intact in the middle of or after transferring. Nevertheless, moving library photos to an external hard drive as backup is not as easy as we imagine.
For one thing, you have to isolate every interrupting factor in the backup, or it may go wrong. Patience is also necessary since the process may take long hours. Here, I recommend iBoysoft MagicMenu, which copies all your photos and transfers them to the target drive at a quick and stable speed. You'll be happy as this little gadget helps you a lot in the backup process.
With an intuitive and user-friendly interface, you can copy photos from your Mac to external storage with ease and satisfaction.
Before the photo backup
1. Make sure the target disk has a larger capacity than the source disk or at least the same.
2. Make a backup of your target disk as the clone will overwrite the data on the target drive.
3. For macOS 12 Monterey and later macOS versions, go to the Apple menu > System Preferences > Security & Privacy > Privacy > Full Disk Access to ensure the "drivermanagerd" program is checked.
4. Make sure you have the read & write permission for both the photos you want to back up and the target external hard drive.
Start the photo backup
1. Select multiple files on the Mac that you intend to make a secure backup.
2. Right-click them to select Copy To from the dropdown menu, and then select the destination subordinated to the Copy To menu. For the drive you first used as a backup place, you need to give it a

You can also choose Send To from the iBoysoft MagicMenu menu, which takes away the original files directly.
3. Wait for the copy process to end and then you're all set.
Why not join me to share this article with your followers?
How to back up photos on a Mac to an external hard drive via Finder?
It's workable also if you send photos from your Mac machine to an external USB/flash drive via Finder provided you have enough time. Here are how to go:
- Connect the desired drive you intend to use as a backup destination.
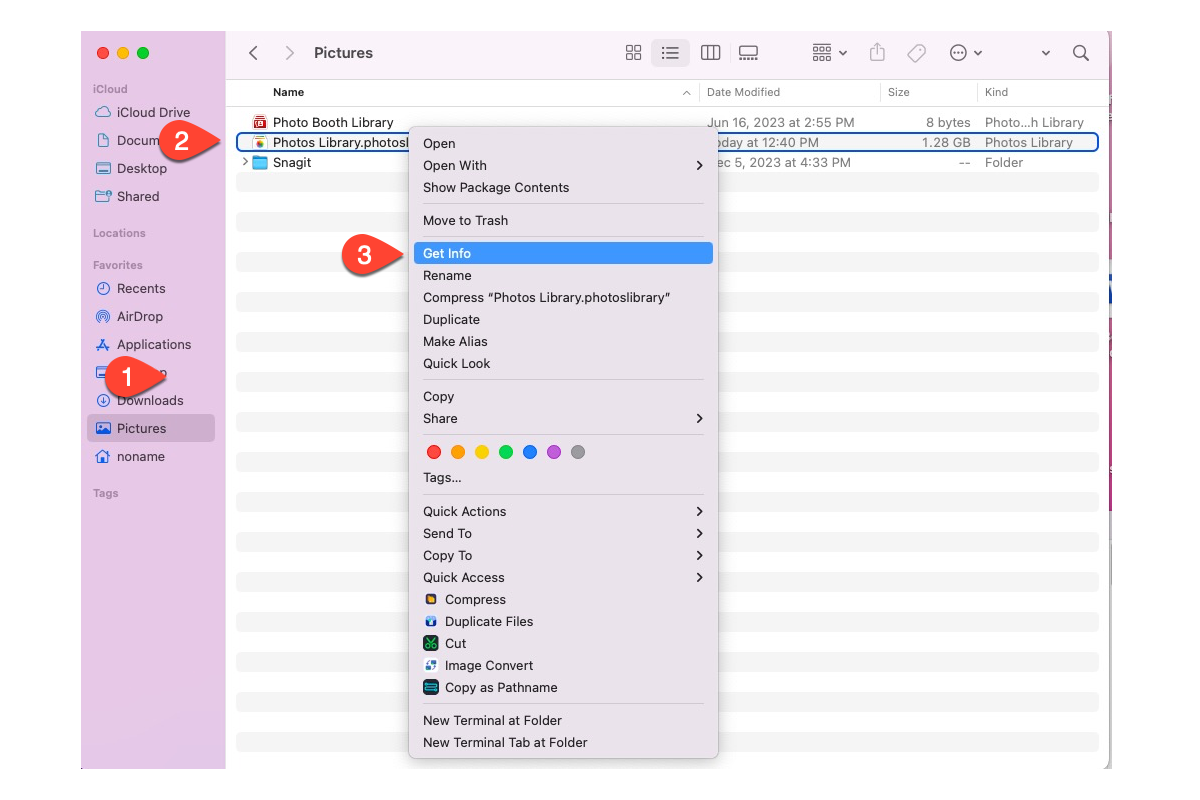
- Launch Finder on your computer and click Pictures on the left sidebar to navigate the Photos Library. Or go to another folder that stores the photos you want to make a full backup.
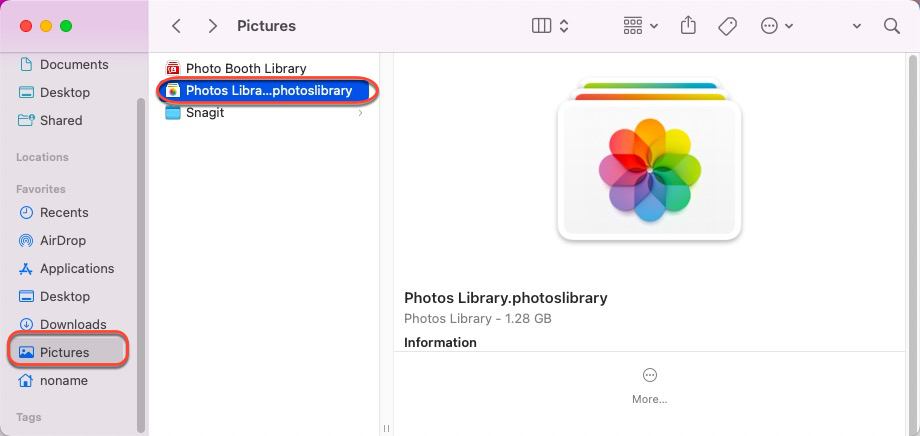
- Right-click the photo folder and tap on Get Info to tell if the drive you connected is enough to store all backup files.
- Drag the folder to the drive icon lying on your computer desktop.
- Wait for the whole process to end.
Note: Some photos are missing from your Mac? Use data recovery software for Mac to recover them.
How to back up photos on a Mac to an external hard drive via Tima Machine?
Time Machine is a perfect built-in toolkit for you to back up half-finished or done pictures to an external drive. You can enable it to back up every modification to a file automatically or manually complete the photocopy mission.
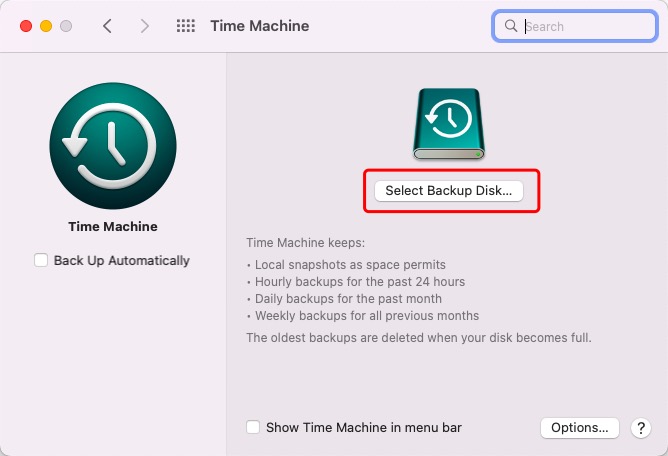
- Connect the target drive to your computer and launch Time Machine via Launchpad.
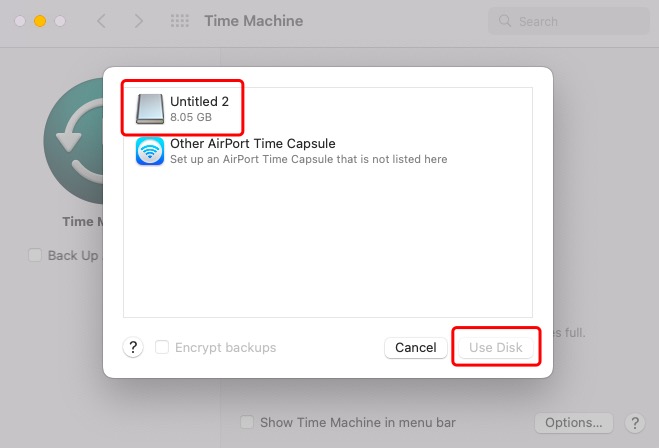
- Tap Select Backup Disk and choose the target disk.
- Click Use Disk to use it as the backup drive.
- Select the photos that you want to back up and start the process.
- Wait for the process to end and safely eject the drive.
Tips you should know in Mac photos backup to an external drive
As earlier mentioned, there are sorts of bummers that may hinder the Mac photo backup process, ranging from data loss to backup failure. You can read this section to make the backup process barrier-free and smooth.
Check the file system of the desired drive. As we all know Mac has no write access to a drive with an incompatible file system, like Windows NTFS file system, unless you use iBoysoft NTFS for Mac. So please make sure the drive is formatted to Mac compatible file system (FAT, exFAT, APFS, HFS, and HFS+) beforehand.
Check the free space of the destination drive. Make sure the desired drive has enough space to hold all the photos you want to back up or the process will be terminated.
Ensure you have read & write permission. You should have read & write permission for both the drive and the files then the process can be successful. Right-click either to select Get Info, then change the user account you're logged in currently to read & write permission.
Ensure the connection is good. Poor or unstable connection leads the backup mission to fail. Even worse, it may cause photos corrupted! So you have to connect the drive to your computer firmly and do not touch it during the process.
Make the device powered on. Connect your computer to power or the backup stops due to the computer's power off. Plus, make sure the computer continues working even in Sleep Mode or it will disobey your time plan.
Final word
This post gathers all effective ways to transfer photos from a Mac to a Seagate, PNY, SanDisk, Samsung, OWC's Envoy Pro FX, Western Digital, etc. external hard drive, and you can choose one as you like. Among these, iBoysoft MagicMenu is most recommended for its excellence in file copy, which is extremely worth a shot!