There are several ways to share screen on Mac via Messages, FaceTime calls, and the newly added screen-sharing feature in video conference calls. In addition, macOS Sonoma introduced a separate, standalone app called Screen Sharing. Let's explore more about the Screen Sharing app on macOS Sonoma.
Redesigned Screen Sharing app overview
macOS has provided VNC Server functionality since version 10.5 in 2007 and has supported Facetime screen sharing since version 12.1 with the release of SharePlay in 2021. Larger IT environments are the target customer for Apple's Remote Desktop.
Apple keeps improving screen sharing in macOS Sonoma to the point where it's user-friendly for beginners, and the Screen Sharing app is a part of it. This new app is contained in the macOS Utilities folder, with it, you can establish a higher-fidelity connection specific to Sonoma systems and connect to remote Macs via VNC. For graphically demanding apps, this provides desktop responsiveness that is closer to native on gigabit and faster networks.
The redesigned Screen Sharing app also introduces a high-performance mode, available on Apple Silicon Macs, which enables extremely responsive remote access via high-bandwidth networks by utilizing the sophisticated media engine in Apple Silicon.
How to use the Screen Sharing app
The procedure to use the Screen Sharing app to share your Mac screen with another Mac on macOS Sonoma is a little different from that on macOS Ventura and earlier. This part will guide you to use the Screen Sharing app on macOS Sonoma step by step.
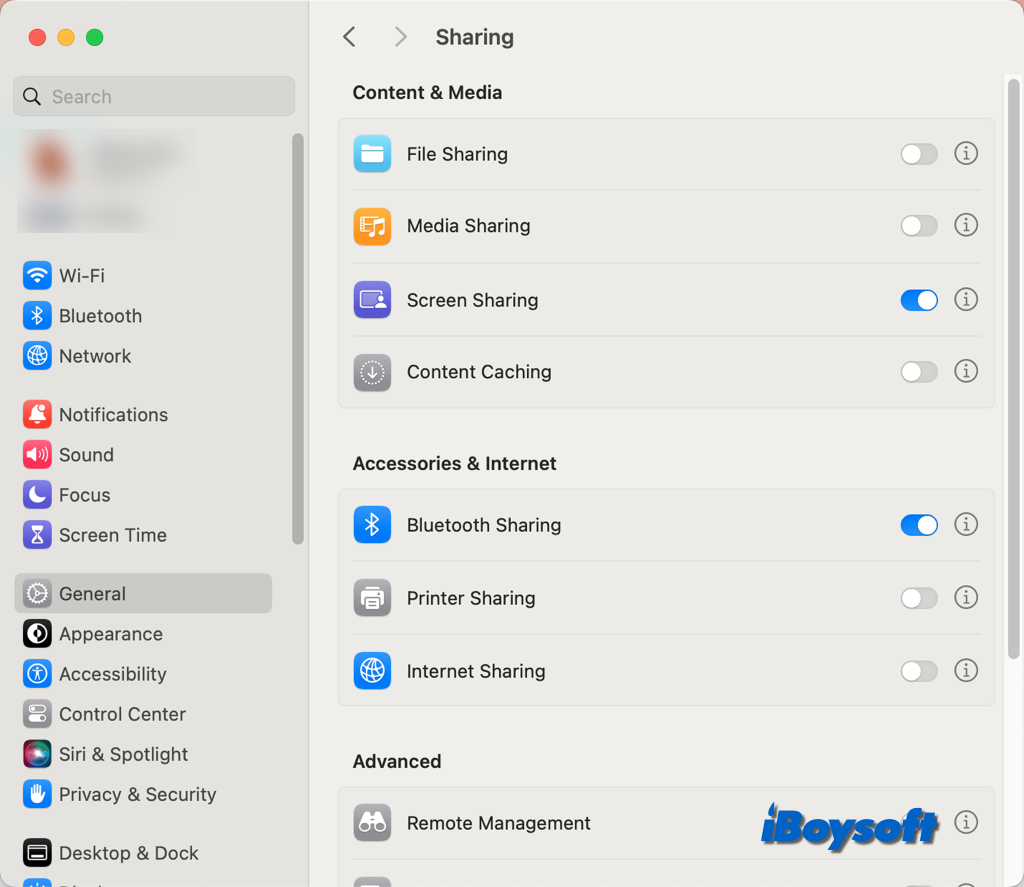
Turn on screen sharing in System Settings
Before you proceed to the specific steps, you should make sure both your Mac and another Mac you want to view have screen sharing turned on, this is the first step you must take when sharing screens on macOS Sonoma and earlier versions.
- Open the Apple menu and choose System Settings.
- Choose General on the left sidebar and click Sharing on the right.
- Toggle on Screen Sharing.
Now, you can follow the steps below to use the app to start a screen-sharing session:
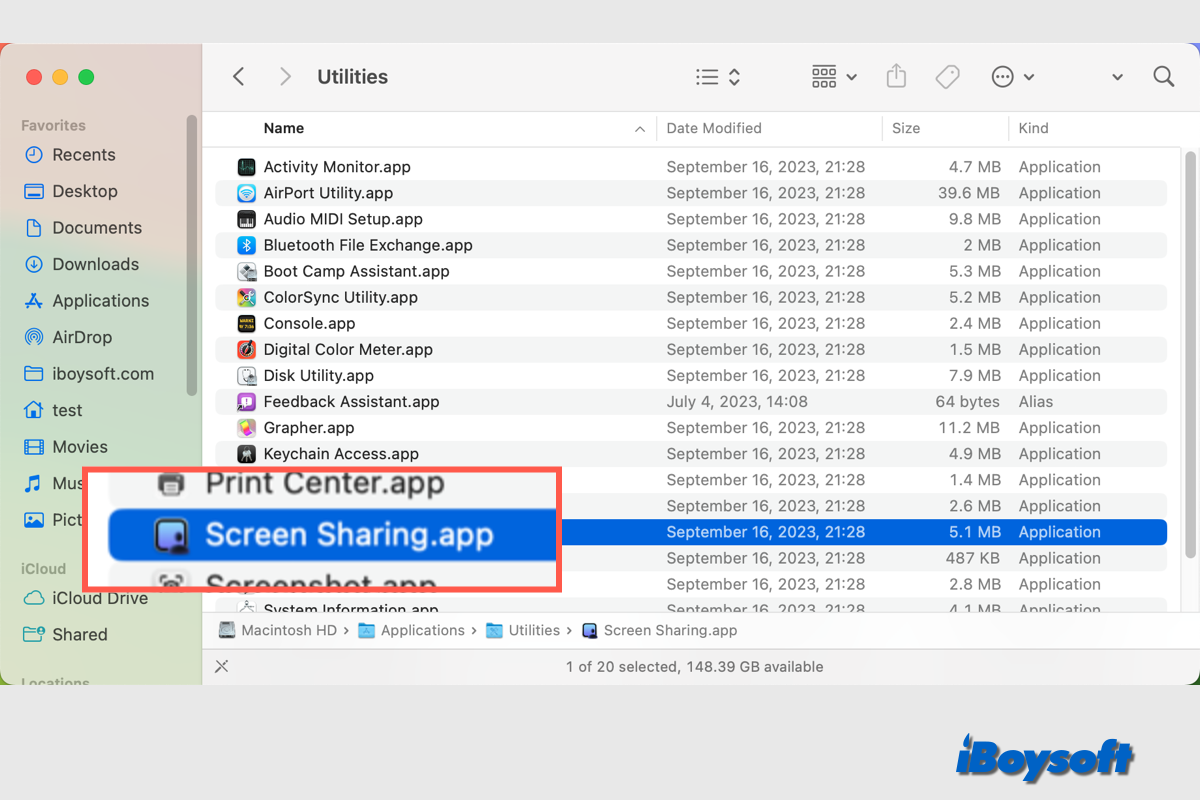
- Open the Screen Sharing app on your Mac from Finder > Applications > Utilities.
- You can choose a previously shared connection or add a new one:
Click All Connections in the sidebar, move the pointer over the target computer, and then click Connect.
Click Network in the sidebar, move the pointer over the device you want to access, then click Connect.
Click the "+" button in the toolbar, enter a hostname or Apple ID, then click Connect. - If asked, enter a username and password, then click Sign In.
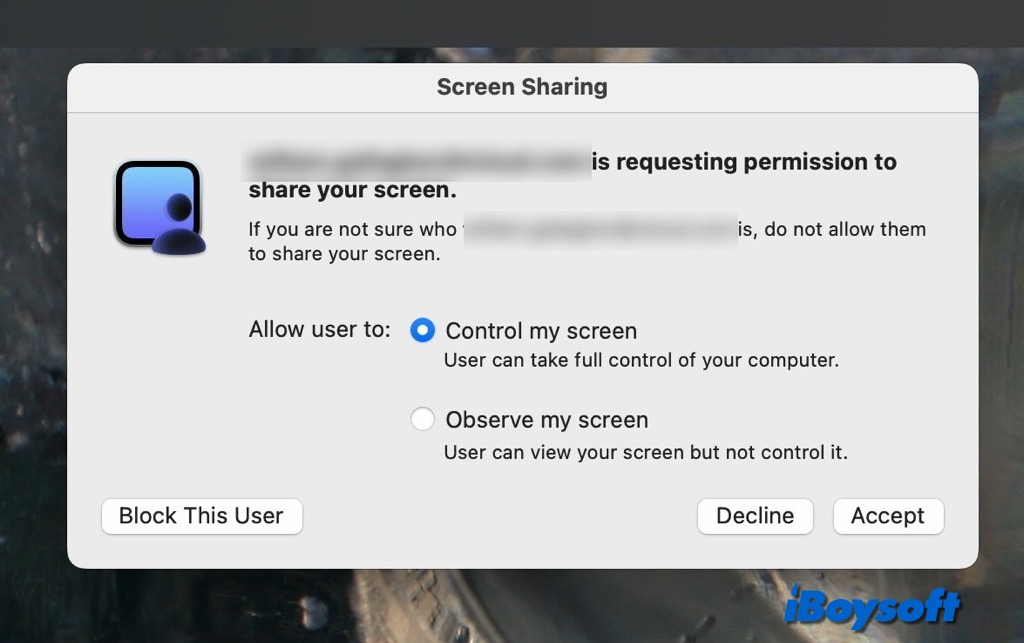
- A request notification appears on the Mac you want to view, click on Accept.
- Still, on the Mac on which you accept the connection request, choose Allow user to: Control my screen, or Ovserve my screen, and click Accept again.
- On an Apple Silicon Mac running macOS Sonoma and later, the Select Screen Sharing Type window is displayed, you can select Standard or High Performance. If you selected High Performance, click the Display Type pop-up menu, choose one or two virtual displays, then click Continue.
- Once the work is down, on the Mac on which the screen is shared, click on the screen-sharing icon at the top, and select End Screen Sharing from the drop-down menu.
Share this post with others in need!