This article explains how to use the Extensions settings to enable and disable both Apple and third-party extensions on your Mac and how to choose which extensions to add to the Share menu. You can use extensions such as Markup to add extra functionality to apps, the Finder, and the Touch Bar on Mac.
Where to access Extensions settings on Mac?
There are some macOS built-in extensions you can enable for Mac apps, Finder, and Touch Bar, and when you download and install third-party applications on Mac, they may also require you to enable the extensions on Mac. All of the extensions are used to make your work convenient and guarantee the normal operation of the third-party apps.
During the installation of third-party software on Mac, it may prompt a System Extension Blocked window asking to enable kernel/system extension on Mac, you can follow the instructions to open Security Preferences to enable it. If you mistakenly click Ignore, or you want to turn an extension off for a certain app, you can also access it with the steps below.
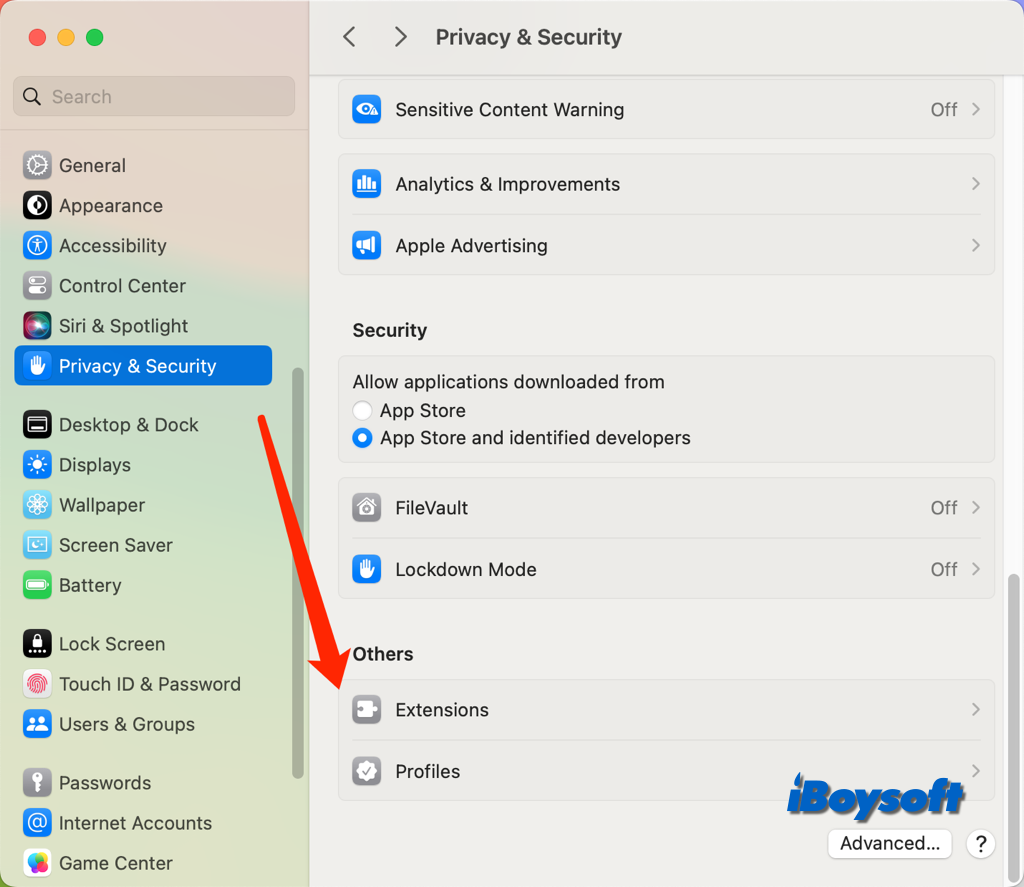
Here's how to access Extensions settings on Mac:
On macOS Ventura and Sonoma:
- Click the Apple logo and choose System Settings.
- Scroll down the sidebar and choose Privacy & Security.
- Move to the bottom on the right, you can see Extensions.

On macOS Monterey and earlier:
- Open the Apple menu and select System Preferences.
- Click Extensions on the pane.
- Enter your admin password if asked.
How to change Extensions settings on Mac?
Whether you want to turn on or off the extensions for Apple and third-party applications on Mac, edit the extensions listed in the Share menu, or add extensions for apps, Finder, and the Touch Bar, this part covers.
Options available in Extensions:
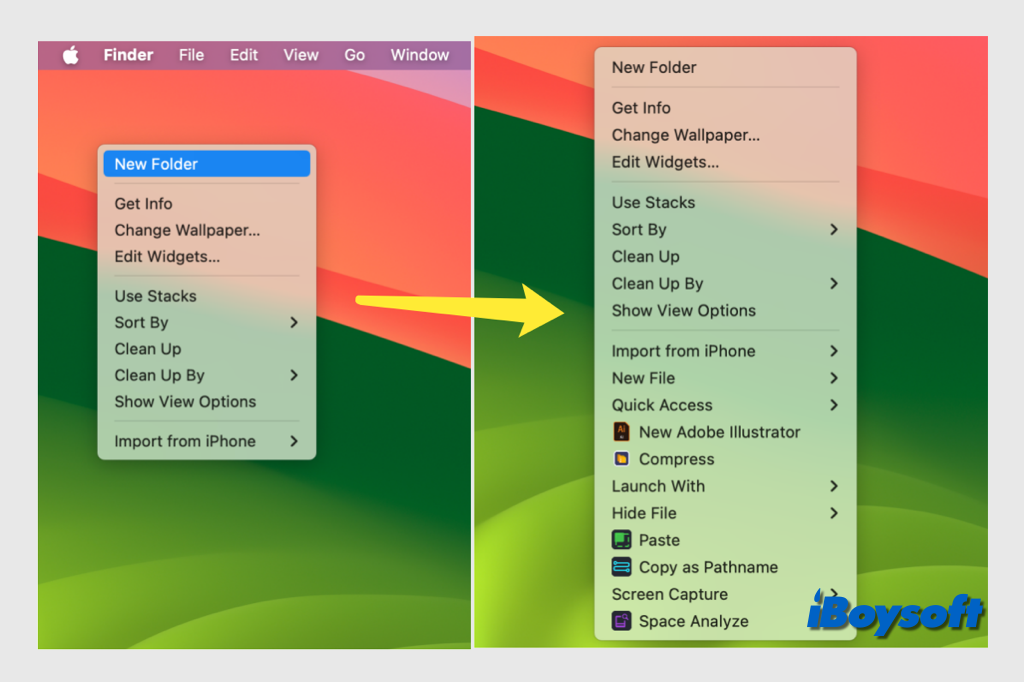
Added extensions: These are extensions created by third-party developers. You may see Actions, Finder, Sharing, and other tick boxes below the app extensions. For example, I installed the iBoysoft MagicMenu, a right-click enhancer, and there is a Finder extensions tickbox, I need to select it so that I can access the iBoysoft MagicMenu's feature via the Finder context menu.

Actions: These are content extensions installed on your Mac. If you select the Markup, it enables you to annotate and draw on PDF documents and images in apps such as Mail, TextEdit, or Preview. See How to use the Markup tool for Mac?
Finder Extensions: Finder extensions installed on your Mac. If you want to make a certain extension such as iCloud Drive available in the Finder, just check the box below it.
Photos editing: Photos extensions installed on your Mac, such as Markup. After you select the Photos extension, it will be available in Photos while editing photos.
Quick Look: Quick Look extensions installed on your Mac, such as Mail. If you enabled the Quick Look extensions for apps like Mail, you can quick look an item on Mac without opening it.
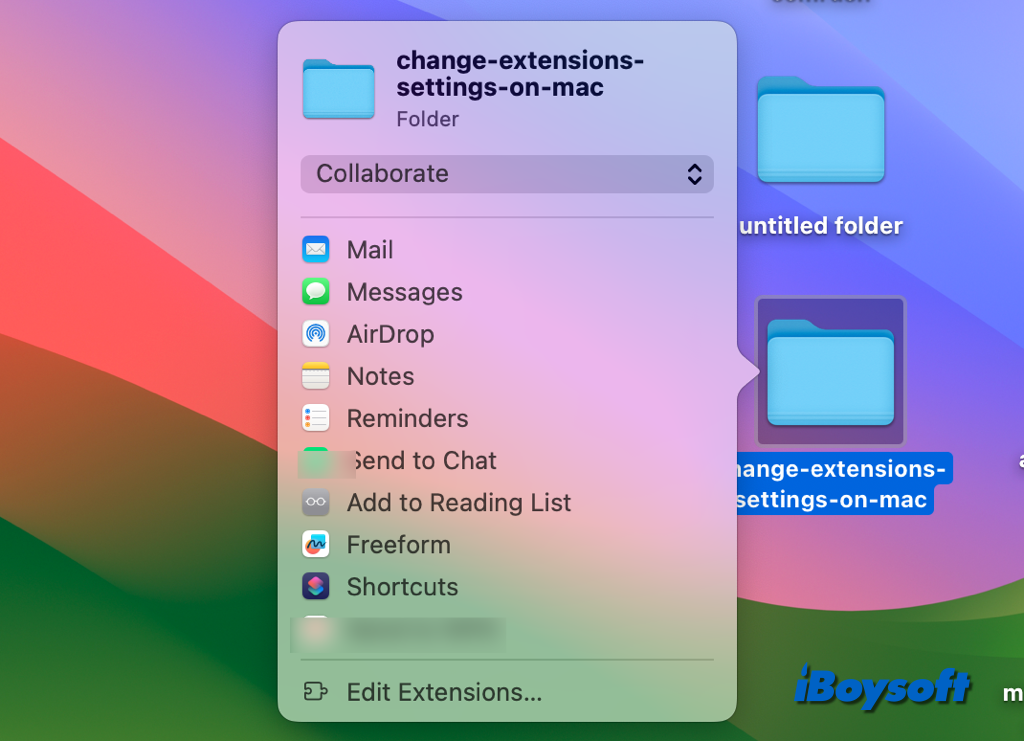
Sharing: Select the sharing extensions such as Copy Link, Notes, and Add to Photos so that they are available from the Share button in the Finder and in many Mac apps.

Note: You can't uncheck default extensions like Mail and AirDrop. If an extension selected in the list is not available in the Share menu, it indicates the item you selected can't be shared using that extension. For example, you can use AirDrop to share a web page in Safari, but not selected text.
Finder: Enable extensions you want to access from the Quick Actions menu on the desktop and in the Finder and the Finder Preview pane.
Touch Bar: If your Mac has a Touch Bar and you set Touch Bar options to show Quick Actions or added a Quick Action button to the Touch Bar, select the extensions you want to access from.
Share to help others change Extensions settings on Mac!