
Quick Actions appears in the dropdown menu when you right-click a file or folder on your Mac desktop, allowing you to complete some work with simple clicks. The Quick Actions vary according to different file types. For instance, you can rotate and markup an image, while you cannot do that to a document file.
Utilizing this feature in the Finder window is permissible, furthermore, you are allowed to create your own Quick Actions in Mac Finder as well. This article published on iBoysoft tells you how to get Quick Actions in Finder in detail.
The utility you need is the Quick Actions menu, Automator, or third-party software -- iBoysoft MagicMenu, a wonderful right-click enhancer, and the whole process takes up 5 minutes or so.
How to get Quick Actions in Finder via the Quick Actions menu?
Quick Actions is a fantastic tool included with your Mac that appears when you right-click any file on your Mac desktop or in the Finder window. It allows you to finish a task in a quicker way. More surprisingly, if you execute a job on a regular basis, you can develop your own Quick Actions.
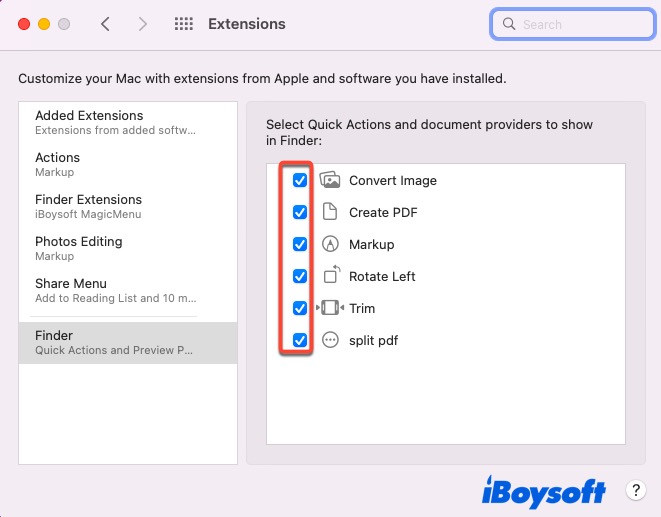
The Quick Actions menu supports you to add or remove some actions that you can perform to certain files. Here I am gonna show you how to do it:
- Right-click any file on your Mac desktop or Finder window.
- Select the Customize option from the dropdown menu and then you'll be prompted to a new window. You can also change Extensions settings on Mac from Privacy & Security in System Settings.
- Toggle on the quick actions that you need or toggle off the ones you want to remove.
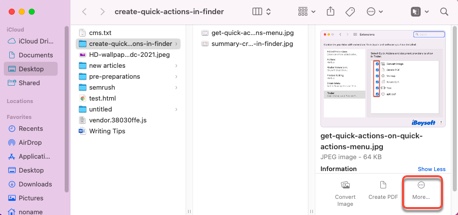
Alternatively, you can click the More button in the toolbar below the Preview and pick Customize to add or cancel certain actions.
Though effective, the actions that you can change are definitely limited. For more quick action changes, go to the Automator app instead.
Many thanks if you'd like to share this informative article with more people on your social platform!
How to get Quick Actions in Finder via the Automator app?
Compared with the Quick Actions menu, Automator allows you to develop various actions according to the file types.
Put it delicately, you can create special actions for Calendar, Contacts, Developers, Files & Folders, Fonts, Internet, Mail, Movies, Music, PDFs, Photos, Text, and Utilities, which are probably all the categories you can access on your computer.
Let's work on how to create Quick Actions in Finder via Automator on your Mac. This post takes you through how to create a quick action for PDF as an example.
- Press the Command + Space keys together on your Mac and type Automator.
- Hit the Enter/Return key to launch the Automator app.
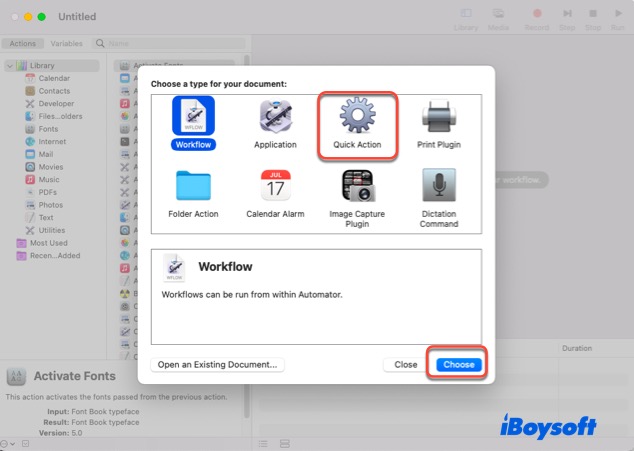
- Click New Document below the window bottom and then select Quick Actions in the new popup.
- Click Choose to proceed.
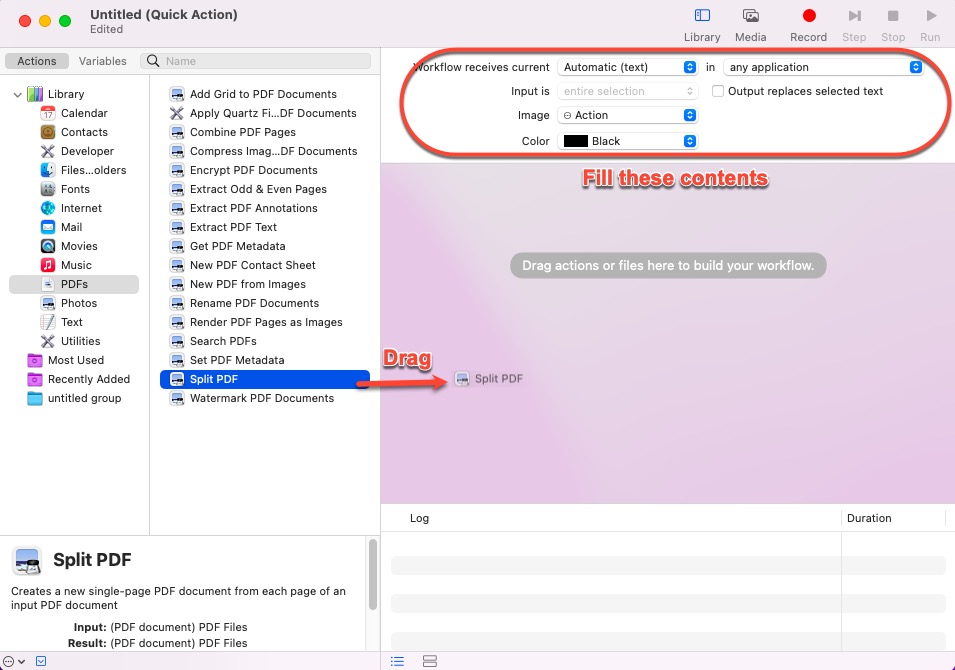
- Select PDF (or another category) from the left sidebar that you need to create a new quick action.
- Determine the content in the upper right menu bar according to your requirement, Which includes Workflow receives current, the application that you want to put the quick action into use, Input is, Output replaces selected text, Image, and Color.
- Drag the action that you want to create from the left menu bar.
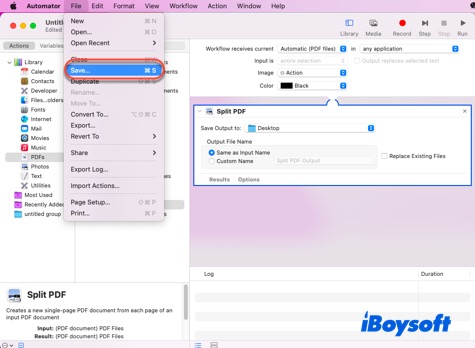
- Save the actions that you add by clicking File on the upper left menu bar and selecting the Save button.
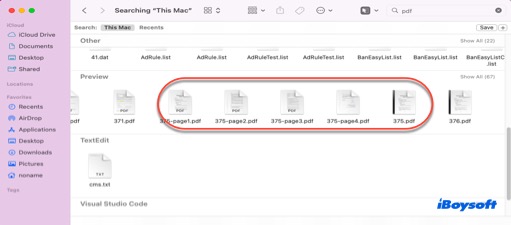
Then, right-click the file to execute the quick action. I made a quick action for PDF files so that I can select a PDF file and choose split it.

Then you can see that a PDF file with 2 pages is split into 2 PDF files that all save in the same location.
The methods to develop any other quick actions are quite similar to the steps on making a PDF quick action, if you repeat certain tasks frequently, creating a quick action in Automator saves your time and effort a lot.
If you create a quick action through Automator successfully, why not share your happiness with others?
How to get Quick Actions in Finder via iBoysoft MagicMenu?
iBoysoft MagicMenu is a wonderful toolkit that allows you to perform quick actions by right-clicking any files or folders on your Mac. Compared to the quick actions in the Quick Actions menu and Automator, the actions are more common and user-friendly provided by iBoysoft MagicMenu.
New File
You can create a new file by right-clicking any blank space on your Mac desktop, including TXT, RTF, Doc, Adobe Illustrator, Doc-07, WPS DPS, WPS ET, Keynote, Markdown, Numbers, Pages, Plist, PPT, PPT-07, Adobe Photoshop, Python, Ruby, Shell, WPS, XLS, XLS-07, and XML.

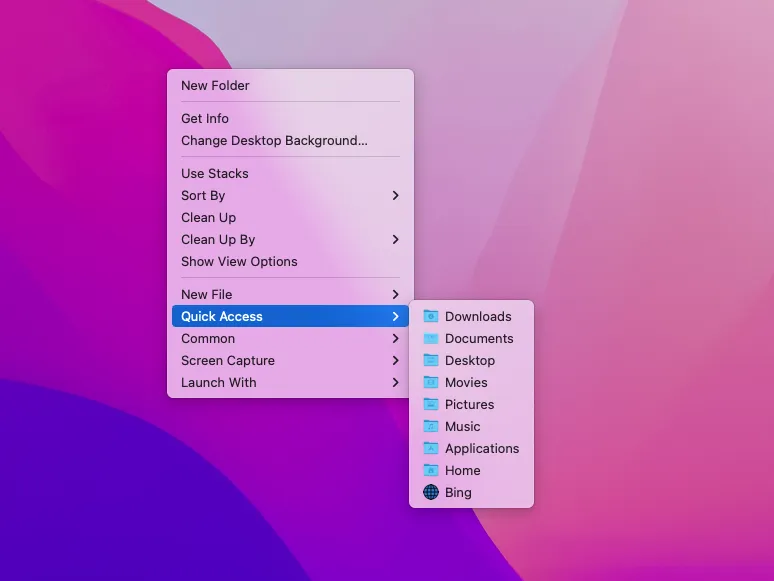
Quick Access
iBoysoft MagicMenu supports quick access for you to Downloads, Documents, Desktop, Movies, Pictures, Music, Applications, Home, and Bing. You are allowed to add quick access as you like.
Step 1: Open iBoysoft MagicMenu Main UI and click Quick Access on the left panel.
Step 2: Click Add at the top.
Step 3:Click Browse to select a local app, folder, partition, or disk. Or You can copy and paste a webpage URL to the Path section.
Step 4:Click Ok and the new item will be added to the sub menu of Quick Access automatically.
Move To
Instead of repeating the copying and pasting actions, iBoysoft MagicMenu helps you add folders to the Move To menu and you can move a file to a target path with a single right click.
You can either edit a function in iBoysoft MagicMenu as you like. I'll show you how to edit a function with the step-by-step guidelines:
Step 1: Select a function in Function Library.
Step 2: Click the Edit button.
- If you select a default function, you can only move it to a different category.
- If you select a function you added, you will see the same window when you added it and be able to change its name, icon, script, etc.
Step 3: Click OK to save the change(s).
For more information about quick actions, visit the iBoysoft MagicMenu online help straightforwardly.
If you think this right-click enhancer is wonderful, do not hesitate and share it with more people!
Quick Actions not showing in Finder
My Quick Actions not showing in Finder Window or when I right click on a file in the finder window. I have them all checked in System Preferences under Extensions. I see some of them when clicking on a Jpeg but none of them when clicking on a .docx, .pages, .xls file or .numbers files.
Some Mac users point out that Quick Actions not showing in Finder really drives people nuts. Quite frankly, the Quick Actions feature varies according to the file that you select. Markup is for PDFs, Trim for movies, and Rotate for images.
Therefore, if the Quick Actions not showing in Finder trouble hits, verify if the file type can perform the Quick Action. If you need more quick actions, follow the content discussed above to create your own.
Wrap up
If you find that Quick Actions can no longer meet your demands, you can create one by yourself. This post offers you 3 ways including the Quick Actions menu, Automator, and iBoysoft MagicMenu, you can choose one or more as you like.
FAQ about how to get Quick Actions in Finder
- QWhat is Quick Actions in Mac OS?
-
A
Quick actions is a utility that helps you perform certain tasks, such as creating a PDF or rotating an image, right from the Finder or your desktop, without opening an app.
- QHow do I add Quick Actions to Finder Mac?
-
A
Step 1: Choose Apple menu > System Settings, then click Keyboard in the sidebar. ...
Step 2: Click Touch Bar Settings on the right, then click Customize Control Strip.
Step 3: Drag the Quick Actions button to the bottom of the screen until it appears in the Touch Bar.
Step 4: Click Done.