
You probably have never thought that one day your hard disk SMART status reads Failing, and then the MacBook Pro will keep crashing and eventually become dead or unbootable, while unfortunately, it just happens. Then, your Mac won't turn on at all. At that time, you cannot access data on your Mac.
You might have searched ways about MacBook Air/MacBook Pro hard drive data recovery from the Internet. To be honest, it's not easy to recover data from a dead, crashed, and unbootable MacBook.
However, this post offers some stepwise and efficient solutions for recovering data from a dead MacBook Pro/Air. Are you ready? Following the complete guide, you'll become a data recovery expert.
How to recover data from a dead/crashed MacBook Pro/Air:
| Solutions | Steps |
| 1. Use iBoysoft Data Recovery (Easiest) | 1. Boot into macOS Recovery mode to run iBoysoft Data Recovery Software; only with certain command lines. 2. Scan the broken, dead, and crashed hard drives for lost data. 3. Preview the recovered files and click Recover to restore them. 4. Save the recovered data well for later usage. |
| 2. Create a bootable installer (Complex) | 1. Create a bootable installer for an external hard drive based on the macOS you're running. 2. Utilize the external hard drive to boot the dead MacBook Air/Pro. 3. Access the hard drive for inaccessible files if it allows you to do so and save them well. |
| 3. Utilize another functional Mac (Risky) | 1. Open your MacBook Pro/Air case and remove the hard drive carefully. 2. Put your MacBook hard drive into the external hard drive enclosure. 3. Connect the MacBook hard disk to the MacBook hard disk to the healthy Mac for lost data. 4. Save the lost files well on your Mac computer. |
| 4. Use Target Disk Mode (Failure-prone) | 1. Disable the FileVault setting on the working Mac, 2. Connect the crashed Mac to a working Mac with a Thunderbolt or Firewire cable. 3. Press down the power button on the dead MacBook Pro/Air while holding down the T button. 4. Access the files and folders you need once the dead MacBook shows on your healthy Mac. |

How to recover data from a dead/crashed MacBook Pro/Air?
Believe that the files on that broken MacBook Pro/Air really mean something to you while recovering them seems so tough. Actually, there are ways.
Solution 1: Use iBoysoft Data Recovery to recover data from dead/crashed MacBook Pro/Air (Easiest)
Maybe you have learned that Mac file recovery software is the best solution to retrieve your files from an unbootable Mac. But do you really know what's the best and safest one? Indeed, some data recovery software even will damage your original data on Mac.
Here are some necessary characteristics of the qualified MacBook Pro/Air data recovery software:
- Compatible with your Mac operating system (Even the current macOS 14 Sonoma)
- Only read data on Mac and won't destroy it
- Easy and intuitive operating procedure
- Powerful ability to recover lost data in different situations
iBoysoft Mac Data Recovery software is such a useful and safe data recovery software.
To recover data from a dead MacBook Pro/Air with iBoysoft Mac Data Recovery, there is no need to create a bootable drive for running the program. But almost all the other data recovery software requires you to do so. It's troublesome to find another working Mac to create a bootable USB drive. Right?
With iBoysoft data recovery software, all you need to do is boot your dead MacBook Pro/Air in macOS Recovery mode. Then, rescue data from the MacBook within a few clicks.
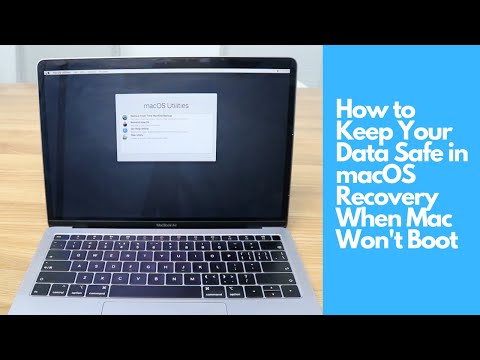
To help you know every step clearly, here is the video about how to use iBoysoft Mac data recovery software when your Mac won't boot.
Solution 2: Create a bootable installer and recover data from dead MacBook Pro/Air (Complex)
If you only have this crashed MacBook Pro/Air, data recovery is hard. But there still is a method. That is to boot the dead MacBook Pro/Air with a bootable USB drive first, and then get data off the Mac hard drive.
Creating a bootable installer is the crux. You should prepare some stuff and the process is very complex.
Here is what you need: a healthy Mac, a USB drive, and a cable.
Next, get down to create a bootable USB drive:
- Download the macOS installer from the App Store on the working Mac.
Note: Don't proceed to install macOS at this time, just download the installer. - Connect your USB drive to the Mac and open Terminal (Finder > Applications > Utilities).
- Type one of the following commands to create a bootable installer (Replace "MyVolume" with the name of your bootable USB drive).
macOS Ventura:sudo /Applications/Install\ macOS\ Ventura.app/Contents/Resources/createinstallmedia --volume /Volumes/MyVolumemacOS Monterey:sudo /Applications/Install\ macOS\ Monterey.app/Contents/Resources/createinstallmedia --volume /Volumes/MyVolumemacOS Big Sur:sudo /Applications/Install\ macOS\ Big\ Sur.app/Contents/Resources/createinstallmedia --volume /Volumes/MyVolumemacOS Catalina:sudo /Applications/Install\ macOS\ Catalina.app/Contents/Resources/createinstallmedia --volume /Volumes/MyVolumemacOS Mojave:sudo /Applications/Install\ macOS\ Mojave.app/Contents/Resources/createinstallmedia --volume /Volumes/MyVolume
Or you can find other macOS versions from support.apple.com.
Now, you have a bootable USB macOS installer. Next, use it to boot up your dead MacBook Pro.
- Plug the USB drive into your MacBook Pro.
- Restart your Mac while pressing down the Option key.
- Release the key when seeing the startup disk options.
- Choose the external USB drive and click Restart.
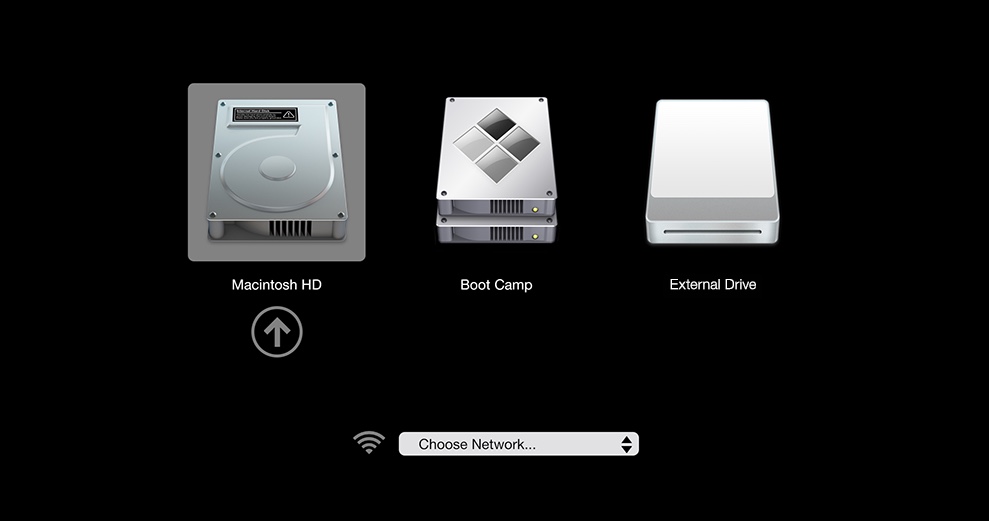
Then, your MacBook Pro will start. At that time, open Finder and check if the MacBook Pro/Air hard drive is accessible. If the MacBook Pro/Air hard drive is accessible, you can then find the files and folders you want and then back them up well to a drive for later usage.
But if the hard drive is failing (it is a high possibility), you can use the data recovery software to rescue files from the corrupted, inaccessible, or unmounted MacBook Pro/Air hard drive.
Step 1: Download and install iBoysoft Data Recovery for Mac on your MacBook Pro/Air.
Step 2: Scan the MacBook Pro/Air hard drive and preview the scanning results.
Step 3: Select the desired files and click Recover.
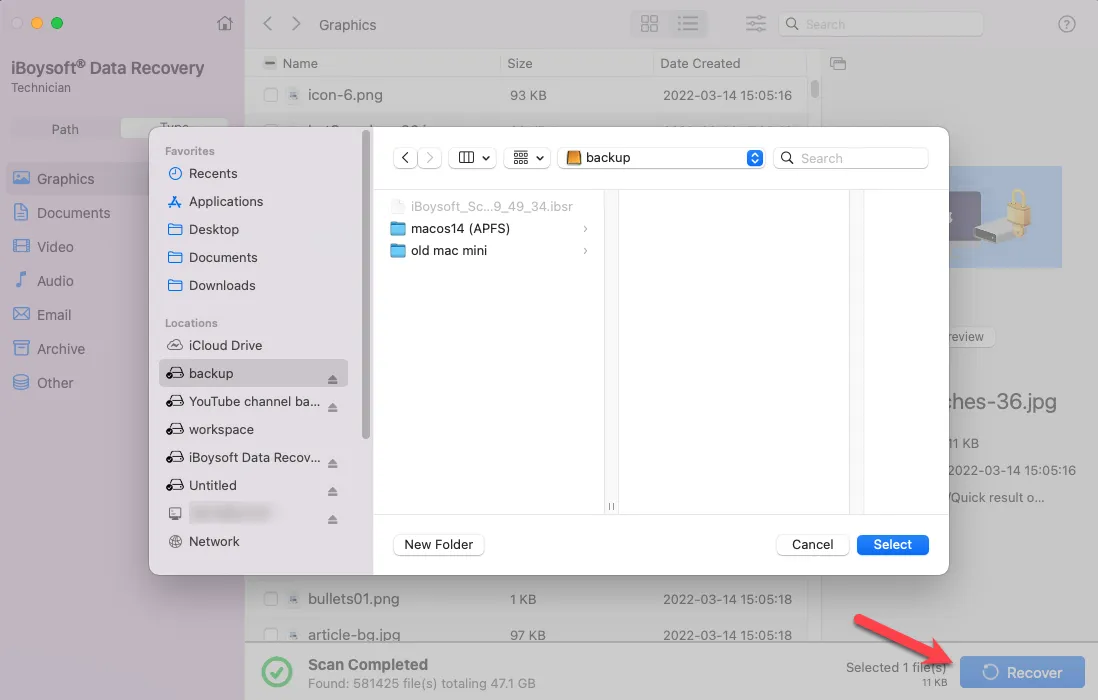
Within a few clicks, you'll recover lost data from the MacBook Pro/Air hard drive with this powerful data recovery software.
Solution 3: Recover data from crashed MacBook Pro/Air with another Mac (Risky)
If you have another working Mac, it is also possible to recover data from the dead MacBook Pro /Air with its assistance of it.
In brief, this way requires your MacBook hard drive to work as an external hard drive to be connected to the healthy Mac. Uh, a little bit of a problem, isn't it?
The preparations: a screwdriver, an external hard drive enclosure, and a USB connection cable.
The possible risks you should know before taking action:
- If you take out the built-in internal hard drive from your dead MacBook, your MacBook Pro/Air will be damaged.
- If the MacBook Pro's internal hard drive was dead due to a virus attack, your healthy Mac will be influenced too.
- If you are not an expert in Mac machines, you may fail to connect the MacBook hard drive to another Mac.
If you can accept these negative consequences, go on following the detailed steps.
- Open your MacBook Pro/Air case and remove the hard drive carefully.
- Put your MacBook hard drive into the external hard drive enclosure.
- Connect the MacBook hard disk to the healthy Mac.
Whoops, what a way with full of risk! It's all for your sake to use a data recovery tool rather than taking out the built-in MacBook Pro/Air hard drive for data recovery.
Solution 4: Use Target Disk Mode to recover data from dead MacBook Pro/Air (Failure-prone)
Target Disk Mode, a boot mode on Mac, enables a Mac to behave like an external hard drive for another Mac. It is used to transfer files between two Macs.
But things aren't that simple. You need another healthy Mac and use the Thunderbolt or Firewire cable to connect the two Mac computers. Besides, disable FileVault on the working Mac.
After connecting, press the power button of your dead MacBook Pro/Air while holding down the T button. Your dead MacBook will show on your healthy Mac. But as there are some issues with your MacBook Pro/Air hard drive, usually it may not show up on the healthy Mac.
Whatever, for the sake of unnecessary hassle, use the data recovery software to do the data recovery task.
How to repair and restore the dead/crashed MacBook Pro/Air hard drive?
After recovering data from the crashed MacBook Pro/Air, you can fix your broken MacBook Pro/Air without worrying about data loss. Then, when your MacBook Pro/Air can boot up, restore your MacBook Pro/Air with the recovered data.
Fix your dead MacBook Pro/Air with some basic solutions
- Reset PRAM/NVRAM.
- Reset SMC.
- Boot in Safe Mode.
- Repair with Disk Utility in macOS Recovery mode.
Erase the MacBook Pro/Air hard drive & reinstall macOS
Nevertheless, if the solutions above fail to fix the MacBook that is dead, another solution is to erase the MacBook Pro/Air hard drive and reinstall macOS.
Note: Reformat will fix the file system corruption and ERASE YOUR DATA, therefore, make sure you have recovered files from the crashed MacBook Pro/Air with iBoysoft Data Recovery for Mac at first.
- Reboot the Mac with the Command + R keys pressed so that you can boot the Mac in macOS Recovery mode.
- Select Disk Utility and then click on the Macintosh (or named macOS) volume.
- Click on Erase at the upper menu bar, then fill in the Name, Format, and Scheme boxes.
- Click Erase to confirm the erasure process.
- Right-click the Macintosh-Data (or named macOS-Data) volume and select Delete APFS Volume.
Next, go back to the macOS Utilities window and select the Reinstall macOS utility. Follow the on-screen instructions to reinstall macOS. Then, your MacBook Pro can boot up again.
FAQs about MacBook Pro/Air data recovery
- Q1. If the deleted files on MacBook Pro/Air are recoverable?
-
A
Yes, but with some conditions. The deleted files are recoverable only when they are not overwritten by other data. Therefore, stop doing any further operation on your drive until you get your files back.
- Q2. If data on the crashed MacBook Pro/Air is sure to be recovered?
-
A
No. Files on dead MacBook Pro/Air can be recovered by Mac data recovery software only when your hard drive is not physically damaged. For example, if the drive has serious bad sectors or the drive has been broken, no software can help.
- Q3. Can iBoysoft Data Recovery for Mac recover lost data from APFS SSD?
-
A
Yes. Since 2016, the MacBook Pro/Air with Touch Bar has used SSD that is directly soldered to the computer's logic board and people are wondering can they recovered lost data in this case? In fact, iBoysoft Data Recovery for Mac can recover lost data from corrupted APFS SSD with ease.
- Q4. What should I do if the MacBook Pro/Air hard drive is physically damaged?
-
A
It depends on whether the files on this drive are important for you or not. If they are too valuable to be lost, you can send the MacBook Pro/Air to a local data recovery lab for help, which will cost much usually. Or if they are not, you can replace the drive with a new system drive.