The latest macOS 15 Sequoia was released to the public on September 16, 2024. If your Mac is compatible, we recommend you create a bootable USB installer for macOS Sequoia. This can be beneficial in several ways, including helping you:
- clean install macOS Sequoia on Mac
- boot up an unbootable Mac and install macOS Sequoia on it
- install macOS Sequoia on multiple Macs without downloading the installers each time
- install macOS on unsupported Macs
- upgrade to macOS Sequoia when App Store and Software Update are not working
- downgrade macOS
- install macOS Sequoia on Windows
In the paragraphs below, we'll explain two ways to make a Sequoia bootable USB and install Sequoia from the USB.
Tips: The successor of macOS Sequoia, macOS Tahoe, was released. If you want the latest macOS version, create a bootable USB installer for macOS Tahoe.
| How to create Sequoia USB installer | Efficiency | Difficult Level |
| Use an install disk creator for Sequoia | High, fast, safe, and boots up Mac | Low, guided instructions & simplified steps |
| Manually make macOS Sequoia bootable USB via Terminal | Low, takes time, needs Terminal knowledge, and may fail to make Sequoia bootable USB or boot up Mac | High, manually format and create USB installer |
Way 1: Use an Install Disk Creator for macOS Sequoia 🌟
There are three challenges you may face when making a bootable macOS Sequoia USB installer manually. First, the complex process, which involves formatting drives and running commands in Terminal. Second, you could get stuck during the process and eventually fail to create the boot disk. Third, the created bootable USB may fail to boot up your Mac.
That's why we suggest using a guided tool like iBoysoft DiskGeeker to create the Sequoia boot disk. It can greatly improve the success rate and save time. It even allows you to download the macOS Sequoia installer in high-speed mode to avoid wasting time.
Tips: This bootable drive creator has a library of macOS DMG files that supports you in creating boot disks for macOS High Sierra and later. If you want to make bootable USBs for macOS Sierra and earlier versions, you need to upload the corresponding DMG file.
Here's how to create the bootable macOS Sequoia USB installer:
Step 0: Prepare a USB drive or any storage device with 20 GB or more storage space and ensure it's backed up because the process will erase all data.
Step 1: Download and install iBoysoft DiskGeeker.
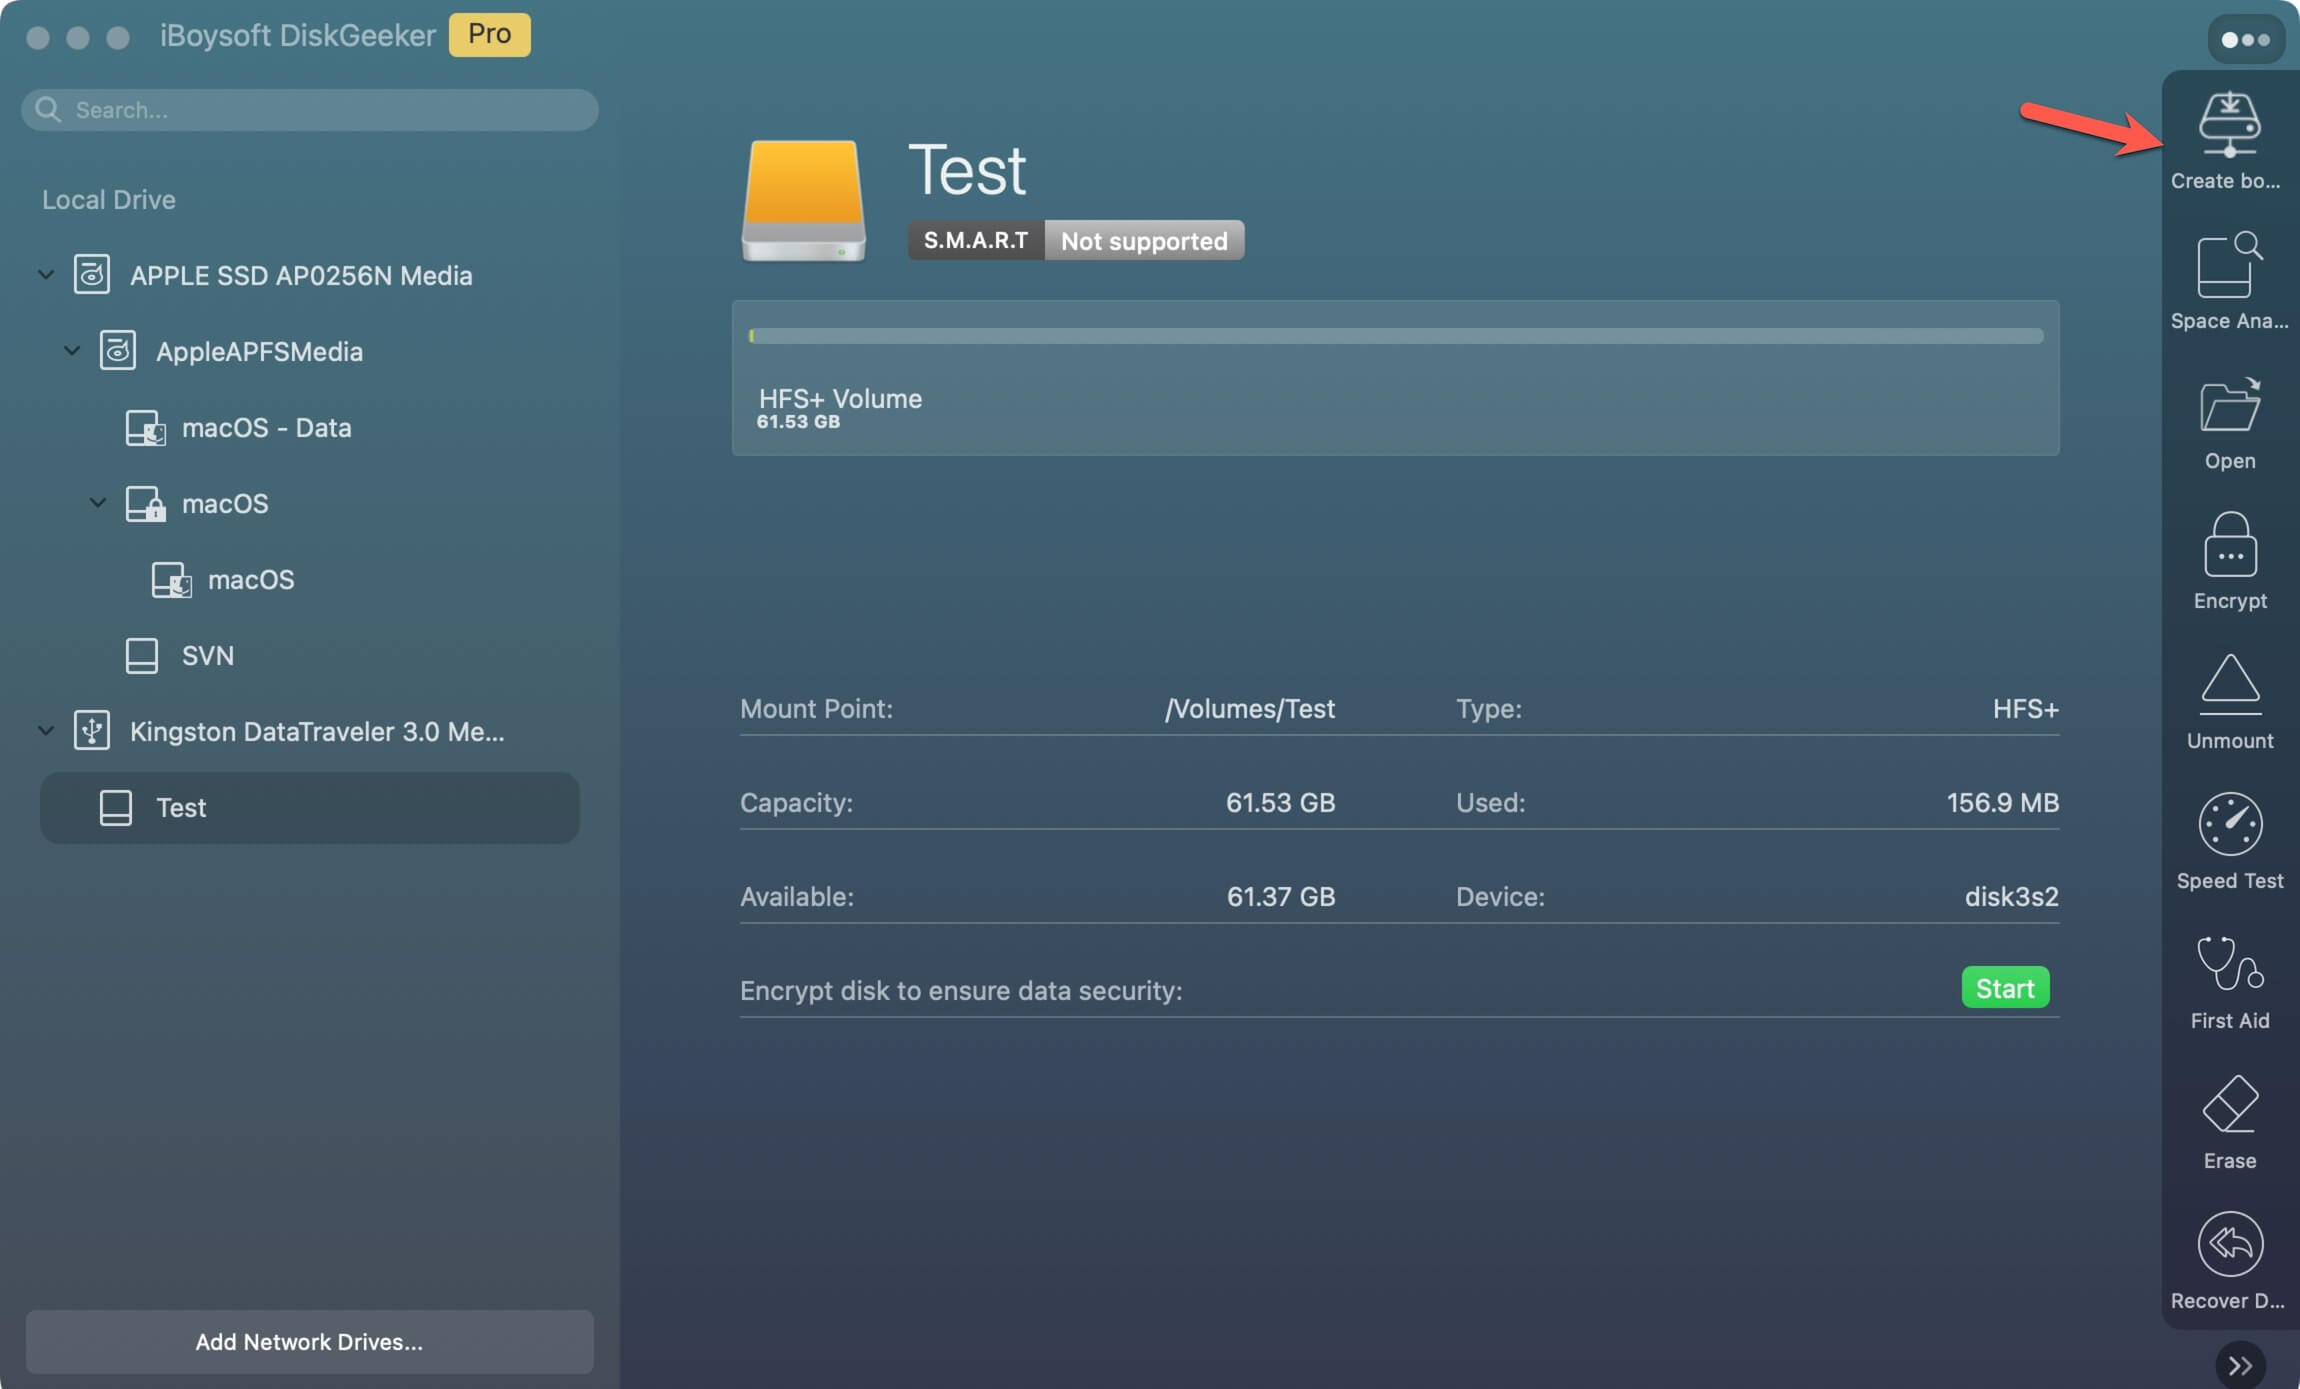
Step 2: Open the install disk creator, select the external drive from the left side, and click Create boot disk.
Step 3: When a message pops up reminding you that the external disk will be formatted, click Continue.
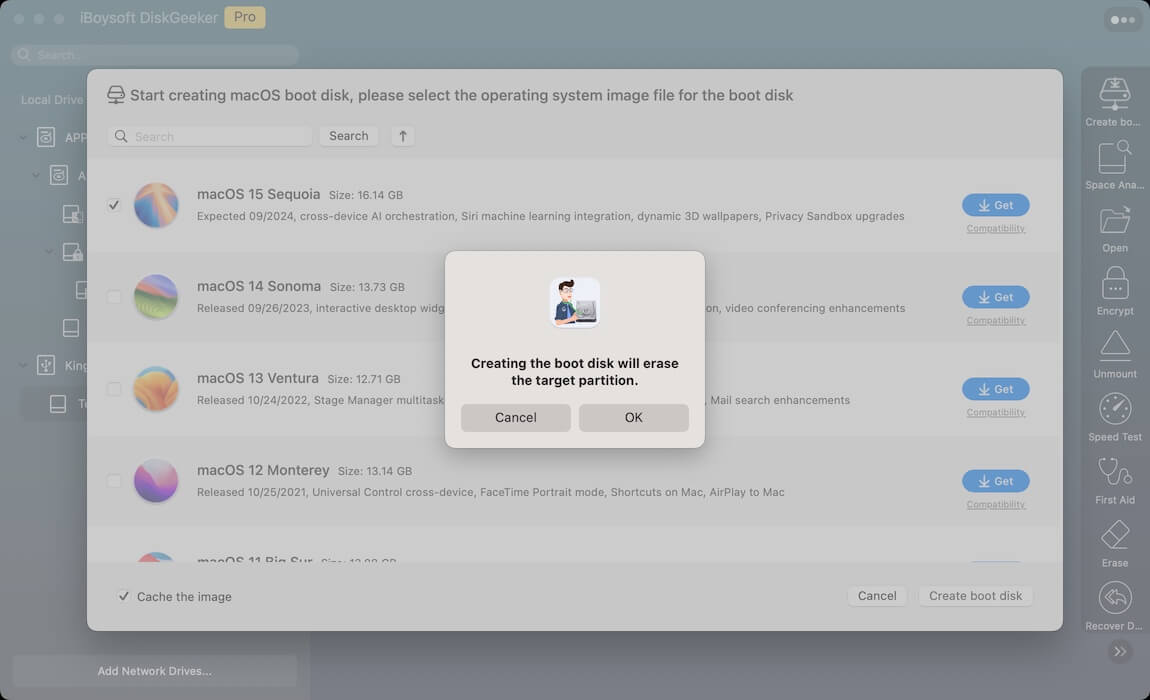
Step 4: Select macOS 15 Sequoia from the list of available macOS installers and click Create boot disk.

Step 5: Click OK when seeing the reminder that your drive will be erased.
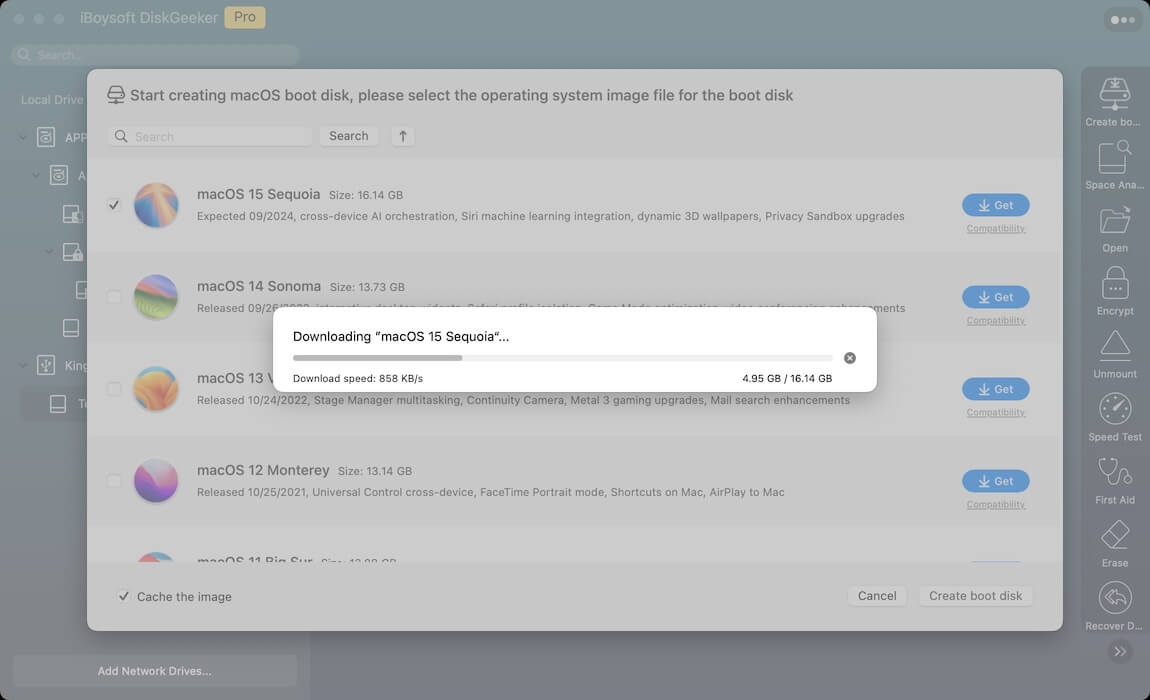
Step 6: The app will start downloading the macOS Sequoia DMG file. Once it's complete, it will create the bootable USB for macOS Sequoia automatically after you confirm that the drive can be erased.
With the macOS Sequoia USB boot drive in hand, you can boot your Mac from the external drive to perform the expected task.
If you only have a Windows PC, create the macOS bootable USB on Windows.
Share this Sequoia install disk creator to help others create Sequoia USB installer!
Way 2: Make Sequoia bootable USB installer manually
If you'd rather spend more time and create macOS Sequoia USB boot drive manually, follow the steps below.
Here's an overview:
- Step 0: Preparation before creating a bootable installer for macOS Sequoia
- Step 1: Download macOS Sequoia for bootable USB
- Step 2: Format external hard drive for macOS Sequoia
- Step 3: Create macOS Sequoia bootable USB installer
- Step 4: Install macOS Sequoia from USB (Optional)
Step 0: Preparation before creating a bootable installer for macOS Sequoia
- A USB flash drive or an external hard drive with at least 20 GB of space
- A strong internet connection on your Mac
- Clean up your Mac to ensure a smooth download and install
Before creating the macOS Sequoia bootable USB, it's advisable to delete the unnecessary files on your Mac to make space for the installer and its installation. This can prevent the download and installation of macOS Sequoia from failing due to insufficient space.
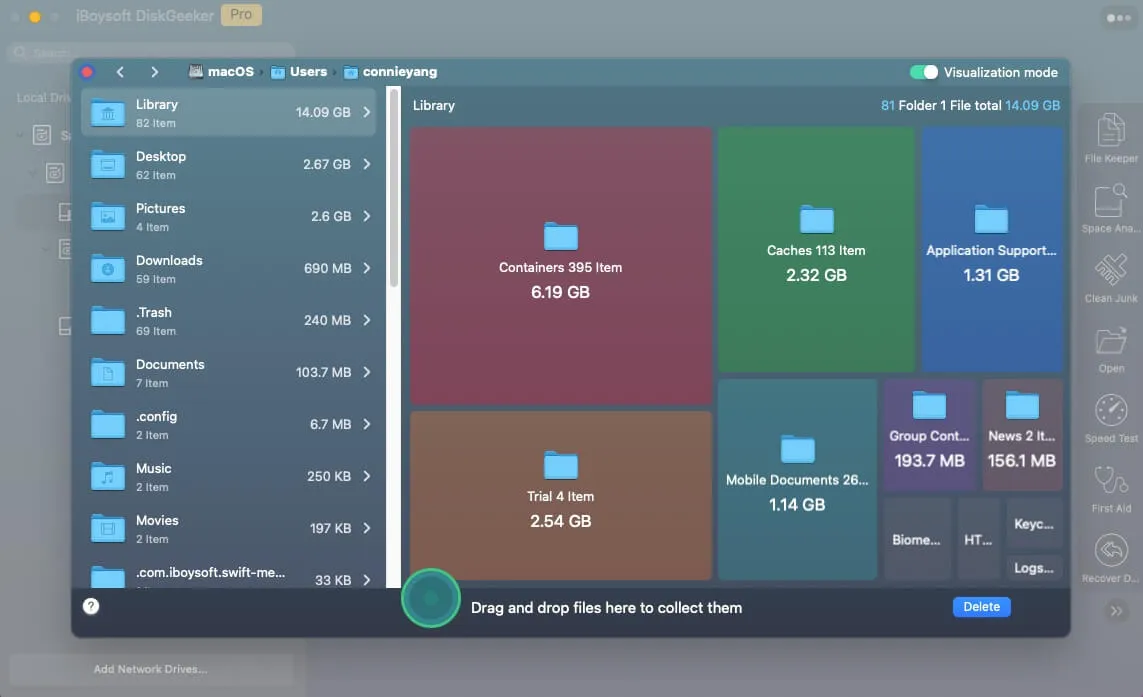
You can manually locate the unwanted files and permanently delete them. Or, if you want to save time, you can use iBoysoft DiskGeeker to analyze your Mac's disk space. It can list all files on your Mac in descending order by size and allow you to quickly remove the unneeded.
Step 1: Download macOS Sequoia for bootable USB
To make a Sequoia bootable USB, you must first download its full installer and ensure it's saved in the Applications folder as an installer app rather than a disk image (.dmg) or package (.pkg). Here are three ways to download the macOS Sequoia full installer:
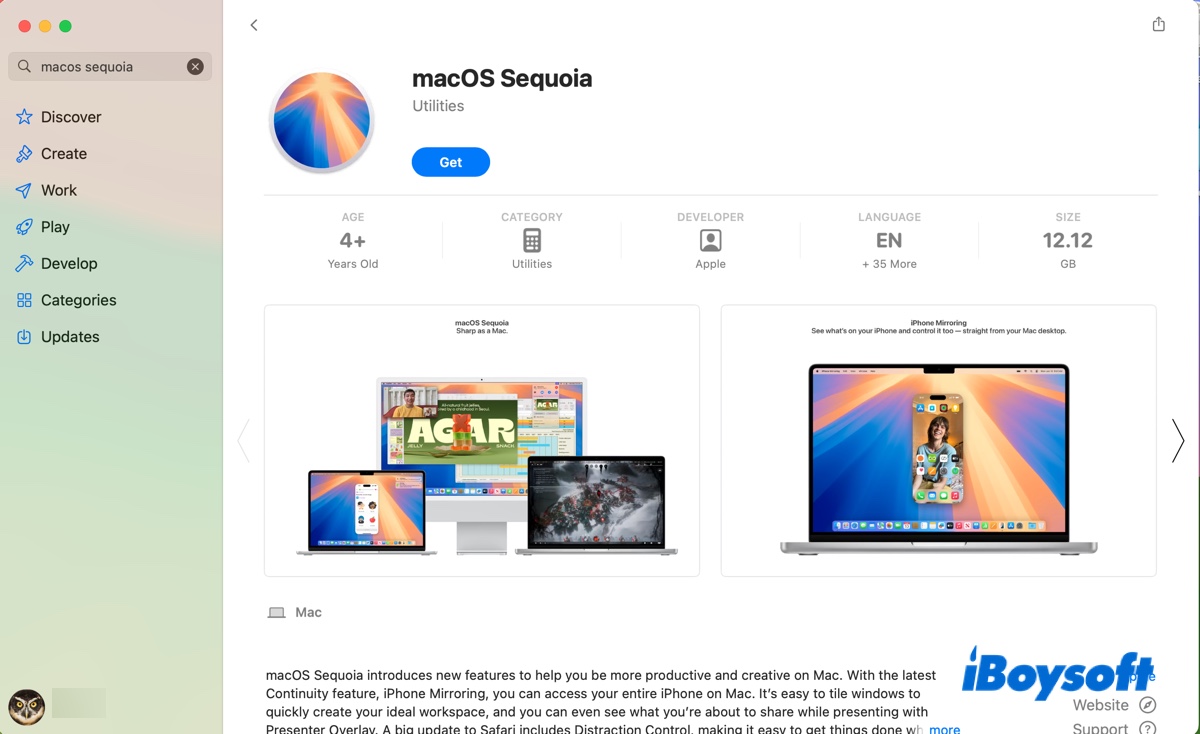
- Download macOS Sequoia from the App Store. Open the Mac App Store, search for "macOS Sequoia," then click View > Get to download it to your Applications folder. When the installer is downloaded, it'll open automatically. To quit the installer, press Command-Q.
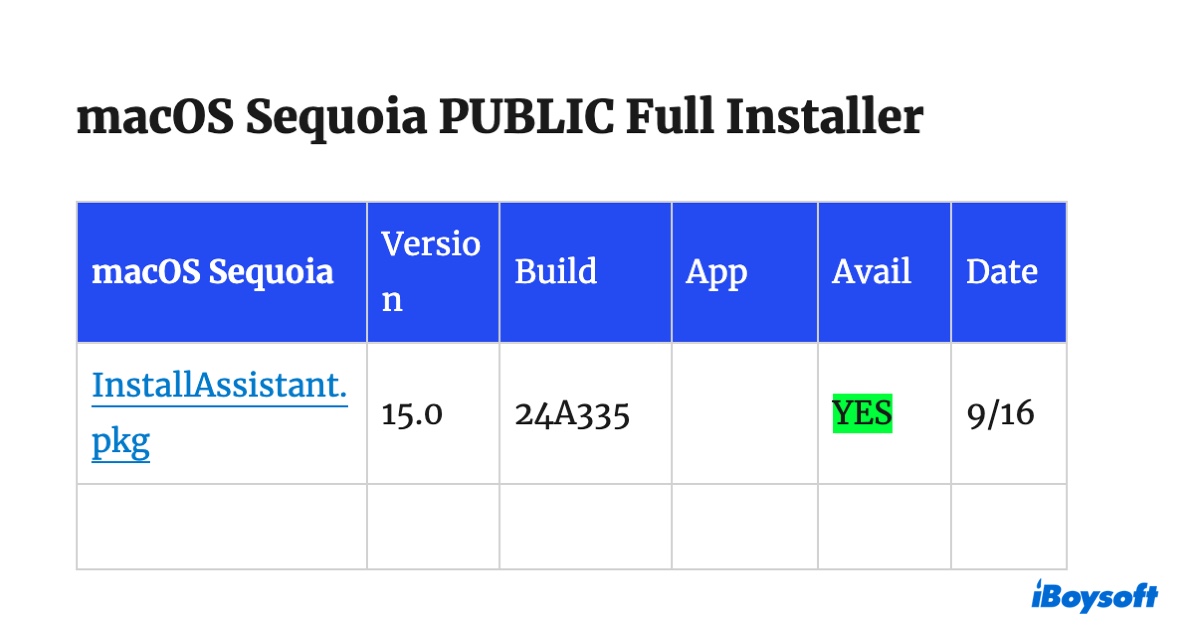
- Download macOS Sequoia directly from Apple's server. Mr Macintosh keeps all download links for macOS Sequoia. You can open this page and click the latest macOS Sequoia version to download the full installer. This will get you a .pkg file, which you need to open and install to move the installer into your Applications folder.
- Download macOS Sequoia from Terminal. Alternatively, you can acquire the macOS Sequoia installer from Terminal with the following commands.
To list all macOS installers compatible with your Mac, run:
softwareupdate --list-full-installers
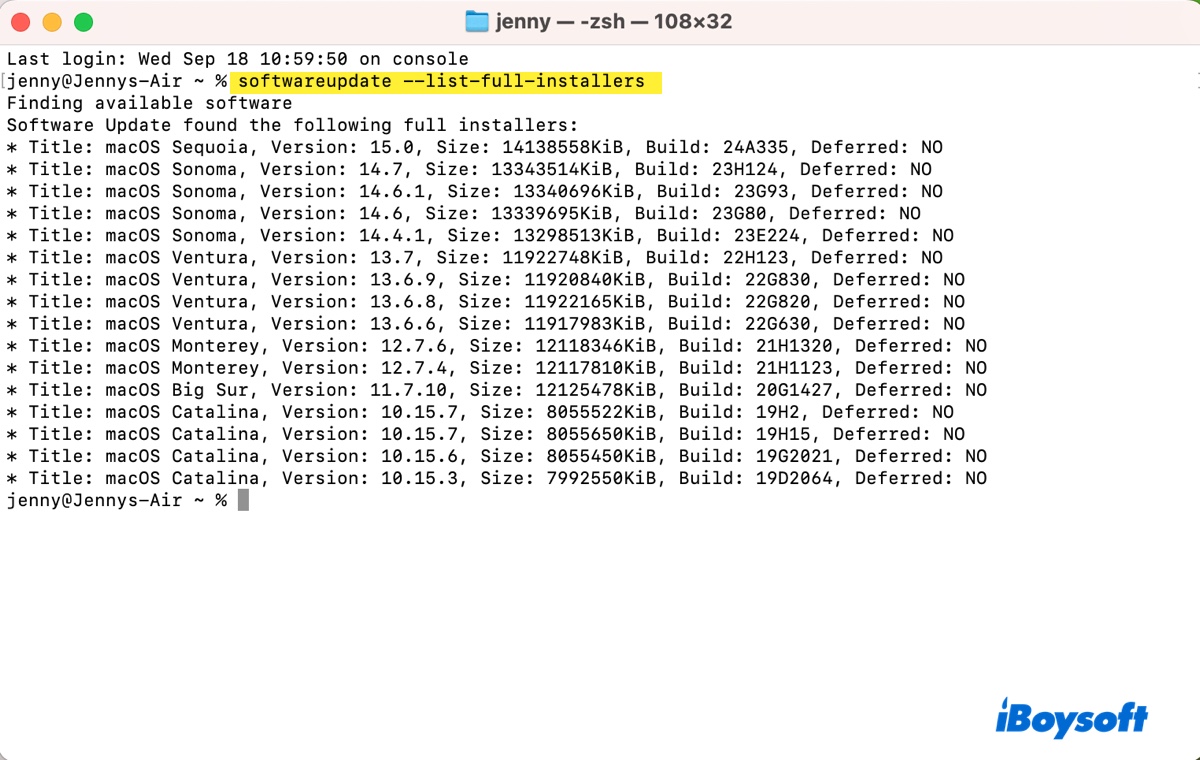
Note down the version number of macOS Sequoia, for instance, 15.0. Then replace version_number in the command below with it and execute the command to download Sequoia.
softwareupdate --fetch-full-installer --full-installer-version version_number
E.g., softwareupdate --fetch-full-installer --full-installer-version 15.0
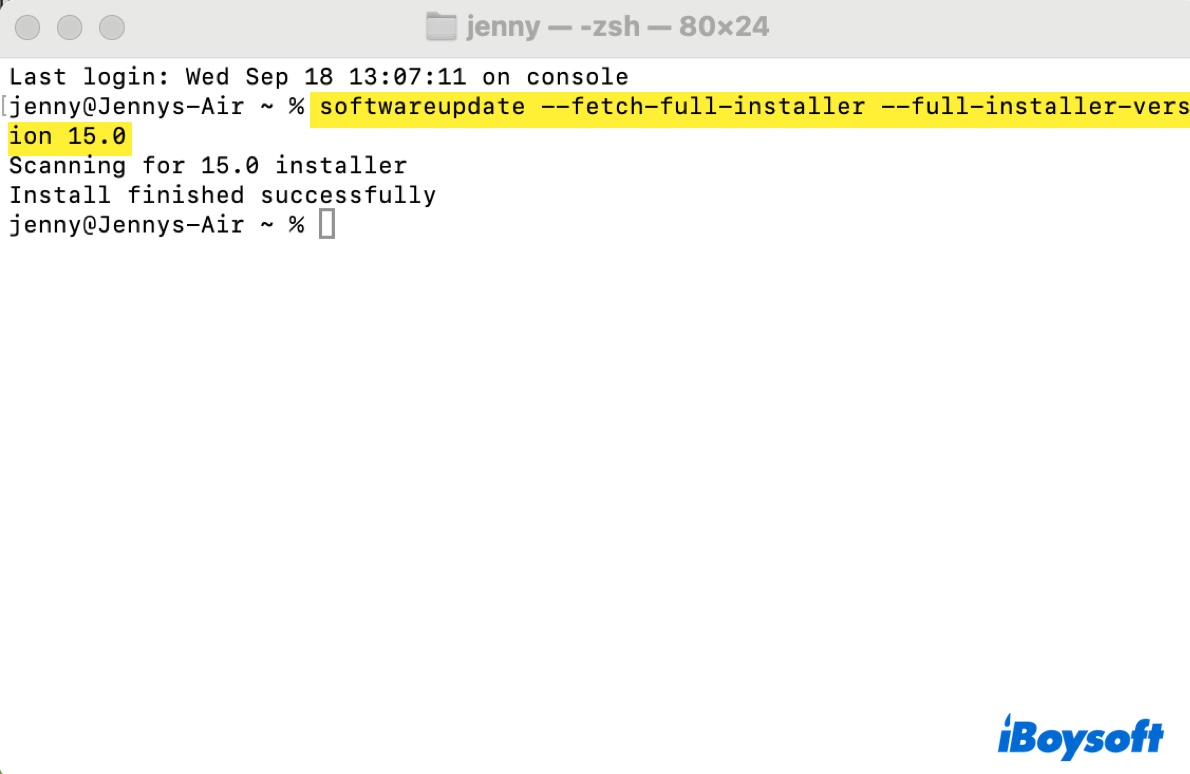
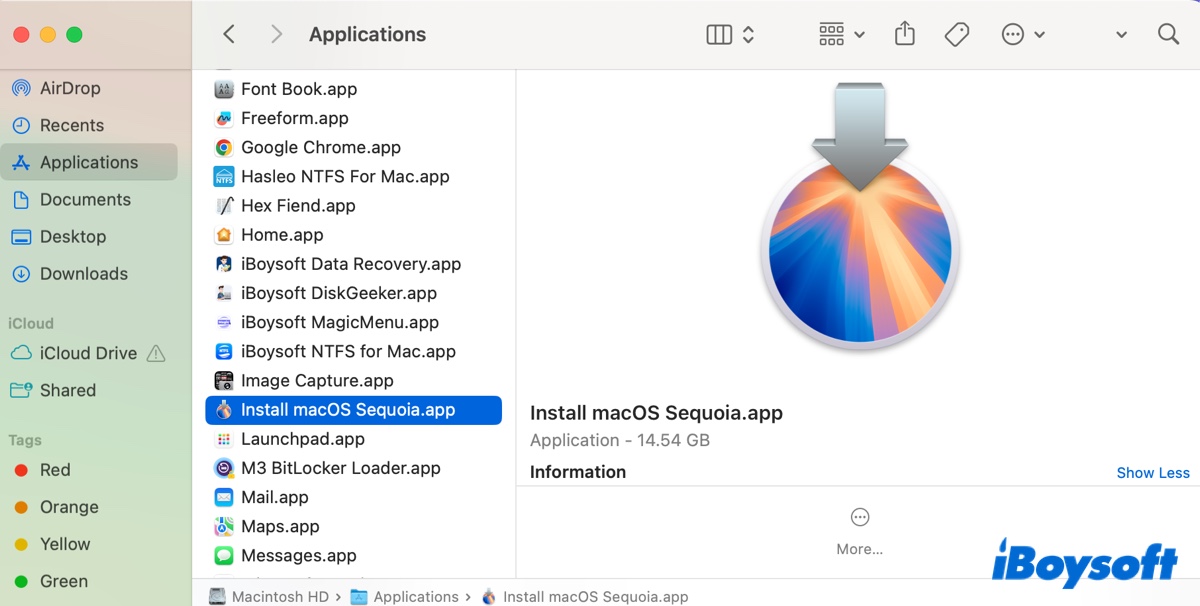
Once the download is complete, you'll find the "Install macOS Sequoia" installer in your Applications folder.
Share to help others get macOS Sequoia download for bootable USB!
Step 2: Format external hard drive for macOS Sequoia
This step is not a must but is recommended to avoid errors that may fail the Sequoia USB installer. By formatting the external hard drive, you'll delete everything on it and assign it a new, clean file system. If the drive containes important files, back them up before proceeding.
Take the steps below to prepare the drive:
- Insert the external drive into your Mac.
- Launch Disk Utility.
- Click View > Show All Devices.
- Select the top level of your external drive and click Erase.
- Name it MyVolume.
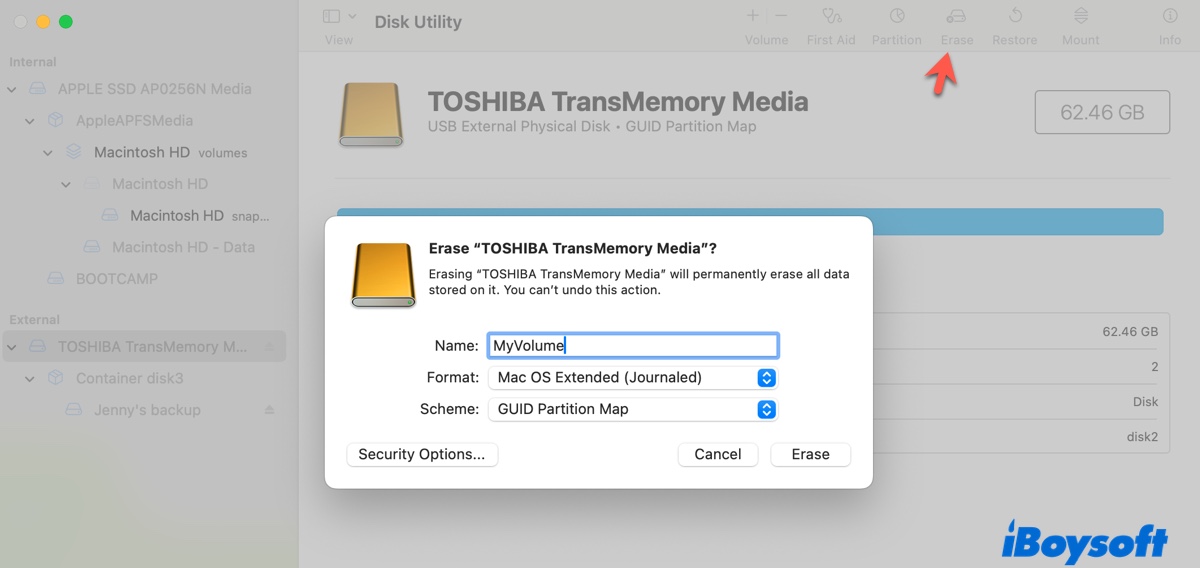
- Choose Mac OS Extended (Journaled) as the format.
- Keep the scheme GUID Partition Map.
- Click Erase.
Step 3: Create macOS Sequoia bootable USB installer
After your external drive is erased, follow the steps below to create a bootable Sequoia USB installer:
- Open Terminal.
- Input the command below and hit Enter.sudo /Applications/Install\ macOS\ Sequoia.app/Contents/Resources/createinstallmedia --volume /Volumes/MyVolume
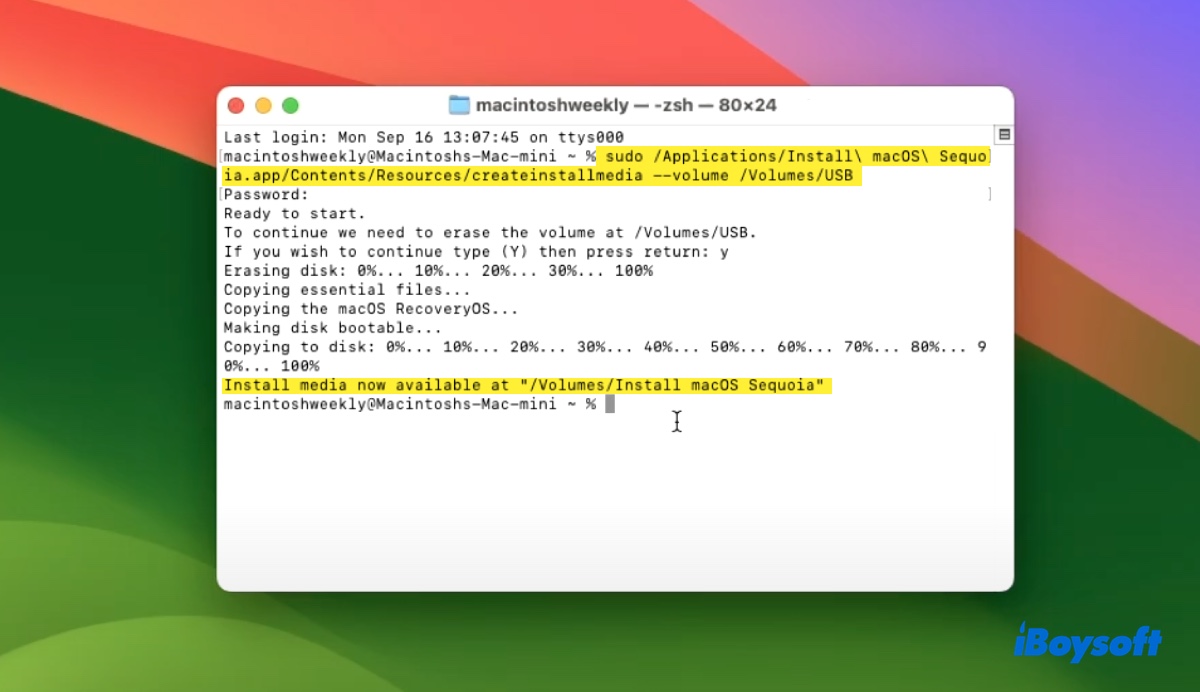
- Type your administrator login password and hit Enter when prompted.
- When required, type Y to confirm you want to erase the volume and press Enter.
- Click OK if you see an alert that Terminal wants to access files on a removable volume.
- When Terminal says that the "Install media is now available at '/Volumes/Install macOS Sequoia'," you can close Terminal and eject the drive.
If you can't create the macOS Sequoia USB boot drive or see the error "The bless of the installer disk failed," use the following install disk creator for Sequoia.
Step 4: Install Sequoia from USB
Now that you have the macOS Sequpia bootable installer, you can install macOS Sequoia from the USB.
How to install Sequoia from USB on Apple Silicon Macs?
- Turn off the Mac you want to install macOS Sequoia.
- Connect the bootable USB installer to your Mac. (Ensure your Mac has an internet connection, which is needed to get firmware and other information.)
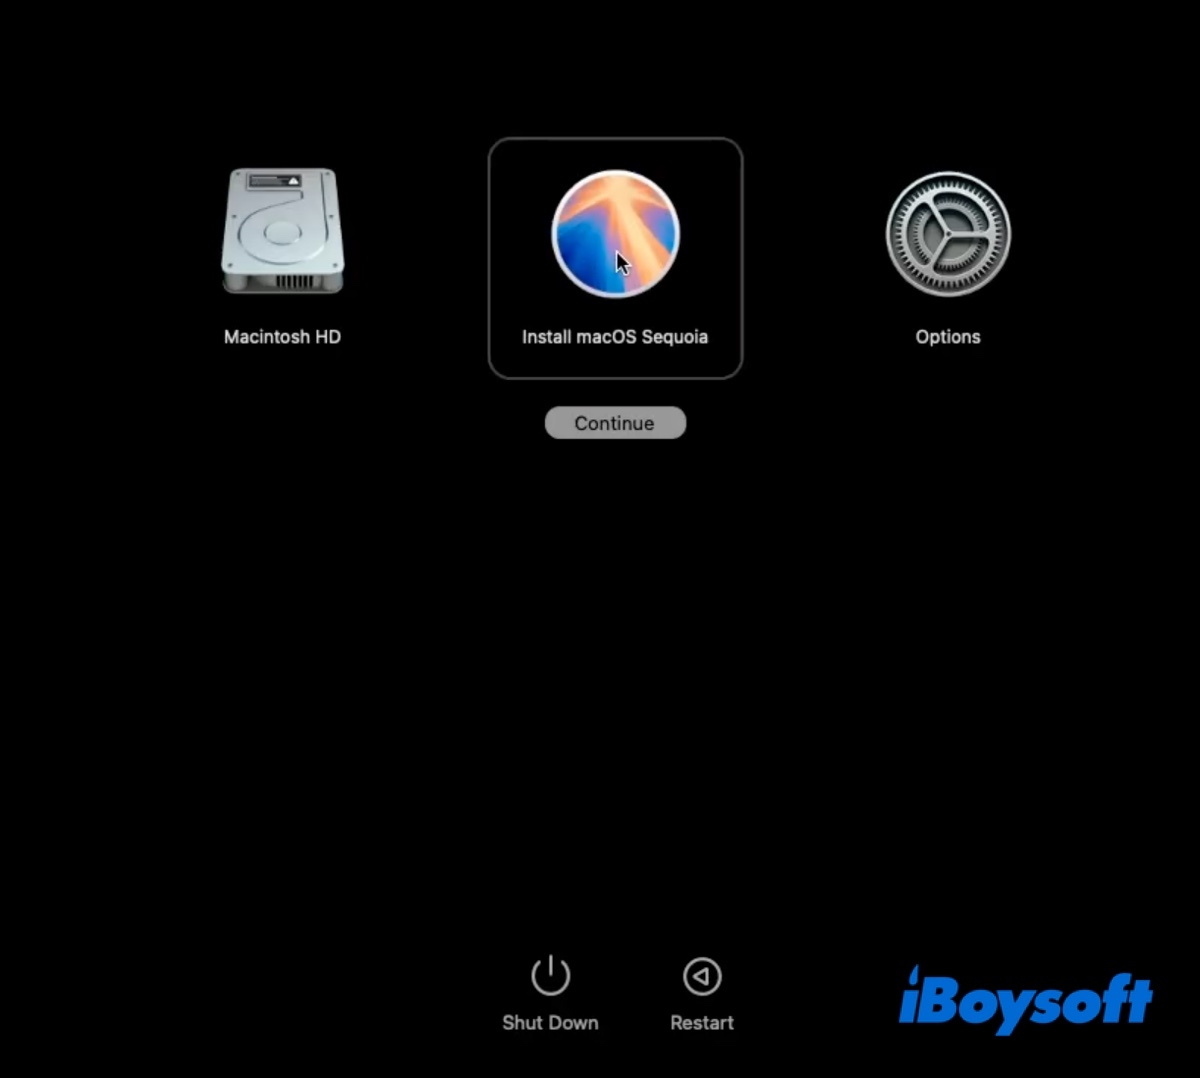
- Press and hold the power button until the "startup options window" shows up.
- Select the bootable installer and click Continue.
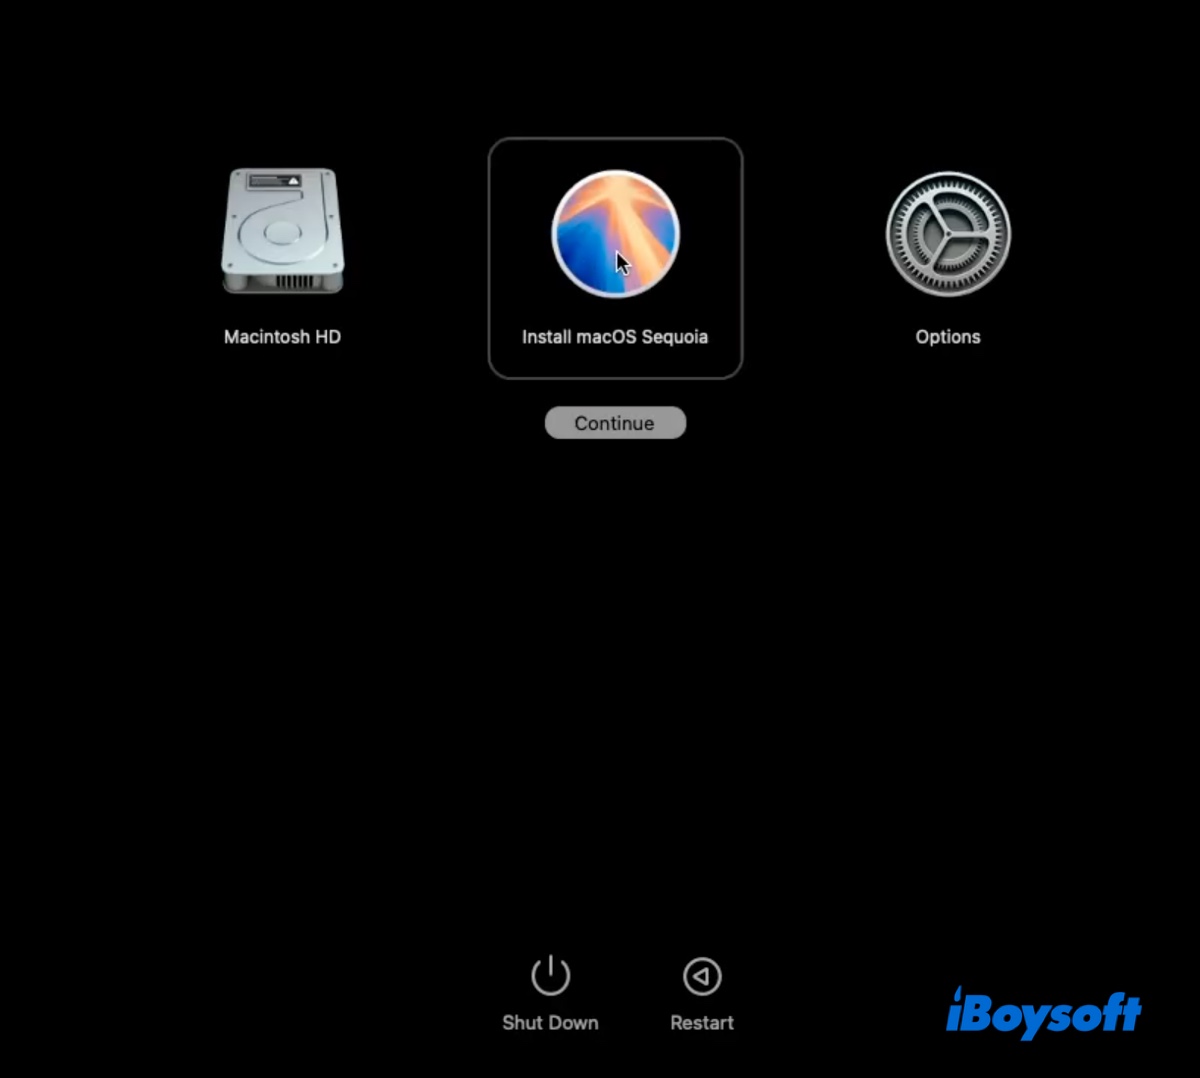
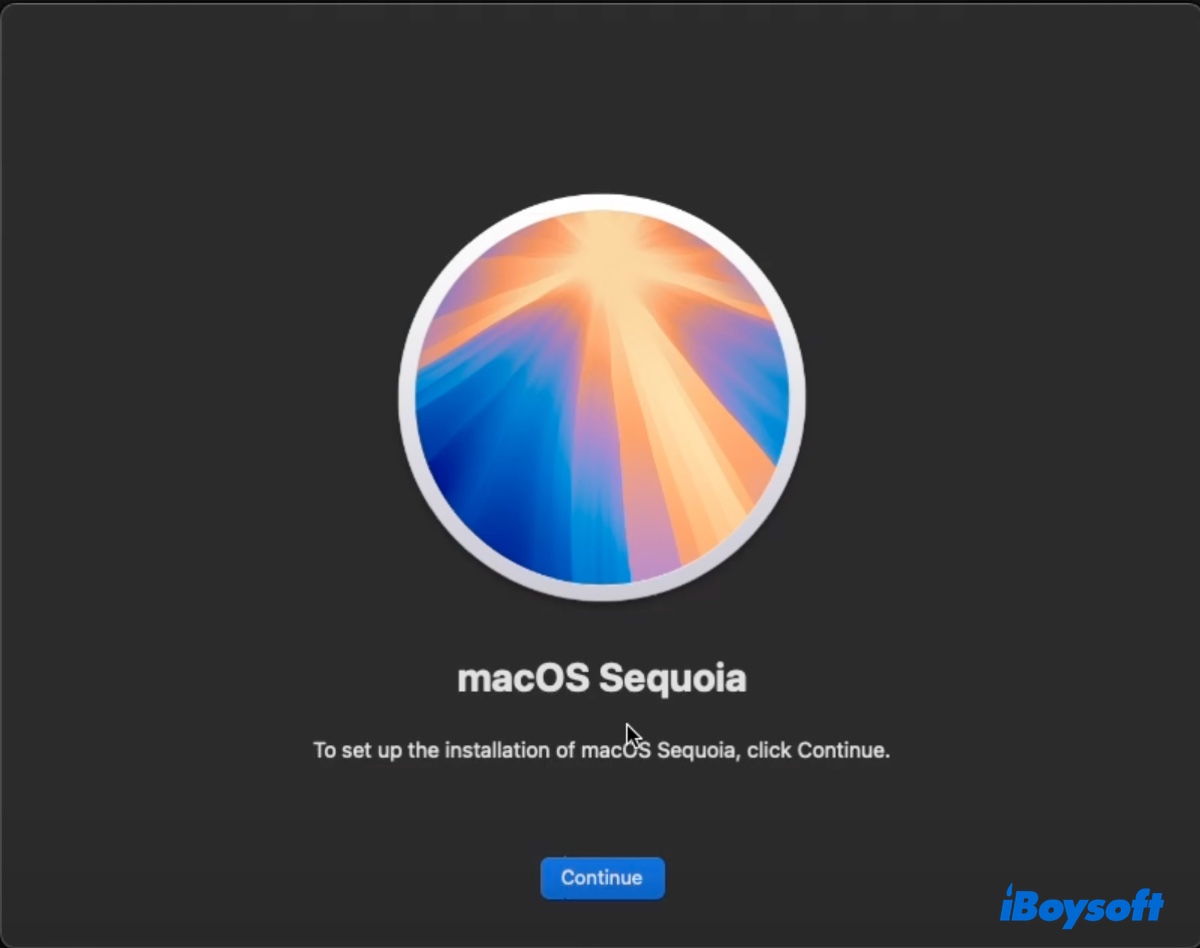
- Follow the instructions to install macOS Sequoia.
How to install Sequoia from USB on Intel-based Macs?
Note: If you have a T2 Mac, ensure Startup Security Utility is configured to allow booting from external or removable media.
- Shut down the Mac you plan to install macOS Sequoia.
- Plug in the bootable USB installer.
- Turn on the Mac and immediately press and hold the Option key
- Release the key when seeing a dark screen showing the bootable volumes.
- Choose the macOS Sequoia bootable installer and click the onscreen arrow.
- Select your language if asked.
- Choose "Install macOS," click Continue, and then follow the onscreen instructions to install Sequoia.
If data loss occurs after macOS installation, use Mac file recovery software to rescue the files ASAP.
Share these steps on how to install macOS Sequoia from a USB!