With the Trackpad on your keyboard of MacBook Air/Pro or the Apple Magic keyboard associated with iMac, you don't even need a mouse to control your Mac. Reading this post, you can learn how to configure your Mac Trackpad to make it work the way you want.
How to access Mac Trackpad preferences?
Apple simply configures the Trackpad on Macs when they are shipped out. Mac users can change the Trackpad settings according to personal habits to meet their needs, such as how firmly you must press the trackpad to take action, enabling right-click on Mac feature of Trackpad, turning off the clicking sound, etc.
All these configurations you can make residents in the Trackpad preferences, you can access them with the steps below:
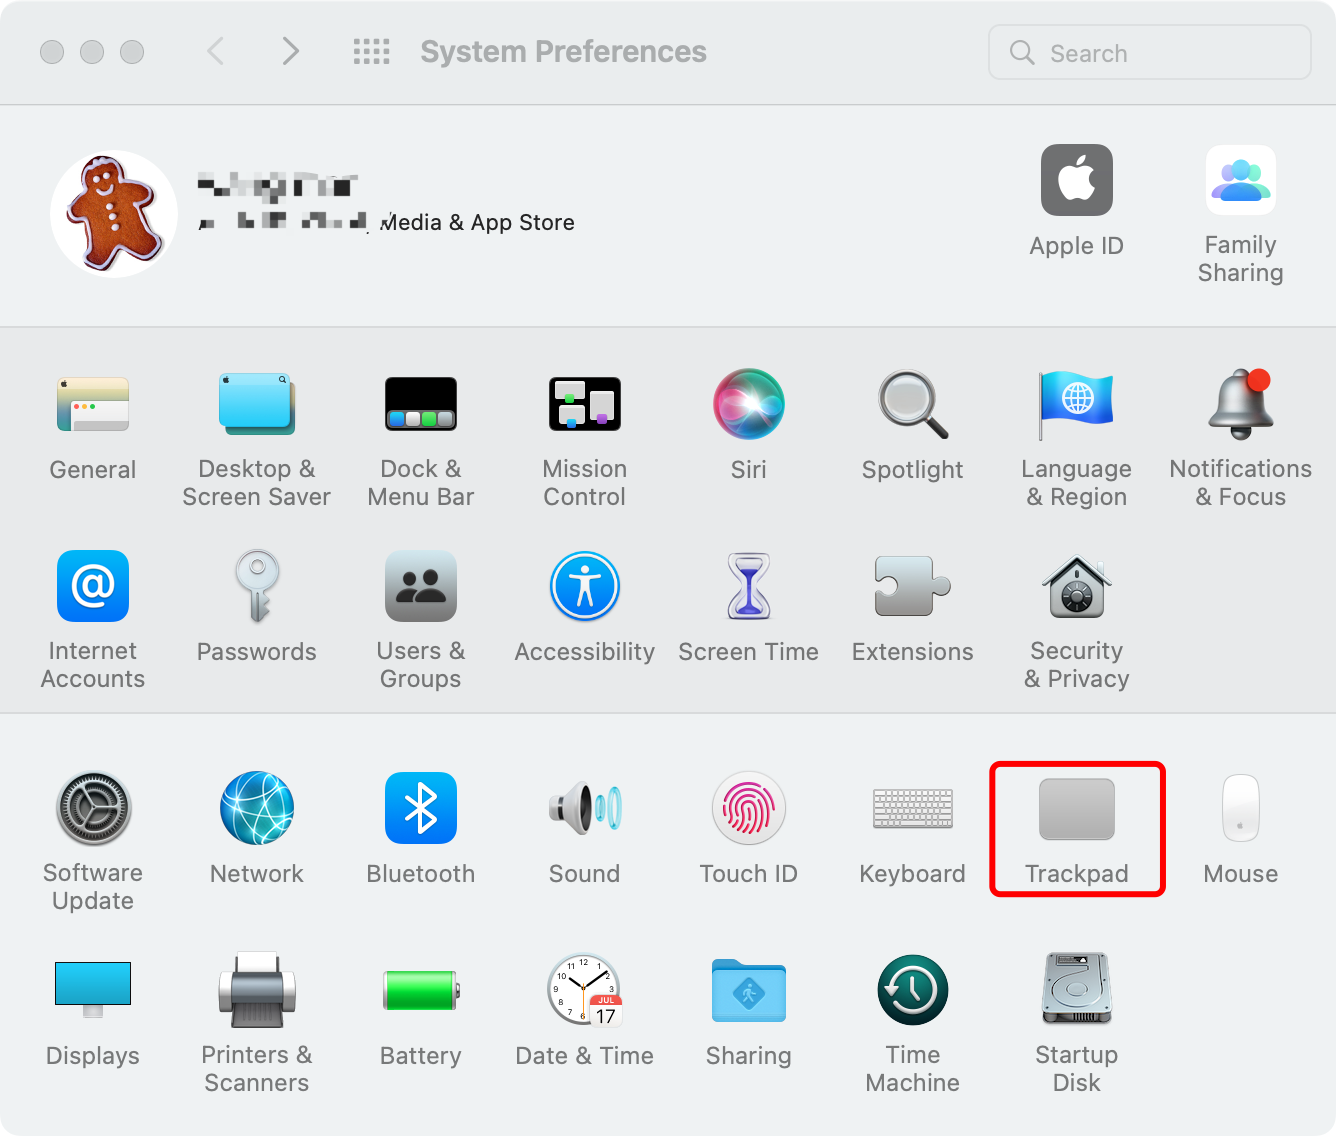
- Open the Apple Menu featured with an Apple logo on the upper right corner of the screen.
- Choose System Preferences on the drop-down menu.
- Click Trackpad on the pane to open its preferences.
How to customize your Mac Trackpad?
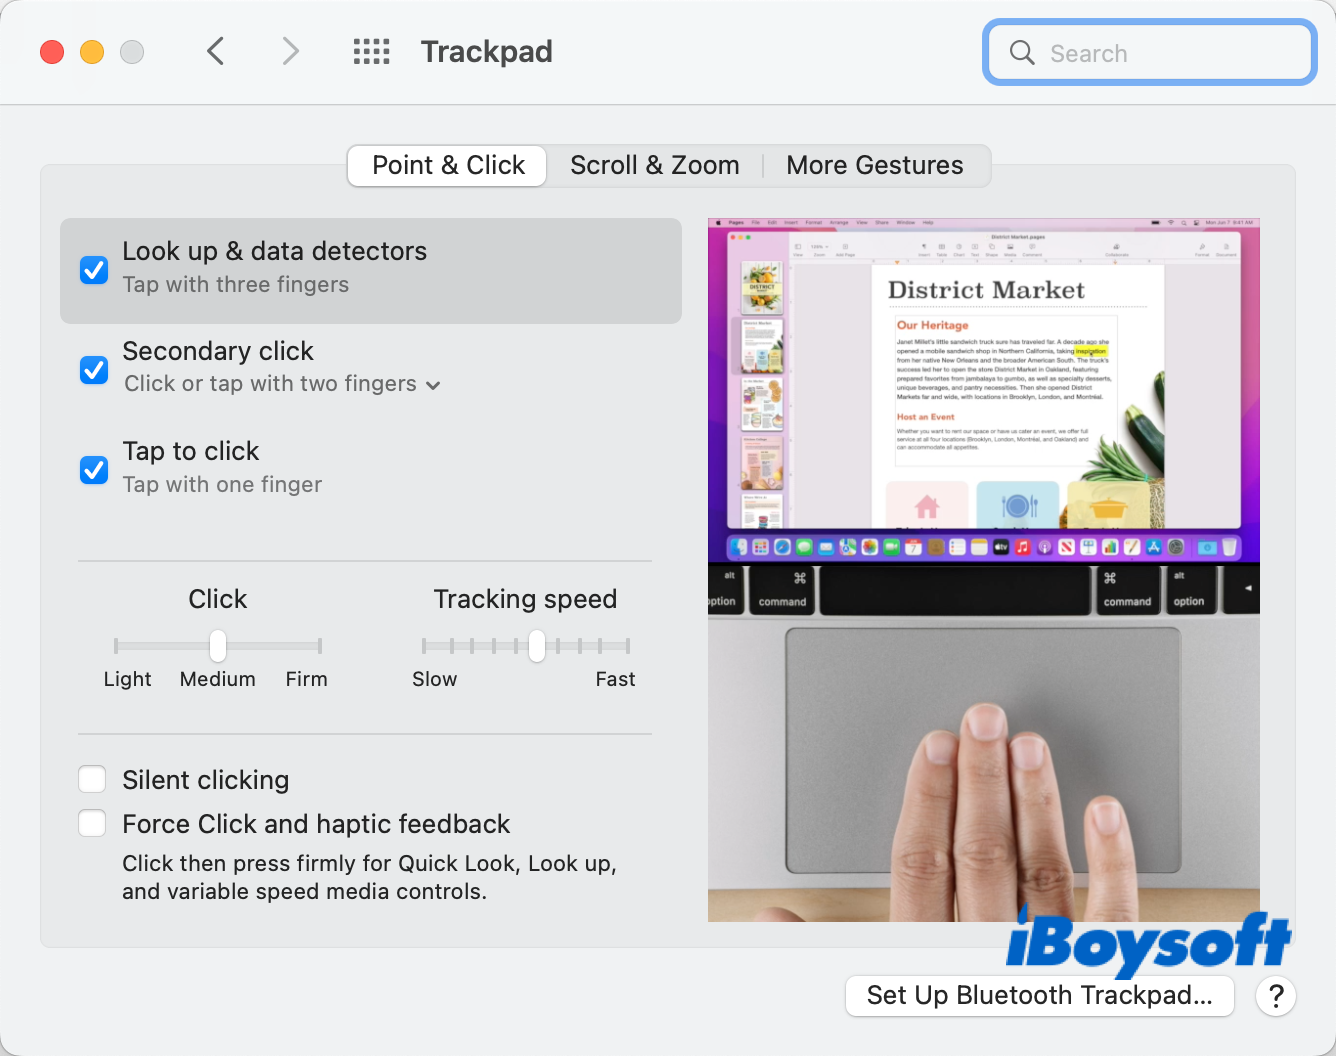
After you access the Trackpad preferences, you can see that there are three tabs, namely Point & Click, Scroll & Click, and More Gestures. Click on each tab, there are multiple options you can use to configure the Trackpad.
When you hover the cursor on each feature on the left side, there is an animation on the right side showing you how the selected feature works if enabled. Let's dive into the details.
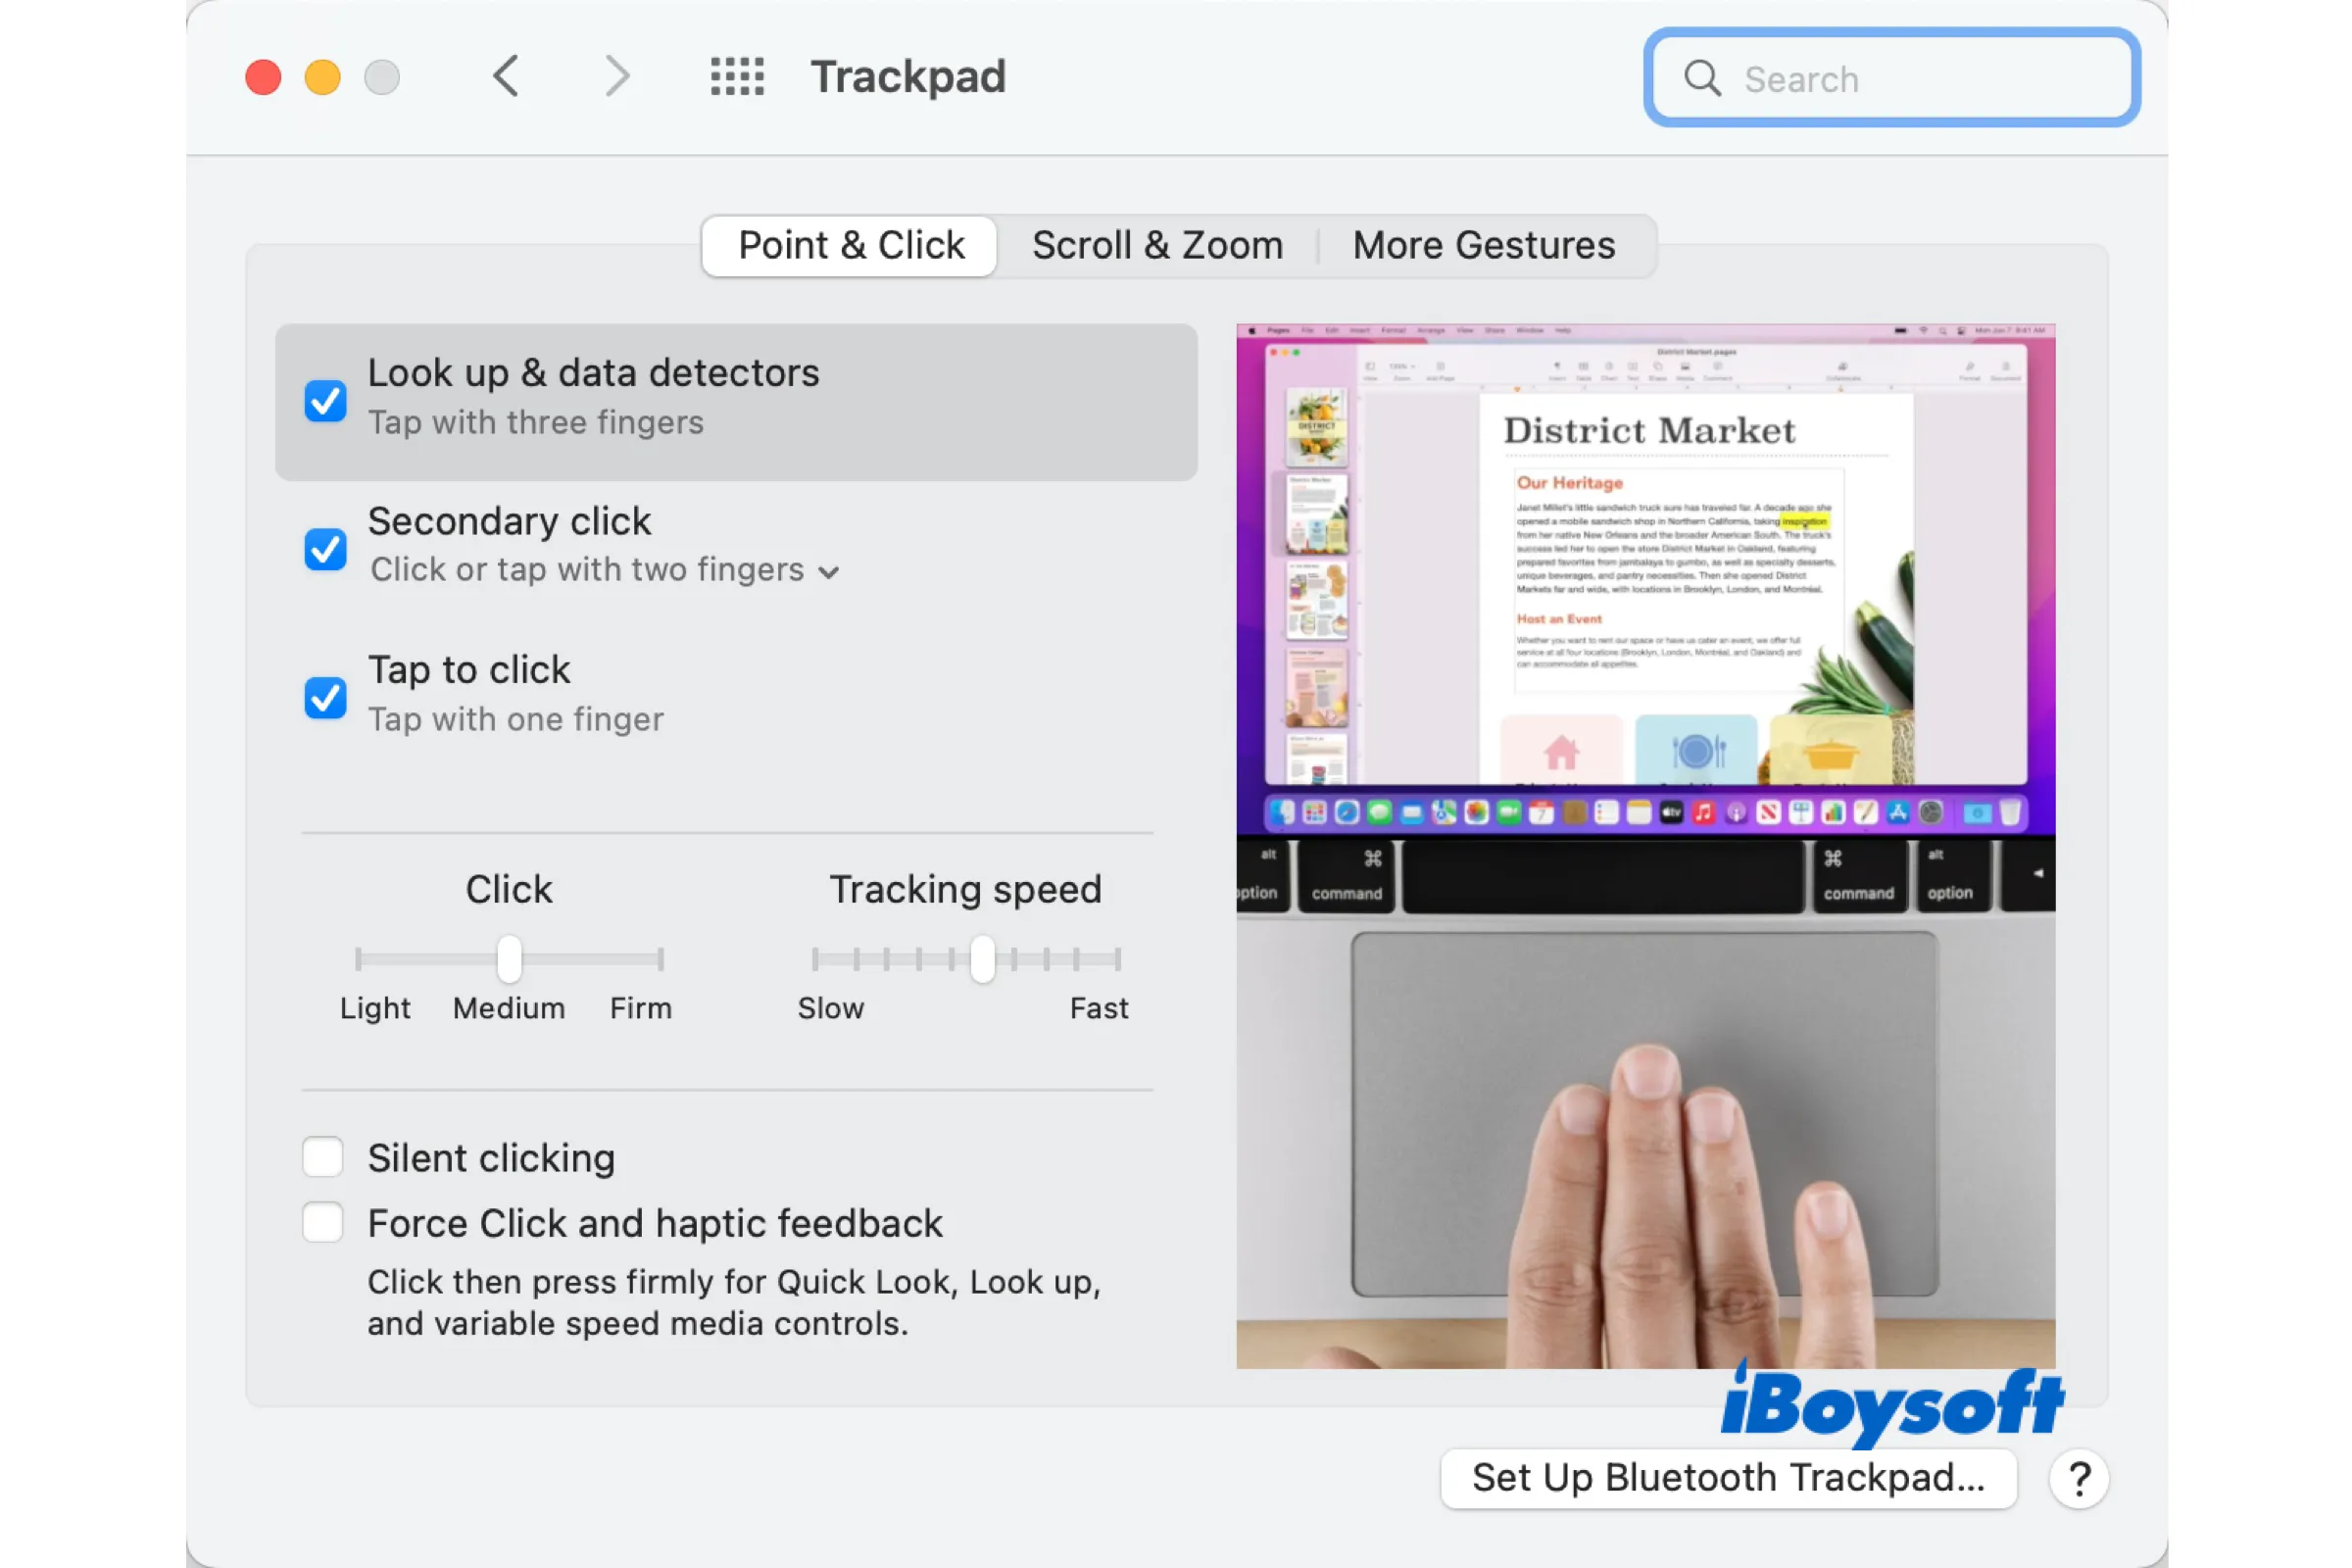
Point & Click tab
Here, you can set to click on the Trackpad just like using a mouse.
- Look up & data detector: When you read on the browser or deal with some word documents, you can tap the Trackpad with three fingers, and it will automatically select the current item on the screen, such as a word, data, address, then a drop-down menu pops up, where you can choose to look up the word in the dictionary, copy the address, etc.
- Secondary click: With this feature enabled, you can easily open the secondary menu just like you right-click on a Windows PC. You can choose to click or tap with two fingers, click in bottom right corner, or click in bottom left corner on the Trackpad to trigger this feature.
- Tap to click: You can slightly tap on the Trackpad with one finder to click on an item.
- Click & Tracing speed: To adjust the pressure you need to click your Trackpad and the tracing speed of the pointer when you move it across the screen.
- Silent clicking: Turn off the clicking sound on a Force Touch trackpad.
- Force Click and haptic feedback: Click an item and then press firmly until you feel a deeper click, then you can take action to quick look, look up, etc.
Scroll & Zoom tab
By moving your fingers on the Trackpad to control and move the item on the screen.

- Scroll direction: Natual: Tap on the Trackpad with two fingers and move from left to right, from top to bottom to move the contents of a window in the same direction as your fingers.
- Zoom in or out: You can zoom in and zoom out on Mac using Trackpad. Just open the target window on the screen and place two fingers on the trackpad. Then, pinch the fingers together on the trackpad to zoom out or move them apart to zoom in.
- Smart zoom: Double-tap with two fingers on the Trackpad to zoom in or zoom out the window.
- Rotate: Place two fingers on the Trackpad and rotate the item in the same direction as your fingers.
More Gestures tab
You can enable more gestures here to effectively use the Trackpad on Mac.
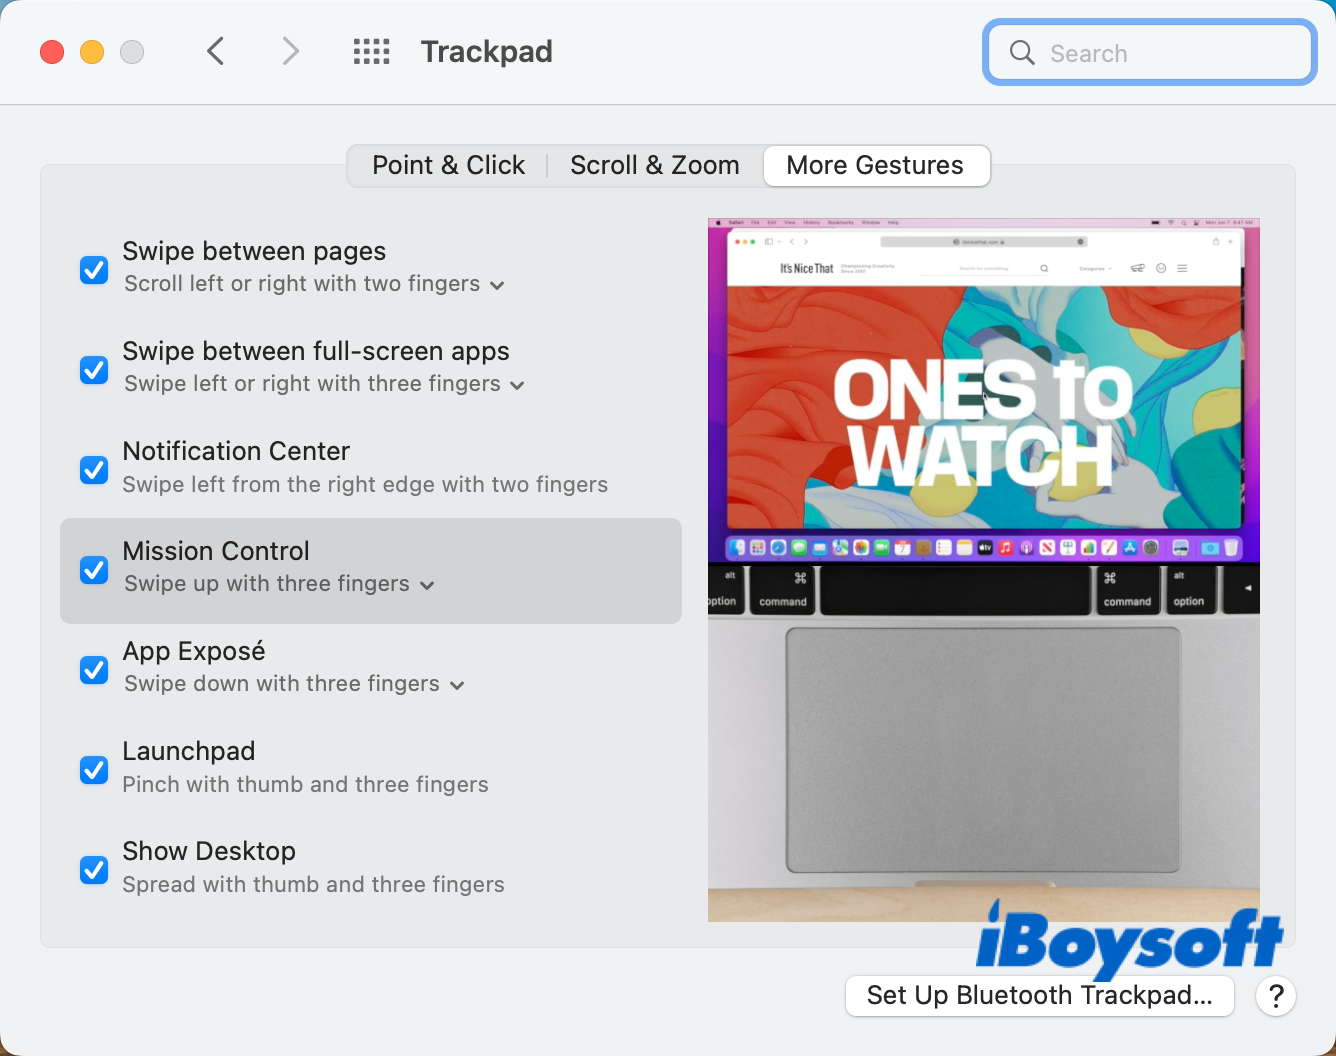
- Swipe between pages: Move your fingers on the Trackpad back and forward to swipe between pages. Choose to scroll left or right with two fingers, and swipe with two or three fingers to activate this feature on the Trackpad.
- Swipe between full-screen applications: When you have opened multiple full-screen applications on the screen, you can move your fingers on the Trackpad to quickly swipe between different applications on the screen by settings to swipe left or right with three or four fingers.
- Notification Center: Swipe left from the right edge with two fingers to open the Mac Notification Center to display at the upper right corner of the screen.
- Mission Control: Swipe up with three or four fingers to trigger Mission Control which offers a bird's-eye view of all the opened full-screen windows on the screens, and you can quickly switch between them.
- App Expose: Swipe down with three or four fingers to enter Expose.
- Launchpad: Pinch with the thumb and three fingers to open the Launchpad app.
- Show Desktop: Spread with the thumb and three fingers to hide open windows and display your desktop.
Common issues when using Mac Trackpad
Some Mac users report that the Trackpad on MacBook is lagging, it may be caused by the incorrect Trackpad sensitivity and other settings, temporary system glitches, etc. You can try the methods we provide in the linked guide to fix it, including resetting the Trackpad tracking speed, resetting SMC and NVRAM, etc.
Besides, you may encounter the problem that the drag and drop not working when using Trackpad on Mac. Then, restart the Finder app, reboot your Mac, reset the Trackpad settings, delete plist files, and update macoS may get the problem solved.
If the Trackpad is not working on MacBook may be a headache, macOS bugs or some sort of software malfunctions within your MacBook Air/Pro may be the culprit. Applying some effective methods may get the malfunctioned Trackpad to work again.

[Easy Steps] How to Do an Electronic Signature on Mac
This article tells you how to do an electronic signature on Mac, and helps you sign any document on Mac more easily via your trackpad, camera, and iPhone. Read more >>
If you think this guide is useful, just share it with more people!