
Compared with 10 years, or 20 years ago, our lifestyle has changed dramatically. In this era of digitalization, we tend to replace almost all our conventional activities with a digital substitute. Whether it is shopping, reading a book, or hailing a taxi, we are inclined to do it online.
Inevitably, instead of signing a paper document, signing it with an e-signature online has become more and more popular nowadays. By doing this, we can sign those important files using our computer, and send them over mail in no time. In this article, we'll show you how to do an electronic signature on Mac in detail, read on for more!
How to do an electronic signature on Mac?
For Mac users, macOS provides a convenient way to create electronic signatures on Mac - sign all your documents through the built-in Preview app. With the Mac Markup tool in Preview, you can create a digital signature by using Mac Trackpad, camera, or even your iPhone, and store it so that you can use it anytime you need it in the future.
It's quite easy to make a digital signature, thus to sign a document on your Mac using the Preview app. Whenever you receive a document from your clients, or you want to sign a document online, you can follow these steps to generate your own digital signature:
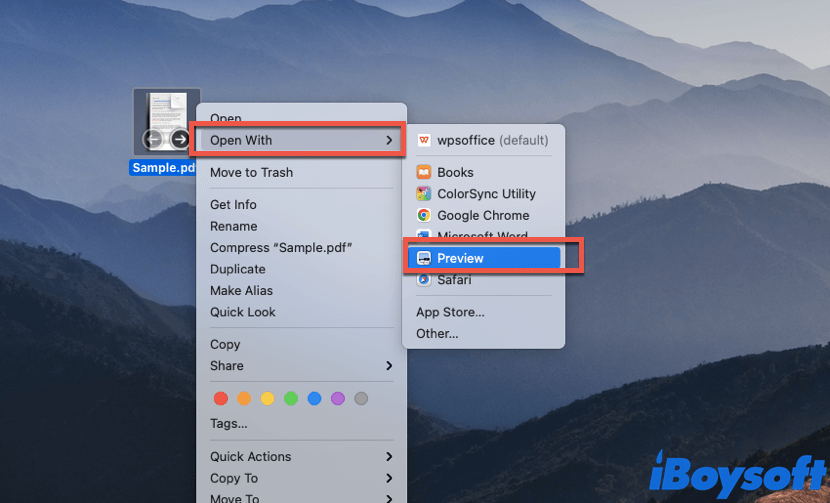
- Locate the file you wish to sign electronically either on the desktop or on the Mac Finder, then right-click on it.
- In the right-click menu, select Open With, then choose the Preview option from the sub-menu. It will open the wanted file on the Preview app.
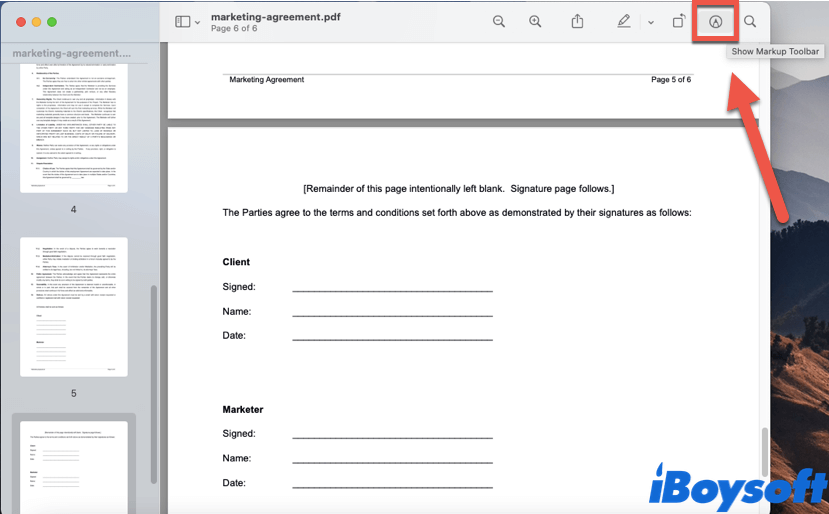
- When the file you want to sign online is open on the Preview app, click the Show Markup Toolbar icon (it looks like a pen or a crayon), which is located in the top right corner of the Preview app window.
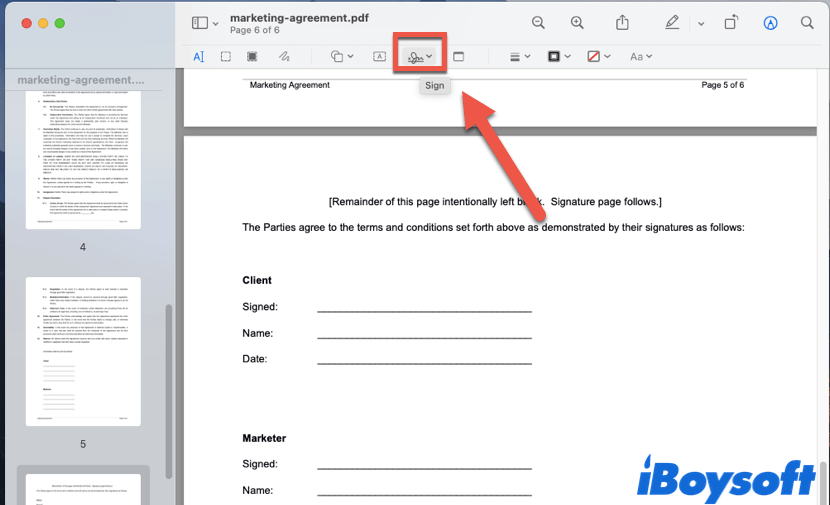
- After clicking on the Show Markup Toolbar icon, the Markup Toolbar will appear underneath the main toolbar. Click on the Sign icon, then select Create Signature.
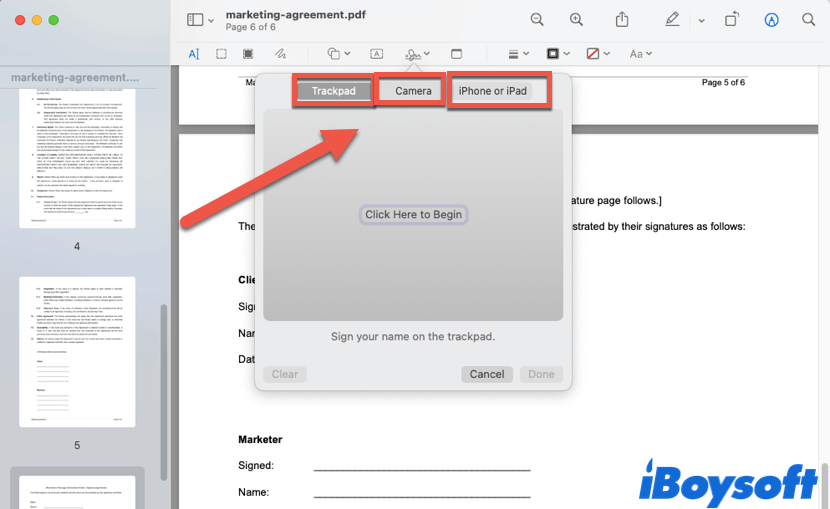
- A pop-up window appears, which allows you to create an electronic signature on Mac using either your Trackpad, Camera, or your iPhone/iPad.
Since there are three options listed under the Create Signature option, you may get a little bit confused. Don't worry, in the how to create an electronic signature on Mac guide below, we will explain the three ways one by one in detail. Without further ado, let's get on with it!
Think this content is quite useful? Share it with your friends now!
Create an electronic signature with Trackpad
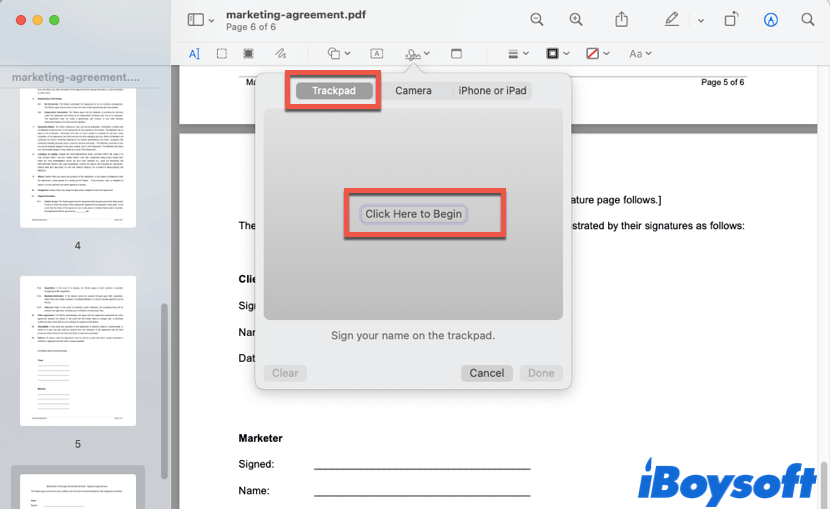
As you can see in the picture above, the first available option is Trackpad, which is also the quickest way to create a digital signature. Here's how to do an electronic signature on Mac via Trackpad:
- Click the Trackpad option from the three available options in the Sign menu, and you will find Click Here to Begin in the blank space, click on it.
- Now you can use your fingertip to write down your name on your Mac's Trackpad. What you write will show on the screen in real-time. The digital signature you scribble on Trackpad will be more accurate if you use a stylus.
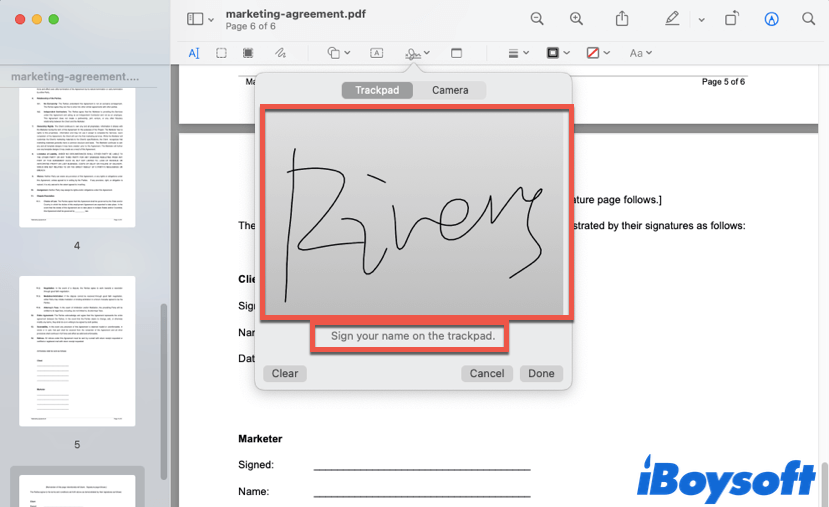
- After finishing writing down your signature on the Trackpad, press any key on your keyboard to continue, then click Done to save it. If you're not happy with how it turned out, simply click Clear and sign on the Trackpad again.
- Now you've created a digital signature successfully, you can click on it to get it on your document, and drag it to the right place.
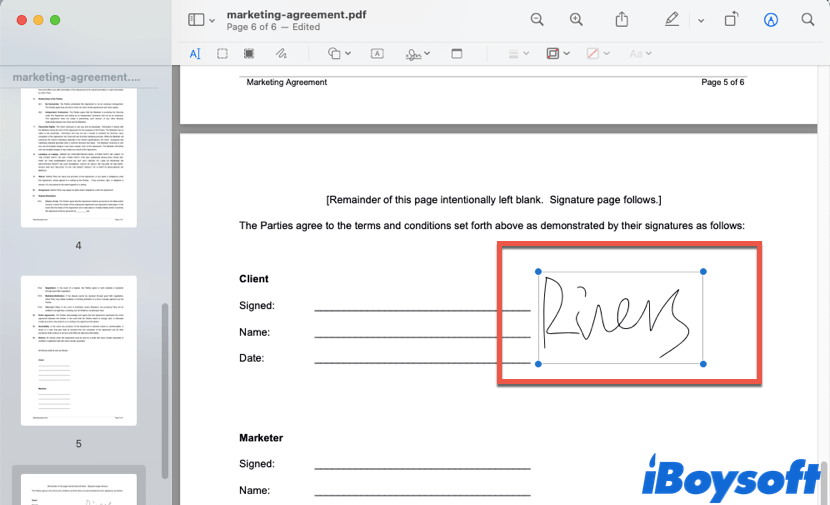
Also, according to your desire, you can resize or reposition the digital signature you just created. It's all up to you!

Fix MacBook Pro Trackpad Not Working (Step-by-Step)
It tells how to fix the MacBook trackpad not working, including the MacBook Pro trackpad not working, the MacBook Air trackpad not working, and why the trackpad not working on Mac. Read more >>
Make an electronic signature with Mac camera
The Camera is the second option that you can use to create an electronic signature on Mac, and it's more accurate than writing on Trackpad. After, we're used to writing with pens instead of fingertips. Here's how to create an electronic signature on Mac using Camera:
- Click on the Camera option from the three available options in the Sign menu, then grab a white sheet of paper.
- Write your signature down on the white paper, then hold that paper in front of the camera on your Mac. Make sure the signature is clear enough, and you can see its preview in the space provided.
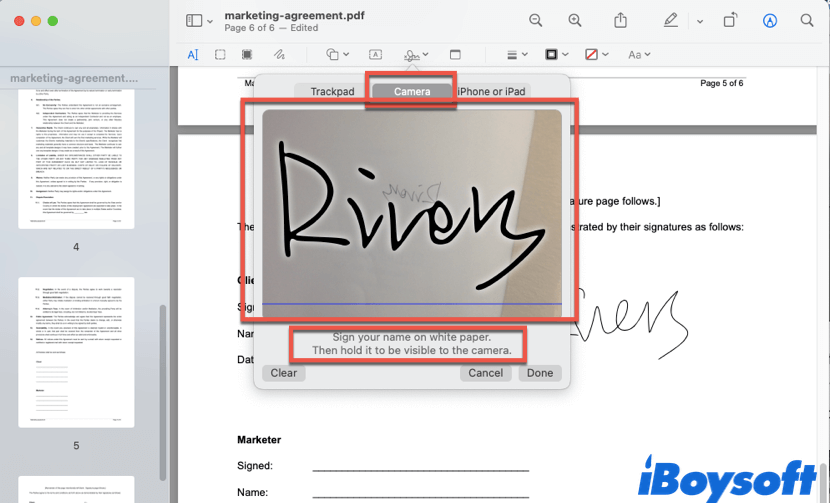
- Click Done to save the hand-written signature as a digital version. If you want to get it on your document, simply click the Sign icon, and click the digital signature recorded from the white paper.
In addition, you can resize the digital signature on your document, and also reposition your signature to fit right in the document.
Do an electronic signature with mobile devices
If unfortunately, the Trackpad and the camera on your Mac do not function well, you can still create an electronic signature on Mac with mobile devices. Here's how to do an electronic signature on Mac via iPhone or iPad:
- Make sure you have an iPhone or iPad nearby, unlock it, and then click the iPhone or iPad option in the Sign menu.
- A blank space will appear on your iPhone/iPad screen, it is a specific area for you to sign your digital signature. Now, sign your signature with your fingertip on the blank space on your iPhone/iPad.
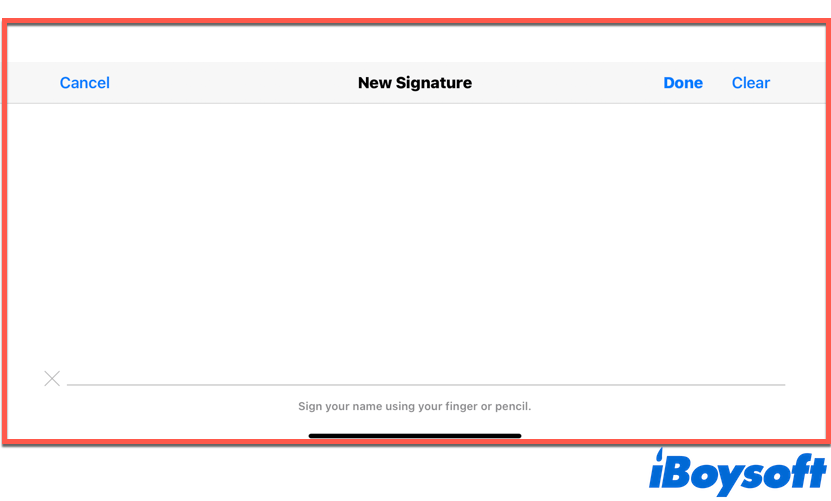
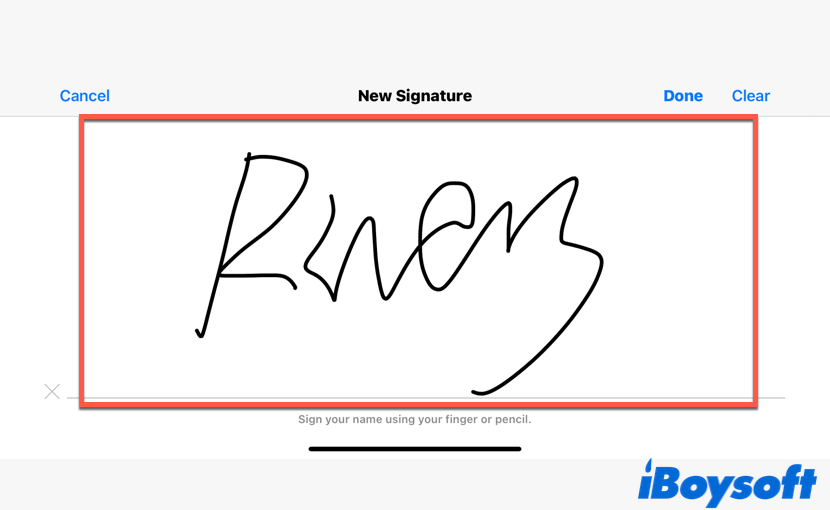
- What you sign on your mobile device will appear on the Preview app simultaneously, if you are fine with the signature you just wrote down, click Done on your device to save it.
Now, you can use the digital signature to sign your document on Mac at any time, since it is saved on the Preview app. If you want to delete those signatures you're not satisfied with, or not used, simply open Preview, and delete unwanted signatures in the Sign menu.
Create electronic signatures on Mac successfully? Share it on social media and let more people see this post!
Bonus: What if you want to create signed template documents?
Apart from sending back files that require personal signatures, there are times for us to send signed documents to others, such as a tenancy agreement. If you want to use the above methods to sign the agreement first, then send it to tenants, you may sign it over and over again every time when someone wants to rent your house. What if I tell you, there's an easier way?
In this situation, you can use iBoysoft MagicMenu to help you create a pre-edit template file that contains your signature with a single right-click.
iBoysoft MagicMenu is a right-click enhancer on macOS. It works based on adding new and improved functionalities to your control panel with a right-clicking mouse button. With its added New File feature, you can generate thousands of signed template documents with one click. Moreover, it supports various file formats, including doc, docx, xls, xlsx, txt, pdf, ppt, Keynote, Pages, Markdown, and Numbers.
Here's how to use iBoysoft MagicMenu to create signed template documents:
- Free download, install, and launch iBoysoft MagicMenu on your Mac.
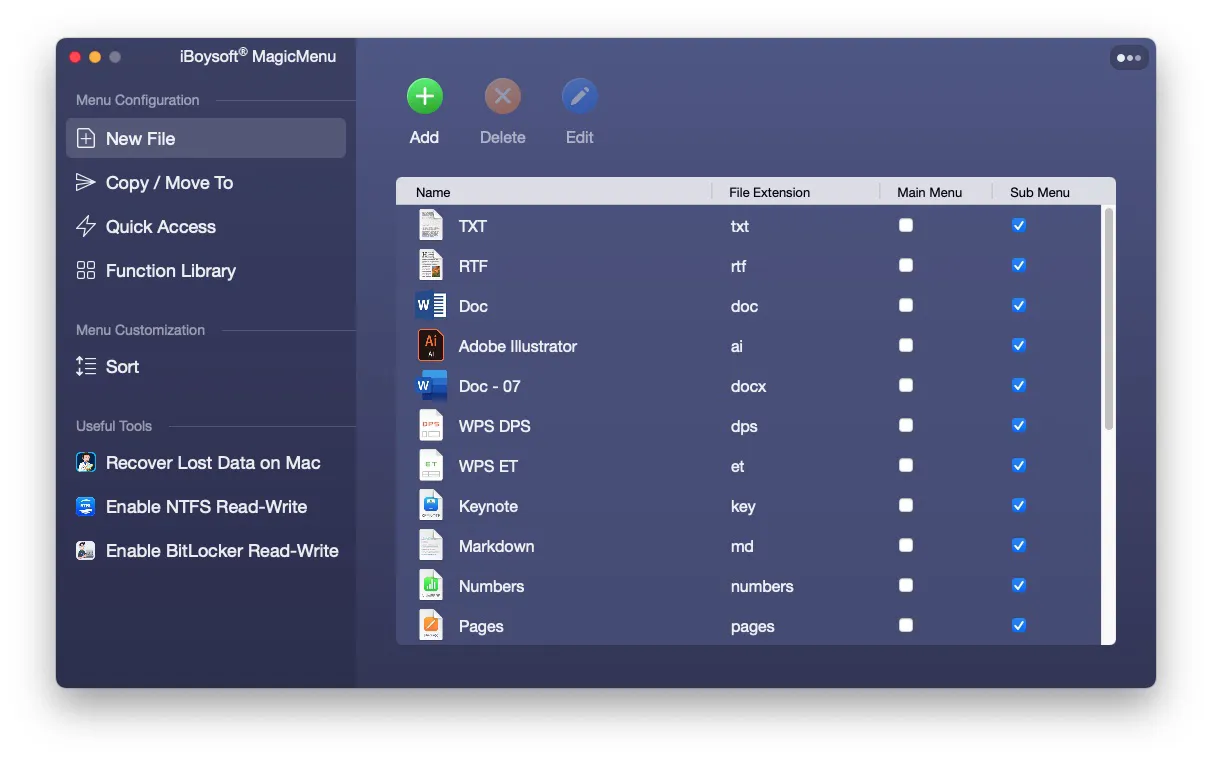
- In the user interface, click on the Add button on the top, then click browse to add your signed template document to the software, and click OK. The template document will be added to the sub menu of your right-click menu automatically.
- Right-click on the blank space on the desktop, select New File, then choose the signed template document.

Think this tool is really helpful? Share it with more people!
Final word
There are three methods you can use to create electronic signatures on your Mac computer, either using Trackpad, Mac camera, or iPhone/iPad. If you want to generate a signed template document, do not hesitate to use iBoysoft MagicMenu!