If you're looking to install macOS Mojave on your Mac or Windows PC or create a macOS Mojave bootable installer, you'll need the macOS Mojave full installer DMG file. This can be a bit challenging because even the App Store only provides an incomplete installer with a size of 14.7 MB.
Fortunately, you can download the latest version of the macOS Mojave DMG file from iBoysoft DiskGeeker. Additionally, it has an intuitive interface that helps you create a macOS Mojave bootable USB installer in a few clicks.
- Free download iBoysoft DiskGeeker and open it. (If you need to create a bootable USB installer for macOS Mojave, connect an external drive to the Mac.)
- If you only want to download macOS Mojave DMG, choose one internal volume and click Download Image. After that, choose macOS 10.14 Mojave and click Get.
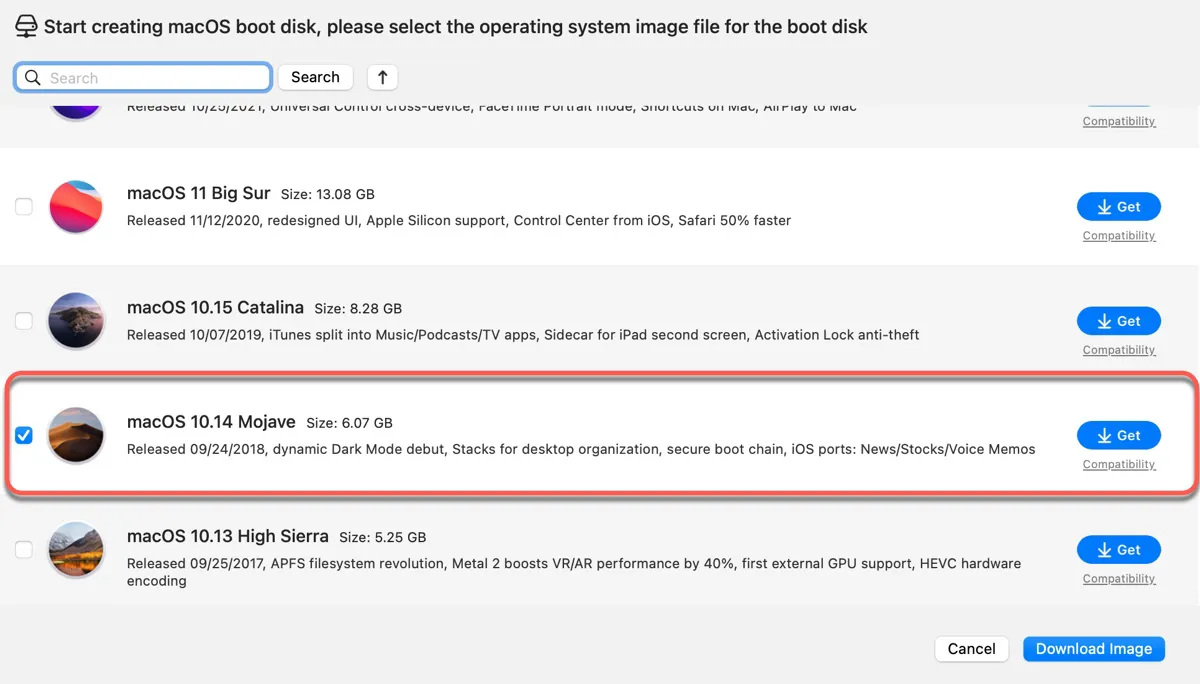
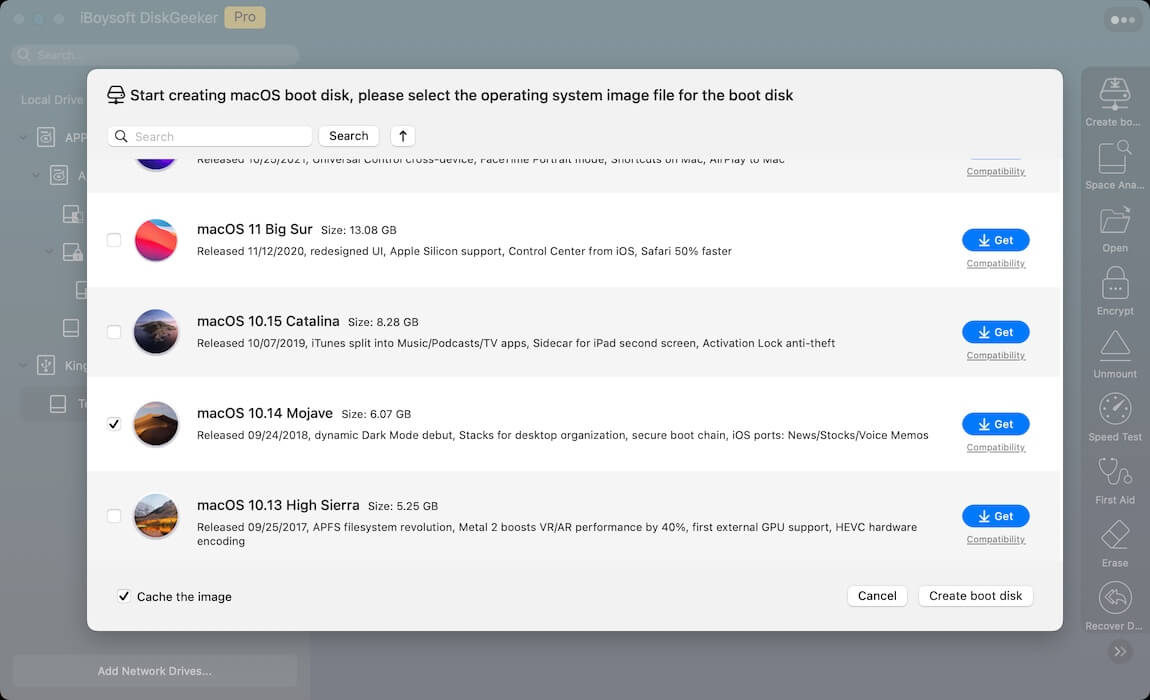
- If you're trying to download the Mojave DMG for creating a boot drive, choose your external drive and click Create boot disk. Then select macOS 10.14 Mojave and click Create boot disk.
We'll also explain how to download the latest macOS Mojave 10.14.6 DMG full installer and learn how to create a bootable macOS Mojave DMG file manually. If you need the ISO file, you can download the macOS Mojave ISO file directly or convert the DMG to ISO.
How to get macOS Mojave download DMG safely?
The safest way to download Mojave DMG is from iBoysoft DiskGeeker. It has a library of macOS DMG files made from reliable full installers. Apart from the Mojave DMG file, it also contains the Sequoia DMG, Sonoma DMG, Ventura DMG, Monterey DMG, Big Sur DMG, Catalina DMG, Mojave DMG, and High Sierra DMG.
This software can guide you to create a bootable USB installer for macOS Mojave and other versions as well. If you're downloading the Mojave 10.14.6 full installer DMG file to make a boot disk, this app will save you considerable time.
With it, you don't need to worry about storage shortage, as it helps you find and remove unwanted files efficiently.
Here's how to download mavOS Mojave DMG on Mac:
Step 1: Download iBoysoft DiskGeeker and finish its installation.
#Download Mojave DMG#Create macOS Mojave bootable USBClean up Mac
Step 2: Select an internal partition from the left and click Download Image at the right sidebar.
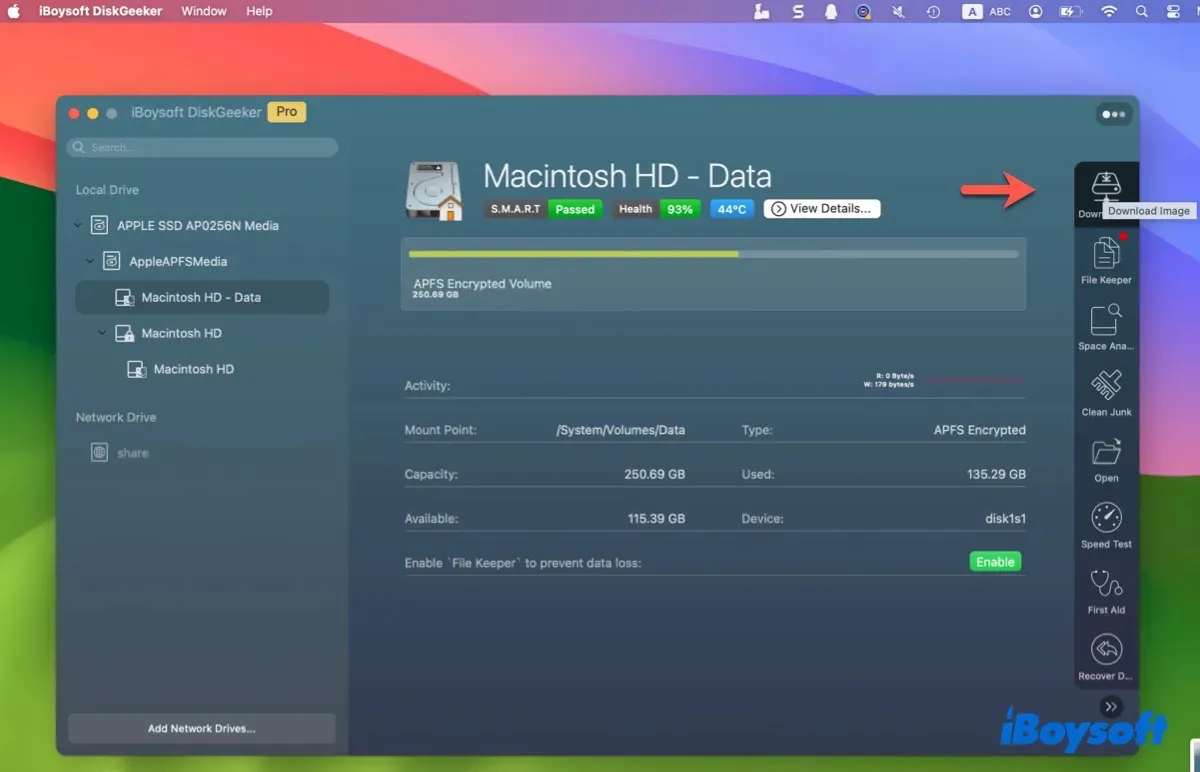
Step 3: Choose macOS 10.14 Mojave and click Get.

Step 4: Decide where to save the Mojave DMG and wait for it to be downloaded fully.
If you want to make a macOS Mojave boot disk from the DMG file, take the steps below:
Step 1: Choose your external drive from the left and click Create boot disk.
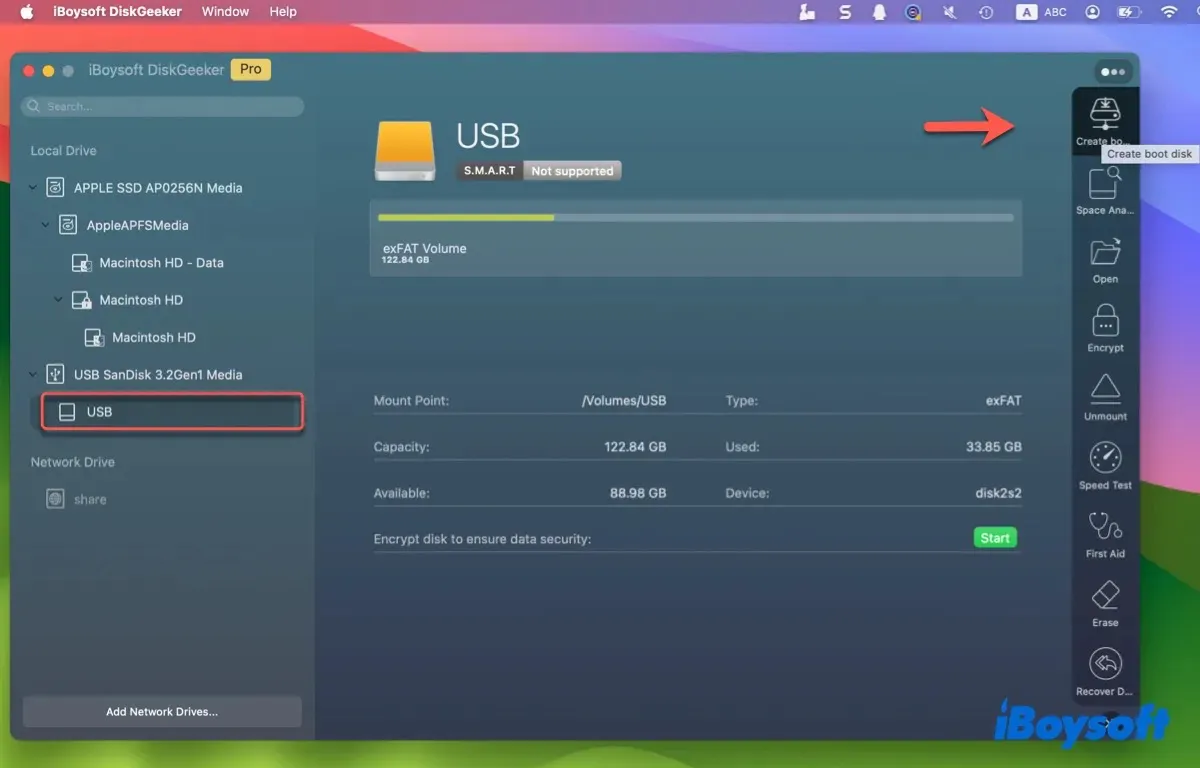
Step 2: Start to create a macOS Mojave boot media.
If you've downloaded the Mojave DMG, click Create boot disk > Browse Image to choose the file.
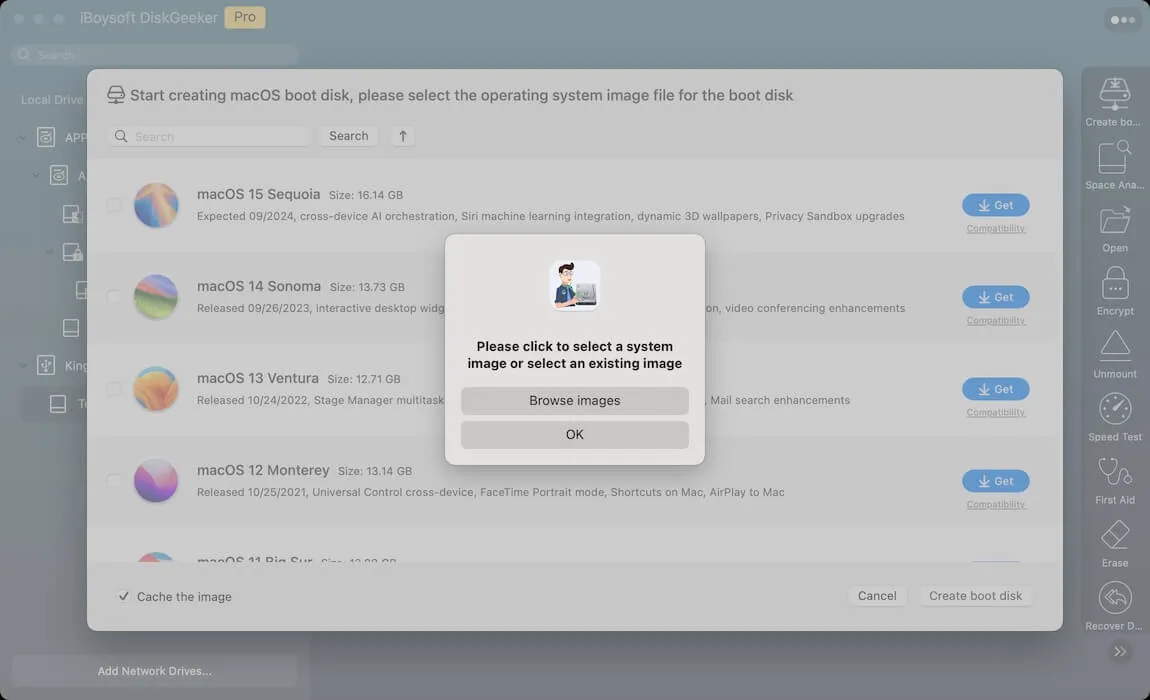
If you haven't downloaded the Mojave DMG, select macOS Mojave and click Create boot disk to download it first.

The install disk for macOS Mojave should begin creating automatically after it confirms with you that the drive will be formatted.
Help us reach more people who need the macOS 10.14.6 DMG installer!
How to download macOS Mojave DMG file on Windows or Mac directly?
You can also download the macOS Mojave 10.14.6 DMG file from the link below. It's about 6GB, made with the full installer of macOS Mojave. Whether you want to run macOS Mojave on a Hackintosh or a Mac, the link should help.
macOS Mojave 10.14.6 DMG file download
Share this post to benefit others who need to download macOS Mojave DMG without App Store.
How to create a bootable macOS Mojave DMG file on Mac?
Tips: If you're not familiar with Terminal commands, it's not recommended to create a Mojave DMG file manually, as it's error-prone and time-consuming. Instead, you can directly download the macOS Mojave DMG full installer from iBoysoft DiskGeeker. Click the button below to download it for free.
If you have a Mac and prefer making the bootable macOS Mojave DMG file yourself, you need to go through the following steps:
- Step 1: Download the full installer of macOS Mojave
- Step 2: Create a blank disk image and mount it
- Step 3: Make the macOS Mojave DMG bootable
- Step 4: Eject the macOS Mojave DMG file
Step 1: Download the full installer of macOS Mojave
To create the macOS Mojave DMG file, you must first acquire the full installer. Take these steps:
- Go to dosdude's Mojave page and download the macOS Mojave Patcher.
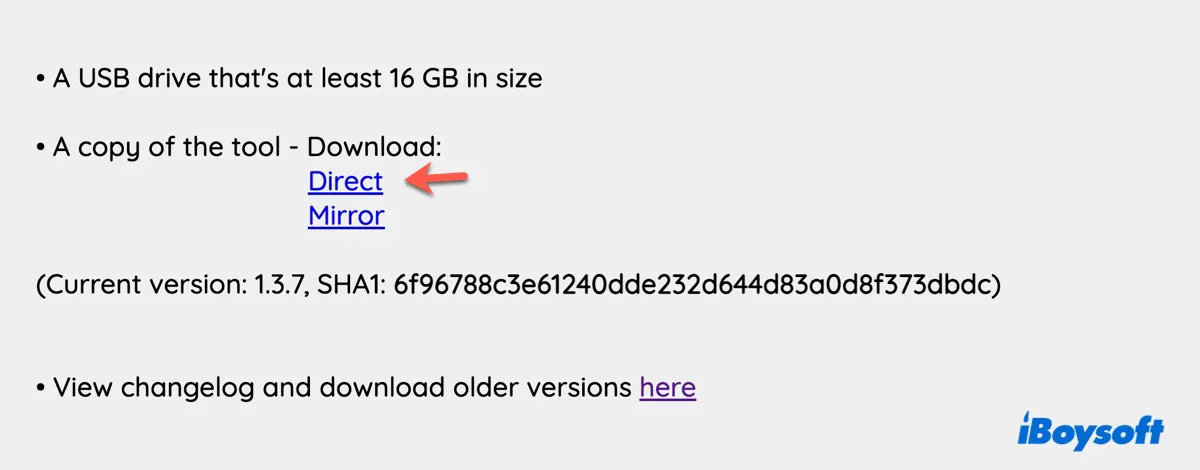
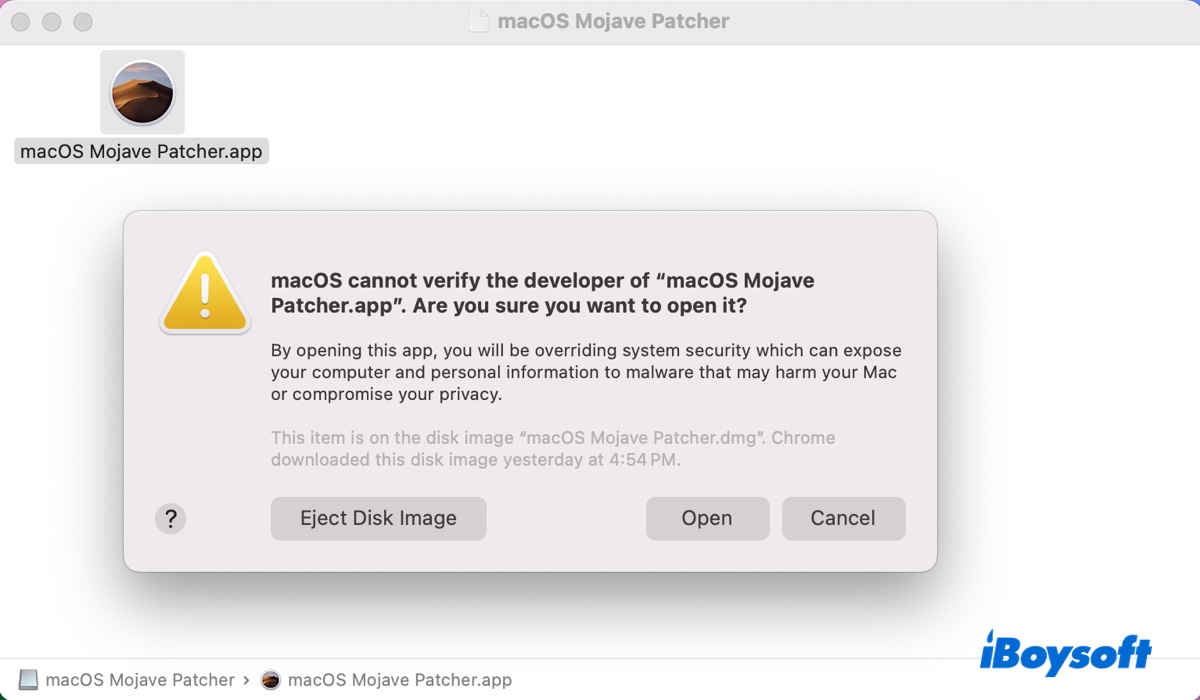
- Double-click the downloaded .dmg file to open it.
- Right-click on the macOS Mojave Patcher.app and select Open.
- When it asks you to confirm that you want to open the app, click Open.
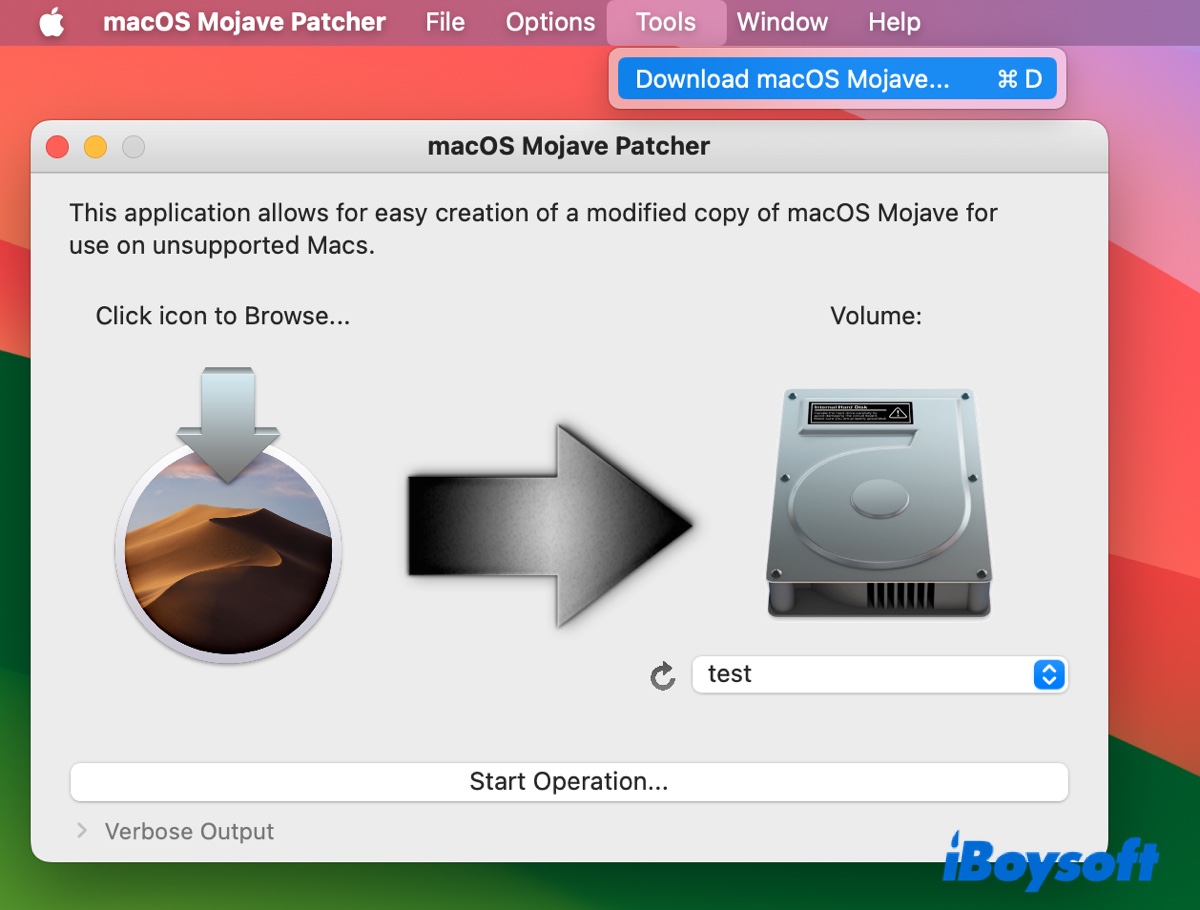
- After the tool launches, select its active window, then click Tools > Download macOS Mojave from the top menu bar.
- Click Yes to proceed.
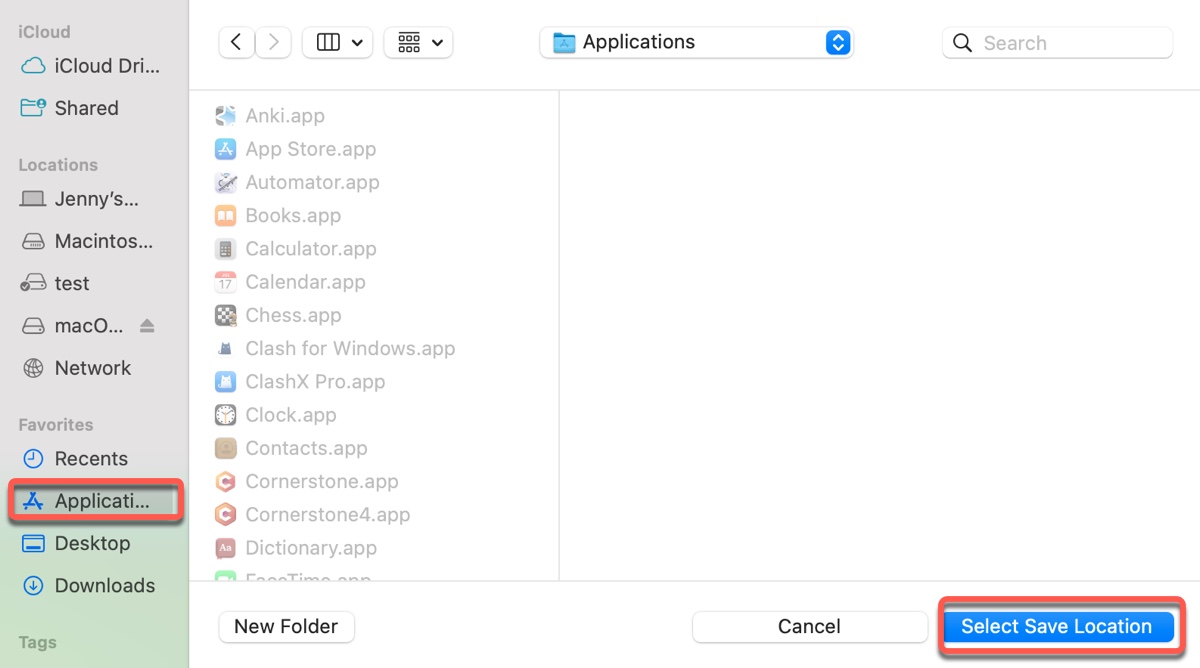
- Choose Applications on the left and click "Select Save Location."
- Wait while the download process is ongoing.

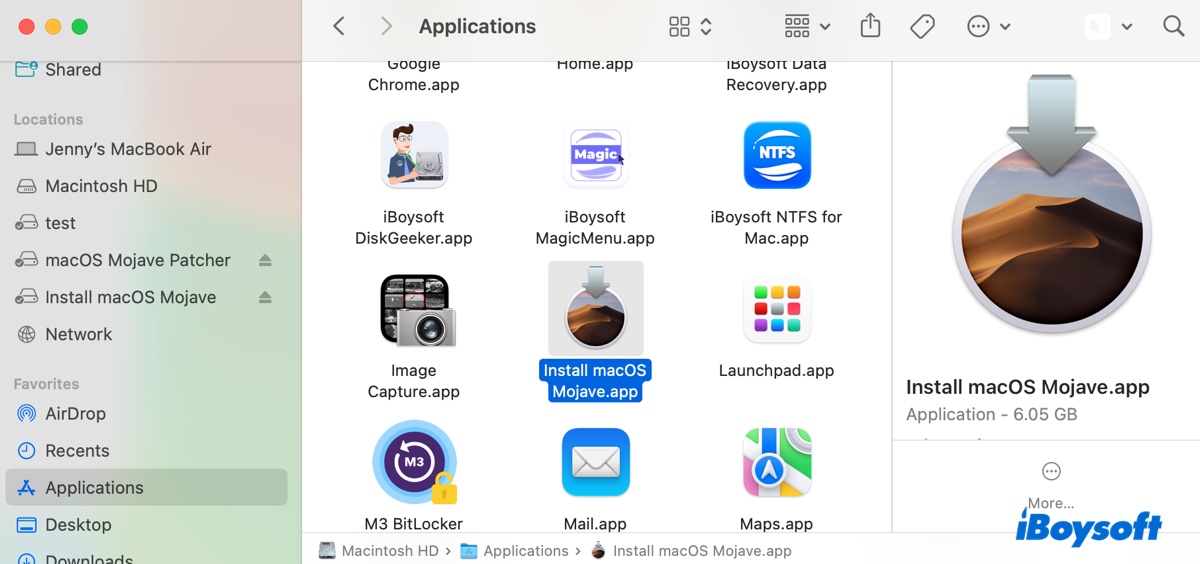
- After the download is complete, the installer will be added to your Applications folder, labeled "Install macOS Mojave."
Step 2: Create a blank disk image and mount
Now that you have the macOS Mojave full installer, it's time to prepare an empty disk image using the built-in Terminal app.
- Press Command + Space and type in "terminal" to launch the app.
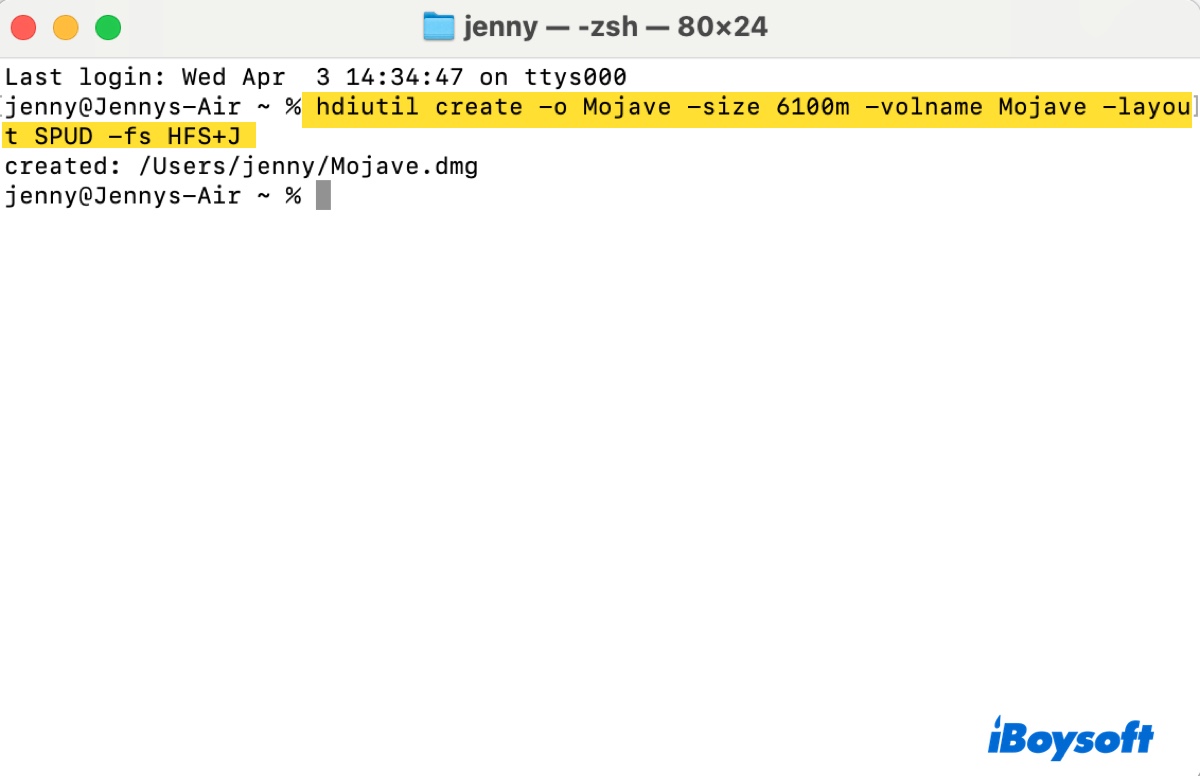
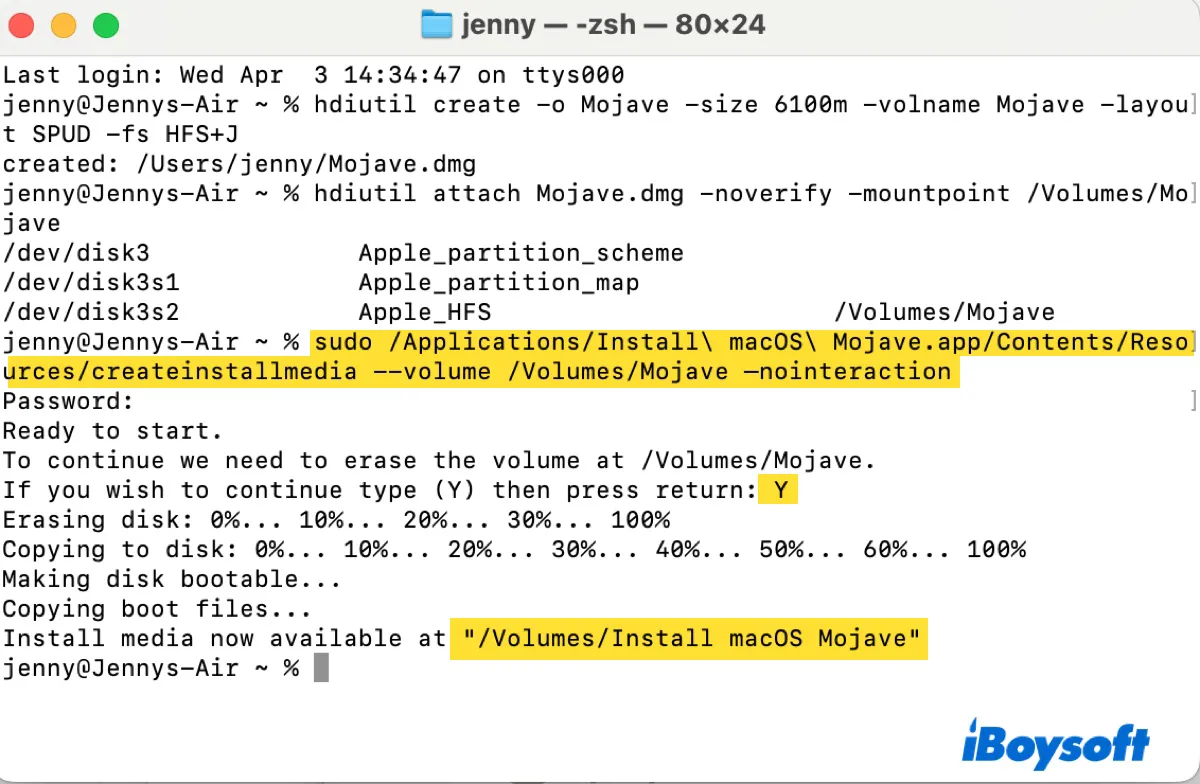
- Input the following hdiutil command and hit Enter.hdiutil create -o Mojave -size 6100m -volname Mojave -layout SPUD -fs HFS+JThis creates a new disk image file named "Mojave" with a size of 6100 megabytes, containing a single volume named "Mojave," using Mac OS Extended (Journaled).
- Mount the disk image with the command below.hdiutil attach Mojave.dmg -noverify -mountpoint /Volumes/Mojave
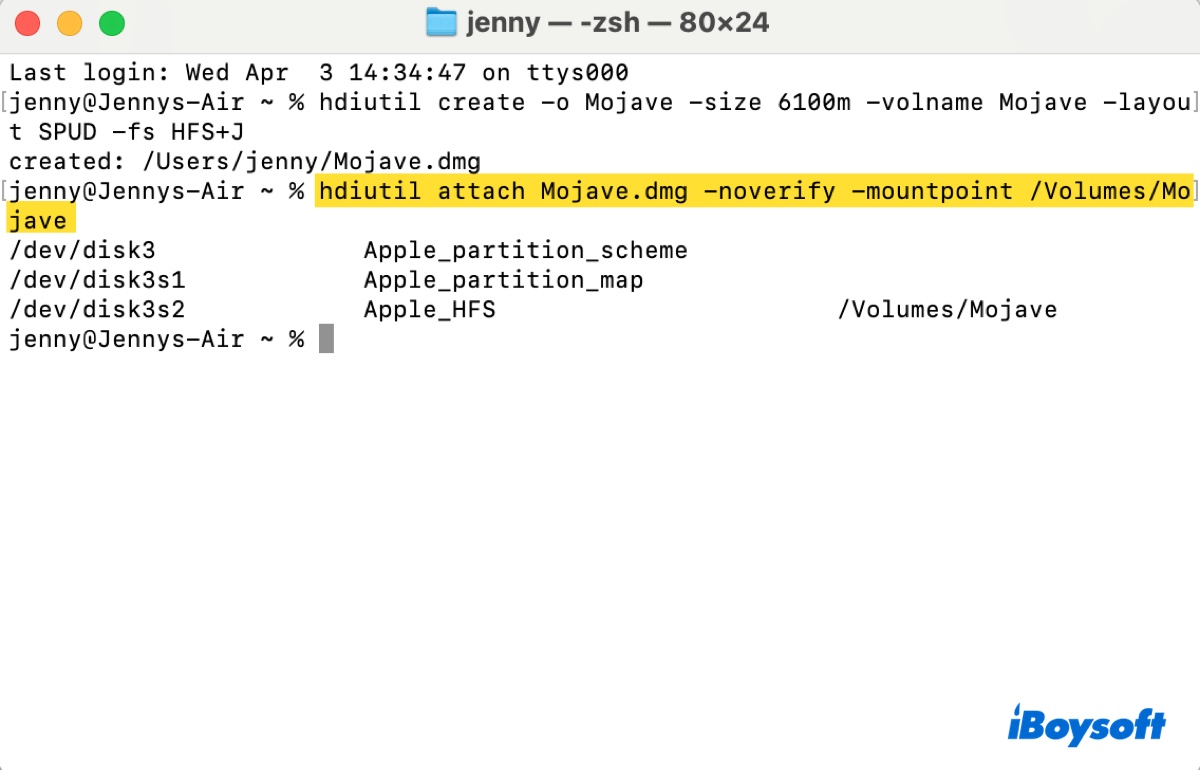
The disk image should now appear on your desktop with the name Mojave.
Step 3: Make the macOS Mojave DMG bootable
In this step, you'll need to run the command below in Terminal to create the bootable macOS Mojave DMG file. Ensure you're logged into your Mac with an admin account, as the command uses sudo.
sudo /Applications/Install\ macOS\ Mojave.app/Contents/Resources/createinstallmedia --volume /Volumes/Mojave –nointeraction
When Terminal asks for your admin password, type it in and press Enter when you're finished. You may also need to type Y and hit Enter to confirm your action.
Step 5: Eject the macOS Mojave DMG file
Once the bootable DMG file is created, its disk name will be changed to "Install macOS Mojave," as you can see on the desktop. The actual file can be found in your user folder, accessible from Finder > Macintosh HD > Users > yourusername.
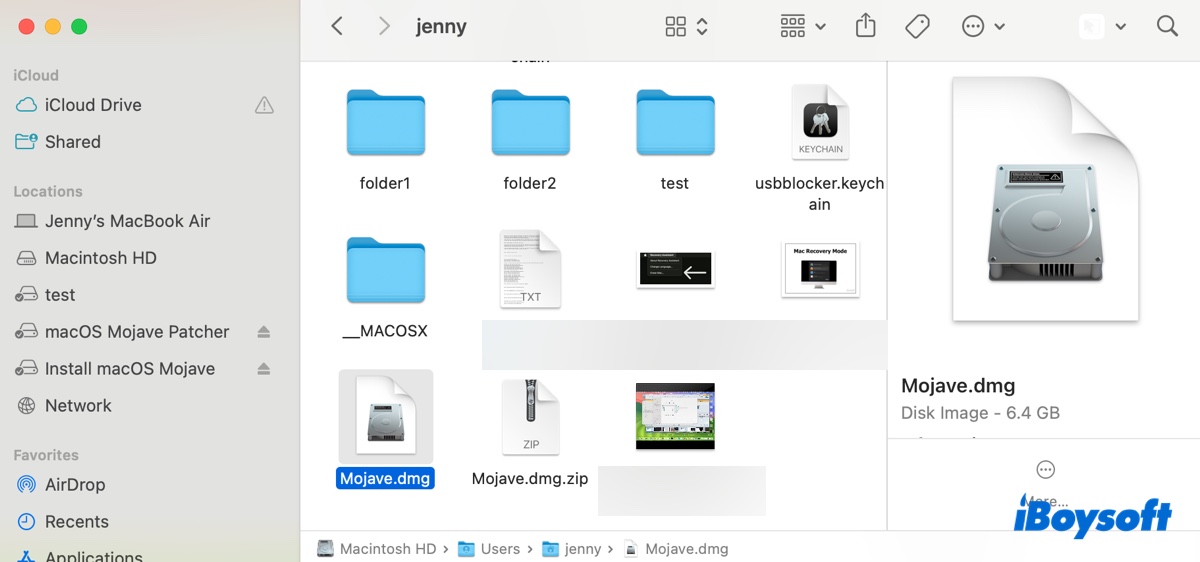
If you want to copy the file to a different drive, remember to eject the disk image on your desktop beforehand by right-clicking on it and selecting Eject.
I hope you find this post helpful. If you do, please share this guide!
FAQs about macOS Mojave download DMG
- QHow to install macOS Mojave DMG?
-
A
To install macOS Mojave from the DMG file, you should:
1. Double-click to mount the disk image.
2. Run the installer inside.
3. Select the desired destination to install macOS Mojave.
4. Follow the onscreen instructions to complete the installation.
- QWhere to download macOS Mojave?
-
A
If you have a compatible Mac, you can download macOS Mojave from the App Store; if not, obtain it from the link provided in this guide.
- QHow do I download Mojave on older Mac?
-
A
To download macOS Mojave on an older Mac, you can either use the download link in this article or get it from the macOS Mojave patcher tool.