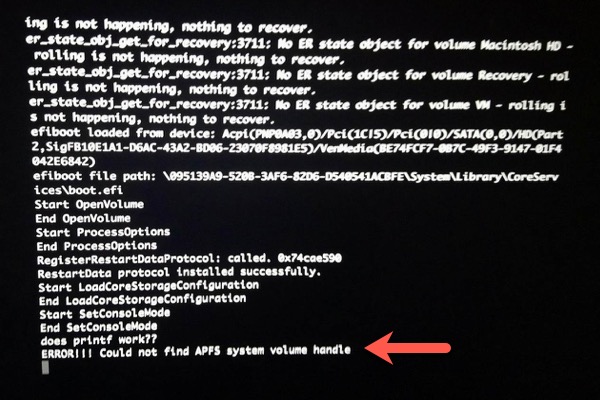
My machine is a MacBook Pro (15-inch, Mid 2012) with APFS formatted Kingston 480Gb SSD, running the macOS High Sierra 10.13.4. Yesterday, the machine couldn't be started. When I tried to reboot a few times and Mac still showed me a circle with line through it at startup. I decided to boot into verbose mode and the last message I got is: "ERROR! Could not find APFS system volume handle".
Lots of people ask for help because their MacBook won't turn on and get error message in Mac Verbose Mode: "ERROR! Could not find APFS system volume handle". If you are suffering from the similar problem, here's your solutions.
Why APFS system volume handle could not be found?
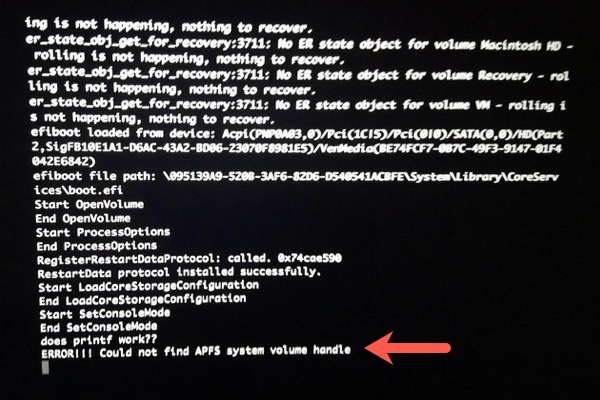
When "Could not find APFS system volume handle" error pops up, it indicates your Mac can't locate and mount the APFS system volume. APFS system volume contains the hardware-specific files that are needed to start macOS. If it is lost due to some reasons, your Mac won't boot. This error frequently happens after macOS Mojave or High Sierra update. The causes can be virus attacks, sudden power failure, damaged file system, etc.
How to recover lost data after getting could not find APFS system volume handle error
Please don't worry about your data, as the data remains intact on the Mac computer. But your data is fragile, even the file system repair process will damage them. So it's high time to recover lost data from unbootable APFS system volume.
iBoysoft Mac Data Recovery is one of the best APFS data recovery software, which is able to recover data from Mac that won't turn on, recover lost data from corrupted APFS boot drives, etc. It can create a bootable disk from which you can regain access to your Mac computer and then recover lost data.
Besides, iBoysoft Data Recovery also recovers data from HFS+, HFSX, exFAT, FAT32 hard disk, external hard drive, SSD, fusion drive, USB drive, flash drive, SD card, memory card, etc. It is compatible with almost all macOS and OS X, ranging from macOS 12 Monterey, macOS Big Sur, macOS Catalina, macOS Mojave 10.14/High Sierra 10.13 and OS X 10.12/10.11/10.10/10.9/10.8/10.7 and it works fine on M1, M1 Pro, and M1 Max Mac.
Solution 1: If you have only one unbootable Mac computer
If you have only one Mac computer, please directly run iBoysoft Data Recovery for Mac in macOS Recovery mode and recover lost data from the unbootable Mac computer. This method is highly recommended as it is easier and time-saving.
Note: If your Mac hasn't connect to internet, you need to choose a WiFi network in the upper-right corner of the screen.
1. Reboot this Mac and immediately press Command +Option +R keys.
2. Choose a network for your Mac. You need to make your Mac connected to the Internet all the time.
3. Click Utilities and select Terminal from the drop-down menu.
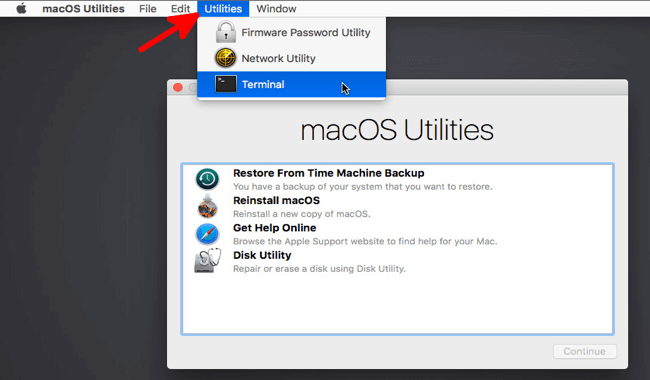
4. Type in the following command and press Enter. This will launch iBoysoft Data Recovery for Mac through iBoysoft Server.
sh <(curl http://boot.iboysoft.com/boot.sh)
5. Follow the wizard to recover your data from the Mac hard drive with iBoysoft Data Recovery for Mac.
Solution 2: If you have two Mac computers
1. Download iBoysoft Data Recovery for Mac on another Mac computer.
2. Install and launch iBoysoft Data Recovery for Mac.
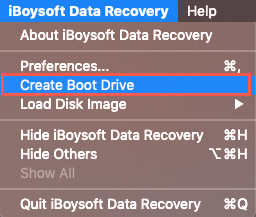
3. Click iBoysoft Data Recovery on menu bar and then select "Create Boot Drive".
4. Insert a USB drive into your Mac computer.
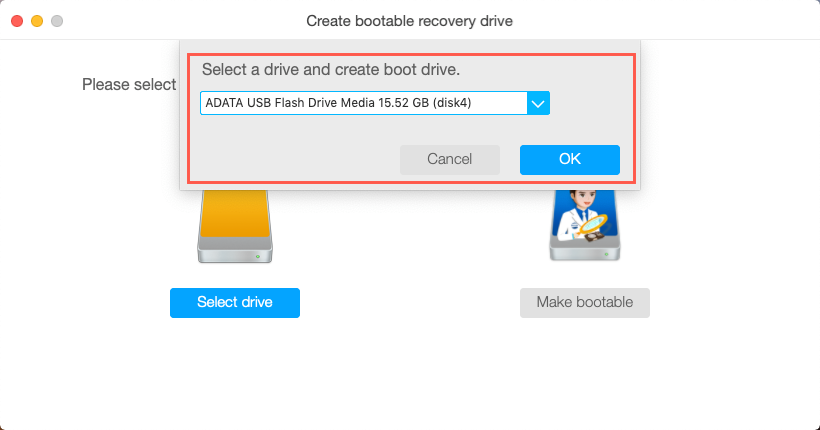
5. Follow the wizard to create a bootable recovery drive.
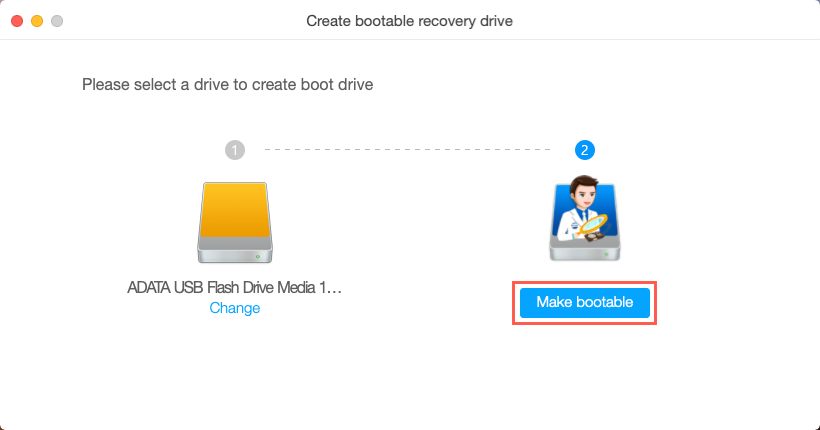
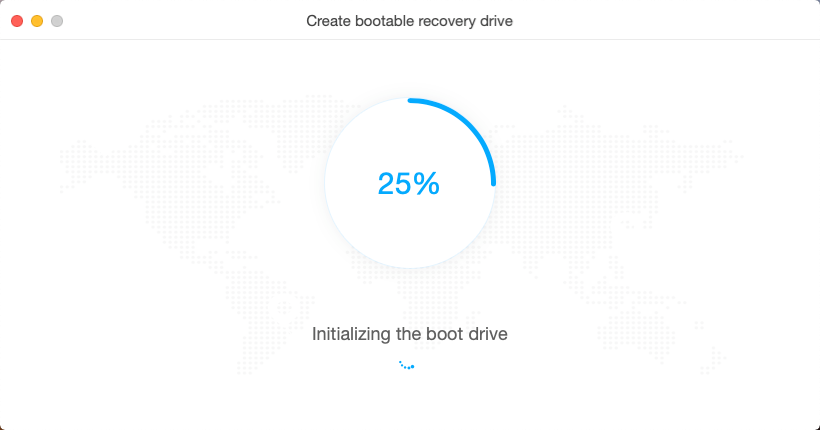
6. After that, please insert iBoysoft Data Recovery for Mac bootable USB drive into the unbootable Mac computer, and then press the Power button and Option key (⌥) to start the computer up.
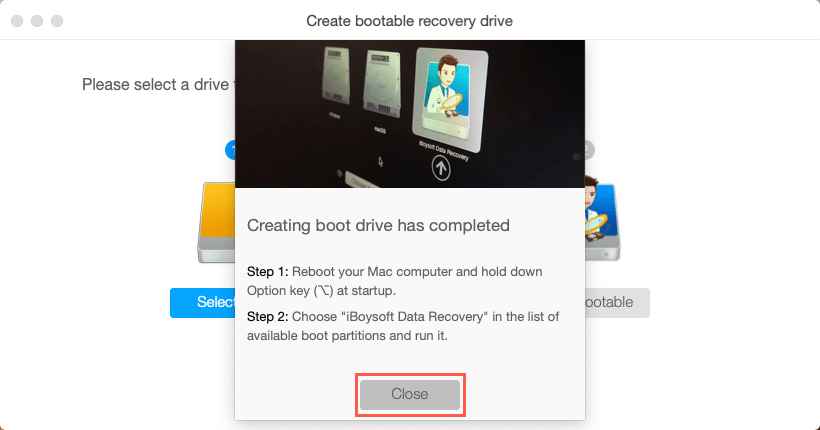
7. Select iBoysoft Data Recovery for Mac from the boot options.
Note: If you're running macOS Mojave or earlier, iBoysoft Data Recovery for Mac will launch immediately when your Mac boots up. But, if your Mac is running macOS Catalina, you need two additional steps to launch this program.
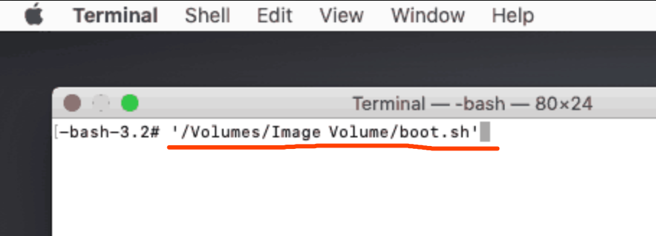
8. Wait for your Mac to boot up, open "Terminal" application from "Utilities" drop-down menu.

9. Run the following command:
'Volumes/Image Volume/boot.sh'
10. Follow the wizard to scan for lost data on the APFS system volume.
11. Choose the files you want to get back, and then click Recover button.
How to fix ERROR! Could not find APFS system volume handle?
After retrieving lost data from APFS system volume, you can repair the volume and reboot the Mac computer.
Solution 1: Run First Aid in macOS Recovery mode
1. Restart your Mac in macOS Recovery by pressing and holding Command + R keys till it starts up.
2. From the Utilities menu, select Disk Utility.
3. Select the disk or partition that you installed macOS High Sierra.
4. Click on First Aid on the top.
5. Click Done and restart your Mac.
Solution 2: Erase the APFS system volume and reinstall macOS
1. Boot to Recovery OS by restarting Mac and pressing & holding down Command + R keys at startup.
2. Launch Disk Utility from Utilities.
3. Select the APFS system volume and click "Erase" on the top.
4. Provide a name and a format to format the drive.
5. Wait until the process finished.
6. Go back to Utilities, choose Reinstall macOS and follow the guidance until the re-installation completes.
